Cereal Macarons with Cereal Milk Frosting

Cereal Macarons with Cereal Milk Frosting 3
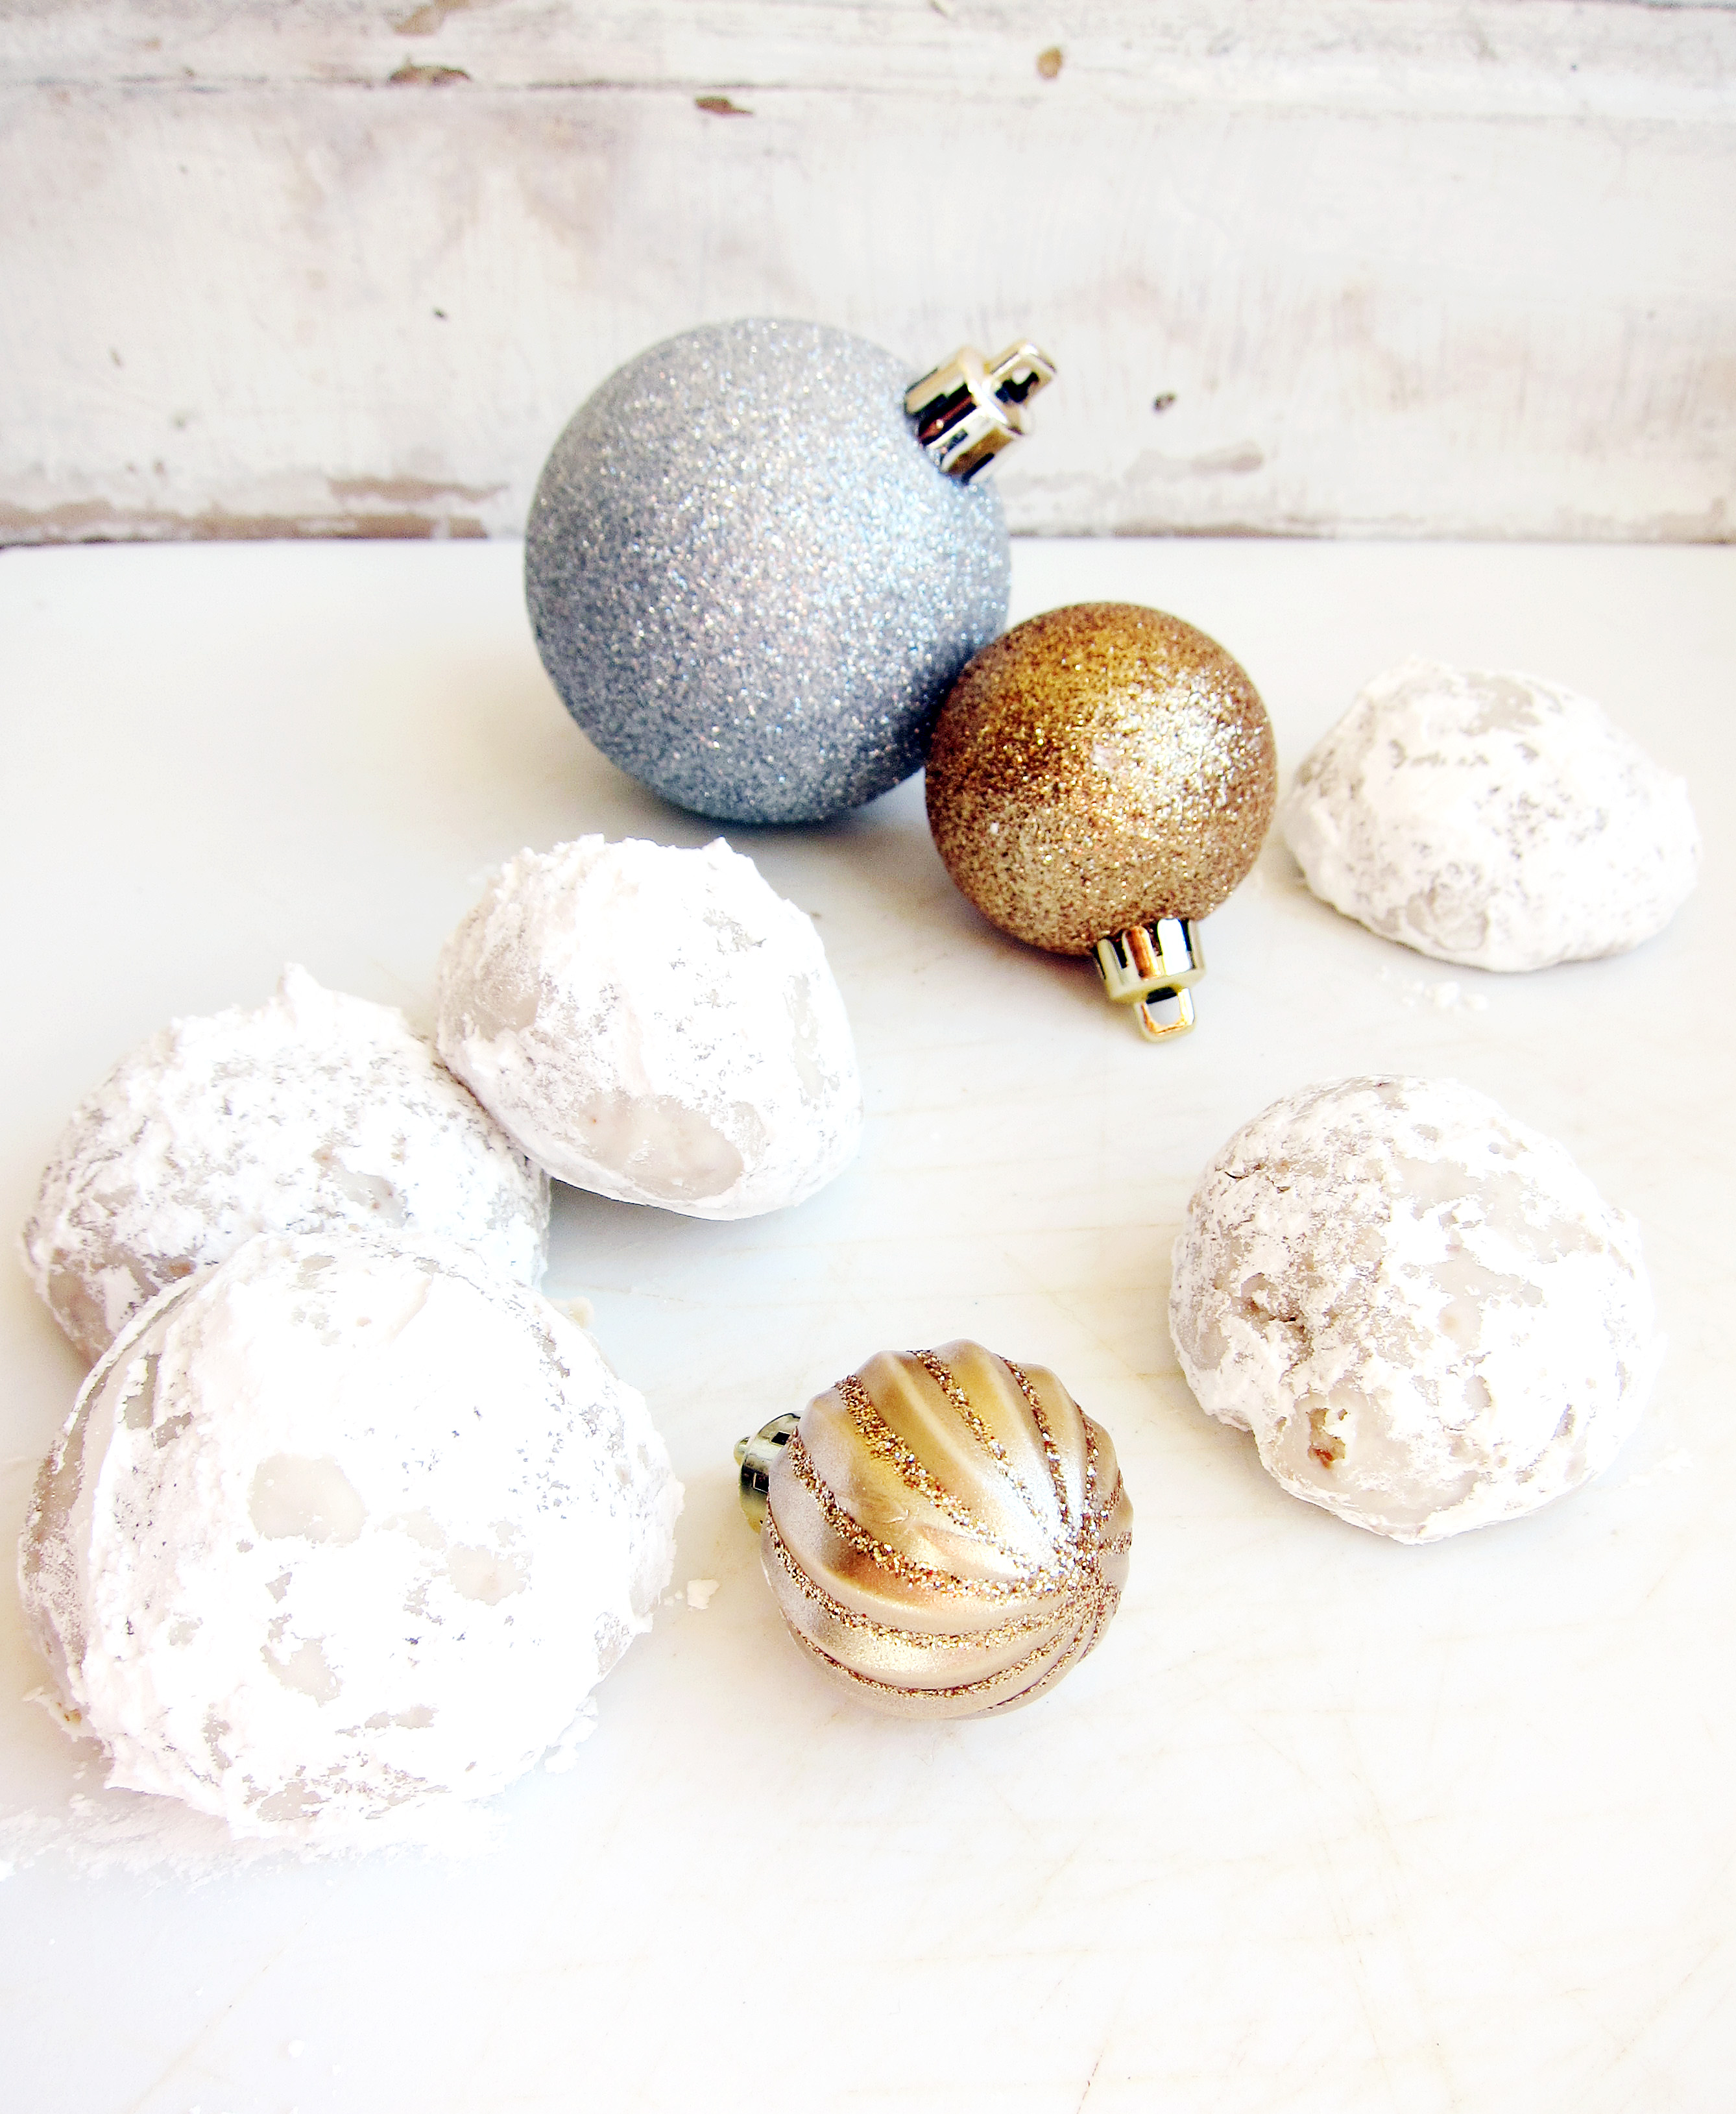
Cereal and I have a love/hate relationship. I love how there are endless flavors and textures, how each cereal turns plain milk into a unique drink, and how you can eat it for pretty much any meal or snack (and even when you run out of milk, you can eat it plain, kind of like teeny tiny cookies).
Cereal Macarons with Cereal Milk Frosting 1 fruit loops macarons cereal milk frosting recipe cereal milk frosting On the other hand, I hate it for two reasons: 1) I pretty much cannot stop eating it once I open it up. It’s rare for me to have the “recommended serving”. I once took out a measuring cup and measured exactly one serving. Dude, it’s the size of my fist and I have small fists. 2) I hate soggy cereal. I think there is nothing worse than fully saturated cereal. It gets all mushy and some even start deteriorating into the milk. Don’t ask me to do something once that milk hits the bowl, because unless it’s a real emergency I’m taking the five minutes to eat it.
Cereal Macarons with Cereal Milk Frosting 2cereal macarons recipecereal macaron recipe
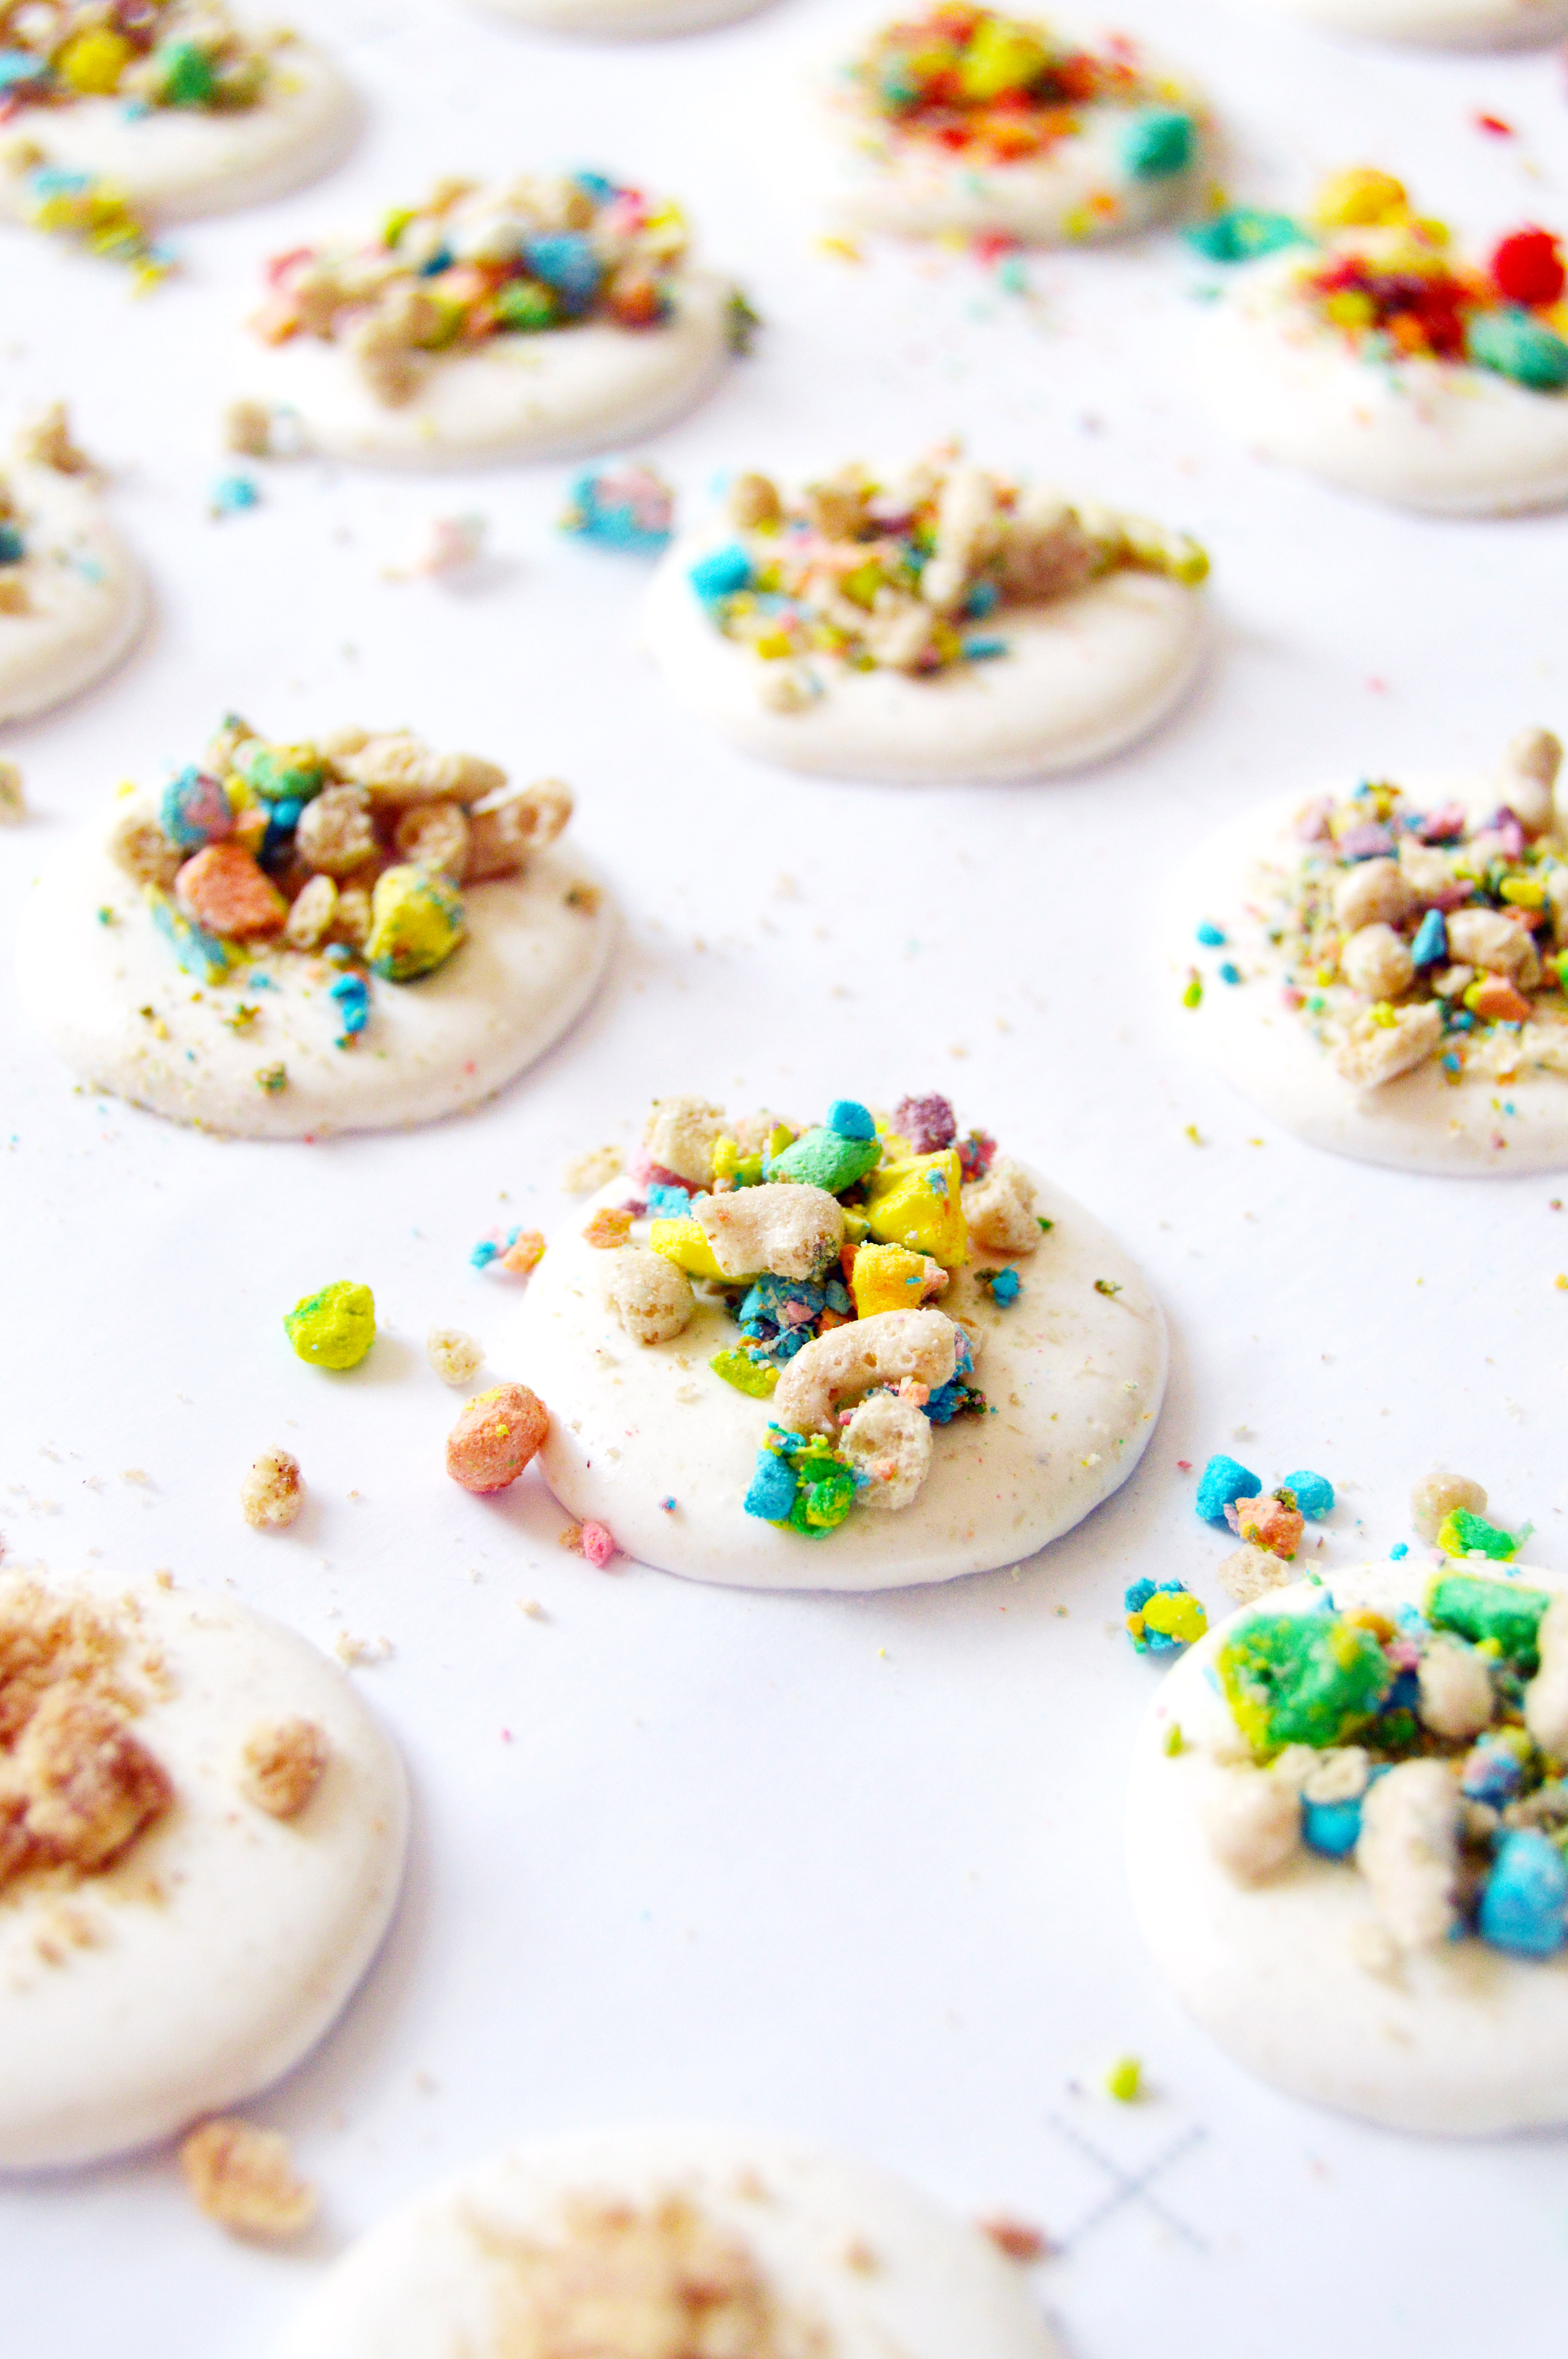
This recipe takes two of the best parts of cereal: the crispy bits and the cereal milk.  No sogginess, and you can customize each macaron flavor to whatever you wish! The cereal milk from this recipe tastes like the cereal milk you would get from Frosted Corn Flakes. (I got the inspiration from Momofuku Milk Bar’s cereal milk soft serve.) I suppose you could try using a different cereal (sans the toasting) and you would technically get the flavor that cereal’s milk.
lucky charms macaron fruit loops macaron frosted cheerios macaroncocoa pebbles macaron trix macaron cinnamon toast crunch macaron
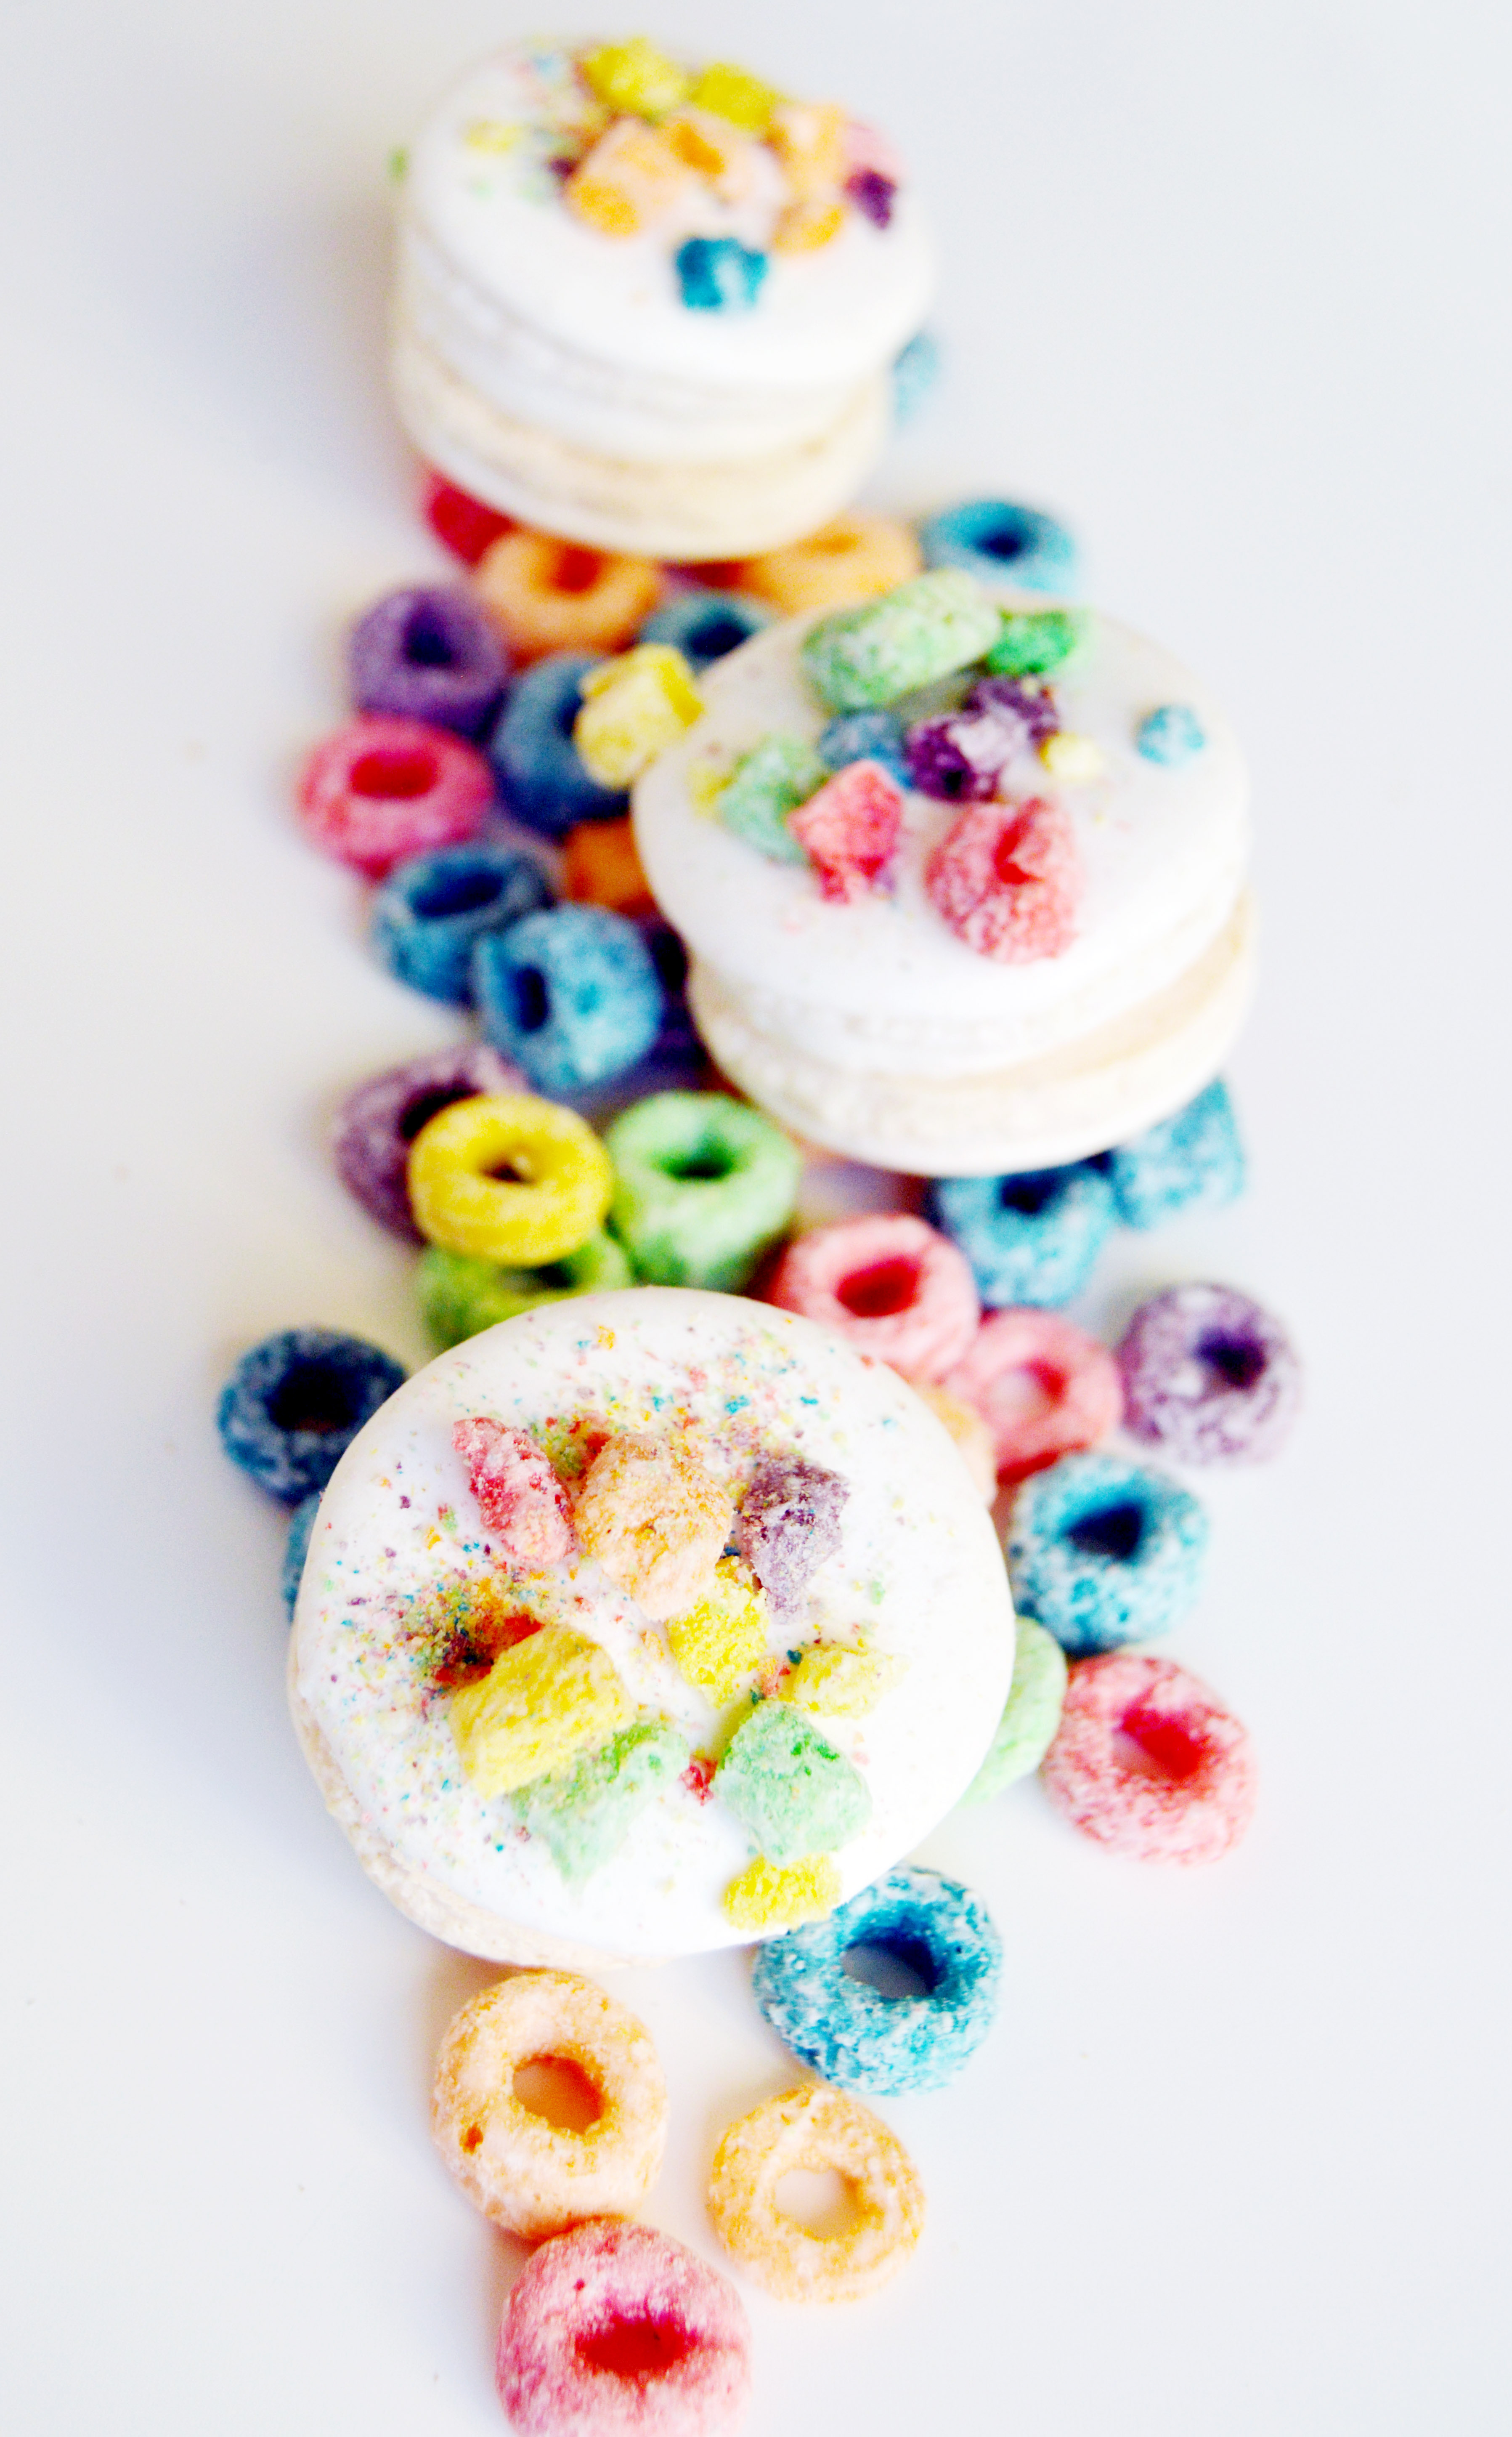
It was really exciting to watch them bake and I loved seeing them in so many different colors and textures. The Lucky Charms batch smelled especially good in the oven. I think it was the marshmallow bits baking and yes, they were magically delicious.

Cereal Macarons with Cereal Milk Frosting

Ingredients:
212 g. almond meal
212 g. powdered sugar
172 g. egg whites, divided to 82 g. and 90 g (aged, if possible)
236 g. sugar
158 g. water
cereal of your choice, crushed (I bought the multipack of mini bags to have a variety.)
cereal milk frosting (recipe below)

Instructions:

  1. Line two baking sheets with parchment paper or silicone mats.
  2. In the bowl of a food processor, add the almond meal and powdered sugar and pulse until thoroughly combined.
  3. Sift the mixture over a large mixing bowl, throwing out the lumps as they appear.  Add 82 g. of the egg whites and stir until you get a thick mixture.
  4. In a small pot attached with a candy thermometer, combine the sugar and water over medium heat and boil until the syrup reaches 200˚F.
  5. Once the syrup reaches 200˚F, start whipping the remaining 90 g. in the bowl of your stand mixer with the whisk attachment on medium speed until soft peaks are reached.
  6. Once the syrup reaches 248 ˚F, remove the pot off the burner and slowly pour the syrup down the side of the mixing bowl with the egg whites on medium speed.
  7. Once the egg whites are fully incorporated, increase the speed to medium high until egg whites form glossy, stiff peaks.
  8. Mix a ⅓ of the egg white mix to the almond mixture and stir together until the batter is slightly lighter and less pasty.  From then on, fold in ⅓ of the egg white mixture at a time until the mixture “flows like magma”.  The mixture should be smooth and run thick ribbons off the spatula.
  9. With a pastry bag fitted with a ½ in. plain tip, pipe 1¼ – 1½ in. rounds.
  10. The piped batter may have peaks but should smooth away in a minute or two.
  11. On half of the macaron shells, sprinkle on desired crushed cereal.
  12. Let the batter stand until the tops of the macarons are dry to the touch, about 30 minutes to 1 hour.
  13. Preheat the oven to 325-350˚F.  If your oven tends to run hot go for 325˚F, if not then 350˚F.
  14. Lower the heat to from 350˚F to 300˚F. (If starting from 325˚F, lower to 275˚F.)
  15. Bake 10-12 minutes, until the feet are formed and the tops are smooth.  The macaron shell is done when you slightly wiggle it and it starts to come off of the parchment paper / silicone mat.
  16. Remove pan from oven and reheat oven to higher temperature for 10 minutes before baking the next tray, lowering the temperature when you start baking it.
  17. Pipe a dollop of cereal milk frosting on the plain macaron shell.
  18. Top it with crushed cereal macaron, flattening it slightly to push the frosting to the outer edge.
  19. *This step is optional but I prefer to age my macarons. To do so, place assembled macarons in an airtight container and refrigerate overnight. The next day, the macaron shells will have softened slightly and in my opinion, more delicious.

Cereal Milk Frosting

1½ c. cereal milk (recipe below)
1/4 c. flour
½ tsp. kosher salt
8 oz. (2 sticks) unsalted butter, room temperature
¾ c. sugar
½ tsp. vanilla extract

Instructions:

  1. In a small pot over medium heat, whisk milk, salt and flour until combined.
  2. Continuously whisk mixture until thickened to a pudding like consistency.
  3. Once thickened, strain through a mesh strainer into a bowl with a spatula to remove lumps.
  4. Place a piece of plastic wrap on top of the flour mixture (to prevent skin from forming) and put bowl into the fridge until fully cool.
  5. In a mixer bowl fitted with the whisk attachment, mix the sugar and butter on high speed until fluffy and pale about, 5-10 minutes.
  6. Add the chilled flour mixture and continue to whip on high speed until the sugar is completely dissolved and the mixture is no longer gritty, about 5-10 minutes.
  7. Add the vanilla extract and mix until combined.

Cereal Milk

Ingredients:

3 ½ c. Corn Flakes cereal
4 c. whole milk, cold

Instructions:

  1. Preheat oven to 300˚F.
  2. On a sheet pan lined with parchment paper, toast cereal for 5-7 minutes, until slightly deeper in color.
  3. Cool toasted cereal.
  4. In a large bowl, mix cereal and milk and steep for 30 minutes, until cereal is soggy.
  5. Strain mixture through a fine mesh strainer. (Do not force mixture through mesh strainer. The resulting milk will be starchy and thicker than what you started with.)

*Macaron recipe adapted from Bouchon Bakery by Thomas Keller, Sebastien Rouxel.
*Cereal milk recipe adapted from Momofuku Milk Bar by Christina Tosi, David Chang.

Tiramisu Crunch Ice Cream Cake

Tiramisu Crunch Ice Cream Cake 1I made this cake for my sister’s birthday last week. As far as sisters go, my sister and I are as different as night and day. We don’t look alike, with the exception that we both share freckles. Growing up, I would be pale from staying in and reading books while she would be as tan as can be from playing outside. She loves the color black while I love white. She is loud and I am quiet. She prefers vegetables, while I prefer steak. She likes things simple and casual while I cannot get enough frills and bows. She favors pants in comparison to my preference to dresses. She is also not partial to desserts whereas I cannot live without them (as evidenced by this blog). I always tell people that whatever she is good at, I lack it and whatever I am good at, she lacks it.
Tiramisu Ice Cream Cake 3I love creating cakes and I look forward to baking one for all of my family members on their special day. But my sister does not like cake. HOW?! As someone whose life (or a good part of their life) revolves around frosting, and sugar and flour, it is hard to understand someone who does not like cake. So every year on her birthday, I resort to an ice cream cake. Because let’s face it, who doesn’t like ice cream?
Tiramisu Crunch Ice Cream Cake 2Tiramisu was one of my least favorite desserts because I used to rarely drink coffee. If anything, I loved it for the mascarpone cream. (Ah, mascarpone cream… everything you touch becomes a magical milky confection.) But ever since I gave up diet coke, I’ve been leaning towards coffee for my caffeine fix and I’ve managed to fall in love with the bitter brew. My sister’s preferred choice of drink has always been coffee, so tiramisu was a no-brainer when it came to a flavor choice.
layoutI have to say, this cake ranks as one of the best cakes to come out of my kitchen. It features layers of coffee ice cream sandwiched between coffee syrup soaked sponge cake, chocolate almond crispies (!!!), and is covered by a blanket of mascarpone whipped cream and adorned with dark chocolate accents and cocoa powder. I know. It sounds like it is too much work and it is true that there are many components to the cake. However, each part is simple to make!
mascarpone cream I always use high quality ice cream when it comes to ice cream cakes. It is important to have the lower air content so that the ice cream stays firmer, longer. I used Haagen-Dazs in mine. The sponge cake is a standard sponge cake that is divided in half. The coffee syrup is nothing more than a mix of sugar and dark brewed coffee. The chocolate almond crispies provide a crunch and a textural contrast to the smooth ice cream and cake. To make it, you simply stir chocolate almond spread with Rice Krispies cereal until it is evenly coated. The mascarpone whipped cream is a mix of vanilla extract, powdered sugar, mascarpone, and cool whip. I am not a fan of cool whip, but when it comes to ice cream cakes, I think it is superior in terms of spreadability and stability. To make the chocolate accents, simply melt some chocolate and using a small offset spatula, drag a dollop of chocolate over parchment paper and repeat until you have as many pieces as you need. They will not all look uniform, but I think that’s what makes it look slightly “rustic”.
Tiramisu Ice Cream Cake 4I understand if you are a little overwhelmed by it. But trust me, it is worth every minute you spend making it. 😉

Tiramisu Crunch Ice Cream Cake

Ingredients:

56 oz. premium coffee ice cream, softened
sponge cake, halved horizontally (recipe below)
coffee simple syrup (recipe below)
chocolate almond crispies (recipe below)
whipped mascarpone cream (recipe below)
dark chocolate, melted (for garnish)
cocoa powder (for garnish)

Instructions:

  1. Line two 8-inch cake pans that are 3 inches deep with a double layer of plastic wrap that overhangs over the cake pan.
  2. In one of the cake pans, place one half of the sponge cake and brush liberally with coffee syrup. (You do not want to soak the cake, but put enough of it that it is moist.)
  3. Layer 28 oz. of coffee ice cream over the cake base, smooth so that the coffee base is as smooth as you can get it.
  4. Place pan in freezer for about 10 minutes.
  5. Meanwhile, make the chocolate almond crispies.
  6. Get half of the chocolate almond crispies and layer it over the ice cream, flattening it with an offset spatula to make it as flat, even and smooth as possible.
  7. Wrap the overhanging plastic wrap over the cake pan and place in freezer until completely frozen, preferably overnight.
  8. In the second lined cake pan, smooth 28 oz. of coffee ice cream with offset spatula evenly.
  9. Chill in freezer for 10 minutes.
  10. Layer the remaining chocolate almond crispies over the coffee ice cream.
  11. Place the second half of the sponge cake and brush liberally with coffee simple syrup.
  12. Wrap the overhanging plastic wrap over the cake pan and place in freezer until completely frozen, preferably overnight.
  13. On a cake board you are planning to serve, carefully unmold the first cake pan you put together by lifting the plastic wrap off of the pan and unwrapping it completely.
  14. Take the second cake pan and unmold it, and place on top of the first cake pan layer with the sponge cake layer facing downwards. Apply pressure to fuse the two layers together.
  15. Place in freezer to harden for about 20-30 minutes.
  16. Meanwhile, make the whipped mascarpone cream.
  17. Remove frozen cake from freezer and frost the outside of the cake with ¾ of the whipped mascarpone cream.
  18. Place cake back in the freezer and put the remaining whipped mascarpone cream in a piping bag with a plain large round tip.
  19. Remove cake from freezer and use the piping bag to place decorative dollops of cream over the top of the cake by making even vertical rows of cream.
  20. Using a mesh strainer, liberally dust the top of the cake with cocoa powder. The cocoa powder will dust the surface of the cake board too, carefully use a wet paper towel to clean the cake board off.
  21. Place cake back in the freezer.
  22. While cake is freezing, make decorative chocolate pieces.
  23. Line two baking sheets with parchment paper.
  24. Using a small offset spatula, drag dollops of dark chocolate to create a streak. Use larger dollops for the bottom and smaller dollops for the top. Place in refrigerator to set for 5-10 minutes.
  25. When set, remove the cake from the freezer and decorate the bottom of the cake with the longer chocolate pieces and the top of the cake with the smaller chocolate pieces.
  26. Refrigerate until ready to serve.

Vanilla Sponge Cake

Ingredients:

½ c. all-purpose flour
½ c. cornstarch
4 large eggs, separated
1 tsp. vanilla extract
¾ c. sugar, divided
pinch of salt

Instructions:

  1. Preheat oven to 350˚F and grease the inside of an 8 inch baking pan with nonstick spray.
  2. In a small bowl, sift together flour and cornstarch.
  3. In the bowl of a standing mixer fitted with the whisk attachment, beat the egg yolks, vanilla extract, and ½ c. sugar on high until thick and pale.
  4. Transfer mixture into a large bowl.
  5. Thoroughly wash and dry mixing bowl and whisk attachment.
  6. In a clean bowl of a standing mixer fitted with the whisk attachment, beat egg whites and salt until soft peaks form.
  7. Slowly incorporate the remaining ¼ c. of sugar into the egg whites and mix until whites are stiff and glossy.
  8. Fold egg whites into the egg yolk mixture in three additions.
  9. Fold in flour mixture
  10. Transfer batter into the prepared cake pan.
  11. Bake 30-40 minutes or until a cake tester inserted into the center of the cake comes out clean.
  12. Cool cake on a wire rack until ready for use.

Coffee Simple Syrup

Ingredients:

½ c. strong, dark coffee
¼ c. sugar

Instructions:

  1. Heat coffee and sugar together until sugar is completely dissolved.
  2. Cool until ready for use.

Chocolate Almond Crispies

Ingredients:

3 c. Rice Krispies Cereal
1 c. chocolate almond spread (I used this one from Trader Joe’s)

Instructions:

  1. Heat chocolate almond spread until easily pourable.
  2. In a large bowl, mix chocolate almond spread and cereal until cereal is evenly coated.
  3. Cool mixture until ready for use.

Whipped Mascarpone Cream

Ingredients:

12 oz. Cool Whip (thawed)
1 lb. mascarpone cheese
3 tbsp. powdered sugar
1 tsp. vanilla extract

Instructions:

  1. In a large bowl, whip Cool Whip and half of mascarpone cheese until smooth with an electric hand mixer.
  2. Add the remaining half of the Cool Whip and mix until incorporated. Do not over whip.
  3. Add powdered sugar and vanilla extract and whip until homogeneous.

* Vanilla Sponge Cake recipe from Martha Stewart.

A (Belated) Blogiversary, A Funfetti Cake Batter Cake & A Giveaway

Funfetti Cake Batter Cake and Macarons 3It’s my first Blogiversary! One year ago, I started blogging on this little website with a lot of encouragement from friends and family. I cannot believe that it has already been a year. Each time I am able to share recipes, tutorials or whatever this brain of mine thinks of, I am so grateful to be able to send off a little piece of my creativity into the webosphere.  I’m even more grateful to the all of you who take the time out of your day to read the little bits of me that I post on my wee space on the internet.
funfetti macarons Funfetti Cake Batter Cake and Macarons 2Because anything celebratory requires sprinkles (or glitter) in my brain, I made a little cake chock-full with sprinkles for this post. It has sprinkles in the frosting, around the outside, and on the macarons. (I originally wanted to do a funfetti cake, but being me I totally forgot to add the sprinkles to the cake batter so instead it went into the frosting.) And because I love all things macarons, I added some funfetti macarons. The cake and the macarons are filled with cake batter frosting. My secret ingredient to making it taste like cake batter? Boxed cake mix. *GASP*I know. I never ever ever ever ever use boxed cake mix but this is the one time exception. And because it uses boxed cake mix, it is definitely on the sweeter side of the dessert spectrum. It also has that nostalgic bake sale cupcake taste that I loved in my youth.
Funfetti Cake Batter Cake and Macarons 5 Funfetti Cake Batter Cake and Macarons 6To celebrate my ridiculously belated blogiversary, I’m hosting a giveaway! If you know me at all, Target is one of my favorite places to shop. I’m telling you, I cannot walk out of that store without something in my hand! It literally has everything you need so I’m giving away a $25 gift card so that you too can enjoy a small shopping trip to Target.*  Entering the giveaway is so simple! Simply follow me on Instagram and like my giveaway photo and for an extra entry, like and leave a comment on this post about what kind of cake you like. The giveaway ends on Friday, May 8th and if the winner does not respond within 3 days, I will be selecting another one. Funfetti Cake Batter Cake and Macarons 4Funfetti Cake Batter Cake and Macarons

Vanilla Buttermilk Cake (recipe below)
Funfetti Cake Batter Frosting (recipe below)
Funfetti Macarons (recipe below)
1-2 c. Sprinkles

Instructions:

  1. Evenly fill and stack each layer of vanilla cake with funfetti cake batter frosting.
  2. Crumb coat the cake with a thin layer of cake batter frosting (funfetti cake batter frosting without the sprinkles.)
  3. Place cake in freezer for 5 minutes until the frosting on the outside sets firmly.
  4. Once crumb coat is set, frost the entire cake with cake batter frosting.
  5. Take a handful of sprinkles and slowly cup the outside of the cake, patting it to ensure full coverage. (This part will create a mess. Sprinkles will bounce and fall everywhere.)
  6. Let frosting set in freezer for 5 minutes.
  7. Take cake out and frost little mounds of frosting around the top of the cake and attach a funfetti macaron for decoration.

Vanilla Buttermilk Cake

Ingredients:
1.5 c. cake flour
1  c. sugar
½ tbsp. baking powder
⅛ tsp. salt
¾ c. buttermilk, divided
4 oz. unsalted butter, room temperature
2 eggs, room temperature
1 egg yolk
1 tsp. vanilla extract

Instructions:

  1. Preheat the oven to 350˚F and line four 6-inch cake pans with parchment paper.
  2. In a bowl of a standing mixer with the paddle attachment, add flour, sugar, baking powder, and salt. Mix until combined.
  3. On low speed, add ½ c. buttermilk and butter and mix until combined.
  4. In a separate bowl, whisk eggs, egg yolk, ¼ c. buttermilk, and vanilla extract until homogenous.
  5. On low speed, slowly add the egg mixture to the flour mixture.
  6. Increase speed to medium, and mix until combined.
  7. Evenly divide cake batter into the three cake pans.
  8. Bake about 20-25 minutes until cake is done or until a toothpick inserted into the center comes out clean.
  9. Let cool in pan for 10 minutes, and then move onto a cooling rack until completely cool.

Funfetti Cake Batter Frosting

Ingredients:
3 c. whole milk
¾ c. flour
¼ tsp. salt
1½ 1b. (6 sticks) unsalted butter, room temperature
3 c. sugar
¼ c. cake mix
1 tbsp. vanilla extract
½ c. sprinkles

Instructions:

  1. In a saucier pan, put milk, salt and flour and whisk until combined on medium heat.
  2. Continuously whisk mixture until thickened to a pudding like consistency.
  3. Once thickened, strain through a mesh strainer into a bowl with a spatula to remove lumps.
  4. Place a piece of plastic wrap on top of the flour mixture and put into the fridge until fully cool.
  5. In a mixer bowl fitted with the whisk attachment, mix the sugar and butter on high speed until fluffy and pale about, 5-10 minutes.
  6. Add the chilled flour mixture and continue to whip on high speed until the sugar is completely dissolved and the mixture is no longer gritty, about 5-10 minutes.
  7. Add the vanilla extract and cake mix and mix until combined.
  8. Reserve ⅔ of the mixture for filling the macarons and frosting the outside of the cake.
  9. Mix ½ c. sprinkles into the remaining frosting for filling the cake.

Funfetti Macarons

Ingredients:
212 g. almond meal
212 g. powdered sugar
172 g. egg whites, divided to 82 g. and 90 g (aged, if possible)
236 g. sugar
158 g. water
nonpareils for decorating
cake batter frosting (recipe above)

Instructions:

  1. Line two baking sheets with parchment paper or silicone mats.
  2. In the bowl of a food processor, add the almond meal and powdered sugar and pulse until thoroughly combined.
  3. Sift the mixture over a large mixing bowl, throwing out the lumps as they appear.  Add the crystalized lemon and 82 g. of the egg whites and stir until you get a thick mixture.
  4. In a small pot attached with a candy thermometer, combine the sugar and water over medium heat and boil until the syrup reaches 200˚F.
  5. Once the syrup reaches 200˚F, start whipping the remaining 90 g. in the bowl of your stand mixer with the whisk attachment on medium speed until soft peaks are reached.
  6. Once the syrup reaches 248 ˚F, remove the pot off the burner and slowly pour the syrup down the side of the mixing bowl with the egg whites on medium speed.
  7. Once the egg whites are fully incorporated, increase the speed to medium high until egg whites form glossy, stiff peaks.
  8. Mix a ⅓ of the egg white mix to the almond mixture and stir together until the batter is slightly lighter and less pasty.  From then on, fold in ⅓ of the egg white mixture at a time until the mixture “flows like magma”.  The mixture should be smooth and run thick ribbons off the spatula.
  9. With a pastry bag fitted with a ½ in. plain tip, pipe 1¼ – 1½ in. rounds.
  10. The piped batter may have peaks but should smooth away in a minute or two.
  11. Sprinkle nonpareils evenly over macaron shells.
  12. Let the batter stand until the tops of the macarons are dry to the touch, about 30 minutes to 1 hour.
  13. Preheat the oven to 275-325˚F.  If your oven tends to run hot go for 275˚F, if not then 325˚F.
  14. Bake 10-13 minutes, until the feet are formed and the tops are smooth.  The batter is done when you slightly wiggle it and it starts to come off of the parchment paper / silicone mat.
  15. Once cool, frost the inside of the macaron shell with cake batter frosting and sandwich with another macaron shell.

* Open to U.S. Residents only. Winner will be contacted via email.

Cookies and Cream Macarons

Cookies and Cream Macarons 1Another year has come and gone, and as predicted a slew of healthy dishes and diet how-tos flooded my newsfeed as soon as the new year started. I’m all for being healthy and starting with a blank slate, but what’s life without a little treat now and then? Personally, I feel like I’ve been indulging a little more than I should since January. Actually, I think I’ve been eating worse than I did during the holidays. Am I the only person who is at their heaviest from January to March? I’ll chalk it up to holiday blues… and not my obvious laziness. Talking about laziness, does anyone else still have their Christmas tree up? I keep putting that particular task off every week. I just know it’s going to stay up till February. Help.
Cookies and Cream Macarons 4You know what didn’t last though? These macarons. I made this ridiculously tall, four layered red velvet chocolate cookies and cream cake for my brother’s birthday and I happened to have a bit of the frosting leftover, and that is what sparked this macaron.  What makes this cookies and cream frosting different from the standard cookies and cream? It is made with cookies and cream cookie butter. I picked up a jar of this cookie butter from Trader Joe’s months ago but I still had more than half the jar left. Stirred into my go-to vanilla frosting and lots of Oreo cookie crumbs, it tastes just like an Oreo.
Cookies and Cream Macarons 2Do my photos look any different? Mr. L gifted me with a gorgeous Nikon D3200, and I’m hoping to get to learn how to shoot photos correctly with this thing. I’m having a tough time getting the right things to focus. Other than that, I’m ecstatic to start the new year with new equipment and fresh ideas. Here’s to a new year. 🙂
Cookies and Cream Macarons 3
Cookies and Cream Macarons

Basic French Macarons

Ingredients:
212 g. almond meal
212 g. powdered sugar
172 g. egg whites, divided to 82 g. and 90 g (aged, if possible)
236 g. sugar
158 g. water
6 Oreos, crushed into crumbs

Instructions:

  1. Line two baking sheets with parchment paper or silicone mats.
  2. In the bowl of a food processor, add the almond meal and powdered sugar and pulse until thoroughly combined.
  3. Sift the mixture over a large mixing bowl, throwing out the lumps as they appear.  Add 82 g. of the egg whites and stir until you get a thick mixture.
  4. In a small pot attached with a candy thermometer, combine the sugar and water over medium heat and boil until the syrup reaches 200˚F.
  5. Once the syrup reaches 200˚F, start whipping the remaining 90 g. in the bowl of your stand mixer with the whisk attachment on medium speed until soft peaks are reached.
  6. Once the syrup reaches 248 ˚F, remove the pot off the burner and slowly pour the syrup down the side of the mixing bowl with the egg whites on medium speed.
  7. Once the egg whites are fully incorporated, increase the speed to medium high until egg whites form glossy, stiff
  8. Mix a ⅓ of the egg white mix to the almond mixture and stir together until the batter is slightly lighter and less pasty.  From then on, fold in ⅓ of the egg white mixture at a time until the mixture “flows like magma”.  The mixture should be smooth and run thick ribbons off the spatula.
  9. With a pastry bag fitted with a ½ in. plain tip, pipe 1¼ – 1½ in. rounds.
  10. The piped batter may have peaks but should smooth away in a minute or two.  Take cookie crumbs and sprinkle onto tops of wet batter.
  11. Let the batter stand until the tops of the macarons are dry to the touch, about 30 minutes to 1 hour.
  12. Preheat the oven to 275-325˚F.  If your oven tends to run hot go for 275˚F, if not then 325˚F.
  13. Bake 10-13 minutes, until the feet are formed and the tops are smooth.  The batter is done when you slightly wiggle it and it starts to come off of the parchment paper / silicone mat.
  14. Let cool and fill.

Cookies and Cream Frosting

Ingredients:
½ c. whole milk
3 tbsp. flour
⅛ tsp. salt
4 oz. (1 stick) unsalted butter, room temperature
½ c. sugar
1 tsp. vanilla extract
¾  c. cookies and cream cookie butter
12 Oreo cookies, crushed into crumbs

Instructions:

  1. In a small pot over medium heat, whisk milk, salt and flour until combined.
  2. Continuously whisk mixture until thickened to a pudding like consistency.
  3. Once thickened, strain through a mesh strainer into a bowl with a spatula to remove lumps.
  4. Place a piece of plastic wrap on top of the flour mixture (to prevent skin from forming) and put bowl into the fridge until fully cool.
  5. In a mixer bowl fitted with the whisk attachment, mix the sugar and butter on high speed until fluffy and pale about, 5-10 minutes.
  6. Add the chilled flour mixture and continue to whip on high speed until the sugar is completely dissolved and the mixture is no longer gritty, about 5-10 minutes.
  7. Add the vanilla extract and cookie butter and mix until combined.
  8. Fold in Oreo cookie crumbs.

{Simple Sundays} Snowball Cookies

snowball cookiesHaving lived in New Jersey for most of my life, Christmas is synonymous with cold weather and snow. We don’t get a white Christmas often, but when we do that particular Christmas feels that much more special. Now I’m not saying you need snow to make Christmas special, but these little nuggets will make it seem like Jack Frost hit your house for the night.
Snowball Cookies 1It really couldn’t be easier. You toss in any kind of nut (I used walnuts) into a food processor or you can even crush it with a rolling pin, and process it until it becomes similar to corn meal. Then in a separate bowl you cream butter with sugar and vanilla extract and then you add your flour, ground nut, salt and nutmeg. I suggest grating fresh nutmeg. It really adds that extra special holiday flair. Dose it onto a cookie sheet and you don’t even have to roll them into balls if you don’t want to. Bake until pale brown and toss with powdered sugar when cool.
Snowball Cookies 2It looks like a snow dome or a half formed snowball. Kissed with some nutmeg and powdered sugar, It melts in your mouth but has a substantial bite that is characteristic of all nut cookies.  Enjoy! 🙂
snowball cookies 34
Snowball Cookies

Ingredients:

2 c. all-purpose flour
2 c. walnuts, almonds, or pecans (you can really use any nut you want)
¾ tsp. kosher salt
½ tsp. nutmeg
8 oz. unsalted butter, at room temp
⅓ c. sugar
2 tsp. vanilla extract
1 ½ c. powdered sugar

Instructions:

  1. Preheat the oven to 325˚F and line two baking sheets with parchment paper or silicone mat.
  2. In a food processor, pulse two cups of nuts until finely ground.
  3. In a separate bowl, mix flour, ground nut, kosher salt and nutmeg together.
  4. In a standing mixer fitted with a paddle attachment, cream butter and sugar until pale and fluffy.
  5. Add the vanilla extract and mix until homogenous.
  6. With the mixer on low, add the flour mixture and mix until just combined.
  7. Scoop out tablespoon sized portions of cookie dough and roll into balls.
  8. Bake 15-20 minutes until lightly golden. Let cool.
  9. Once cool, toss each cookie with powdered sugar (the more it is covered, the better) and consume.

Snowball cookie recipe adapted from the brown eyed baker.

Christmas Wreath Macarons

Christmas Wreath Macarons 1Am I the only person that thinks that Christmas snuck upon us this year? I feel like I was waiting forever for Thanksgiving and then BAM! Christmas is right around the corner. (Did anyone else think of this Friends’ scene when they read BAM?) I’ve been dreaming of these macarons since December started and I finally had a chance to bake them earlier this week.
Christmas Wreath Macarons 2Is it cold where you live? It’s been freezing in NJ and I am not used to working in a cooler kitchen. The weather must’ve been super dry because my macaron shells set before I was able to place my sprinkles, hence the little cracks in the shell where I tried to force each sprinkle in with a pair of tweezers (kitchen-use-only-tweezers). I have to admit I was getting quite frustrated with making them and then this happened:
Christmas Wreath Macarons 4Here are my attempts at his mug shots.
Christmas Wreath Macarons 5The thing is, Bear, my cat loves to watch me bake and prep food on the kitchen table. He demands to sit on his own chair and Petey (my other cat) was occupying Bear’s usual space. Fed up with watching from the floor, he decided to get up close and onto the table where the trays of macarons were drying. If you don’t know already, macaron batter is sticky and it took forever to get the green goo out of his tiny paws. Not to mention the trail of green batter on the floor he left when he ran away from me.
Christmas Wreath Macarons 3Despite my frustrations making this particular recipe, I think the macarons would make a cute addition to any cookie platter and add a bit of holiday flair. You can also change up the look of the macaron with different sprinkles. Just make sure you put them on before the shells dry out. If you don’t, they’ll just bounce off like hail on cement pavement.

Christmas Wreath Macarons

Ingredients:

212 g. almond meal
212 g. powdered sugar
172 g. egg whites, divided to 82 g. and 90 g (aged, if possible)
236 g. sugar
158 g. water
green gel food color
various sprinkles

Instructions:

  1. Line two baking sheets with parchment paper or silicone mats.
  2. In the bowl of a food processor, add the almond meal and powdered sugar and pulse until thoroughly combined.
  3. Sift the mixture over a large mixing bowl, throwing out the lumps as they appear. Add 82 g. of the egg whites and stir until you get a thick mixture.
  4. In a small pot attached with a candy thermometer, combine the sugar and water over medium heat and boil until the syrup reaches 200˚F.
  5. Once the syrup reaches 200˚F, start whipping the remaining 90 g. in the bowl of your stand mixer with the whisk attachment on medium speed until soft peaks are reached.
  6. Once the syrup reaches 248 degrees, remove the pot off the burner and slowly pour the syrup down the side of the mixing bowl with the egg whites on medium speed.
  7. Once the egg whites are fully incorporated, increase the speed to medium high until egg whites form glossy, stiff peaks. Add two drops of the green gel food color and mix until batter turns a bright shade of green.
  8. Mix a ⅓ of the egg white mix to the almond mixture and stir together until the batter is slightly lighter and less pasty. From then on, fold in ⅓ of the egg white mixture at a time until the mixture “flows like magma”.  The mixture should be smooth and run thick ribbons off the spatula.
  9. With a pastry bag fitted with a ¼ in. plain tip, pipe a ring of macaron batter leaving the hole in the center as wide as possible. (If you do not, it will close up when the macaron bakes.)
  10. Before the batter dries, place your sprinkles in the desired area.
  11. The piped batter may have peaks but should smooth away in a minute or two. Let the batter stand until the tops of the macaron batter are dry to the touch, about 30 mins to 1 hour.
  12. Preheat the oven to 275-325˚F. If your oven tends to run hot go for 275˚, if not then 325˚.
  13. Bake 10-13 minutes, until the feet are formed and the tops are smooth. The batter is done when you slightly wiggle it and it starts to come off of the parchment paper / silicone mat.
  14. Let cool and fill.

Basic Vanilla Frosting

Ingredients:
2 c. whole milk
½ c. flour
¼ tsp. salt
1 1b. (4 sticks) unsalted butter, room temperature
2 c. sugar
1 tbsp. vanilla extract

Instructions:

  1. In a saucier pan, put milk, salt and flour and whisk until combined on medium heat.
  2. Continuously whisk mixture until thickened to a pudding like consistency.
  3. Once thickened, strain through a mesh strainer into a bowl with a spatula to remove lumps.
  4. Place a piece of plastic wrap on top of the flour mixture and put into the fridge until fully cool.
  5. In a mixer bowl fitted with the whisk attachment, mix the sugar and butter on high speed until fluffy and pale about, 5-10 minutes.
  6. Add the chilled flour mixture and continue to whip on high speed until the sugar is completely dissolved and the mixture is no longer gritty, about 5-10 minutes.
  7. Add the vanilla extract and mix until combined.

*Basic macarons adapted from Bouchon Bakery by Thomas Keller, Sebastien Rouxel.

Cute Halloween Bat Cupcakes

Cute Halloween Bat CupcakesI know I said I would post about my Rebels Party next, but today is Halloween. And if I don’t share this with you now, I would have to wait a whole year to post this! I have a little cousin, J (wait, can I call her “Little J” from now on? A la Gossip girl??), who asks me to make cupcakes for her classroom parties every year. Last year I made these cauldron cupcakes, but it wasn’t an original idea of mine. This year I was bent on doing something unique, and of course every time I thought something was new, Google told me I was wrong. After a solid week of thinking about spiders, cats, ghosts, graveyards, pumpkins, candy corn, witches and other Halloween themed items, I came up with these really cute bat cupcakes.
Cute Halloween Bat Cupcakes 3Start by tinting vanilla frosting to a blue that is similar to the night sky and add some edible gold stars. The bats are made with Oreo truffles which are one of the easiest desserts you can make. You basically mix Oreos and cream cheese and you get these tasty nuggets of goodness. Plus, I used cookie dough Oreos which made them that much more awesome. Stick on some candy eyes, chocolate wings and chocolate covered candy pearls and you’ve got a bat. The moon in the background is made with yellow candy melts sprinkled with sanding sugar to make it glitter. By the way, I hurried my butt to get a few shots of these before the sun went down and that’s the reason I’m lacking more photo content. I love me some fall, but I do not love the short days… no siree.

Halloween Bat Cupcakes

Chocolate Cupcakes

Ingredients:

1 ¾ c. all-purpose flour
2 c. sugar
¼ c. natural unsweetened cocoa powder
½ c. Dutch-process unsweetened cocoa powder
2 tsp. baking soda
1 tsp. baking powder
1. tsp. kosher salt
½ c. vegetable oil
2 extra-large eggs, room temperature
1 tsp. vanilla extract
1 c. strong, hot coffee

Instructions:

  1. Preheat oven to 350 degrees and line 2 muffin pans with cupcake liners (24 cups in total).
  2. In a stand mixer fitted with the paddle attachment, mix flour, sugar, both cocoa powders, baking soda, baking powder and salt until fully combined.
  3. In a separate bowl, whisk vegetable oil, eggs, and vanilla extract until combined.
  4. With the mixer speed on low, add the egg mixture to the flour mixture until combined.
  5. Turn off the mixer. With a spatula, scrape the sides of the bowl to fully incorporate the two mixtures.
  6. Turn the mixer on low and slowly add the hot coffee to the batter. Once added, raise the speed to medium until completely homogenous.
  7. Fill cupcake liners with 2/3 full with batter and bake about 15-20 minutes. Checking at 13 minutes for doneness with a toothpick.
  8. Let stand for 5-10 minutes when done, then put onto a cooling rack to fully cool.

Night Sky Frosting

Ingredients:

2 c. whole milk
½ c. flour
¼ tsp. salt
1 1b. (4 sticks) unsalted butter, room temperature
2 c. sugar
1 tbsp. vanilla extract
royal blue gel food color
violet gel food color

Instructions:

  1. In a saucier pan, put milk, salt and flour and whisk until combined on medium heat.
  2. Continuously whisk mixture until thickened to a pudding like consistency.
  3. Once thickened, strain through a mesh strainer into a bowl with a spatula to remove lumps.
  4. Place a piece of plastic wrap on top of the flour mixture and put into the fridge until fully cool.
  5. In a mixer bowl fitted with the whisk attachment, mix the sugar and butter on high speed until fluffy and pale about, 5-10 minutes.
  6. Add the chilled flour mixture and continue to whip on high speed until the sugar is completely dissolved and the mixture is no longer gritty, about 5-10 minutes.
  7. Add the vanilla extract and mix until combined.
  8. Add blue and violet gel colors until desired color is reached.

Yellow Moons

Ingredients:

yellow candy melts
yellow sanding sugar

Instructions:

  1. Melt yellow candy melts and pour into a squeeze bottle.
  2. On a sheet pan lined with wax paper, draw and fill in 1 inch wide circles with the squeeze bottle.
  3. Sprinkle yellow sanding sugar while candy melt is still melted.
  4. Let set until use.

Oreo Truffle Bats

Ingredients:

36 Oreos
8 oz. package of cream cheese, softened
1 tsp. vanilla extract
black candy melts
black candy pearls
small candy eyeballs

Instructions:

  1. Put Oreos in a food processor and pulse until fine crumbs form.
  2. Add softened cream cheese and vanilla extract, and pulse until blended.
  3. Shape into 40 small balls onto a wax paper lined sheet pan and chill until firm.*
  4. Melt the black chocolate candy melt in a tall and narrow bowl or cup and dip chilled truffles using a fork. Let excess drip back into the bowl/cup.
  5. Let the chocolate on the truffle set until firm.
  6. Pour melted chocolate candy melt into a squeeze bottle.
  7. On a separate sheet pan lined with wax paper, draw wings with squeeze bottle. Set aside.
  8. While the wings set, use the black candy melt to adhere candy eyeballs onto the chocolate truffle.
  9. Take a black candy pearl, dip it into melted black candy melt and adhere onto top of the bat’s head. Let set.

Assembly

You will need:

chocolate cupcakes, baked and cooled
night sky frosting
yellow moons
truffle bats
edible gold star glitter
large open star decorating tip

Instructions:

  1. In a pastry bag fitted with a large open star decorating tip, fill with night sky frosting and frost a tall swirl on a chocolate cupcake.
  2. Sprinkle edible gold star glitter all around the sides.
  3. Add a yellow moon towards the back of the cupcake and place a truffle bat (without its wings) onto the center of the cupcake.
  4. Take two wings and position it next to the truffle bat.
  5. Enjoy!

*If mixture is too soft to shape into balls, spoon 40 small separate mounds on a wax paper lined sheet pan and chill.  Once chilled, you should be able to form them into balls.

Chocolate cake recipe adapted from Ina Garten.
Oreo truffle recipe adapted from Kraft.

Peaches and Cream Crêpe Cake

Crêpe Cake 6It’s been a while. Residency was kicking my butt and I ate too well for my birthday week and decided to go on a diet. Two weeks later, residency is still kicking my butt and the diet was a disaster. What happens when a food blogger decides to go on a diet? They lose content. Lesson learned. I won’t do it again. I promise.
Crêpe Cake 3Several weeks ago my good friend, H, brought two slices of crêpe cake from Lady M Confections. If you don’t know already, Lady M is a chain of cake boutiques that specialize in crêpe cakes. I never tried a crêpe cake before and was pleasantly surprised by the delicate layers and the light taste. But when H told me how much she paid, I was shocked at the price tag. $8 for a slice of cake?? As delicious it was, I could not justify that kind of cost and said I would never pay that that much for a slice of cake, ever.
Peaches and Cream Crêpe Cake 1Fast forward two weeks and as my birthday approached closer, I couldn’t help but think of that ridiculously expensive crêpe cake. Do I just bite the bullet and buy it or should I try it on my own? I’ve never attempted at making crêpes at home but it was my birthday, and I decided I would make one if I wanted to.
Crêpe Cake 2I know some people think making your own birthday cake is sad or depressing and until this year, I’ve been blessed with significant others that would buy me the cake of my desire. But you know what, making your own cake is better because you get exactly what you want and how you want it. Plus, if you make a mistake or mess up, you don’t feel guilty or pressured about ruining someone’s special day.
Crêpe Cake 4I had some fresh picked peaches when I went peach picking in August, so I decided to incorporate it into the cake. If I could redo this cake, I would make the crêpes thinner. As a novice, I was worried about it tearing and made them on the thicker side. In hindsight, it wasn’t necessary. So go thin if you decide to make it.
Crêpe Cake 5In the end, it was worth the effort and I suggest eating it immediately after caramelizing the sugar.  Because when you take a bite of the crisp bits of sugar with the light cake, you will be in heaven. Plus when you refrigerate it, the sugar melts and you get an odd syrup that may or may not pool all over your refrigerator shelf. (Yes, this happened. No, I was not fun cleaning it up.)

Peaches and Cream Crêpe Cake

For the Crêpes

Ingredients:
6 tbsp. butter
3 c. milk
6 large eggs
1 ½ c. all-purpose flour
7 tbsp. sugar
pinch kosher salt

Instructions

  1. Prepare the batter a day before you want to serve the cake.
  2. In a small saucepan, melt and brown the butter.
  3. In a separate saucepan, heat the milk and cool for 10 minutes. (Do not boil milk.)
  4. In a food processor, pulse eggs, flour, sugar and salt until fully combined.
  5. Add milk and butter and pulse until fully combined.
  6. Refrigerate batter for 8-24 hours.
  7. On the day of, bring the batter to room temperature.
  8. Heat a 6” nonstick pan and spray the pan with nonstick spray and wipe off.
  9. Spread 3 tbsp. of batter and swirl to cover the pan.
  10. Cook until the bottom begins to brown and flip the crêpe cook the other side until it sets.
  11. Repeat until all of the batter is used.

For the Pastry Cream

Ingredients:
2 c. milk
¼ c. sugar
2 egg yolks
1 egg
¼ c. cornstarch
¼ c. sugar
2 tbsp. unsalted butter
1 tsp. vanilla extract

Instructions:

  1. Prepare the pastry cream a day before you want to serve the cake.
  2. In a medium saucepan, bring milk and ¼ c. sugar to a boil.
  3. In another medium bowl, mix egg yolks, egg, cornstarch and ¼ c. sugar until a paste forms.
  4. Using a ladle, drizzle a ladleful of milk while continuously whisking the egg mixture. Continue to drizzle in hot milk a little at a time until you mix in ¾ of the milk.
  5. Take the egg milk mixture and pour it into the saucepan with the remaining milk.
  6. Cook the mixture while stirring constantly over medium heat until mixture is thickened and pudding like.
  7. Remove saucepan from heat and mix in butter and vanilla extract. Set aside.

To Assemble

Ingredients:
1 ½ c. heavy cream
3 tbsp. powdered sugar
2 tbsp. Kirsch
3 large very ripe peaches, cut into small bits
granulated or powdered sugar for garnish (optional)
sliced peaches for garnish (optional)

Instructions:

  1. Whip the heavy cream and powdered sugar until stiff peaks form.
  2. Fold in prepared pastry cream, Kirsch and peaches.
  3. Lay two crêpes on a cake plate. Using an offset spatula, spread a thin layer of peach pastry cream. Cover with a crêpe and repeat until all the crêpes are used. Save the best looking crêpe for the top.
  4. Chill for at least 2 hours to set.
  5. When ready to serve, you can:
    1. Dust the top with powdered sugar.
    2. Sprinkle the top with granulated sugar and caramelize with a blowtorch.
    3. Garnish the top with sliced peaches, sprinkle the top with granulated sugar and caramelize with a blowtorch.

Crepe Cake recipe adapted from NY Times.

Chocolate Frosted Flake Macarons

Chocolate Frosted Flake Macarons 2I tend to pair certain foods with particular people.  Frosted Flakes is one of them.  My grandmother started every morning with a bowl of frosted flakes while doing her daily Bible reading with her red pen.  I woke up particularly early yesterday morning and that certain memory came to mind.  Plus, the weather was unusually cool and dry and perfect for macarons.   Call it fate, but that’s how this macaron flavor was born.Chocolate Frosted Flake Macarons 7
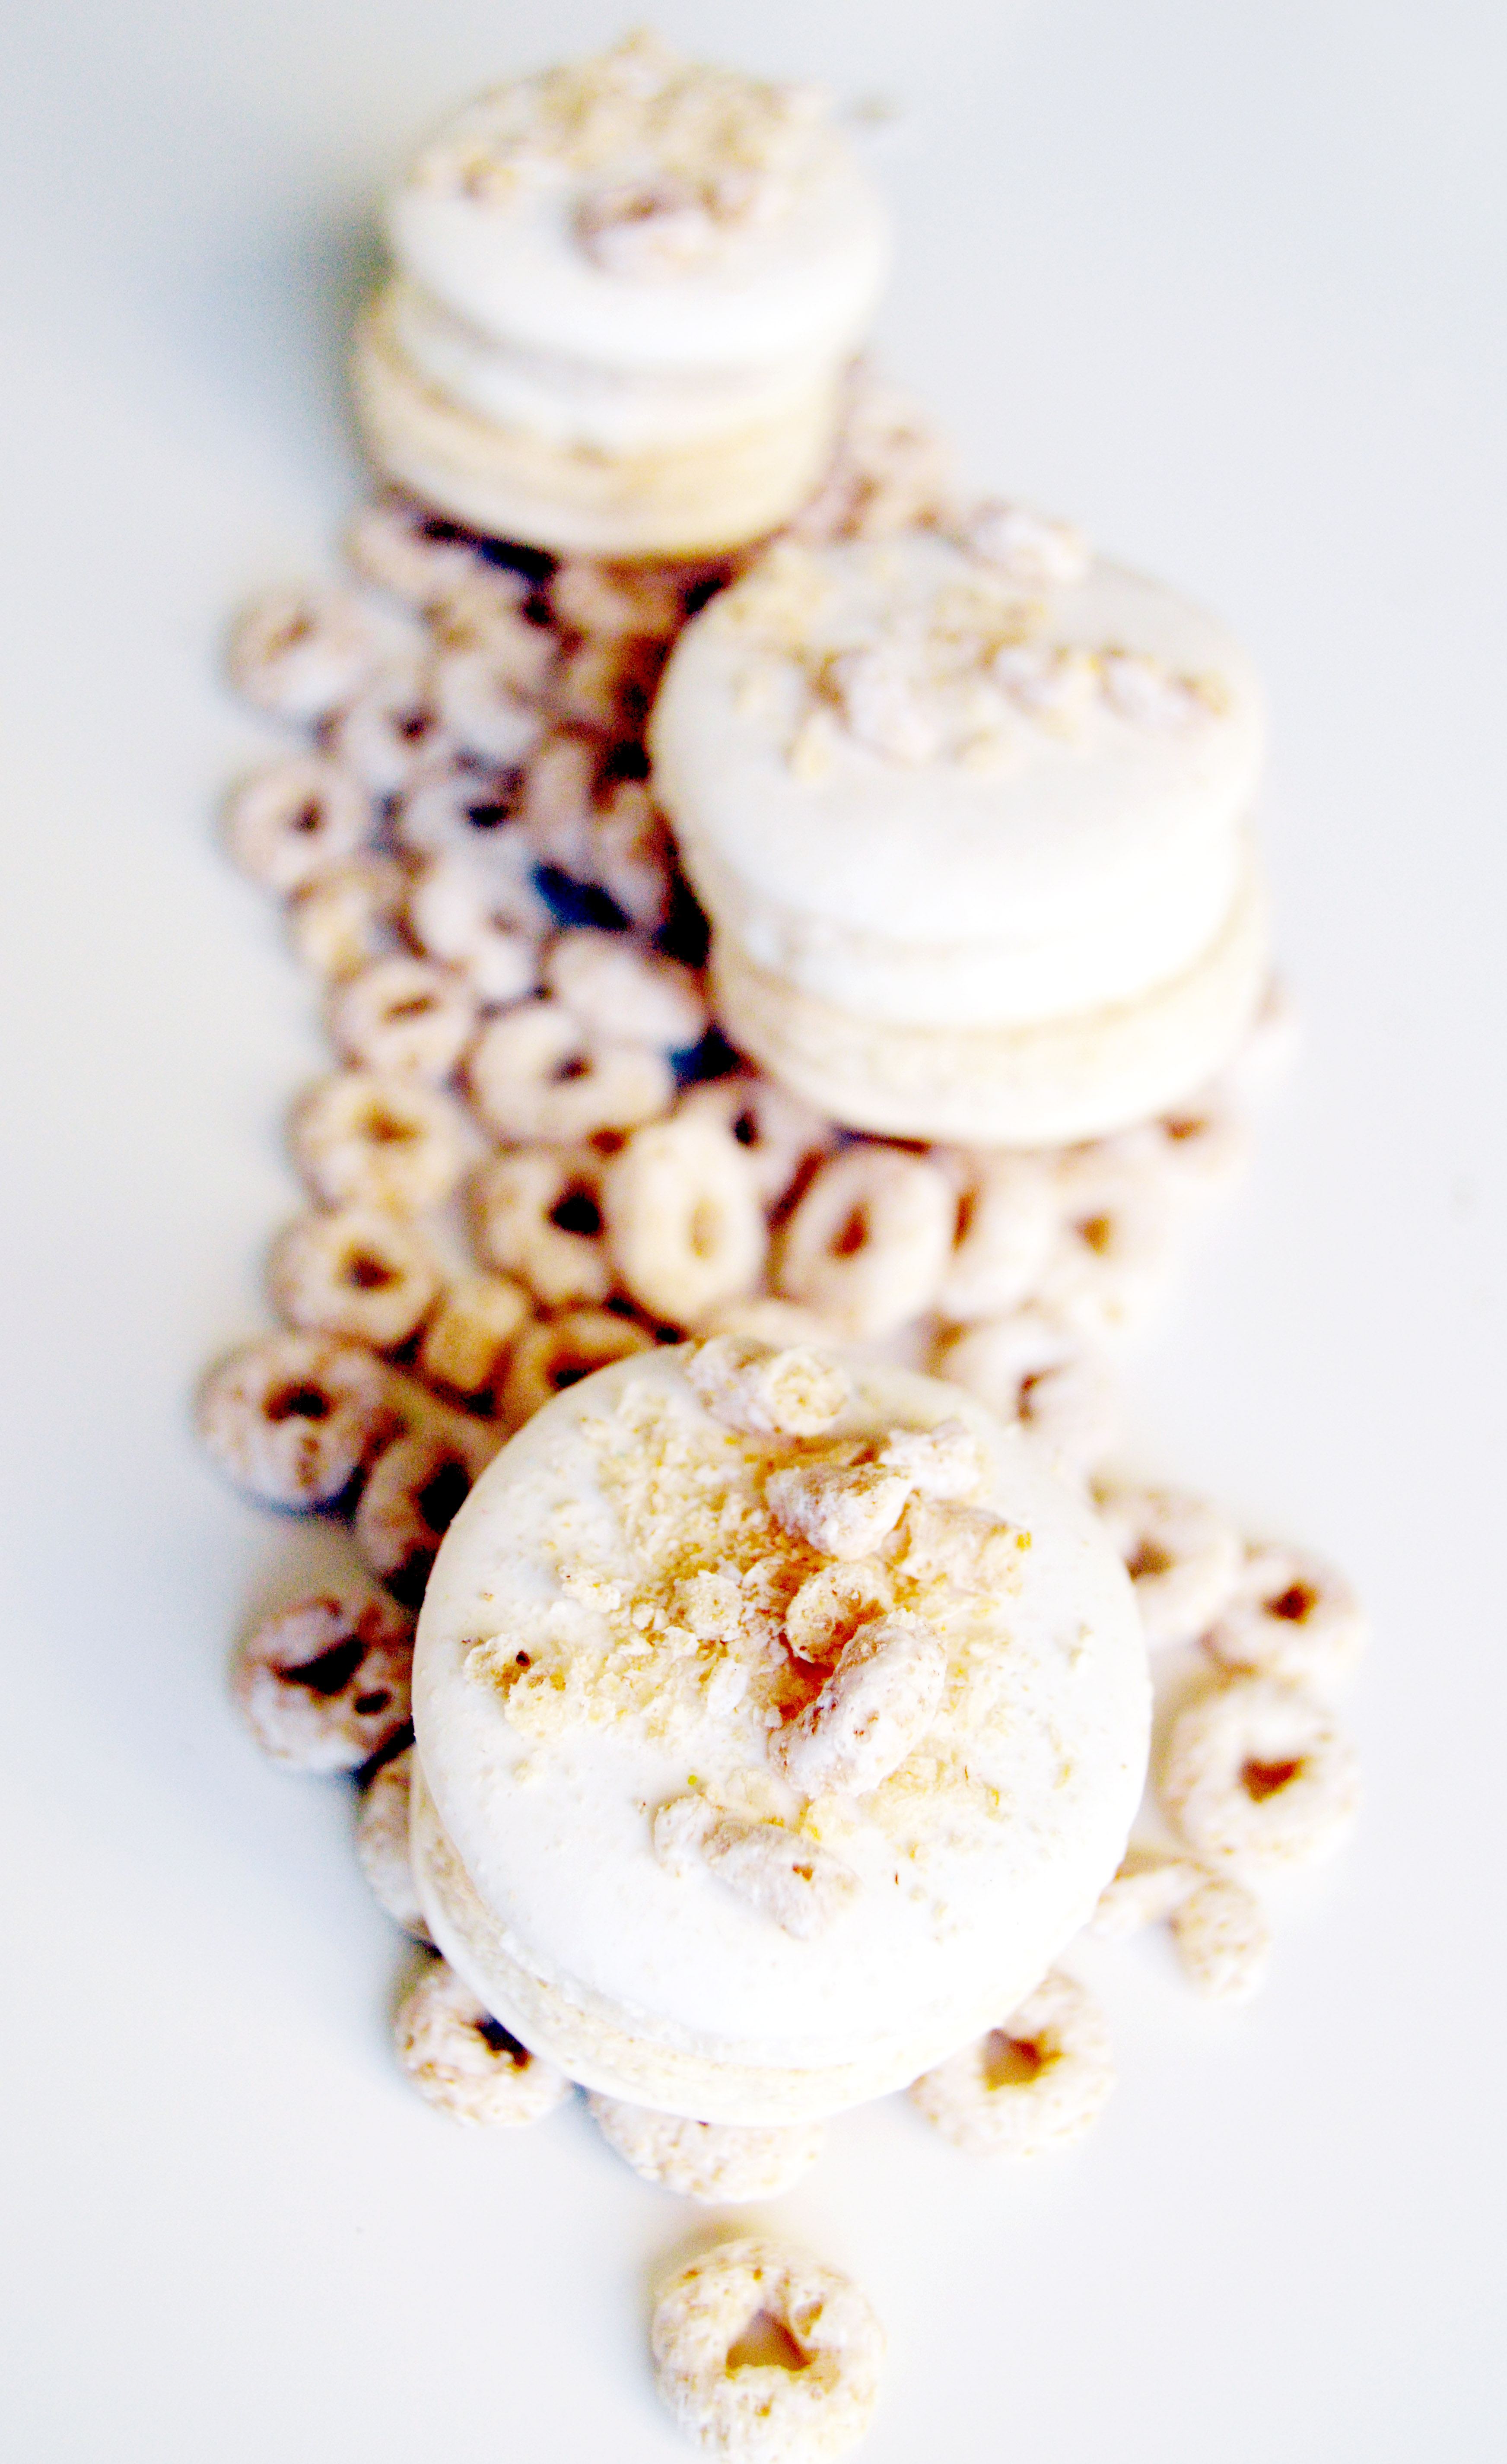
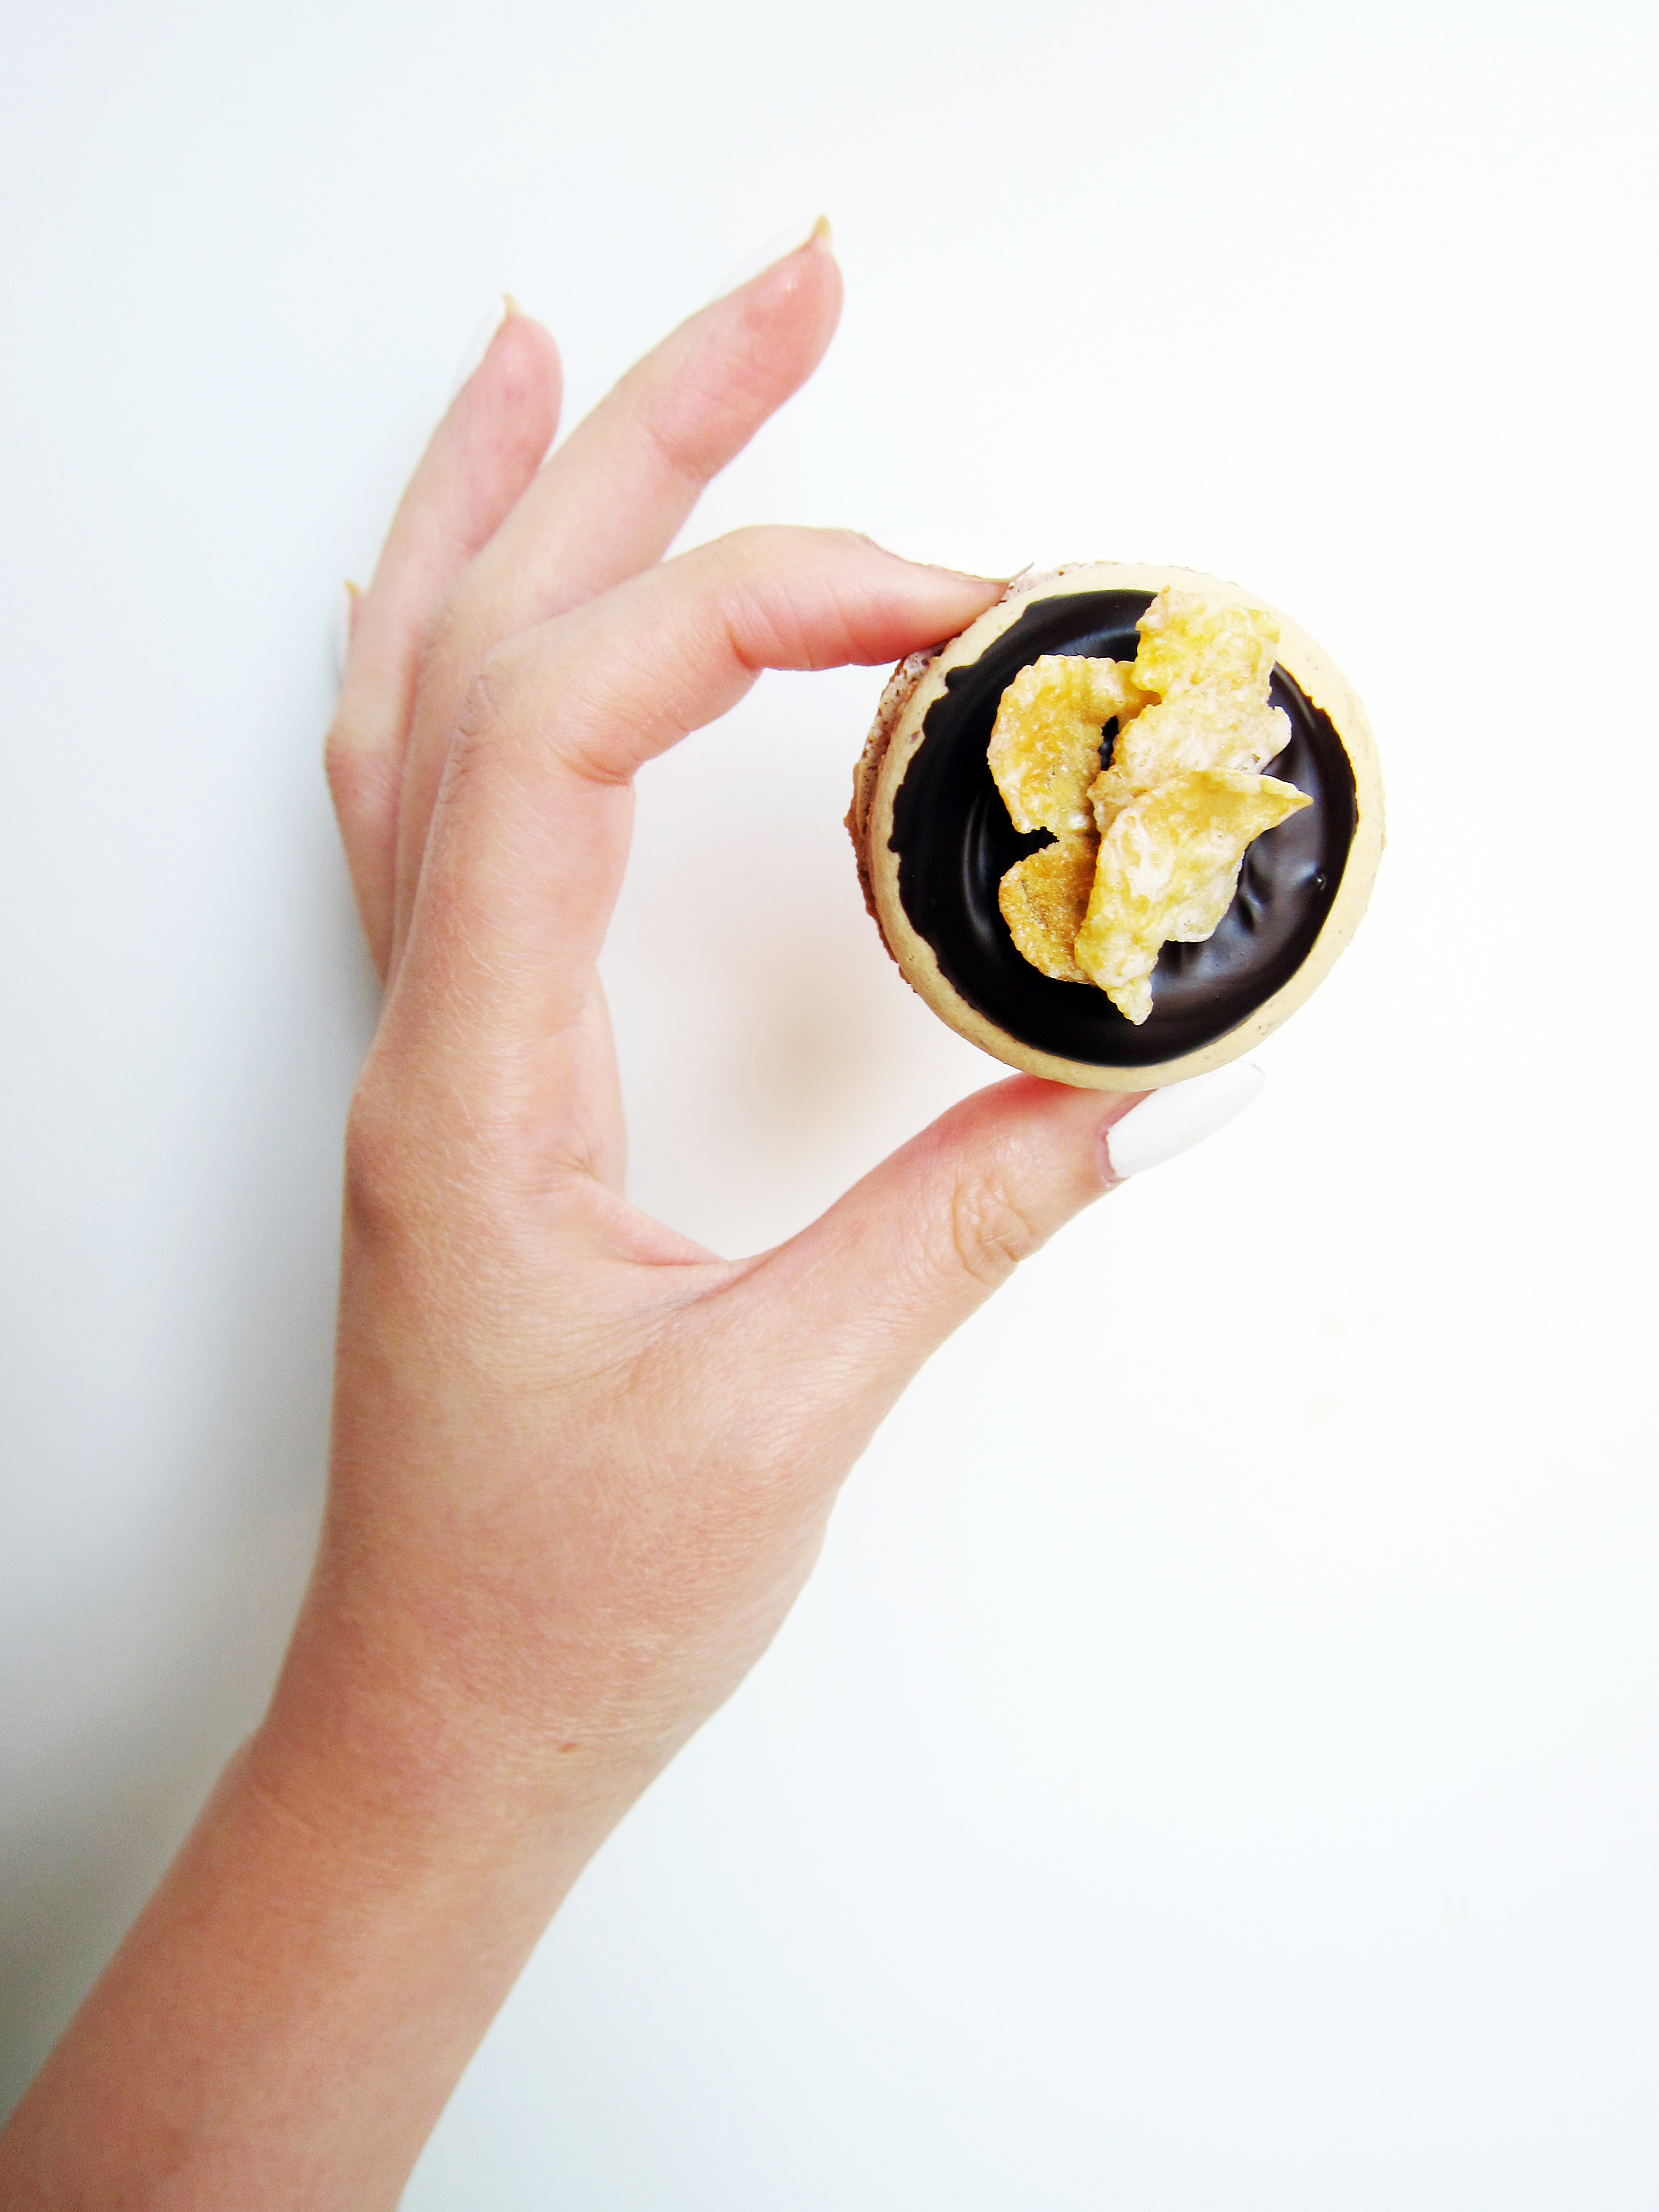
I know, I know.  Frosted Flake macarons?  It sounds odd, but it’s really good!  I even brought them out with me yesterday and someone noted that it might’ve been the best macaron he ever had.
Chocolate Frosted Flake Macarons 3It starts with a vanilla macaron base.  (The speckles are from the almond skins my almond flour had.)  Then, it’s filled with a salted milk jam* filling, to mimic that sweet milk you get when you eat Frosted Flakes.  The tops are dipped into melted sweet chocolate and garnished with a few Frosted Flakes.  Chocolate Frosted Flake Macarons 1I really love how the Frosted Flakes stand up and add an architectural look to them.  They’re pretty to look at and they’re grrrreat to eat.
Chocolate Frosted Flake Macarons 5

Chocolate Frosted Flake Macarons

You will need:
yellow vanilla macaron shells
salted milk jam filling
semi-sweet chocolate, melted
frosted flakes

Basic French Macarons

Ingredients:
212 g. almond meal
212 g. powdered sugar
172 g. egg whites, divided to 82 g. and 90 g (aged, if possible)
236 g. sugar
158 g. water
yellow gel food color

Instructions:

  1. Line two baking sheets with parchment paper or silicone mats.
  2. In the bowl of a food processor, add the almond meal and powdered sugar and pulse until thoroughly combined.
  3. Sift the mixture over a large mixing bowl, throwing out the lumps as they appear.  Add 82 g. of the egg whites and stir until you get a thick mixture.
  4. In a small pot attached with a candy thermometer, combine the sugar and water over medium heat and boil until the syrup reaches 200˚F.
  5. Once the syrup reaches 200˚F, start whipping the remaining 90 g. in the bowl of your stand mixer with the whisk attachment on medium speed until soft peaks are reached.
  6. Once the syrup reaches 248 degrees, remove the pot off the burner and slowly pour the syrup down the side of the mixing bowl with the egg whites on medium speed.
  7. Once the egg whites are fully incorporated, increase the speed to medium high until egg whites form glossy, stiff peaks.  Add two drops of the yellow gel food color and mix until batter turns a light shade of yellow.
  8. Mix a ⅓ of the egg white mix to the almond mixture and stir together until the batter is slightly lighter and less pasty.  From then on, fold in ⅓ of the egg white mixture at a time until the mixture “flows like magma”.  The mixture should be smooth and run thick ribbons off the spatula.
  9. With a pastry bag fitted with a ½ in. plain tip, pipe 1¼ – 1½ in. rounds.
  10. The piped batter may have peaks but should smooth away in a minute or two.  Let the batter stand until the tops of the macaron batter are dry to the touch, about 30 mins to 1 hour.
  11. Preheat the oven to 275-325˚F.  If your oven tends to run hot go for 275˚, if not then 325˚.
  12. Bake 10-13 minutes, until the feet are formed and the tops are smooth.  The batter is done when you slightly wiggle it and it starts to come off of the parchment paper / silicone mat.
  13. Let cool and fill.

Salted Milk Jam Filling

Ingredients:
1 c. dulce de leche (either from a jar or homemade)
1 batch of vanilla frosting (recipe below)
a generous pinch of Maldon salt

Instructions:

  1. Mix dulce de leche, vanilla frosting and Maldon salt until combined.  If the filling is too soft to pipe, chill in the freezer for about 5-10 minutes.  Checking every 3 minutes for the correct consistency.

Basic Vanilla Frosting

Ingredients:
½ c. whole milk
3tbsp. flour
⅛ tsp. salt
4 oz. (1 stick) unsalted butter, room temperature
½ c. sugar
1 tsp. vanilla extract

Instructions:

  1. In a saucier pan, put milk, salt and flour and whisk until combined on medium heat.
  2. Continuously whisk mixture until thickened to a pudding like consistency.
  3. Once thickened, strain through a mesh strainer into a bowl with a spatula to remove lumps.
  4. Place a piece of plastic wrap on top of the flour mixture and put into the fridge until fully cool.
  5. In a mixer bowl fitted with the whisk attachment, mix the sugar and butter on high speed until fluffy and pale about, 5-10 minutes.
  6. Add the chilled flour mixture and continue to whip on high speed until the sugar is completely dissolved and the mixture is no longer gritty, about 5-10 minutes.
  7. Add the vanilla extract and mix until combined.

Assembly

  1. Dip half of the macaron shells into the melted semi sweet chocolate.
  2. Place about 3 Frosted Flakes on top of each chocolate dipped macaron shell.
  3. Let set in freezer for about 5 minutes.
  4. While the chocolate macaron shells are chilling, fill the other half of the macaron shells with the salted milk jam.
  5. Top the milk jam macaron shell with chocolate macaron shell and enjoy!

*I always thought that milk jam was a lighter, less caramel version of dulce de leche.  But after searching the internet, it turns out they’re the same thing.
**Basic macarons adapted from Bouchon Bakery by Thomas Keller, Sebastien Rouxel

Neapolitan Cupcakes

Neapolitan Cupcakes 1I believe that most of the world is split between two factions: chocolate and vanilla.  You love one more than the other. 
Neapolitan Cupcakes 2
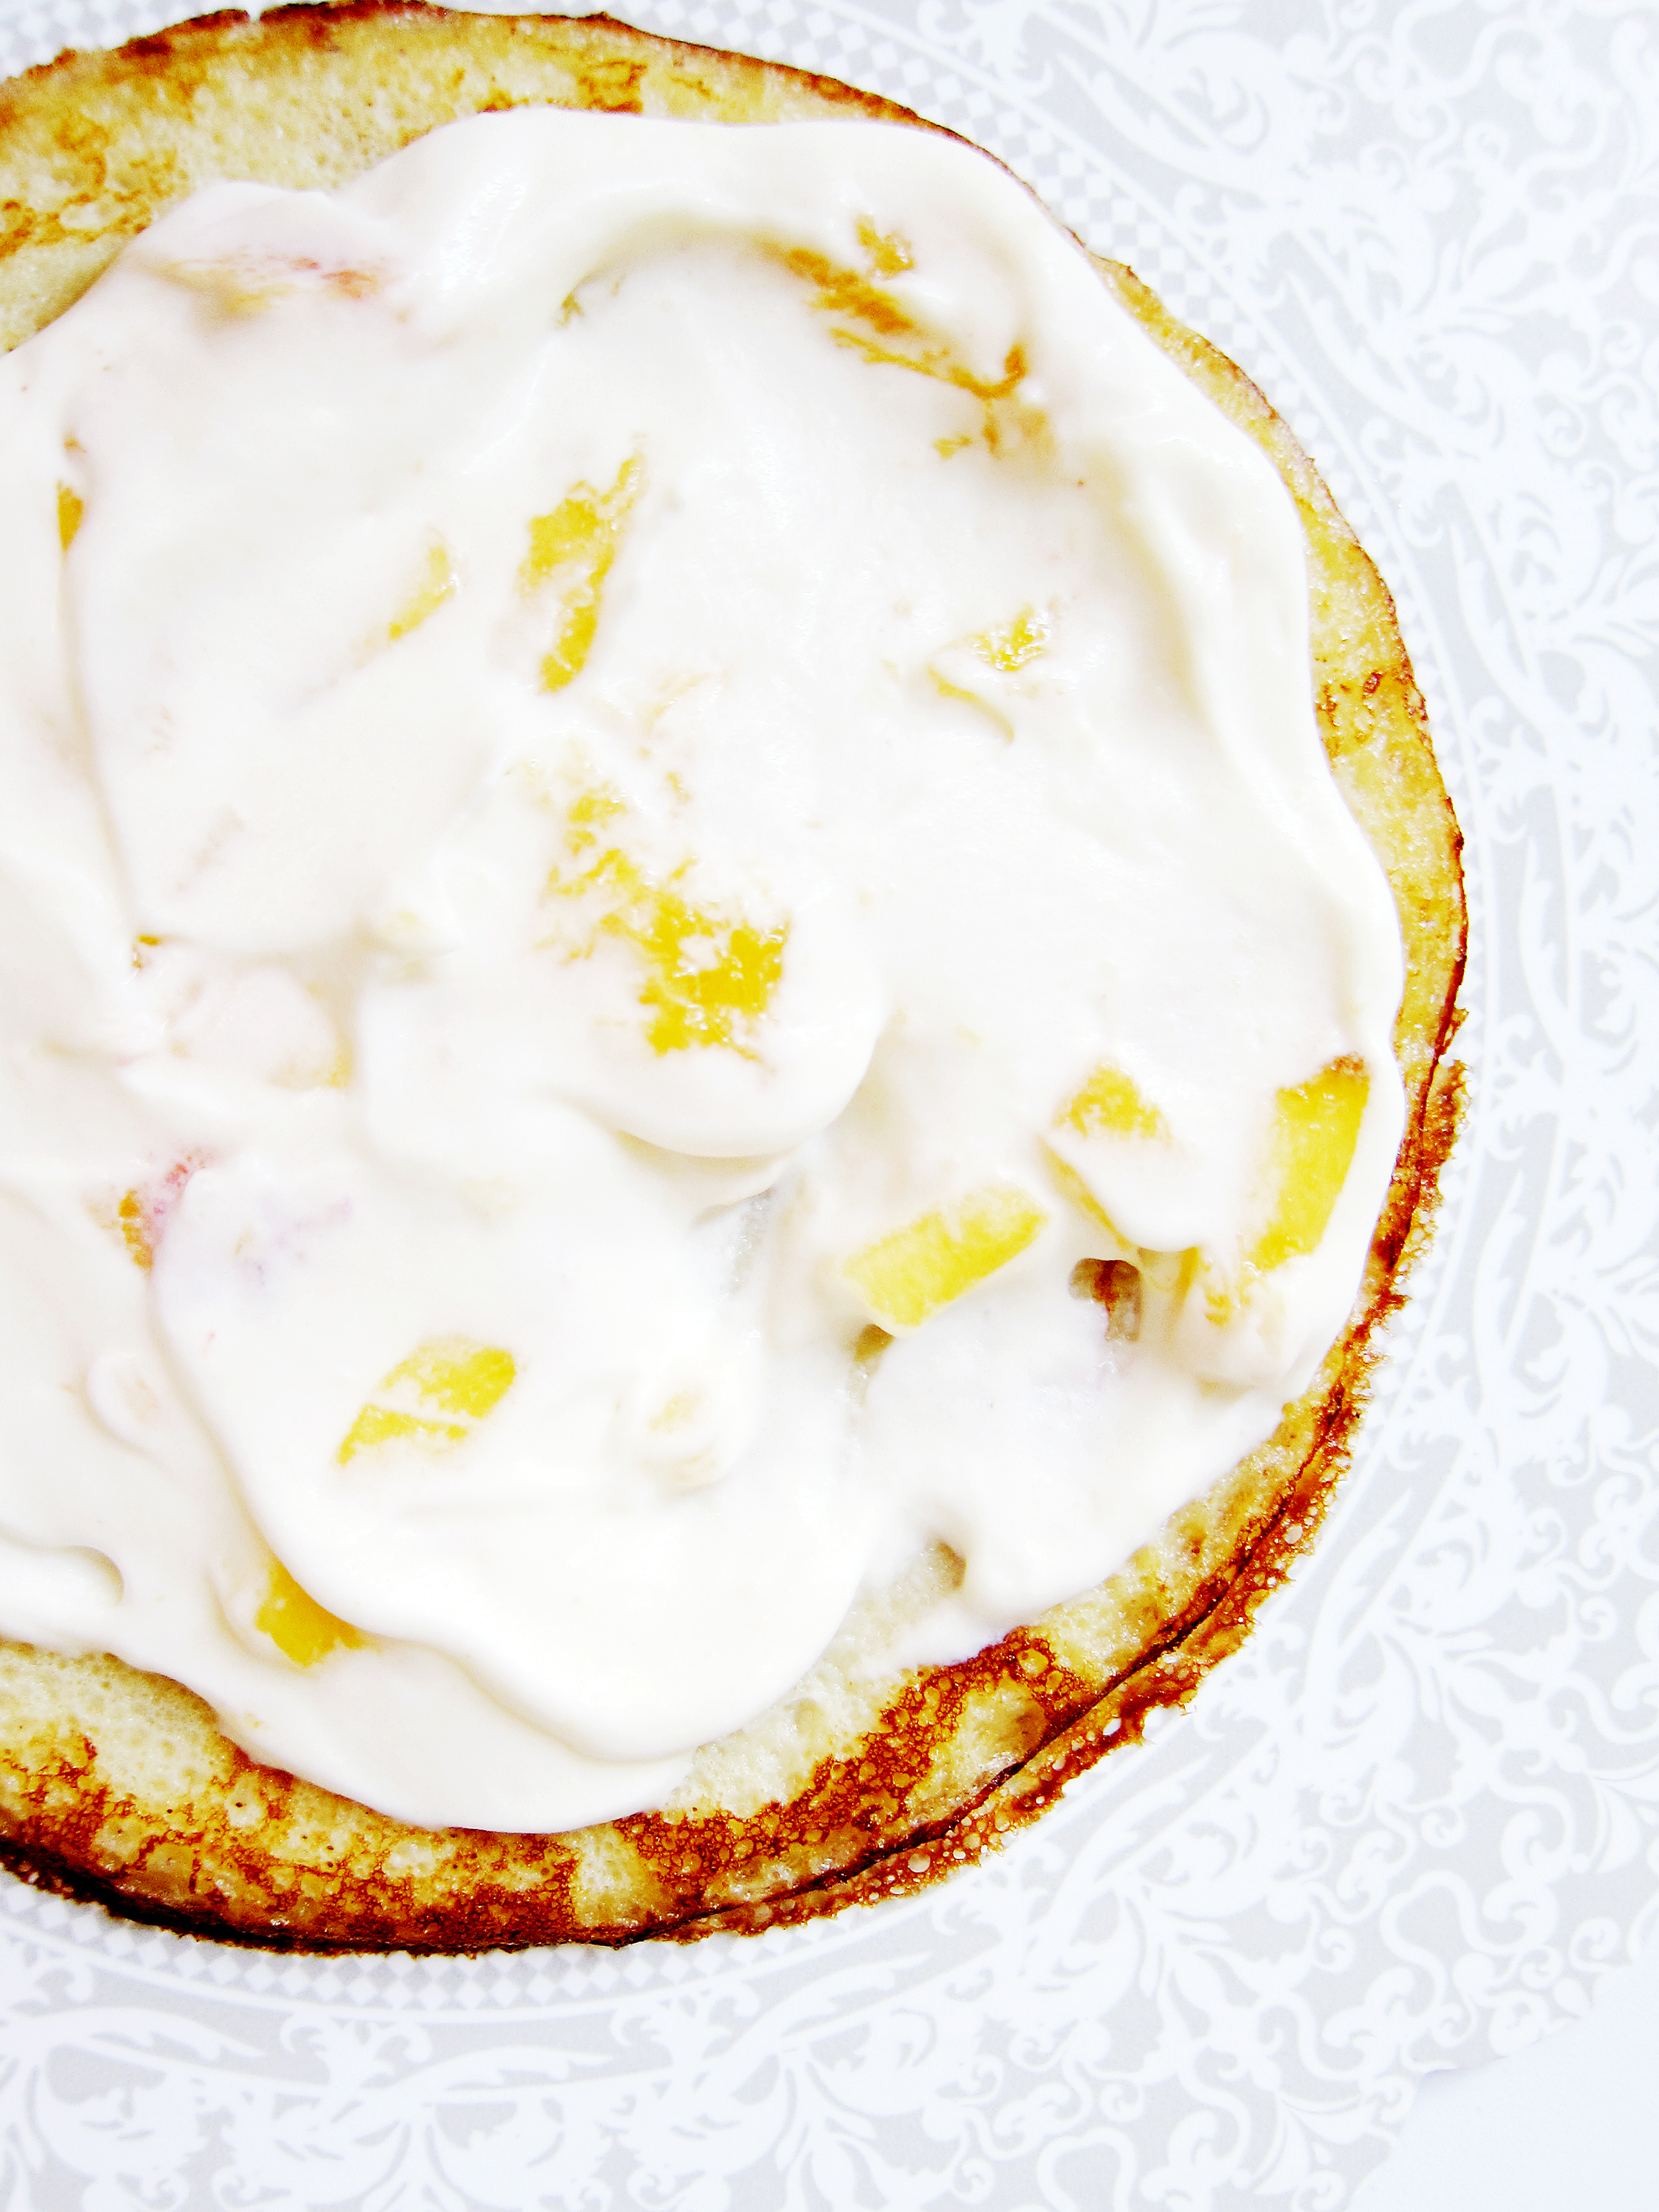
But then there is a small cluster of us who like them all: chocolate, vanilla and strawberry.  We stand in front of grocery freezers and ice cream parlors for minutes on end trying to choose.  “They all sound good!”  “I can go for all of them!”  We secretly like having to share with someone who is in the chocolate or vanilla faction just to avoid making a final decision.

Neapolitan Cupcakes 4This cupcake is for us.  You get the fruity tart strawberry with the sweet lightness of vanilla and dark richness of chocolate.  All rolled into one.  No more time wasted on your preference.  Think of the time you’ll save!

Neapolitan Cupcakes

Chocolate Cupcakes
Recipe Adapted from Ina Garten

Ingredients:
1 ¾ c. all-purpose flour
2 c. sugar
¼ c. natural unsweetened cocoa powder
½ c. Dutch-process unsweetened cocoa powder
2 tsp. baking soda
1 tsp. baking powder
1. tsp. kosher salt
½ c. vegetable oil
2 extra-large eggs, room temperature
1 tsp. vanilla extract
1 c. strong, hot coffee

Instructions:

  1. Preheat oven to 350 degrees and line 2 muffin pans with cupcake liners (24 cups in total).
  2. In a stand mixer fitted with the paddle attachment, mix flour, sugar, both cocoa powders, baking soda, baking powder and salt until fully combined.
  3. In a separate bowl, whisk vegetable oil, eggs, and vanilla extract until combined.
  4. With the mixer speed on low, add the egg mixture to the flour mixture until combined.
  5. Turn off the mixer.  With a spatula, scrape the sides of the bowl to fully incorporate the two mixtures.
  6. Turn the mixer on low and slowly add the hot coffee to the batter.  Once added, raise the speed to medium until completely homogenous.
  7. Fill cupcake liners with 2/3 full with batter and bake about 15-20 minutes. Checking at 13 minutes for doneness with a toothpick test.*
  8. Let stand for 5-10 minutes when done, then put onto a cooling rack to fully cool.

Strawberry Puree

Ingredients:
3 cups of strawberries, smashed
1 tsp. lemon juice

Instructions:

  1. In a small pot, cook strawberries and lemon juice on medium heat until mixture thickens and reduces 1/3-1/2 of the original volume, about 5-10 minutes.
  2. Once thickened, put in a bowl to cool and refrigerate.

Basic Vanilla Frosting

Ingredients:
2 c. whole milk
½ c. flour
¼ tsp. salt
1 1b. (4 sticks) unsalted butter, room temperature
2 c. sugar
1 tbsp. vanilla extract

Instructions:

  1. In a saucier pan, put milk, salt and flour and whisk until combined on medium heat.
  2. Continuously whisk mixture until thickened to a pudding like consistency.
  3. Once thickened, strain through a mesh strainer into a bowl with a spatula to remove lumps.
  4. Place a piece of plastic wrap on top of the flour mixture and put into the fridge until fully cool.
  5. In a mixer bowl fitted with the whisk attachment, mix the sugar and butter on high speed until fluffy and pale about, 5-10 minutes.
  6. Add the chilled flour mixture and continue to whip on high speed until the sugar is completely dissolved and the mixture is no longer gritty, about 5-10 minutes.
  7. Add the vanilla extract and mix until combined.

Strawberry Frosting

Ingredients:
1 batch of strawberry puree
⅔ batch of vanilla frosting

Instructions:

  1. Mix vanilla frosting with ½ of strawberry puree until the mixture turns strawberry pink and fluffy.
  2. Give mix a taste and if not flavored enough, add puree ¼ at a time until desired flavor is reached.

* The toothpick test: insert a toothpick into a cupcake and if the toothpick comes out clean or with a few crumbs clinging to it, it is done.