Funfetti Ooey Gooey Butter Cake

Sometimes the universe aligns to bring something new and that’s how this funfetti ooey gooey butter cake was born. I happened to see a recipe for a plush confetti cake and a gooey butter cake at the same time and I was sold. I needed to have both asap.

The confetti cake portion is vegan (!) and becomes borderline too moist (very similar to a tres leches cake) with the gooey butter topping. The almond-vanilla scented cake was a happy accident as the original recipe called for ⅛ th of a teaspoon of almond extract. My hand unexpectedly had a nervous tremor (probably from trying to measure out a tiny fraction) and I put a bit more, I’m guessing ½ – 1 teaspoon. The end result is an almond-vanilla scented cake that I think cuts the cloying sweetness of most gooey butter cakes. 

It feeds a crowd and is a perfect cake to bake for celebrations. I baked to celebrate me (yay!) on my birthday. 🙂

Funfetti Ooey Gooey Butter Cake

Ingredients:

For the Funfetti Cake Layer:

1 ½ c. all-purpose flour
⅗ c. granulated sugar
1 ½ tsp. baking powder
½ tsp. kosher salt (I use diamond kosher)
1 c. unsweetened non-dairy milk
⅓ c. vegetable oil
2 tbsp. fresh lemon juice
½ tbsp. vanilla extract
½ – 1 tsp. almond extract
⅓ c. rainbow sprinkles

For the Ooey Gooey Layer:

8 oz. cream cheese, room temperature
4 oz. butter, room temperature
12 oz. powdered sugar, plus more for garnish
¼ tsp. kosher salt
2 large eggs
2 egg yolks
2 tablespoons vanilla extract

Instructions:

  1. Preheat the oven to 350℉. Grease and line a 9×13-inch baking pan with parchment paper.
  2. Prepare the ingredients for the funfetti cake. In a large mixing bowl, whisk together the flour, sugar, baking powder and salt. Set aside.
  3. In a large measuring cup (I like that it has a spout) or a medium bowl, whisk together the non-dairy milk, oil, lemon juice, vanilla and almond extract. Set aside.*
  4. Start the ooey gooey layer. In the bowl of a stand mixer fitted with a paddle attachment, combine the cream cheese, butter and salt. Mix on medium speed until combined.
  5. Turn the speed to low and add the powdered sugar in slowly to minimize the sugar dust.
  6. Once all of the powdered sugar is incorporated, turn up the speed to medium-high and mix until the mixture is fluffy, about 8-10 minutes.
  7. In a small bowl, whisk together the eggs, egg yolks and vanilla extract.
  8. Turn the speed of the stand mixer to low and add the egg mixture to the sugar mixture. Mix until combined. Set aside.
  9. Assemble the funfetti cake. Pour the milk mixture over the flour mixture and mix until just combined.
  10. Fold in the rainbow sprinkles.
  11. Pour the funfetti cake batter over the prepared 9×13-inch baking pan. Spread evenly.
  12. Use a spatula to evenly dollop the gooey layer over the cake batter. Smooth evenly.
  13. Bake the cake about 35-45 minutes, until the top layer is toasted golden brown and the cake is cooked through.
  14. Let the cake cool completely before dusting with powdered sugar and serving.*

I delay combining the funfetti cake ingredients to prevent the baking powder from reacting prematurely.

I prefer to serve the cake cold (it helps the cake keep its shape) with hot, unsweetened black coffee.

Toffee Mocha Cake

I used to avoid toffee. It was just too crunchy and the bits of sugar would get stuck in my teeth and I’d have to try and fish it out with my tongue while trying to look like I wasn’t. No? Just me? I could never bring myself to fish it out with my fingers in public, although I’ve seen many people do it without batting an eye. Ick. I’ve always been partial to caramels and their chew until I made my own toffee. Unlike brittle or a not-so-great toffee, good toffee not only breaks into delightful shards in your mouth (as opposed to the jagged, sharp chips) but disintegrates into a caramel liquid that is pleasant on the tongue and doesn’t stick to your teeth.
This cake is an ode to toffee and coffee. I call it a mocha cake because there are layers of chocolate cake in the center and chocolate + coffee = mocha. If I had it my way though, it would really be a toffee coffee chocolate cake. What a mouthful.
The cake itself is well balanced with a salty sweet coffee toffee and its chocolate cake. But if you really don’t want to go through with this over-the-top cake, I’m pleading with you to at least try the toffee. That is one worth taking your time making.

Toffee Mocha Cake
(For a step-by-step video of how I put it together, check out my stories on Instagram (@thebusyspatula)!)

You will need:


Chocolate Cake (recipe below)
Salted Nut Coffee Toffee (recipe below)
Coffee Ganache (recipe below)
Coffee Swiss Meringue Buttercream (recipe below)
Espresso Beans (optional)

Instructions:

  1. On a cake board, place one layer of your chocolate cake.
  2. Spread a thin, but even layer of the coffee buttercream.
  3. Spread a layer of the coffee ganache.
  4. Top with the coffee toffee.
  5. Repeat two more times.
  6. Crumb coat the cake with leftover buttercream and set in freezer for about 10-15 minutes or until the buttercream is firm.
  7. Remove cake from freezer and frost entire cake smoothly.
  8. Garnish the bottom of the cake with crushed coffee toffee.
  9. Place cake in freezer until firm, about 20-30 minutes.
  10. While cake is in the freezer, put the leftover ganache in a squeeze bottle and warm up ganache in a cup of hot water. You want the ganache to be runny enough that it will drip down the sides but not so hot that it will melt the buttercream.
  11. Remove cake from the freezer and do a ganache drip down the side of the cake. Fill the top smoothly with coffee ganache.
  12. Place cake in freezer to set.
  13. In a pastry bag fitted with a star pastry tip (I used Wilton’s 1M), swirl buttercream all around the edge of the cake.
  14. Dust the tops of the buttercream with crushed leftover toffee, and garnish each swirl with one espresso bean.

Chocolate Cake:

Ingredients:

1 ¾ c. flour
2 c. sugar
¾ c. cocoa powder
2 tsp. baking soda
1 tsp. baking powder
1 tsp. kosher salt
1 c. buttermilk, shaken
½ c. vegetable oil
2 eggs, at room temperature
1 tsp. pure vanilla extract
1 c. hot coffee

Instructions:

  1. Preheat oven to 350˚ and grease and line the bottom of four 6” cake pans with parchment paper.
  2. In a stand mixer fitted with the paddle attachment, mix flour, sugar, both cocoa powders, baking soda, baking powder and salt until fully combined.
  3. In a separate bowl, whisk vegetable oil, eggs, and vanilla extract until combined.
  4. With the mixer speed on low, add the egg mixture to the flour mixture until combined.
  5. Turn off the mixer. With a spatula, scrape the sides of the bowl to fully incorporate the two mixtures.
  6. Turn the mixer on low and slowly add the hot coffee to the batter. Once added, raise the speed to medium until completely homogenous.
  7. Divide batter evenly amongst the four cake pans and bake for 18-20 minutes, rotating the cake pans halfway.
  8. Let cake cool in pan for 10 minutes, then turn out of cake pan and move onto wire cooling rack to cool completely.

Salted Nut Coffee Toffee:

Ingredients:

1 c. butter
1 c. sugar
1 ½ tsp. espresso powder
1 ½ tsp. molasses
¼ tsp. kosher salt
nuts (I used walnuts and sunflower seeds)
flaky salt (I used maldon sea salt)

Instructions:

  1. Prepare a sheet pan lined with either parchment paper or a silicone baking mat.
  2. On medium-low heat in a small to medium HEAVY saucepan with a candy thermometer attached, mix butter, sugar, espresso powder, molasses and kosher salt together. (I’m emphasizing heavy because I’ve tried with a lighter pan and I ruined my first batch.)
  3. Whisk mixture constantly until temperature reaches 285˚F.
  4. Pour mixture onto the sheet pan and sprinkle your nuts and then the flaky salt.
  5. Let cool and break into shards.

For the Coffee Ganache:

Ingredients:

120 ml. heavy cream
180 g. white chocolate
2 tsp. espresso powder
1 tsp. coffee emulsion

Instructions:

  1. In a microwave safe bowl, heat heavy cream and white chocolate for one minute. Whisk mixture together until it becomes homogenous. If the white chocolate did not fully melt, microwave at intervals of 30 seconds until melted.
  2. Add in espresso powder and coffee emulsion and whisk.
  3. Pour onto the mocha cake layer and put cake in fridge to set the ganache. About 30 minutes to an hour.

Coffee Swiss Meringue Buttercream

Ingredients:

1 ¾ c. sugar
1 tbsp. espresso powder
7 large egg whites
a pinch of kosher salt
5 ½ sticks unsalted butter
2 tsp. vanilla extract
2 tsp. coffee emulsion

Instructions:

  1. Simmer an inch of water in a medium pot.
  2. In the bowl of a standing mixer, whisk egg whites, espresso powder, sugar and salt together.
  3. Place the bowl over the pot of simmering water and whisk the egg white and sugar mixture continuously until the mixture becomes lighter and no longer grainy.
  4. Remove the bowl from the pot and transfer the bowl into the mixer fitted with a whisk attachment.
  5. Mix on high until mixture becomes white and fluffy, and cool (check for this by seeing if the outside of the bowl is cool to the touch).
  6. Add in vanilla extract and butter one stick at a time until a silky smooth frosting forms.
  7. Add 2 tsp. of the coffee emulsion and whip until light brown and homogenous.

Salted nut coffee toffee recipe adapted from The Smitten Kitchen and All Recipes.
Chocolate cake recipe adapted from Food Network.

The Best Mocha Cake

The Best Mocha CakeI rarely ever call anything the “best” because I know there is something out there that’s better. But I’m telling you, this cake is very, very good. Most of the cakes on this website are cakes that I’ve made for my family’s birthday celebrations, and they’ve tasted every single one of them. The good and bad thing about family members is that they are your biggest critics. They’re not too polite to say everything is good when it’s not, and aren’t afraid to tell you that your previous work was better. So when my brother said that it’s one of the best cakes I’ve ever made and requested the same one for this next birthday, I knew it was a winner.
The Best Mocha CakeThis isn’t your average layer cake where you glue rounds of the same flavored cake with some frosting and call it a day. It’s complex and flavorful. With 5 different layers and a jelly glaze, it’s definitely a labor of love. I’m telling you, even I was worn out after putting this cake together, but oh man was it worth it. It’s rich, soft, buttery, light, crunchy and silky at the same time. You can’t mistake the coffee or the chocolate and one doesn’t overpower the other. They’re perfectly balanced.
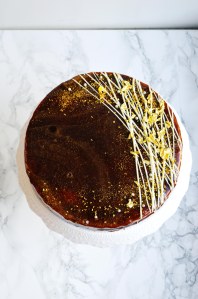
The Best Mocha CakeFirst, you have a chocolate cookie crust, then a mocha cake: followed by a coffee ganache and then chocolate crunchies with a coffee mousse on top. The whole thing is covered in a coffee mirror glaze that’s very glossy and jelly-like. I’ve never made a mirror glaze before, but I have to say I’m not impressed by the flavor. Please, feel free to peel it off before consuming your cake.
The Best Mocha CakeYou want to make sure to use the very best white chocolate for the coffee ganache. I feel if you use the waxy cheap white chocolate, the balance of the cake will be off. This is the time to pull out the valrhona or the guittard and savor every bite of it.
The Best Mocha CakeThe Best Mocha Cake
Makes one 9-inch cake

*Because there are so many components to this cake, I’ll put the ingredients and the instructions for each layer. I don’t want you to have to keep scrolling up for each ingredient. Note that each layer is layered in the same 9-inch springform pan.

For the Oreo Crust:

Ingredients:
25 Oreo cookies, crushed
5 tbsp. unsalted butter, melted

Instructions:

  1. Preheat the oven to 350˚F.
  2. Spray a 9-inch springform pan with nonstick spray and line the bottom with parchment paper.
  3. Stir the cookie crumbs and melted butter in a bowl.
  4. Press the evenly crumbs into the bottom of the springform pan.
  5. Bake the crust for 8 minutes and cool completely before moving onto the next layer.

For the Mocha Cake:

Ingredients:
½ c. strong coffee, room temp
1 ½ tsp. espresso powder
½ c. whole milk
1 tsp. vanilla extract
1 ⅓ c. all-purpose flour
⅓ c. unsweetened cocoa powder
1 tsp. baking powder
½ tsp. baking soda
¼ tsp. salt
½ c. unsalted butter, room temp
½ c. granulated sugar
⅓ c. light brown sugar

Instructions:

  1. Preheat oven to 350˚F.
  2. In a measuring cup, whisk coffee, espresso powder, milk and vanilla extract together. Set aside.
  3. In a medium bowl, whisk flour, cocoa powder, baking powder, baking soda and salt together. Set aside.
  4. In the bowl of a standing mixer fitted with a paddle, beat the butter and the granulated and light brown sugar together until light and fluffy.
  5. Turn the mixer on low and add in a third of the flour mixture followed by half of the coffee mixture. Repeat with another third of the flour followed by the remaining coffee mixture. End with the last third of the coffee mixture.
  6. Pour about ¾ of the cake batter onto the cookie crust and bake for about 20-25 minutes until the cake is set. Let cool.
  7. *You can bake a few cupcakes with the remaining cake batter to taste test.

For the Coffee Ganache:

Ingredients:
120 ml. heavy cream
180 g. white chocolate
2 tsp. espresso powder
1 tsp. coffee emulsion

Instructions:

  1. In a microwave safe bowl, heat heavy cream and white chocolate for one minute. Whisk mixture together until it becomes homogenous. If the white chocolate did not fully melt, microwave at intervals of 30 seconds until melted.
  2. Add in espresso powder and coffee emulsion and whisk.
  3. Pour onto the mocha cake layer and put cake in fridge to set the ganache. About 30 minutes to an hour.

For the Espresso Chocolate Crunchies:

Ingredients:
10 Oreo cookies
¾ bottle of magic shell
2 tsp. espresso powder

Instructions:

  1. Pulse the oreo cookies in a processor until fine crumbs form.
  2. In a medium bowl, mix ¾ of a bottle of magic shell with the oreo crumbs until thoroughly combined.
  3. Smooth on a layer of crunchies over the chilled coffee ganache.
  4. Evenly sprinkle the 2 tsp of espresso powder over the crunchies.
  5. Chill until the crunchies set, about 15-20 minutes in the freezer or an hour in the refrigerator.

For the Espresso Mousse:

Ingredients:
1 tsp. unflavored gelatin
1 tbsp. water
1 c. heavy cream
2 tbsp. powdered sugar
2 tsp. espresso powder
1 tsp. coffee emulsion

Instructions:

  1. In a small bowl, mix gelatin with water and set aside to hydrate.
  2. Beat the heavy cream until soft peaks form.
  3. Heat the gelatin mixture in the microwave in 10 second increments until melted.
  4. Add in the powdered sugar to the heavy cream and once it is mixed in, add in the gelatin slowly.
  5. Whip until semi-stiff peaks form. Add in the espresso powder and the coffee emulsion.
  6. Whip until stiff peaks form.
  7. Lay a smooth layer of the espresso cream on top of the crunchies using an offset spatula.
  8. If desired, you may use the remaining ¼ of the magic shell from the above recipe and smooth it over on top of the mousse to create a smoother top for the cake.
  9. Chill in the refrigerator until firm, about an hour.

For the Espresso Mirror Glaze:

Ingredients:
1 ¼ c. water, divided
3 tsp. unflavored gelatin
1 ¾ c. granulated sugar
1 tbsp. espresso powder
1 tsp. coffee emulsion
white chocolate (for decoration)
gold leaf/ gold flakes (for decoration)
gold sanding sugar (for decoration)
silver dragees (for decoration)

Instructions:

  1. In a medium bowl, mix ¼ c. water with 3 tsp. gelatin and set aside for 5 minutes.
  2. Add 1 cup of hot water to the gelatin mixture and whisk until gelatin has dissolved.
  3. Add in sugar, espresso powder and coffee emulsion and whisk until smooth.
  4. Once mixture is thickened and cooled, about 20-25 minutes (it should be viscous, I didn’t wait long enough and it wasn’t as thick as I would’ve liked), remove the cake from the refrigerator and unmold from the springpan.
  5. Place cake on top of wire rack with a sheet pan on the bottom.
  6. Pour the gelatin mixture evenly over the cake and let it set. This is a messy move, you will have leftover gelatin all over the bottom of the sheet pan. There is no saving it, just let it go.
  7. While the cake sets, melt about ¼ c. white chocolate in piping bag with a tiny hole cut at the end. Drizzle over one side of the cake in straight lines.
  8. Sprinkle the gold sanding sugar and silver dragees over the same side.
  9. Add the gold leaf.
  10. Chill in fridge until ready to serve.

Oreo crust recipe adapted from Crazy For Crust.
Mocha cake recipe adapted from Brown Eyed Baker.

Gold Pineapple Cake with (Real) Pineapple Buttercream

gold pineappleThis year of blogging seems to be a year of making things that are out of my comfort zone, like the blueberry cruffins or the croquembouche. I used to steer away from projects that looked too difficult or time consuming, but this year I feel like the challenge just spurs me on. When I first saw this gold pineapple cake from adorn cakes, I thought it would be just something I would bookmark and never look back on. But when someone special to you loves pineapples, you make the prettiest pineapple cake that you can. (Seriously, he loves pineapples. One of the first things he ever said to me was, ” I love pineapples.” Kinda strange, I know.)
gold gum paste leavespineapple leavesI would gladly sit here and name off all the steps on the how-to on making this cake, but Aleta already did such a great job, that I’m just going to share the links with you.
YouTube link on how to build the outside of the cake.
Facebook link on how she made the top of the pineapple.gold leavestiny cakeHere are some things I’ve noted while making this cake:

  1. It is time consuming. You need at least two days for this project. You will need one full day to shape, cut, wire, dry out and paint the leaves. It is probably a safe bet to bake the cake the day before too.
  2. Aleta uses modeling chocolate for her cake and so I ordered some. I’ve never worked with modeling chocolate before, and now I understand that it is a very soft medium. If I were to ever tackle this project again, I would use 50% (maybe even 25%) modeling chocolate and the rest fondant.
  3. I made a very small cake. A cake size that I usually use to make smash cakes and I nearly used the entire 2 g. jar of gold powder.
  4. A manicure scissor is really useful for cutting the tiny triangles on the cake.
  5. If you don’t have the green molding tool that is used on the video, just take your bladed molding tool and make three small lines in each pineapple diamond. It will mimic the effect pretty well

modeling chocolate cakegolden pineappleYes, the outside of the cake is important but what about the inside? I couldn’t have a pineapple cake that didn’t have a pineapple filling, so I filled it with a pineapple frosting. I’m a firm believer in using real fruit in all of my fruit flavored frosting so, the pineapple was a challenge. As you know, pineapples are juicy and I could not risk a runny frosting for a cake that required a lot of time sitting at room temperature. So, I solved my problem by using freeze dried pineapples.
golden pineapple cakegold pineappleFreeze dried fruit is an ingenious way to incorporate real fruit into your frosting without increasing the liquid content. I ordered my bag off of amazon and used the whole thing for the 4 inch cake. The resulting frosting had a pineapple tang and complemented the vanilla cake well. It was an expensive cake to make with the modeling chocolate, pineapples, gumpaste, and some extra tools I needed to buy, but well worth the effort. I mean look at it, it’s SO. GOLD.
gold pineapple fondant cakeReal Pineapple Buttercream
For a 4-in. cake

Ingredients:

¼ c. sugar
1 large egg white
6 tbsp. unsalted butter
1.5 oz. freeze dried pineapple

Instructions:

  1. Put dried pineapple chunks into a dry blender, and blend until a very fine powder forms. Set aside.
  2. Bring a small pot filled with about 1 inch of water to a simmer.
  3. Whisk egg white and sugar together in the bowl of your standing mixer.
  4. Place the bowl on top of the small pot and continue whisking the egg whites until you cannot feel the granules between your fingers.
  5. Move the bowl to the standing mixer fitted with a whisk attachment and whip until the mixture becomes fluffy and doubles in size.
  6. Add the butter and continue whipping until a smooth buttercream forms.
  7. Add in ¾ of the pineapple powder and mix until well combined.
  8. Taste and add the rest of the powder if desired.

Buttercream recipe adapted from smitten kitchen.

Paw Patrol Cake (A How-To Guide)

paw patrol cakeI rarely ever take cake orders in the summer, not since the cake fiasco of 2015. On a hot summer day, I made a two-tiered cake with an assortment of fondant animals that took hours to create. It was too large to refrigerate so we had it sitting at room temperature until it was ready to be delivered. Right when we were about to move it, there was a strange buckling around the edge of the cake. We kept calm and moved it to the car, which even after having the AC on for 30 minutes was not cool, but warm. During the 30-minute ride to our destination, the buckling worsened and the fondant pieces started to warp with the frosting. By the time we got there, the cake looked like the Michelin Man’s arm. It sucked that all my hours of work went down the drain, but it was even worse that I ruined someone’s event. That’s the thing about cakes; they are usually the centerpieces of celebrations and can make or break a party. Since then, I’ve turned down any requests for a cake in the summer. Not because I didn’t want to do it, but more so because I was worried about ruining someone else’s big day.
paw patrol cakeWhen my sister approached me about making a cake, my gut reaction was, “No.” After hearing my reasons, she said that it didn’t matter if the cake was perfect and that her friends were just grateful that I would do it. Knowing that perfection wasn’t what they were after took a load off my back, but that didn’t mean that I would try any less.
how to make paw patrol logoThere is a very popular Pinterest picture of a dog bone shaped Paw Patrol cake (this was the photo I was asked to recreate), but it has no information on the dimensions and how to put it together. And after scouring the internet for information, I decided to make a guide on how to put a cake like this together. Like many of my projects, it is not very difficult, but it is time consuming. I think the overall effect is worth it and even more worth it to see the smiles on kids’ faces.
how to make a paw patrol cakeInstead of using fondant for all of the Paw Patrol logo, I used Wilton’s sugar sheets. It is much more stable for hot and humid weather and it’s great for crisp edges. It is important to have a fresh Xacto knife blade. You want the edges to be super crisp. Almost like you printed the logo onto the cake. I did make a fondant base for the logo so that the logo would not be flat against the cake like paper. Other than that, it’s making a lot of paw prints, which looks simple but it ends up taking more time than anticipated because for every paw print there are 4 parts to be made. This cake has approximately 50 paw prints.
paw patrol cake The most difficult part about the cake part is covering the cake with frosting. There are many circles and lines and it took a while to get the crisp edges. But then again, it might be because I’m a novice at frosting untraditional cake shapes. I’m not complaining, it’s always fun to stretch beyond my comfort zone and try new things.

Paw Patrol Cake

For the Paw Patrol Logo:

You will need:

white fondant
wilton’s sugar sheets in white, red, blue, yellow and silver
silver pearl dust
xacto knife
scissors
water
vodka
small paintbrush (food use only)
paw patrol logo, cut out of paper
paw patrol outer stencil, cut out of paper
paw patrol inner stencil, cut out of paper

Instructions,

  1. Roll out the fondant to ¼ inch thickness and place the paw patrol outer stencil on top of it. Using the xacto knife, cut out the fondant to the shape of the shield. (As shown in picture #1)
  2. Place the outer stencil on top of a silver sugar sheet and cut out a piece of the sugar sheet large enough for the stencil. Peel off the plastic backing. Cut out the shape of the outer stencil with the xacto knife. (As shown in picture #2)
  3. Using the paintbrush, paint a small amount of water on top of the white fondant and stick the silver sugar sheet cutout on top of it. (As shown in picture #3)
  4. Place the inner stencil on top of a red sugar sheet and cut out a piece of the sugar sheet large enough for the stencil. Peel off the plastic backing, Cut out the shape of the inner stencil with the xacto knife. (As shown in picture #4)
  5. Using the paintbrush, paint a small amount of water on top of the silver sugar sheet and stick the red sugar sheet cutout on top of it. (As shown in picture #5)
  6. Cut out the “PAW” from the paw patrol logo, remembering to keep the yellow border. (As shown in picture #6)
  7. Place the “PAW” letters on top of a yellow sugar sheet and cut out a piece of the sugar sheet large enough for the letters. Peel off the plastic backing. Cut out the “PAW” with the xacto knife. (As shown in picture #7)
  8. Cut out the yellow border of the “PAW” from the paw patrol logo.
  9. Place the “PAW” letters on top of a blue sugar sheet and cut out a piece of the sugar sheet large enough for the letters. Peel off the plastic backing. Cut out the “PAW” with the xacto knife.
  10. Using the paintbrush, paint a small amount of water on the back of the blue “PAW” and stick it onto the yellow “PAW”. (As shown in picture #8)
  11. Cut out the white paw in the middle of the “A” from the paw patrol logo.
  12. Place the paw print on top of a white sugar sheet and cut out a piece of the sugar sheet large enough for the paw print. Peel off the plastic backing. Cut out the paw print with the xacto knife.
  13. Using the paintbrush, paint a small amount of water on the back of the paw print and stick it onto the middle of the “A”. (As shown in picture #8)
  14. Cut out the white bone from the paw patrol logo.
  15. Place the bone on top of a white sugar sheet and cut out a piece of the sugar sheet large enough for the bone. Peel off the plastic backing. Cut out the bone with the xacto knife.
  16. Place the bone on top of a blue sugar sheet and cut out a piece of the sugar sheet large enough for the bone. Peel off the plastic backing. Cut out the “PATROL” letters with the xacto knife.
  17. Using the paintbrush, paint a small amount of water on the back of the blue letters and stick it onto the white bone. (As shown in picture #9)
  18. Center the “PAW” onto the shield and make sure you know where you want to place it before painting a small amount of water on the back of the letters to place it onto the shield. (As shown in picture #10)
  19. Center the white patrol bone under the “PAW” and make sure you know where you want to place it before painting a small amount of water on the back of the bone to place it onto the shield. (As shown in picture #10)
  20. Mix a small amount of vodka with the silver dust to create a thick silver paint. Brush the silver on the silver shield border to give it a metallic look. Let dry. (As shown in picture #11)

For the Bone Shaped Cake

You will need:

2 batches of vanilla buttermilk cake (recipe below)
1 batch of chocolate frosting (recipe below)
1 batch of vanilla swiss meringue frosting (recipe below)
fondant paw prints (optional)

Instructions:

  1. Cut all the 6-inch cake layers in half. Cut one of the halves into quarters.
  2. Cut a 2 inch strip from both of the 9×13 cake layers. You want to cut the width side of the cake (the long side, not the short side). You will be left with two 7×13 cake layers.
  3. Center one 7×13 cake layer on top of a sheet cake sized cake board. (As shown in picture #1)
  4. Use ¾ of each 6-inch cake layer on three corners to form the circular part of the dog bone. Use three ¼ sections left from the 6-inch cake layer to form the fourth corner of the dogbone. (As shown in picture #1)
  5. Spread a generous layer of the chocolate frosting.
  6. Repeat the same method to the second layer of the cake. (As shown in picture #2)
  7. Crumb coat with the remaining chocolate frosting, remembering to fill in any gaps between the 7×13 cake layer and the 6-inch cake layers. (As shown in picture #3)
  8. Let the cake set in the freezer for about 10 minutes.
  9. Remove the cake from the freezer and spread one layer of the vanilla frosting. Trying to cover up the chocolate as well as you can.
  10. Let the cake set in freezer for about 10 minutes.
  11. Remove the cake from the freezer and smooth on the second layer of vanilla frosting. Try to make it as smooth as you possibly can. This will be your final layer. (As shown in picture #4)
  12. Place the Paw Patrol logo in the center. If you made fondant paw prints, now is the time to place it on the cake. (As shown in picture #5)

Vanilla Buttermilk Cake
(This will make three 6-inch round layers and one 9×13 layer. You will need two batches of this.)

Ingredients:

450 g. cake flour
500 g. sugar
1 tbsp + 1 tsp. baking powder
¾ tsp. kosher salt
5 whole eggs, room temperature
3 egg yolks, room temperature
1 ¼  + ⅓ c. buttermilk, room temperature
1 tbsp. vanilla extract
1 ¼ c. (two and a half sticks) unsalted butter, room temperature

Instructions:

  1. Preheat the oven to 350°F. Prepare one 9×13 baking pan and three 6-inch round cake pans for baking by spraying them with nonstick spray and lining the bottom with parchment paper.
  2. In the bowl of a standing mixer fitted with the paddle attachment, mix the flour, sugar, baking powder and kosher salt on low speed.
  3. Add in the butter and 1 ¼ c. buttermilk into the flour mixture on low speed. Scrape down the side of the bowl.
  4. In a large cup with a spout, mix the eggs, egg yolks, ⅓ buttermilk and vanilla extract with a whisk. Slowly add the egg mixture into the flour mixture.
  5. Scrape down the side of the bowl and mix on low speed again until well combined.
  6. Divide the batter evenly amongst the four pans, making sure that the three 6-in pans are even.
  7. Bake about 15-20 minutes until cake is golden brown or a toothpick inserted comes out clean. The 6-inch cake pans and the 9×13 pan will have different cook times. Make sure you check both to make sure one doesn’t overbake.

Chocolate Frosting

Ingredients:
9 oz. good quality dark chocolate, melted and cooled (The darker the better. Emphasis on good quality.)
400 g. confectioner’s sugar
2 tbsp. unsweetened cocoa powder
¼ tsp. kosher salt
½ c. heavy cream
1 tbsp. vanilla extract

Instructions:

  1. Place all the ingredients in the food processor and pulse a few times before processing it until the frosting is smooth.
  2. Put the whole bowl in the freezer until the frosting sets. Similar to a ganache, the frosting will become more firm and easier to handle after about 10-15 minutes in the freezer.

Vanilla Swiss Meringue Buttercream

Ingredients:
400 g. sugar
8 large egg whites
3 ¼ c. (6 ½ sticks) unsalted butter
1 tbsp. vanilla extract
¼ tsp. kosher salt

Instructions:

  1. Bring a small pot filled with about an inch of water to a simmer.
  2. In a bowl of a standing mixer, whisk the egg whites, sugar, and salt together.
  3. Place the bowl on top of the pot and whisk continuously until the mixture becomes slightly foamy and you cannot feel the grittiness of the sugar, about 5-8 minutes. The mixture will be hot. Be careful.
  4. Move the bowl to the standing mixer fitted with the whisk attachment and whip the egg mixture until the bowl feels cool to the touch.
  5. Add in the butter, and continue to whip until a smooth buttercream forms.
  6. Add in the vanilla extract and continue to whip until incorporated.

Cake and chocolate frosting adapted from sweetapolita.
Swiss meringue frosting adapted from the smitten kitchen.

A Boy Baby Shower & How to Dye Your Own Sprinkles

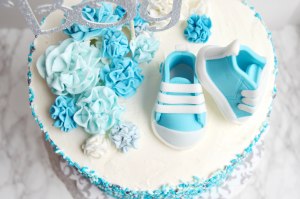
it's a boy cakeThis past weekend I made some baby shower cakes and cupcakes for a friend. There wasn’t a particular theme except the color blue and silver. Now this isn’t the first time I’ve catered for a baby shower, so I had an idea of what I wanted it to look like. If you’re like me and are very particular about your colors, you know how difficult it is to find that riiiiight shade of sprinkles. Try googling “baby blue sprinkles” and most likely you’ll get the generic blue. The first time someone requested a baby blue cake, I searched high and low for the right shade. Etsy, amazon, and just plain google search turned up nothing. Zip. Zilch.
baby boy cakeYou know what they say, “If you want something done, do it yourself.” (<= Side Note: Fifth Element is one of my favorite movies. Also, Gary Oldman pretty much can be anyone he wants. How is this the same person that played Commissioner Gordon?) And so I did. All you need is a ziplock bag, white sprinkles, and gel food color.
baby boy cakePlace your sprinkles in a ziplock bag, add in your gel color. A tiny dab will do. You can always add more but you can’t take away the color. Start massaging your sprinkles into the gel color. The sprinkles will magically start taking on the color of your dye without melting. Once all the sprinkles are uniform in color, you are ready to go!
baby boy cupcakesFor the sprinkles on the cake I used, Americolor’s sky blue and electric blue and for the cupcakes, I used Wilton’s cornflower blue. I bought the silver sprinkles because metallic colors just don’t work as well when hand dying them.
baby boy cupcakesAnother tip I have is that if you’re short on time and on a budget, I recommend ordering items from Etsy. I love Etsy for their homemade things and supporting small business is always a good idea. I suppose I could’ve made the little converse booties and the cutout sign, but I’m pretty sure I wouldn’t have done as neat of a job and it would’ve taken me forever. What I did make were the little fondant pom poms to tie the whole thing together with the décor. I promise to do a tutorial on this soon! 🙂

The Ultimate Oreo Ice Cream Cake with Homemade Crunchies

how to make an ice cream cake

I would say that whenever the topic of ice cream cakes come up, about 75% of the people I talk to gush about how much they love crunchies. You know, the crunchy chocolate crumbs that are usually sandwiched between the vanilla and chocolate ice cream layers in a standard store bought ice cream cake. So when D requested a cookies and cream ice cream cake, with an extra thick layer of crunchies, I set out to make the ultimate cookies and cream ice cream cake.
cookies n' cream ice cream cakeOn another note, I’m not sure if it is cookies n’ cream, cookies n’ creme, cookies and creme, cookies and cream or Oreo. Does anyone know what the “right” way to say it is? The grammar Nazi in my brain says “cookies and cream” but the media uses all of them.  So instead of driving myself crazy, I’m going to use them all interchangeably.
cookies and cream ice cream cakeTo be honest, I was a little disappointed when he requested such a standard flavor. My mind was whizzing with all sorts of crazy flavor combinations (something along the lines of toasted marshmallows, drizzly caramel, crushed salted nuts…) and went to a complete stop when he said cookies and cream. But it’s okay because I took cookies and cream to the next level with this cake. (Kind of like that episode in Friends where Phoebe takes cups and ice to the next level.)
oreo browniesIt starts with an Oreo brownie base, layered with homemade crunchies (just two ingredients, and so easy), with a very generous layer of cookies and cream ice cream (two quarts!), layered again with crunchies and brownie base.
oreo barkIt is then covered in whipped topping, topped with a decadent chocolate ganache (Omg. It was my favorite part of the cake), and decorated with scoops of whipped topping that look like scoops of ice cream (plain and Oreo flavored), and topped with shards of Oreo bark, cookie crumbs and whole mini Oreos. Every single component screams cookies and cream and every bite is as amazing as it sounds.
cookies and cream ice cream cake
The Ultimate Oreo Ice Cream Cake with Homemade Crunchies

Ingredients
2 – 8” round Oreo brownie layers (recipe below)
1 batch homemade crunchies (recipe below)
2 quarts of cookies and cream ice cream, softened*
20 oz. cool whip
chocolate ganache (recipe below)
mini Oreos
¼ c. white chocolate or white candy melts

Instructions:

  1. Line two 8-inch cake pans with plastic wrap. In each pan, put in one Oreo brownie layer.
  2. Split the batch of homemade crunchies in half and spread each half on top of each Oreo brownie layer.
  3. Layer a quart of cookies and cream ice cream in each cake pan, smoothing the top.
  4. Top with plastic wrap and freeze until completely frozen, either over night or 8 hours.
  5. Unmold each cake pan carefully and sandwich the two layers, the ice cream layer meeting in the center and brownie layer facing outwards. Refreeze in freezer for 10 minutes.
  6. Frost the outside of the cake with cool whip. Refreeze in freezer until cool whip is firm.
  7. Crush some mini Oreos and mix Oreo crumbs in half of the remaining cool whip. Leaving the other half plain.
  8. Once cool whip has set, smooth ganache over the top of the cake, letting it drip down the sides. Sprinkle some cookie crumbs on top of ganache before it sets. Place cake in freezer until ganache is completely set.
  9. Using a cookie scoop, layer alternating scoops of Oreo and plain cool whip, sprinkling with cookie crumbs as you go. Freeze to set.
  10. While ice cream is freezing, melt white chocolate/candy melts in a microwave safe bowl being careful not to burn the chocolate.
  11. Line a small sheet pan with wax paper and smooth the melted chocolate evenly using an offset spatula. Top with crushed mini Oreos, and whole mini Oreos. Put in freezer to set.
  12. Break chocolate into shards and reserve for cake.
  13. Once the ice cream cake is set, remove cake from freezer, and decorate the top with the white chocolate shards and top with extra mini Oreos for a grand effect.

Oreo Brownies

Ingredients:
1 box brownie mix, plus ingredients needed to make brownies according to mix**
16 Oreos

Instructions:

  1. Prepare two 8-inch cake pans by spraying with nonstick spray and lining the bottom with parchment paper.
  2. Preheat oven to temperature on the package.
  3. Mix brownie batter according to package and divide evenly between two cake pans.
  4. Place 7 Oreos in a circular formation in each pan, and Oreo in the center.
  5. Bake half of the time said on the package.
  6. Let cool and reserve for cake.

Homemade Crunchies

Ingredients:
30 Oreo cookies
1 – 7.25 oz. bottle of Magic Shell ice cream topping

Instructions:

  1. Using a food processor, Crush Oreos into even crumbs.
  2. In a medium bowl, mix cookie crumbs and ice cream topping until each crumb is well coated.
  3. Reserve for cake.

Chocolate Ganache

Ingredients:
8 oz. dark chocolate, chopped
¾ c. heavy whipping cream

Instructions:

  1. In a heatproof bowl, pour heavy cream on top of chocolate and microwave for one minute.
  2. Let stand 3 minutes and stir until combined.

*I’ve said it before and I’ll say it again, you want to use the premium stuff for ice cream cakes. Because the higher quality ice cream has less air content, it will melt slower. I used Trader Joe’s Joe-Joe’s n’ Cream.
**Yes, I shun cake mixes, but brownie mixes are pretty good in my book. I’m in love with the Ghirardelli brand mixes. Plus, when making a cake with this many components, simplifying any part is worth it.
***Homemade crunchies recipe from Our Best Bites.

Tiramisu Crunch Ice Cream Cake

Tiramisu Crunch Ice Cream Cake 1I made this cake for my sister’s birthday last week. As far as sisters go, my sister and I are as different as night and day. We don’t look alike, with the exception that we both share freckles. Growing up, I would be pale from staying in and reading books while she would be as tan as can be from playing outside. She loves the color black while I love white. She is loud and I am quiet. She prefers vegetables, while I prefer steak. She likes things simple and casual while I cannot get enough frills and bows. She favors pants in comparison to my preference to dresses. She is also not partial to desserts whereas I cannot live without them (as evidenced by this blog). I always tell people that whatever she is good at, I lack it and whatever I am good at, she lacks it.
Tiramisu Ice Cream Cake 3I love creating cakes and I look forward to baking one for all of my family members on their special day. But my sister does not like cake. HOW?! As someone whose life (or a good part of their life) revolves around frosting, and sugar and flour, it is hard to understand someone who does not like cake. So every year on her birthday, I resort to an ice cream cake. Because let’s face it, who doesn’t like ice cream?
Tiramisu Crunch Ice Cream Cake 2Tiramisu was one of my least favorite desserts because I used to rarely drink coffee. If anything, I loved it for the mascarpone cream. (Ah, mascarpone cream… everything you touch becomes a magical milky confection.) But ever since I gave up diet coke, I’ve been leaning towards coffee for my caffeine fix and I’ve managed to fall in love with the bitter brew. My sister’s preferred choice of drink has always been coffee, so tiramisu was a no-brainer when it came to a flavor choice.
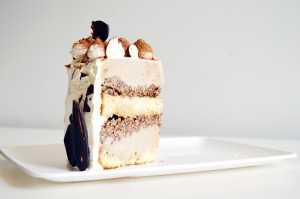
layoutI have to say, this cake ranks as one of the best cakes to come out of my kitchen. It features layers of coffee ice cream sandwiched between coffee syrup soaked sponge cake, chocolate almond crispies (!!!), and is covered by a blanket of mascarpone whipped cream and adorned with dark chocolate accents and cocoa powder. I know. It sounds like it is too much work and it is true that there are many components to the cake. However, each part is simple to make!
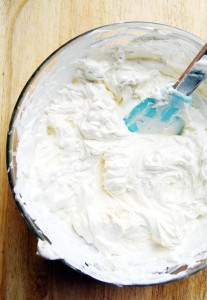
mascarpone cream I always use high quality ice cream when it comes to ice cream cakes. It is important to have the lower air content so that the ice cream stays firmer, longer. I used Haagen-Dazs in mine. The sponge cake is a standard sponge cake that is divided in half. The coffee syrup is nothing more than a mix of sugar and dark brewed coffee. The chocolate almond crispies provide a crunch and a textural contrast to the smooth ice cream and cake. To make it, you simply stir chocolate almond spread with Rice Krispies cereal until it is evenly coated. The mascarpone whipped cream is a mix of vanilla extract, powdered sugar, mascarpone, and cool whip. I am not a fan of cool whip, but when it comes to ice cream cakes, I think it is superior in terms of spreadability and stability. To make the chocolate accents, simply melt some chocolate and using a small offset spatula, drag a dollop of chocolate over parchment paper and repeat until you have as many pieces as you need. They will not all look uniform, but I think that’s what makes it look slightly “rustic”.
Tiramisu Ice Cream Cake 4I understand if you are a little overwhelmed by it. But trust me, it is worth every minute you spend making it. 😉

Tiramisu Crunch Ice Cream Cake

Ingredients:

56 oz. premium coffee ice cream, softened
sponge cake, halved horizontally (recipe below)
coffee simple syrup (recipe below)
chocolate almond crispies (recipe below)
whipped mascarpone cream (recipe below)
dark chocolate, melted (for garnish)
cocoa powder (for garnish)

Instructions:

  1. Line two 8-inch cake pans that are 3 inches deep with a double layer of plastic wrap that overhangs over the cake pan.
  2. In one of the cake pans, place one half of the sponge cake and brush liberally with coffee syrup. (You do not want to soak the cake, but put enough of it that it is moist.)
  3. Layer 28 oz. of coffee ice cream over the cake base, smooth so that the coffee base is as smooth as you can get it.
  4. Place pan in freezer for about 10 minutes.
  5. Meanwhile, make the chocolate almond crispies.
  6. Get half of the chocolate almond crispies and layer it over the ice cream, flattening it with an offset spatula to make it as flat, even and smooth as possible.
  7. Wrap the overhanging plastic wrap over the cake pan and place in freezer until completely frozen, preferably overnight.
  8. In the second lined cake pan, smooth 28 oz. of coffee ice cream with offset spatula evenly.
  9. Chill in freezer for 10 minutes.
  10. Layer the remaining chocolate almond crispies over the coffee ice cream.
  11. Place the second half of the sponge cake and brush liberally with coffee simple syrup.
  12. Wrap the overhanging plastic wrap over the cake pan and place in freezer until completely frozen, preferably overnight.
  13. On a cake board you are planning to serve, carefully unmold the first cake pan you put together by lifting the plastic wrap off of the pan and unwrapping it completely.
  14. Take the second cake pan and unmold it, and place on top of the first cake pan layer with the sponge cake layer facing downwards. Apply pressure to fuse the two layers together.
  15. Place in freezer to harden for about 20-30 minutes.
  16. Meanwhile, make the whipped mascarpone cream.
  17. Remove frozen cake from freezer and frost the outside of the cake with ¾ of the whipped mascarpone cream.
  18. Place cake back in the freezer and put the remaining whipped mascarpone cream in a piping bag with a plain large round tip.
  19. Remove cake from freezer and use the piping bag to place decorative dollops of cream over the top of the cake by making even vertical rows of cream.
  20. Using a mesh strainer, liberally dust the top of the cake with cocoa powder. The cocoa powder will dust the surface of the cake board too, carefully use a wet paper towel to clean the cake board off.
  21. Place cake back in the freezer.
  22. While cake is freezing, make decorative chocolate pieces.
  23. Line two baking sheets with parchment paper.
  24. Using a small offset spatula, drag dollops of dark chocolate to create a streak. Use larger dollops for the bottom and smaller dollops for the top. Place in refrigerator to set for 5-10 minutes.
  25. When set, remove the cake from the freezer and decorate the bottom of the cake with the longer chocolate pieces and the top of the cake with the smaller chocolate pieces.
  26. Refrigerate until ready to serve.

Vanilla Sponge Cake

Ingredients:

½ c. all-purpose flour
½ c. cornstarch
4 large eggs, separated
1 tsp. vanilla extract
¾ c. sugar, divided
pinch of salt

Instructions:

  1. Preheat oven to 350˚F and grease the inside of an 8 inch baking pan with nonstick spray.
  2. In a small bowl, sift together flour and cornstarch.
  3. In the bowl of a standing mixer fitted with the whisk attachment, beat the egg yolks, vanilla extract, and ½ c. sugar on high until thick and pale.
  4. Transfer mixture into a large bowl.
  5. Thoroughly wash and dry mixing bowl and whisk attachment.
  6. In a clean bowl of a standing mixer fitted with the whisk attachment, beat egg whites and salt until soft peaks form.
  7. Slowly incorporate the remaining ¼ c. of sugar into the egg whites and mix until whites are stiff and glossy.
  8. Fold egg whites into the egg yolk mixture in three additions.
  9. Fold in flour mixture
  10. Transfer batter into the prepared cake pan.
  11. Bake 30-40 minutes or until a cake tester inserted into the center of the cake comes out clean.
  12. Cool cake on a wire rack until ready for use.

Coffee Simple Syrup

Ingredients:

½ c. strong, dark coffee
¼ c. sugar

Instructions:

  1. Heat coffee and sugar together until sugar is completely dissolved.
  2. Cool until ready for use.

Chocolate Almond Crispies

Ingredients:

3 c. Rice Krispies Cereal
1 c. chocolate almond spread (I used this one from Trader Joe’s)

Instructions:

  1. Heat chocolate almond spread until easily pourable.
  2. In a large bowl, mix chocolate almond spread and cereal until cereal is evenly coated.
  3. Cool mixture until ready for use.

Whipped Mascarpone Cream

Ingredients:

12 oz. Cool Whip (thawed)
1 lb. mascarpone cheese
3 tbsp. powdered sugar
1 tsp. vanilla extract

Instructions:

  1. In a large bowl, whip Cool Whip and half of mascarpone cheese until smooth with an electric hand mixer.
  2. Add the remaining half of the Cool Whip and mix until incorporated. Do not over whip.
  3. Add powdered sugar and vanilla extract and whip until homogeneous.

* Vanilla Sponge Cake recipe from Martha Stewart.