{Simple Sundays} Everything Bagel Sweet Potatoes AKA Aimee Song’s Sweet Potatoes

If you’ve been reading my blog for a while now, you would know how much I love sweet potatoes. (As evidenced here, here and here.) I love the soft texture it takes on when it is roasted well and the flavor, to me, is as comforting as chicken noodle soup. So when one of my favorite bloggers posted a video about “perfect sweet potatoes”, I had to give it a try.
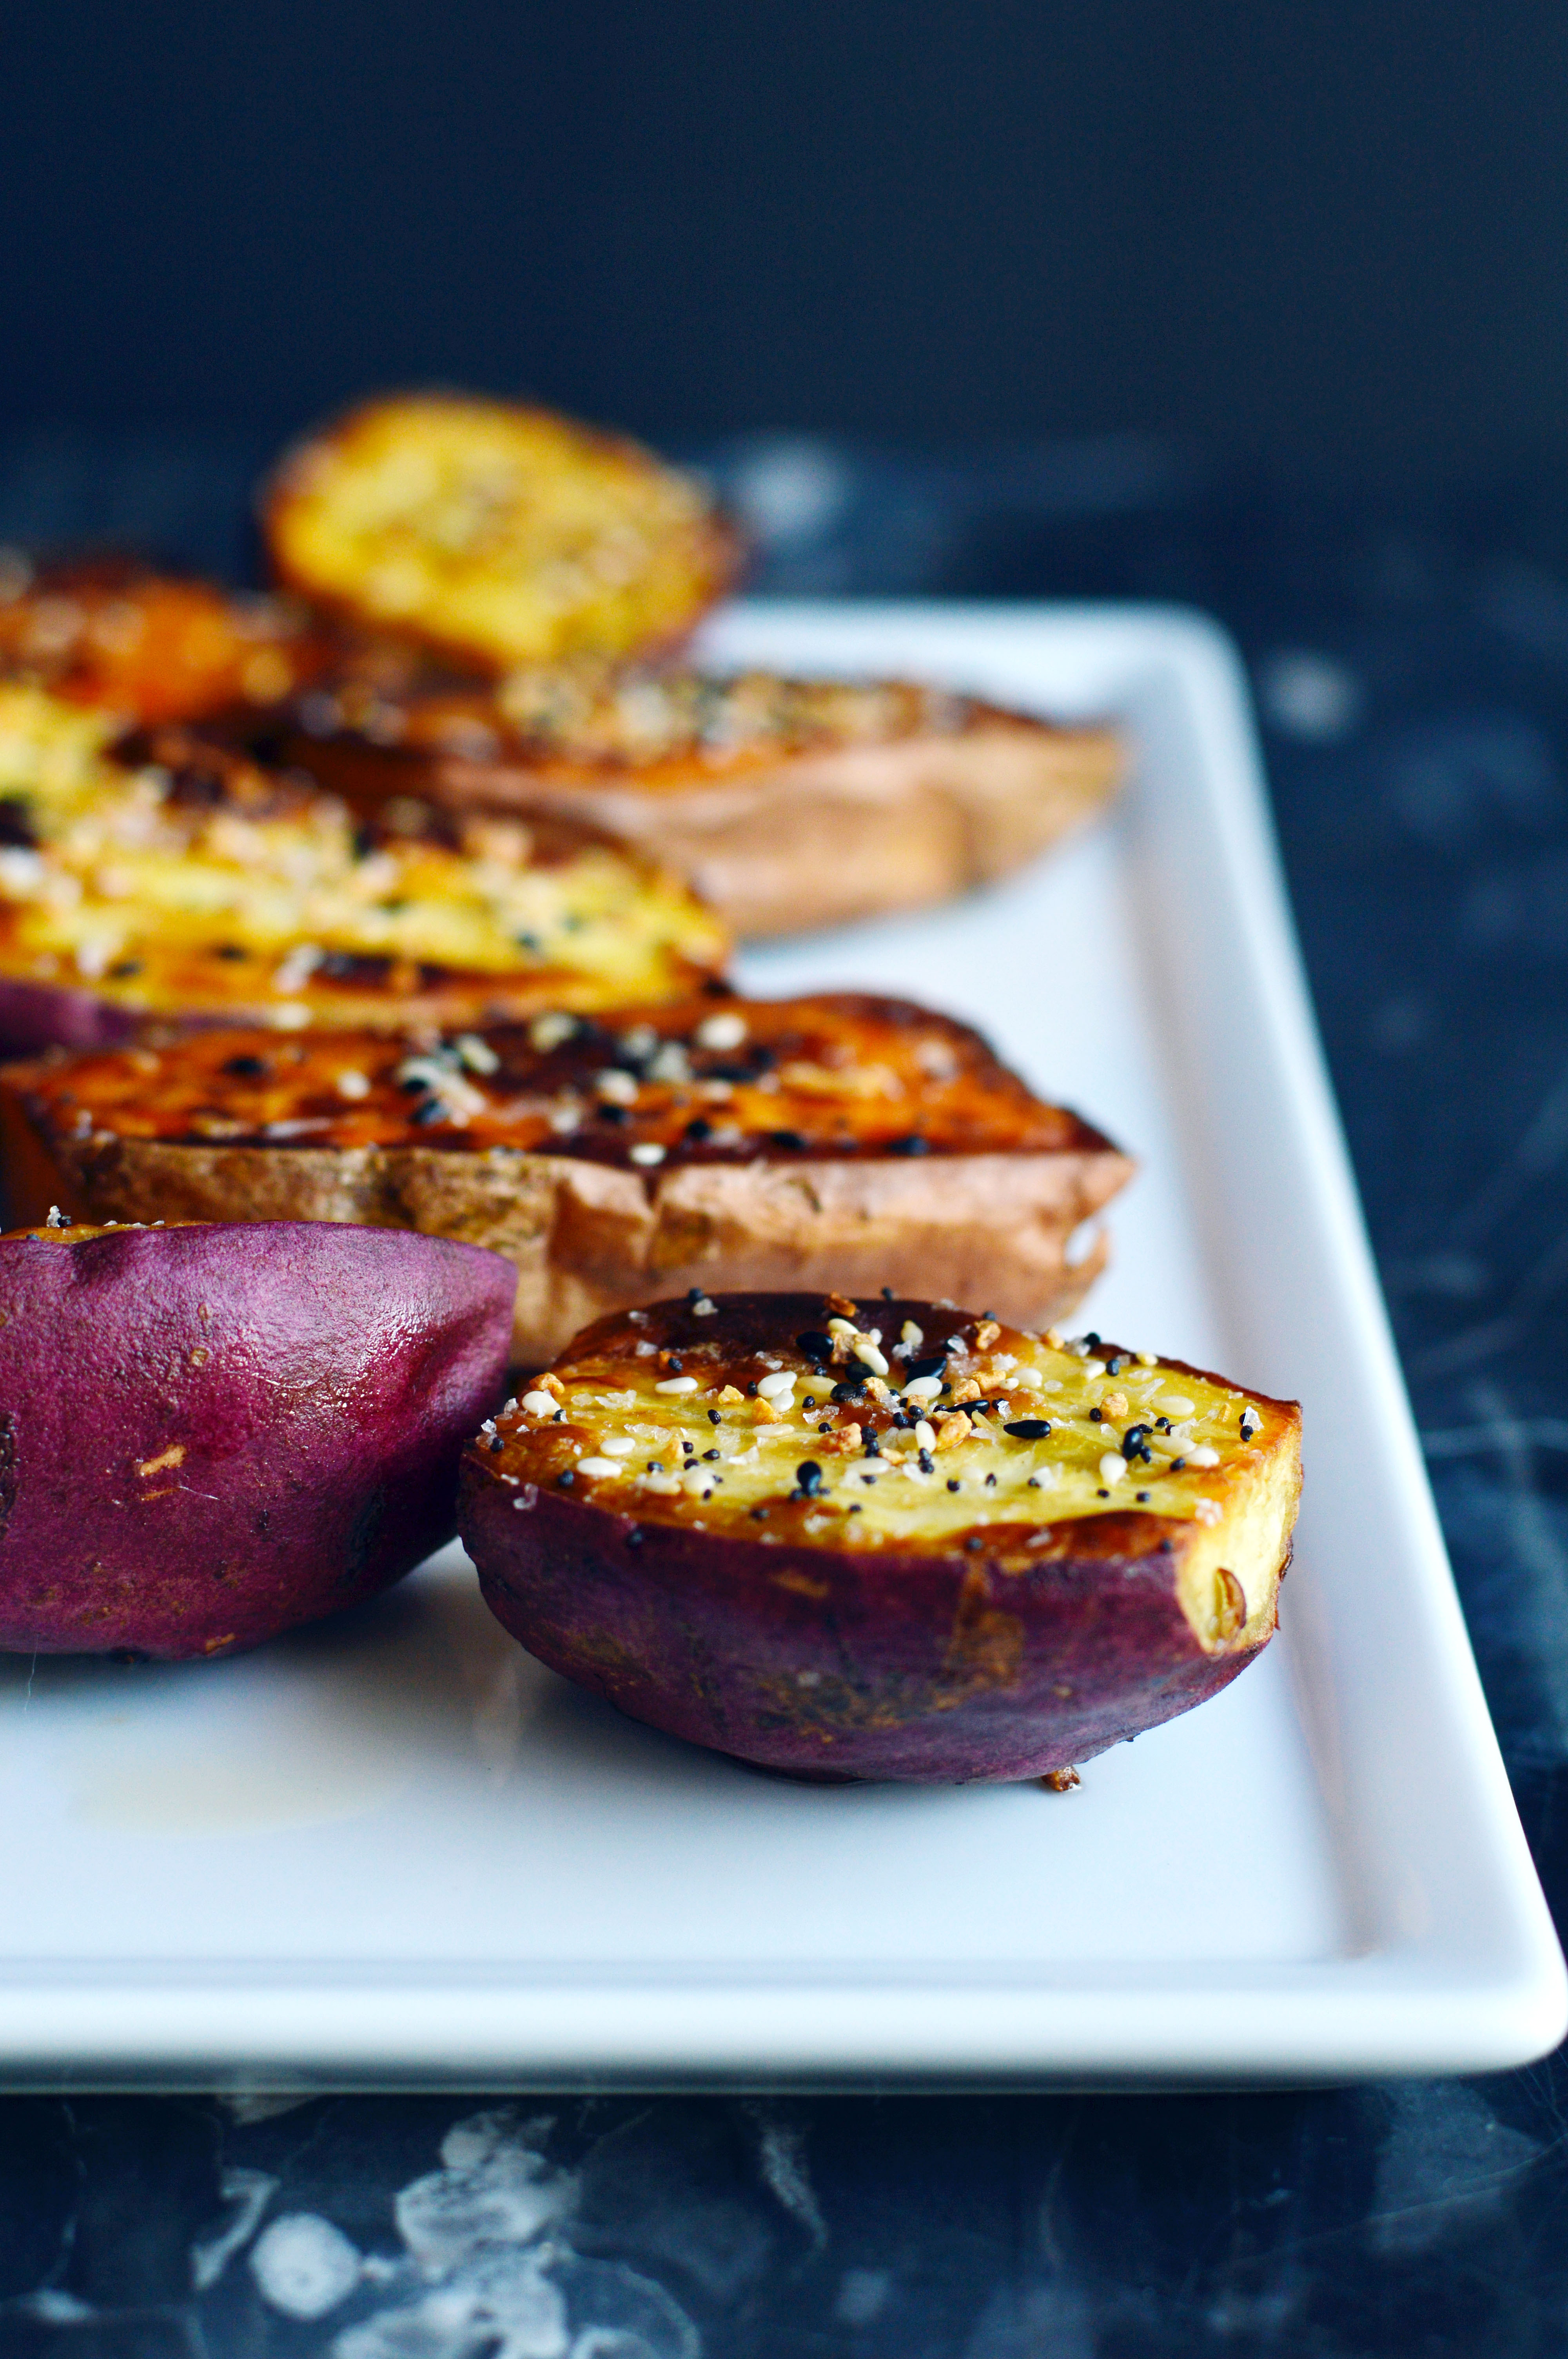
Well, it was quite delicious and nearly perfect! I just tweaked it a little by adding salt and omitting the freshly chopped garlic. (If you love garlic, or are in a garlicky mood, mince a few cloves of garlic and add it to the seasoning stage.)
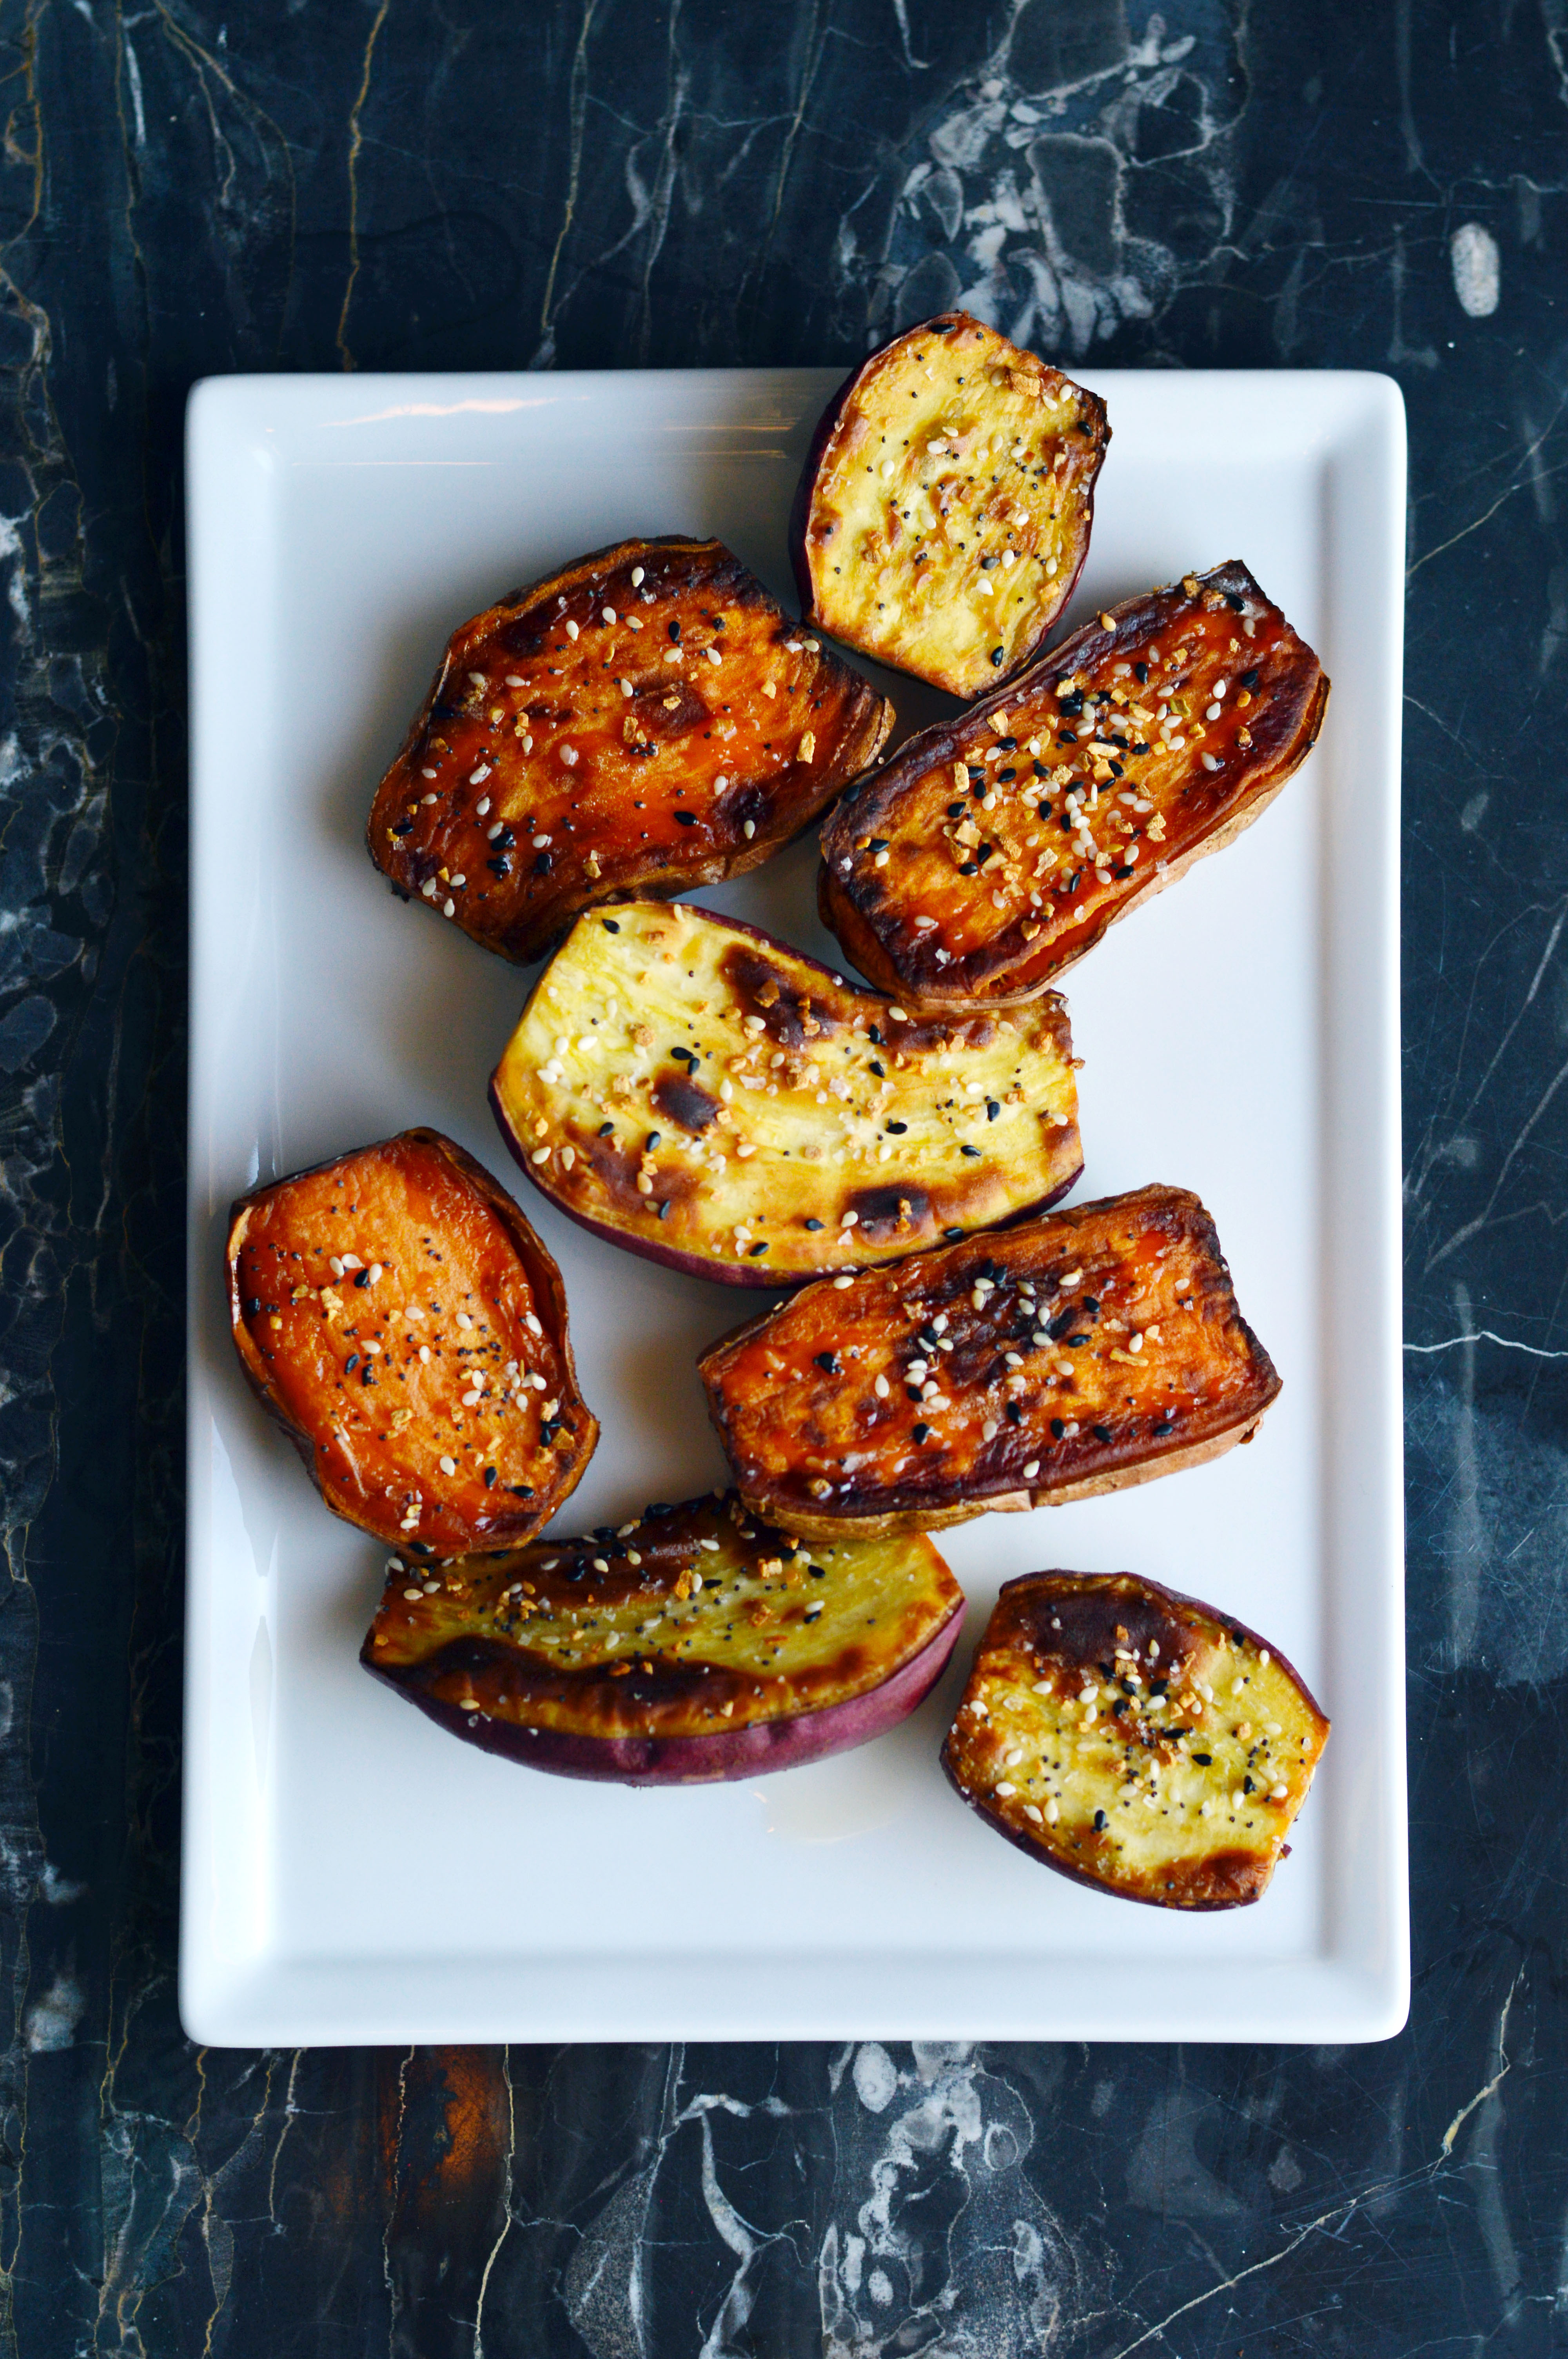
Aimee’s way of roasting the sweet potatoes gives it a crisp exterior and a smooth and buttery interior, and the addition of the “everything but the bagel” seasoning gives a savory edge to the sweetness of the sweet potato. We’ve been making these a lot in our house lately because it is Whole 30 friendly. My sister has been on the whole 30 diet and turns out no sugar, alcohol, grains, legumes, soy, and dairy really cuts down the things that you are allowed to eat. But this has been the sweet-savory snack that has been helping her stay on track.
You can watch the video of Aimee making it here.

Everything Bagel Sweet Potatoes

Ingredients:

3-4 medium sized sweet potatoes (use organic potatoes if you are eating the skin)
avocado oil (or any high smoke point oil)
everything but the bagel seasoning (I got mine at trader joe’s but you can technically make your own)
kosher salt
3-4 cloves of garlic, minced (optional)

Instructions:

  1. Preheat oven to 400˚F and line a baking sheet with aluminum foil (shiny side down).
  2. Thoroughly wash your sweet potatoes. Trim both ends and cut lengthwise.
  3. Coat the sweet potatoes with avocado oil, and place on baking sheet cut-side down.
  4. Roast sweet potatoes 15-20 minutes or until golden brown.
  5. Remove sweet potatoes from oven; flip sweet potatoes so they are cut-side up.
  6. Sprinkle with kosher salt, bagel seasoning, and garlic (if using).
  7. Move baking sheet back into the oven and roast 10-15 minutes more.
  8. Turn off oven and let sweet potatoes sit in oven for an additional 10-15 minutes.
  9. Enjoy!

Recipe adapted from Song of Style.

Rainbow Caprese Salad with Spicy Balsamic Glaze

Rainbow Caprese Salad with Spicy Balsamic GlazeIt’s that time of the year where it’s not exactly summer or fall. I’m dying to wear boots and sweaters but I’m not looking forward to winter. The other day I was watching Quantico (Awesome show btw. Priyanka Chopra is absolutely stunning.), and there was a scene with slushy streets in NYC. My mind immediately curled itself up into a ball thinking, “No…… I’m not ready for another winter.”
heirloom tomatoesRainbow Caprese Salad with Spicy Balsamic GlazeLuckily, we still have some summer produce to cling on to the last whisper of summer. I found some heirloom tomatoes at Trader Joe’s this past week and they were available in so many different hues that a rainbow was the first thing that came to my mind. I’m almost embarrassed to say that nearly every ingredient that I used in this recipe is from Trader Joe’s (even the paprika!), but imo a one-stop shop is always good news.Rainbow Caprese Salad with Spicy Balsamic GlazeI love Caprese salad because it’s a solid balance of flavors. But more than half of the time, I’m disappointed when I order it in a restaurant. The ratio to tomato, cheese, basil and balsamic glaze is usually off. I suppose everyone has their own idea of what makes the perfect ratio and that’s why making it at home is the best option all around. (It’s usually cheaper too.)Rainbow Caprese Salad with Spicy Balsamic Glaze Rainbow Caprese Salad with Spicy Balsamic GlazeHeirloom tomatoes are super sweet and juicy so you want to use a very sharp knife to slice them neatly. Tip: when cutting the little tomatoes, cut them vertically (from the stem end) to get the prettiest shot of the seedy insides. I wanted to balance the sweetness with a hint of heat and it turned out well. I may be biased because I love hot sauce on almost anything and everything. Even if you forgo the spicy glaze and opt for plain balsamic vinegar, it’s still delicious since vegetables + cheese = always tasty.
Rainbow Caprese Salad with Spicy Balsamic Glaze

Rainbow Caprese Salad with Spicy Balsamic Glaze

Ingredients:

2-3 lbs. heirloom tomatoes in various colors, shapes and sizes
16 oz. fresh mozzarella
1 bunch fresh basil
extra virgin olive oil
kosher salt
spicy balsamic glaze (recipe below)

Instructions:

  1. Wash and slice your tomatoes.
  2. Slice your mozzarella.
  3. Pick out the freshest leaves from your basil bunch. Save the tiny ones for garnish.
  4. Line the plate with basil leaves and top it with the mozzarella slices.
  5. Arrange the tomato slices from red to green, starting from the darkest red.
  6. Put some basil slices in between the tomatoes.
  7. Sprinkle the tomatoes lightly with salt and drizzle the olive oil.
  8. Drizzle the balsamic glaze and top with the remaining basil leaves.

Spicy Balsamic Glaze

Ingredients:
½ c. plus ½ tbsp. balsamic vinegar (6% acidity)
½ tsp. red pepper flakes (if you just want a hint of spice, dial it back to ¼ even ⅛ tsp. if you’re sensitive)
¼ tsp. smoked paprika
freshly ground black pepper
¾ tbsp. sugar

Instructions:

  1. In a small pot, add ½ c. balsamic vinegar, red pepper flakes, paprika, sugar and as much black pepper as you want.
  2. Boil down the vinegar until thickened, about 3-5 minutes. Keep a close eye on it so that it doesn’t burn.
  3. Add ½ tbsp. balsamic vinegar to up the acidity that you lost.
  4. Cool and use as desired.

Bacon Wrapped Enoki Mushrooms and Kabocha Squash

Bacon Wrapped Enoki Mushrooms and Kabocha Squash 2It’s officially fall. Only it’s too cold for fall. Last night it was 35 degrees outside and this morning there was a chance of snow for a couple of hours. As much as I love having four seasons, I feel like fall in New Jersey only lasts a few weeks. Whenever I’m on Pinterest or on Instagram I see posts of girls in short sweater dresses with ankle boots without tights or thick coats, I ask myself, “Just where do these girls live? And how can I get myself there?”
ingredients
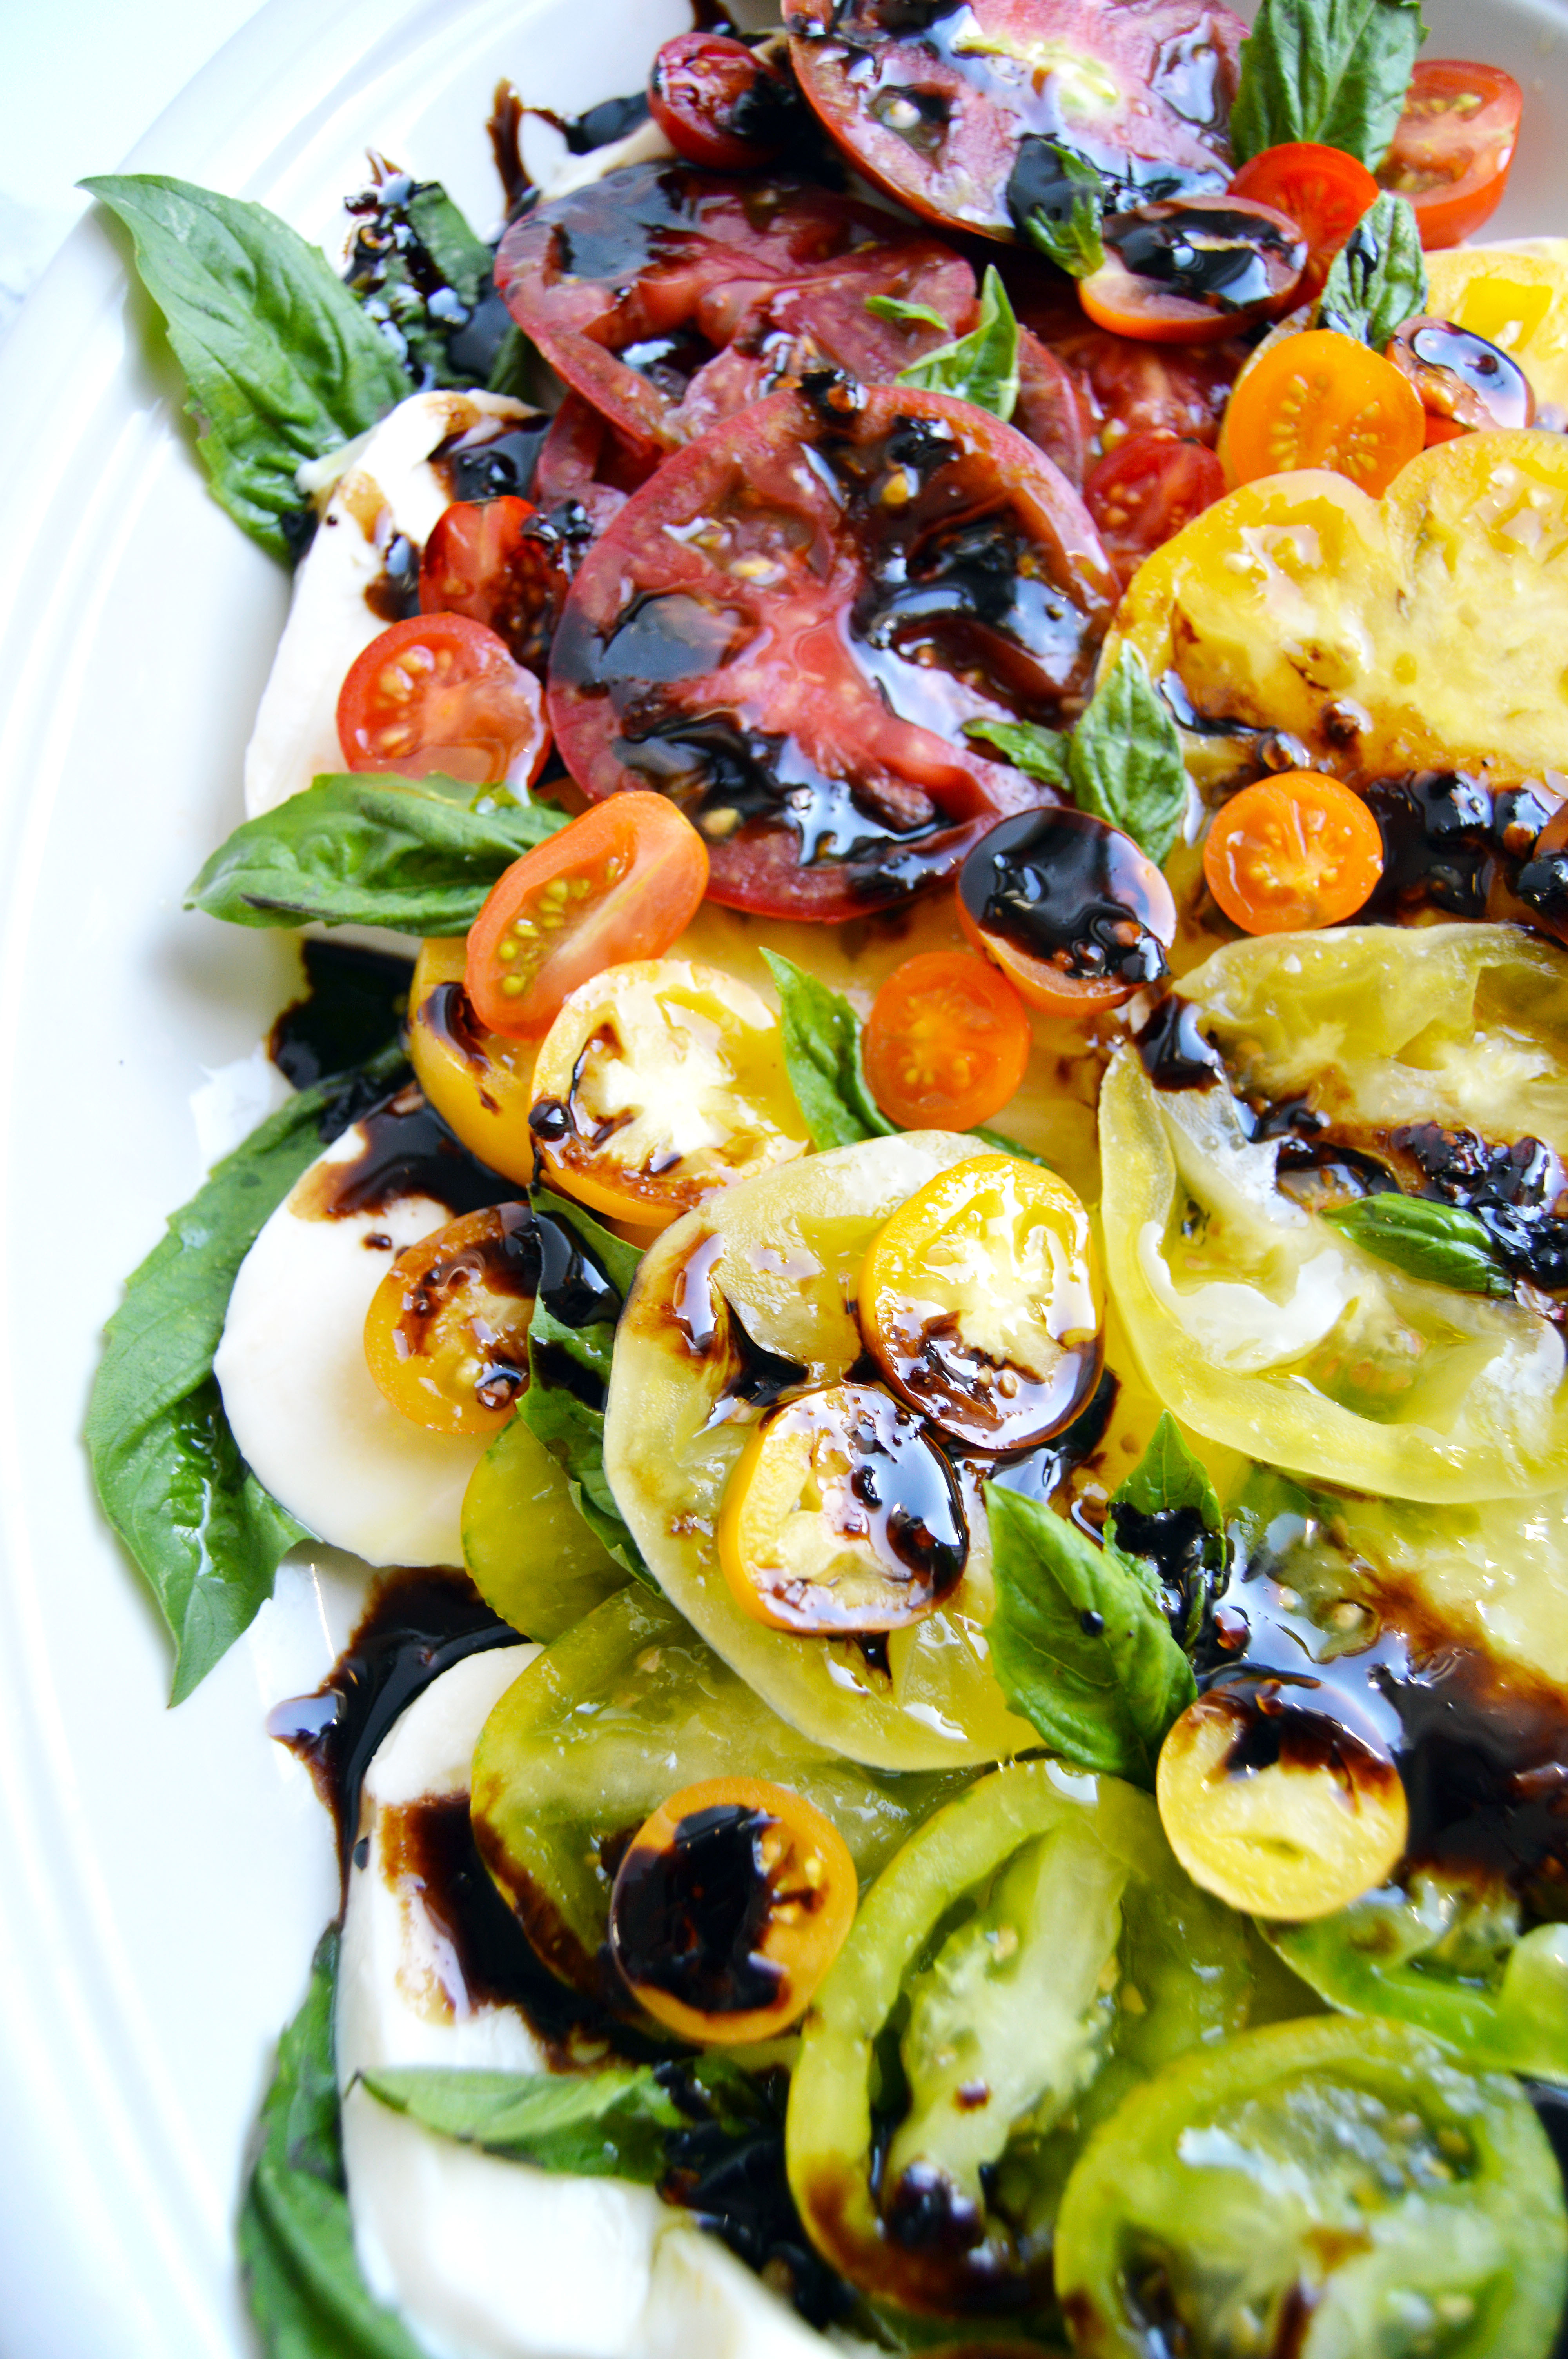
Although it may not feel so much like fall, we can certainly eat like it is. The color orange seems to be the theme of fall food. Pumpkin, butternut squash, sweet potatoes, acorn squash… all of these have orange flesh that not only taste great but are healthy too. If you’ve never tried Kabocha squash, it also has an orange flesh but is sweeter than a butternut squash. Mix that with the salty bacon and the delicate fruitiness of the Enoki mushroom, you have a winner. I added a dash of Unagi sauce on one of them and it was the perfect touch.
kabocha squash bacon enokiIt is incredibly easy to put together and you don’t even have to put in the Kabocha squash or the Unagi sauce. It can be as easy as wrapping the mushroom with the bacon and you’ll still have a crowd-pleasing appetizer that can be made on the fly.
kabocha squash baconI probably won’t be able to write another post before Thanksgiving. So, I hope you have the happiest of Thanksgivings with your loved ones this Thursday and I’m so thankful for all of you reading this. ❤
Bacon Wrapped Enoki Mushrooms and Kabocha Squash 3

Bacon Wrapped Enoki Mushrooms and Kabocha Squash

1 – 4 oz. package of Enoki mushrooms, split into 8 bundles
4 slices of bacon, halved vertically
8 slivers of Kabocha squash, raw
salt and pepper to taste
parsley, minced, for garnish
Unagi (eel) sauce, optional

Instructions

  1. Preheat oven to 375˚F and line a baking sheet with aluminum foil, shiny side down.
  2. Top a bundle of mushrooms with slice of squash and very lightly sprinkle salt on top of the squash.
  3. Wrap the vegetable bundle with a slice of bacon and secure with toothpick. Repeat for the rest of the bundles.
  4. Season the bundles with pepper and roast the bundles for 15-20 minutes, until the bacon is browned and crisp.
  5. Drain bundles on paper towels and if using the unagi sauce, lightly drizzle sauce before serving.
  6. Garnish with minced parsley.

Star Wars Rebels Party

Star Wars Rebels PartyIt’s been a while. With Thanksgiving and prepping for Step 3’s, life has been hectic! I feel a mix of regret and sorrow that I missed out on all things fall for the blog. But, it has fast forwarded to December which means that the holidays are here and that translates to holiday goodies. But before we get started on all things Christmas, let’s get to the Rebels Party.

As someone who has watched the Star Wars movies exclusively, I was skeptical when the hype for Star Wars Rebels rose out of midair. But after watching one episode (which led to another and another…), I have to say that I’ve fallen in love with the characters and the story line. There is just the right mix of darkness and humor for all ages to enjoy.

So when Mr. L approached me about doing another Star Wars party, I couldn’t say no. (This is the second Star Wars themed party to be featured on the blog. The first one is linked here.)

We drew inspiration from Lothal, the planet where the rebels operate.  Lothal is apparently the name of a real city in India and one of the characters, Ezra, really reminds me of Aladdin. Coincidence?? I think not. Anyways, a bit of yellow turf, clay mountains and a modified Lego Space Needle, made a cute tablescape that was reminiscent of the real thing.

Star Wars Rebels Party LothalAs always, there was food with punny names.

Star Wars Rebels Party 2 Star Wars Rebels Party 1Inquisitortilla Chips with Dual Dip (Inquisitor Tortilla Chips with Dual Dip)
Star Wars Rebels Party 4 Star Wars Rebels Party 3Sa-Bean Burritos (Sabine Burritos)
Star Wars Rebels Party 522 Pickup-Cakes (22 Pickup Cupcakes)
Star Wars Rebels Party 8 Star Wars Rebels Party 6Chopper Salad
Star Wars Rebels Party 9“Zeb” Orrelios Oreos
Star Wars Rebels Party 11 Star Wars Rebels Party  10TIE Lettuce Wraps
Star Wars Rebels Party 13 Star Wars Rebels Party 12Kanan Lightsaber Kebabs
Star Wars Rebels Party 15 Star Wars Rebels Party 16Jogan Fruit Juice
Star Wars Rebels Party 17Hoth2O (A nod to the original series)
Star Wars Rebels Party 18The Entire Spread

It was really fun hanging out with friends, eating good food and watching the special broadcast of “Spark of Rebellion” with the extended scene. Everyone went home with a goodie bag filled with Star Wars themed candy and a figure. Of course I got the one figure I didn’t want, the imperial commander. Boo.

Pretzel Hot Dogs

Pretzel Hot Dogs 5Every single time I go to the mall, I have an inner battle with myself.  Do I get a soft pretzel or not?  I try not to have one because frankly it’s just a chunk of carbs and I always feel a little guilty after I eat it.  I suppose the real question is: is it worth feeling guilty about?
Pretzel Hot Dogs 2I would say that the chance of me caving in is about 50/50.  I have a good idea of what it is that I want (plain salted pretzel with lots of golden mustard) until I get to the window and see a glistening pretzel hot dog.  How do they get it so shiny and golden?  Why do you wink at me so in the fluorescent mall light?  Why am I personifying you?
Pretzel Hot Dogs 3I sit there frazzled until it’s my turn and at this point, I blank out and whatever word comes out of my mouth first is what I get.  Sometimes it’s the hot dog, sometimes it’s the pretzel.  All I know is that either way I have buttery, carb-y goodness in my mouth.  I win.
Pretzel Hot Dogs 4Sometimes, you don’t want to go to the mall.  Sometimes, the drive isn’t worth it and the battle of the parking spot is tiring and stressful.  This is for those days, a little reward without the battle.
Pretzel Hot Dog 1Pretzel Hot Dogs

Ingredients:
4 ½ to 5 c. all-purpose flour
1 ½ c. 110°F-115°F water
½ c. milk
2 tsp salt
1 tbsp active dry yeast
1 tbsp sugar
3 tbsp. unsalted butter, melted plus more for brushing
kosher sea salt/ pretzel salt/ Maldon salt
10 c. water
⅔ c. baking soda
1 egg
16 Hot dogs

Instructions:

  1. In a microwave safe cup, warm 1½ c. water until 110°F-115°F or lukewarm.  Stir in sugar until dissolved. Stir in dry yeast and let stand until foamy (about 5 minutes).
  2. While the yeast is proofing, mix 4½ c. flour, milk, salt, and the melted butter into a bowl of a stand mixer.
  3. Add the water mixture into the flour mixture and stir until a loose dough forms.
  4. Let stand for 8 minutes to hydrate flour.
  5. With the dough hook attachment, knead the dough on speed 2 for about 8 minutes.  If you see that the dough is still loose and sticks to the bowl, add the remaining half cup of flour and knead until the dough does not stick to the bowl.
  6. Cover the bowl and let the dough rise until double its size.
  7. Once the dough has risen, preheat oven to 450˚F and line two sheet pans with either parchment paper or silicone mats.
  8.  In a large pot, boil 10 c. of water and baking soda.
  9. Divide dough into 16 equal pieces, and form into a long rope. Carefully wrap each piece around a hot dog, pinch the ends together to seal the dough.
  10. Boil the pretzel hot dogs, one at a time about 15 seconds on each side.  Remove from the water and drain thoroughly with a slotted spoon.
  11. Mix 1 egg with 1 tbsp. water to form an egg wash.
  12. Place onto the sheet pan and brush bread thoroughly with the egg wash and sprinkle with your choice of salt.
  13. Bake until golden brown, about 12-15 minutes.  Brush generously with melted butter.
  14. Let Cool. Eat with a lot of mustard.

Pretzel recipe adapted from Jo Cooks.

Star Wars Day 2014

Star Wars Day 2014 1This is the third year I’ve hosted a Star Wars Day party.  It involves good food with punny names, watching SW movies and SW themed board games.  The first SW party I threw was just a small surprise for a special someone but through the years it’s evolved into a bigger celebration.  I can’t say that I’m a huge fan of Star Wars, but I can say that I love throwing themed parties.  So in a way, I do love Star Wars Day.
Star Wars Day 2014 2Star Wars Day 2014 4
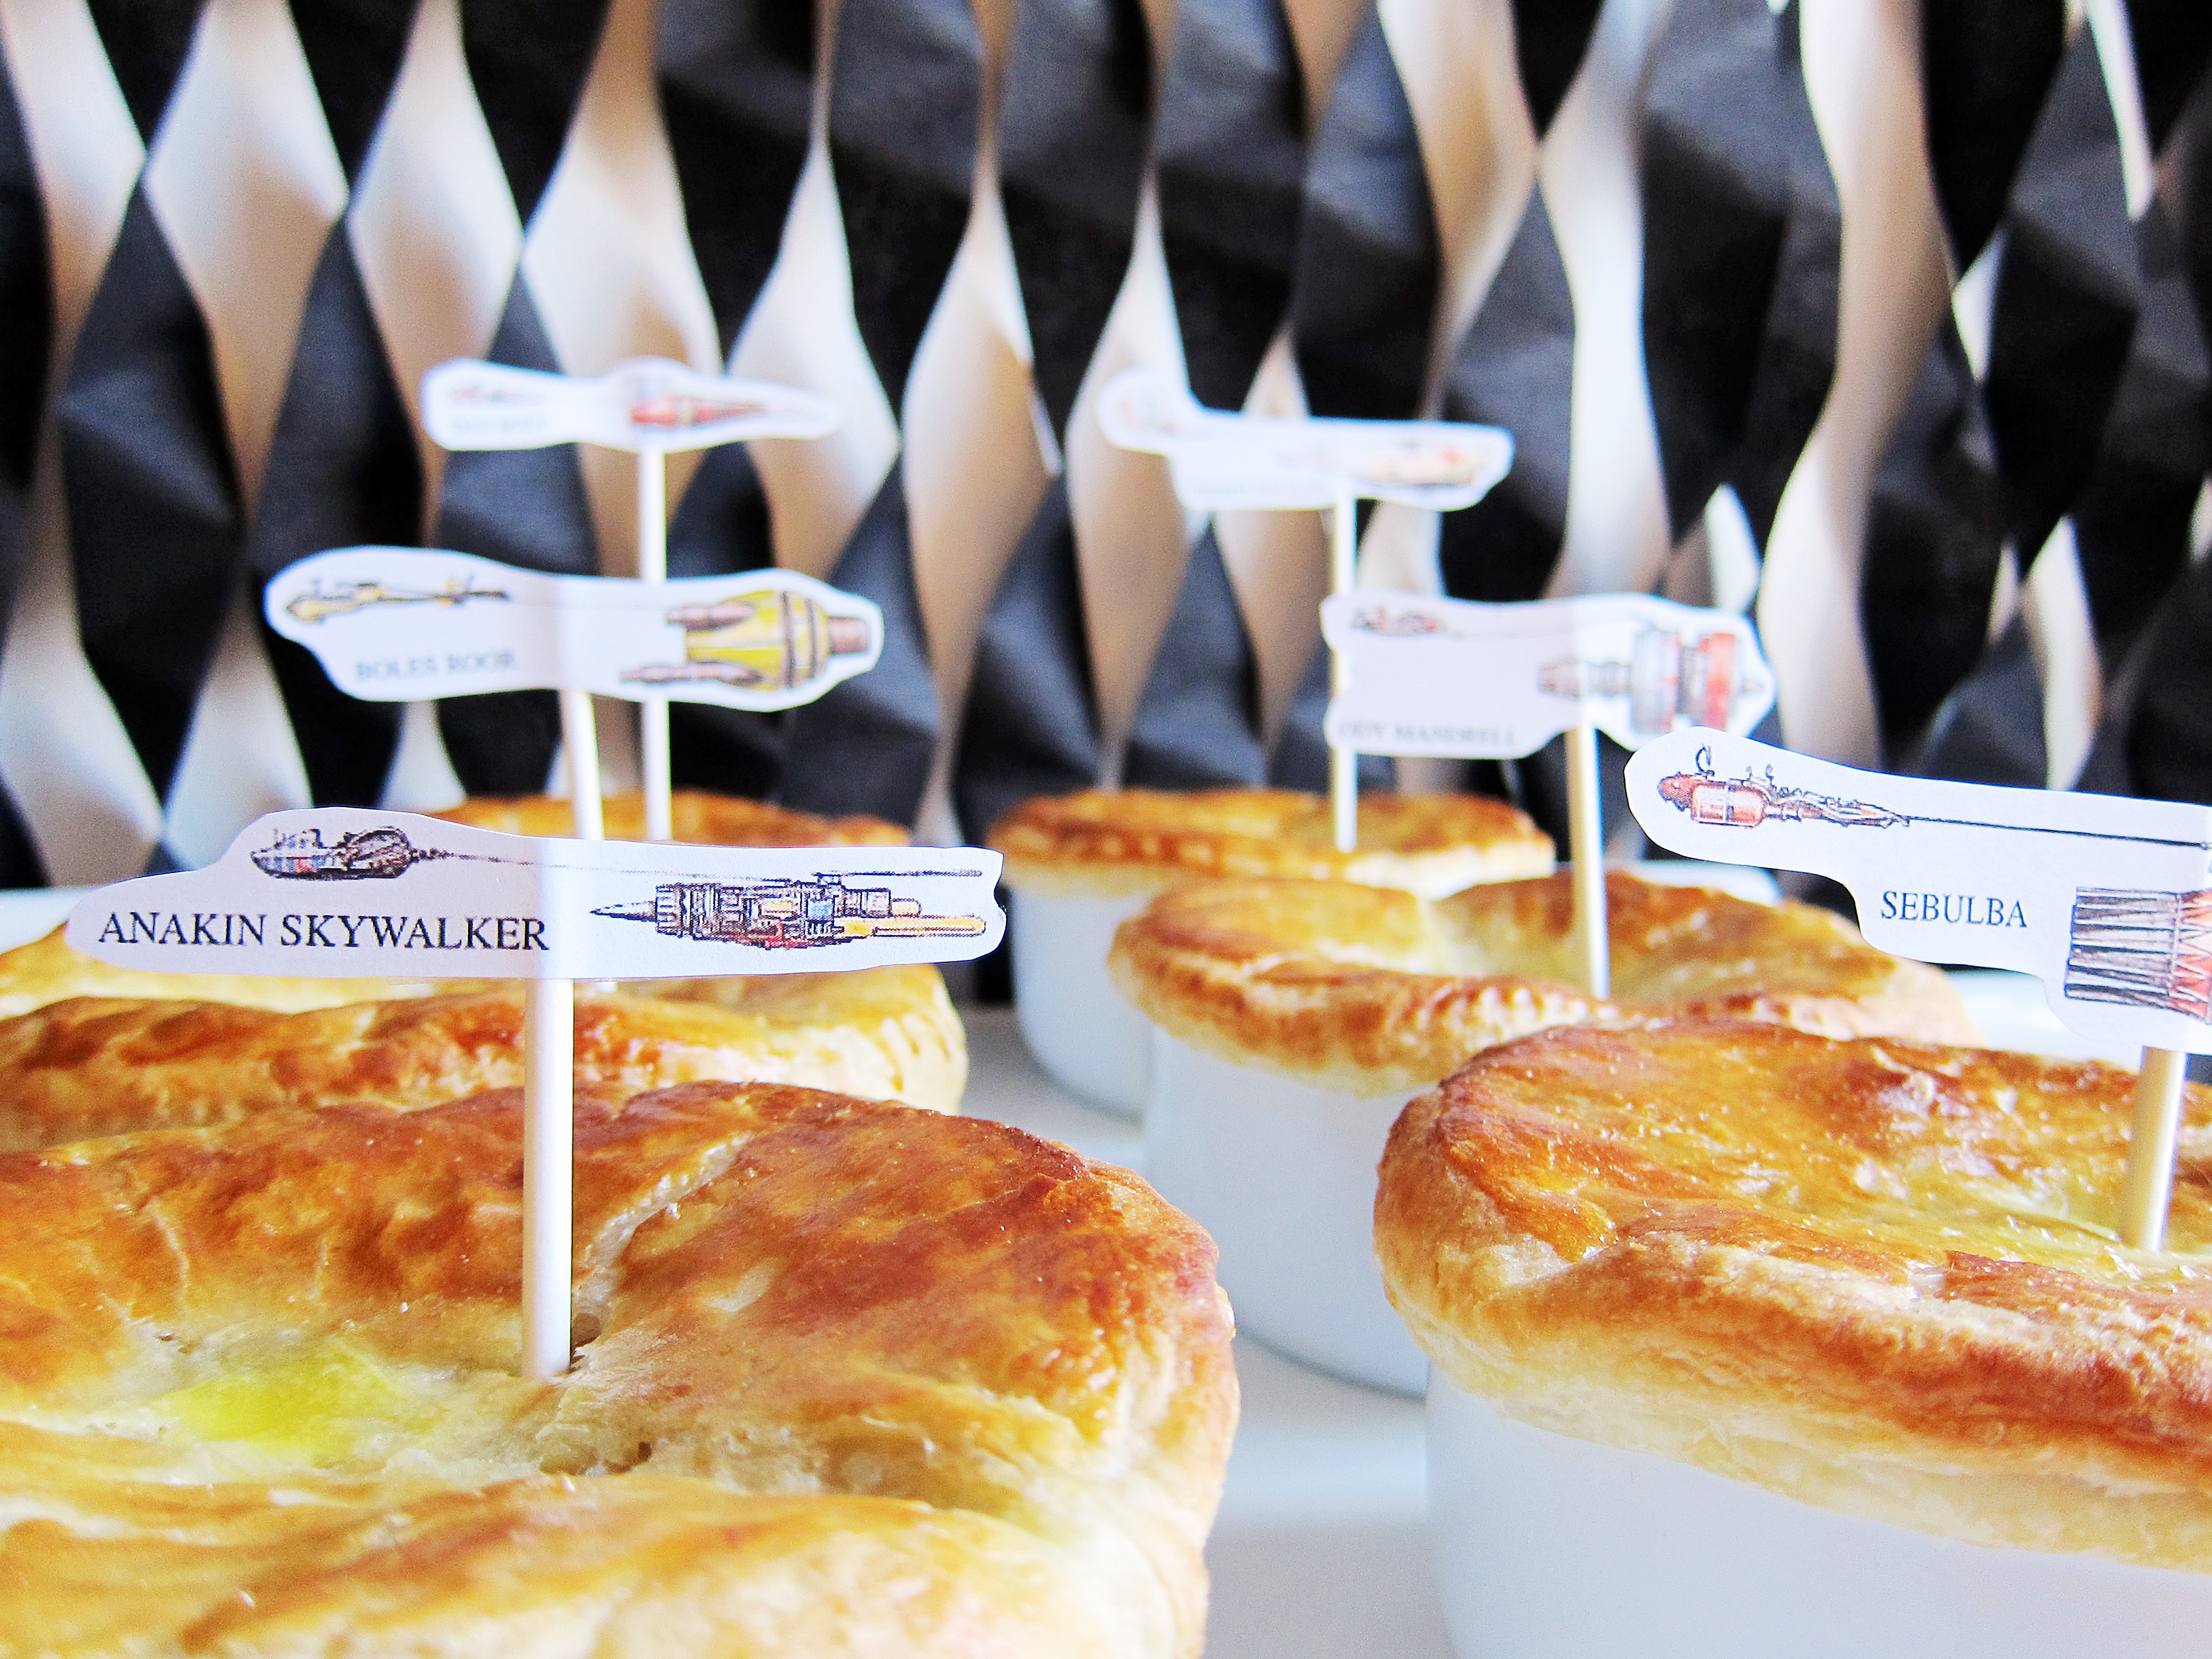
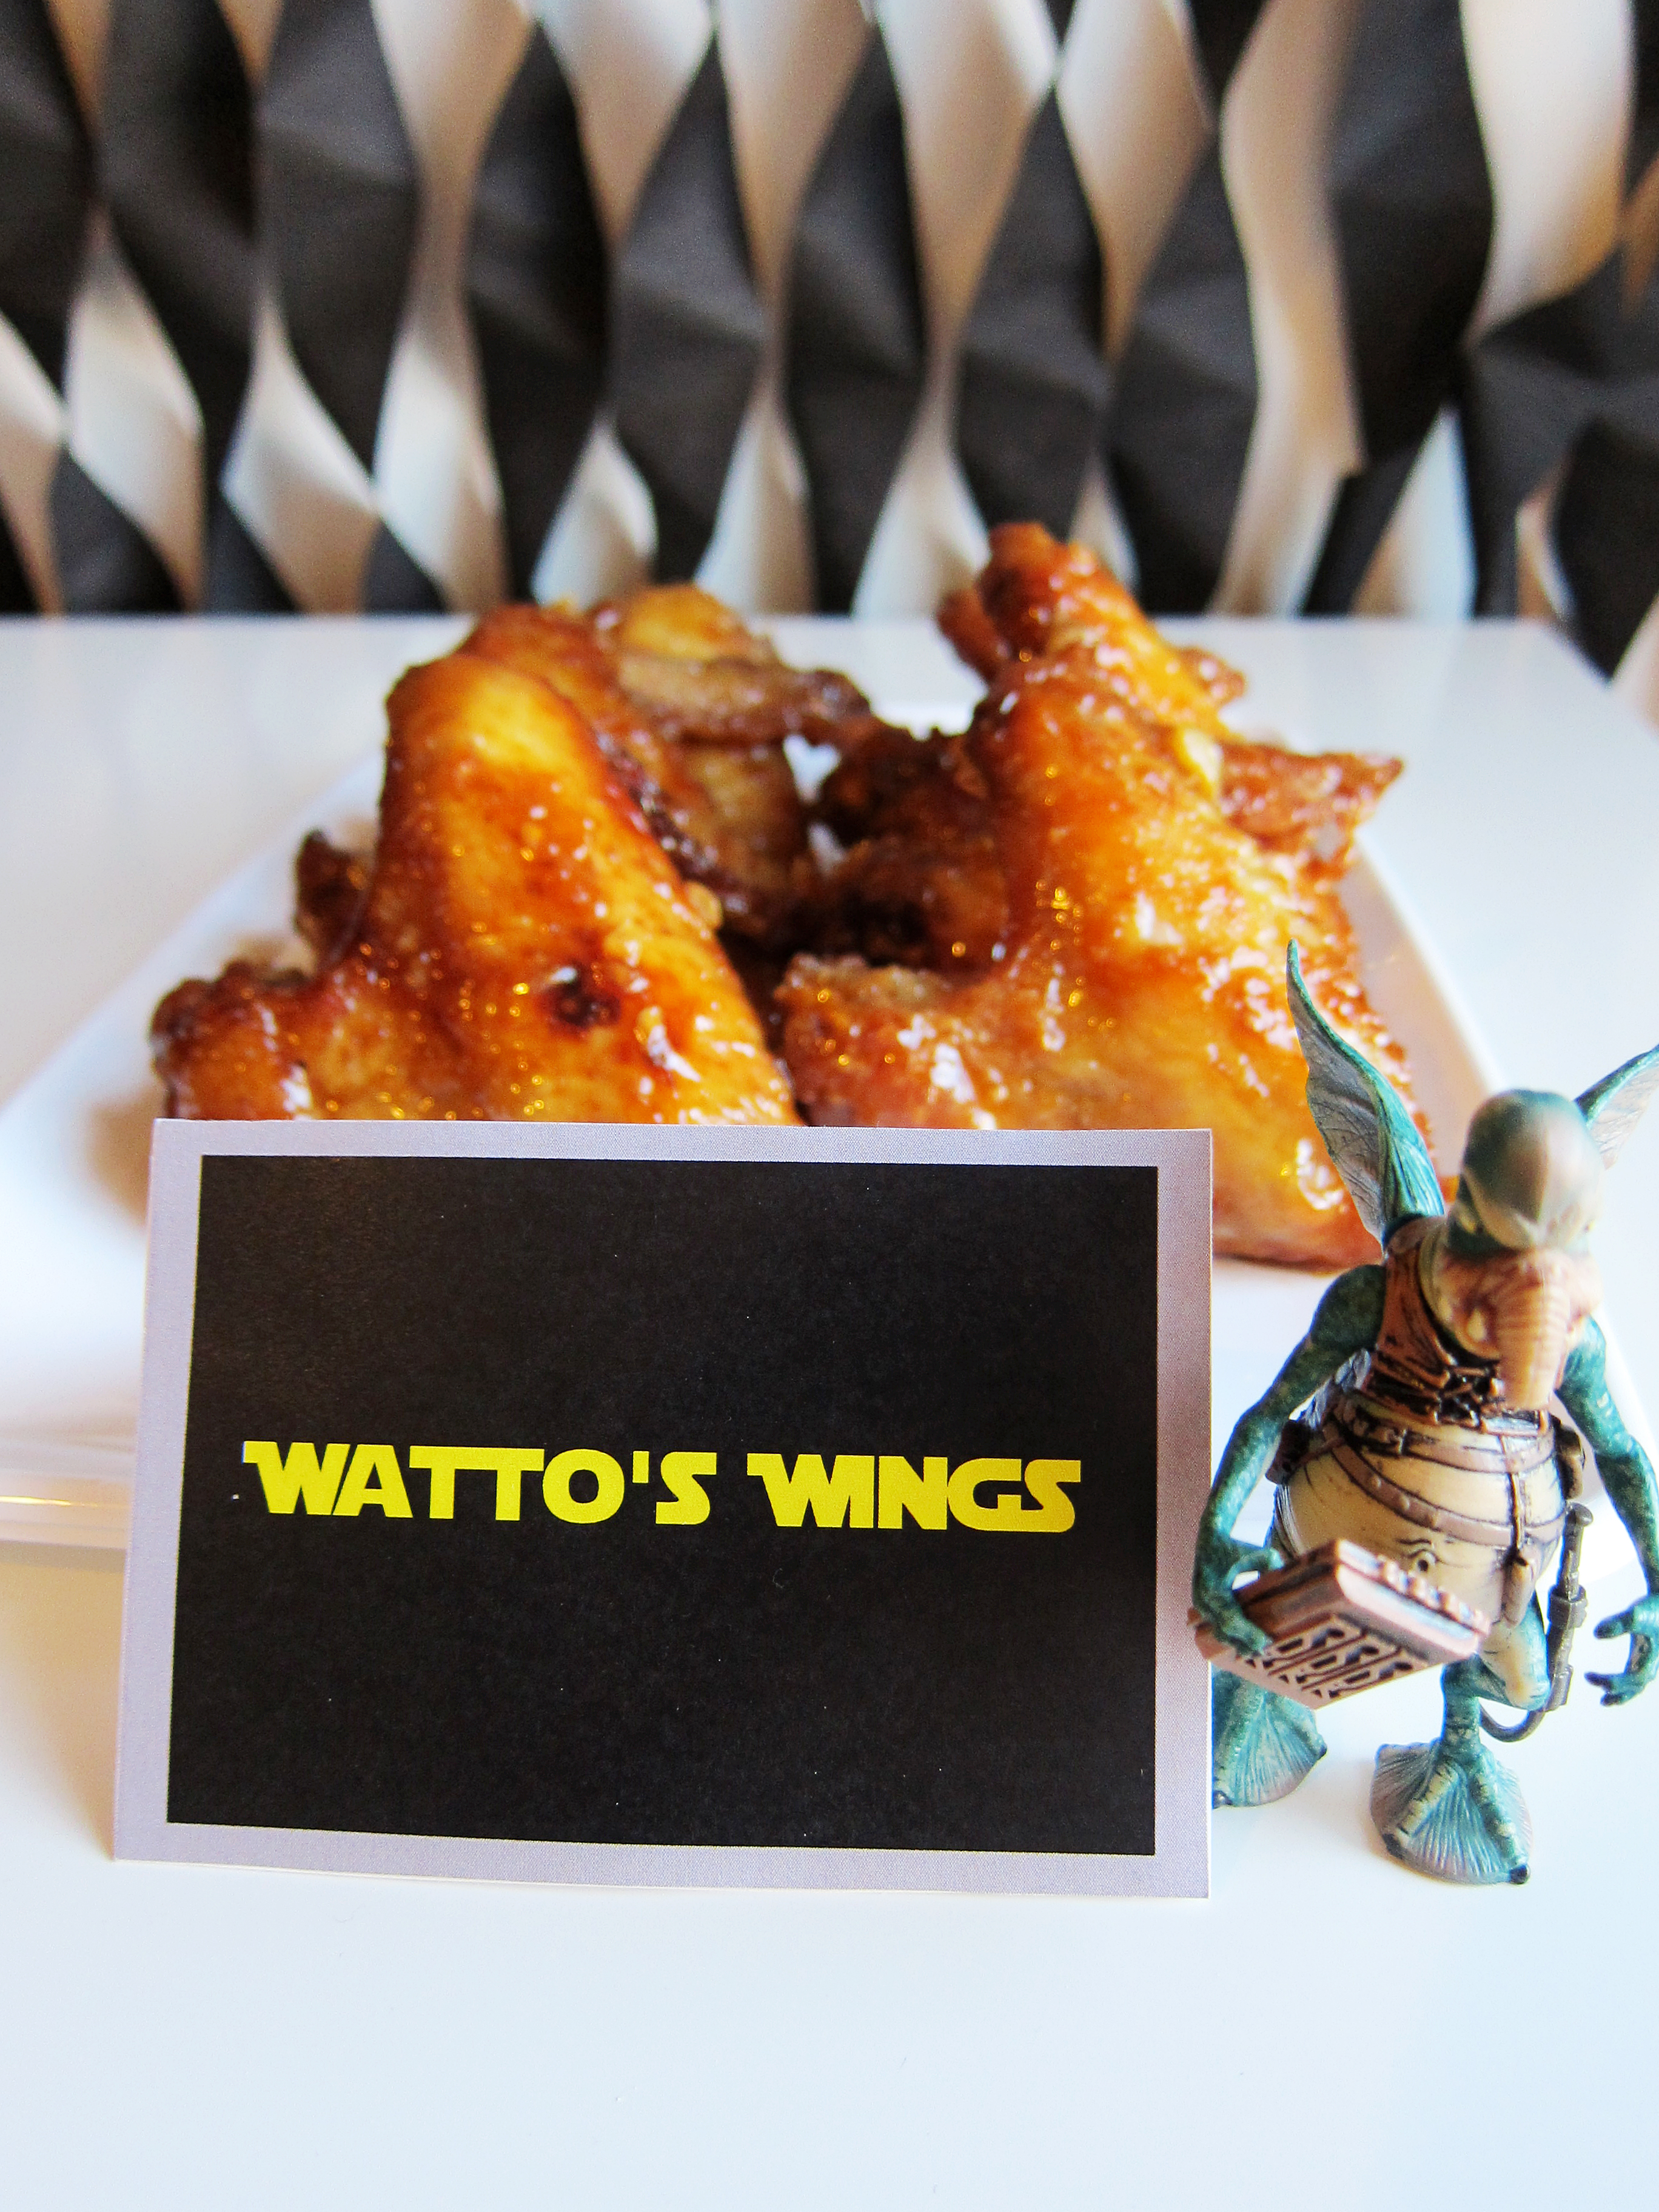
This year‘s party theme was Episode 1: The Phantom Menace, so all of the food and activities were centered on Episode 1 characters and settings.  Here are the things we made for SW Day*:
chicken pod piechicken pod pie 2Star Wars Day 2014 7 Star Wars Day 2014 8obi wontons obi wontons 2padme parfaitpadme parfait 2quail gon jinn 1 quail gon jinn 2watto's wings 1 watto's wings 2The centerpiece of the table was my Darth Maul-ble Cake, a marble cake with chocolate frosting and a chocolate transfer of Darth Maul.   There was a small chorus of “wows” when I revealed it.  Chocolate transfers can take a bit of time, but it is straight forward and simple to do.  I used the same technique for this piece and it turned out fabulous.
steps darth maulI think Darth Maul is quite scary.  To be completely honest, I got a wee bit frightened trying to find the right photo for the transfer.  Filling in the chocolate parts was no walk in the park either, he was just as scary.  I know it sounds silly, but if your imagination runs as wild as mine does I’m sure you understand. Revenge of the Six-th indeed. 🙂
Star Wars Day 2014 19Darth Maul-ble Cake

You will need:

1 Chocolate Marble Cake – Recipe Below
1 Batch of Chocolate Frosting – Can be found here
Black Candy Melts
Red Candy Melts
Yellow Candy Melts
White Candy Melts
A mirrored image of this printout in a black circle

Instructions:

  1. Tape the printout onto a baking sheet or any desired flat surface.
  2. Tape a piece of parchment paper over the printout making sure it covers the entire image.
  3. Melt a small amount of black, red, yellow and white candy melts (do not meld the colors together).
  4. Remember, chocolate transfers are all about layering.  Each time you fill out the next step, you will be going over the previously filled portion.
  5. Using either a toothpick or a piping bag fitted with either a #1 or #2 round tip, fill in the pupil of the eye with the black candy melt. (As shown in the above photo.)
  6. Mix the yellow and white candy melt to get a light ivory hue for the horns. Fill in. (As shown in the above photo.)
  7. Once the pupil is set, fill in the iris with the yellow candy melt.  Let set. (As shown in the above photo.)
  8. The outer edge of the iris has a red outline.  Carefully, trace a red border around the yellow candy melt. Let set. (As shown in the above photo.)
  9. Fill in the sclera with the white candy melt.  (As shown in the above photo.)
  10. Fill in the white edge of the hood while the sclera sets. (As shown in the above photo.)
  11. Using the red candy melt, start filling in the mask like patterns on the face.  Try not to lose the detailed edges because that’s what makes the image pop. (As shown in the above photo.)
  12. Once the red candy melt is set, melt some black candy melts.  Make sure it is not piping hot because you will lose some detail if it is.
  13. Smooth over the entire circumference with the black candy melts.  Let completely set.
  14. Place on top of frosted cake and you’re done!

Chocolate Marble Cake

Ingredients:
1⅔ c. all-purpose flour
½ tsp. baking powder
¼ tsp. baking soda
¼ tsp. kosher salt
4 oz. unsalted butter, melted
1 c. sugar
1 egg, room temp
¼ c. Greek yogurt
¾ c. + 1 tbsp. milk, divided
1 tsp. vanilla extract
¼ c. unsweetened cocoa powder

Instructions:

  1. Preheat the oven to 350˚F and prep a 9” cake pan by coating it with nonstick spray and lining the bottom with parchment paper.
  2. Mix melted butter and sugar in a mixing bowl.  Set aside.
  3. In a separate bowl, mix flour, baking powder, baking soda and salt until combined.
  4. Add the egg, Greek yogurt, ¾ c. milk and 1 tsp. vanilla extract to the butter mixture and mix until homogenous.
  5. Add the flour mixture to the butter mixture and fold until smooth.
  6. Transfer ½ of the mixture to another bowl, mix in 1 tbsp. milk and cocoa powder until a thick chocolate batter forms.
  7. Put half of the vanilla batter into the prepared cake pan and spread out.
  8. Pour all of the chocolate batter on top of the vanilla mixture.
  9. Pour the rest of the vanilla batter over the chocolate batter.
  10. Using a toothpick or a butter knife, make swirls all over the cake. Be careful not to over swirl, or you will lose the marbling.
  11. Bake 18-25 minutes until golden brown or a toothpick inserted in the center of the cake comes out clean.

Cake recipe adapted from sally’s baking addiction.


* If you would like detailed info on any of the food I’ve prepared, don’t be afraid to leave a comment or shoot me an email!