Makgeolli Macarons (Feat. Makku)

It’s National Beer Day! While we are currently unable to enjoy a cold one at a bar with our loved ones, we can safely enjoy one at the comfort of our own homes. The silver lining being that we are all responsibly drinking and not driving. If you’ve never heard of makgeolli before, it’s rice beer! It tastes slightly sweet, tart and creamy. It also has a lightly carbonated body that makes it a refreshing drink for any time of day.

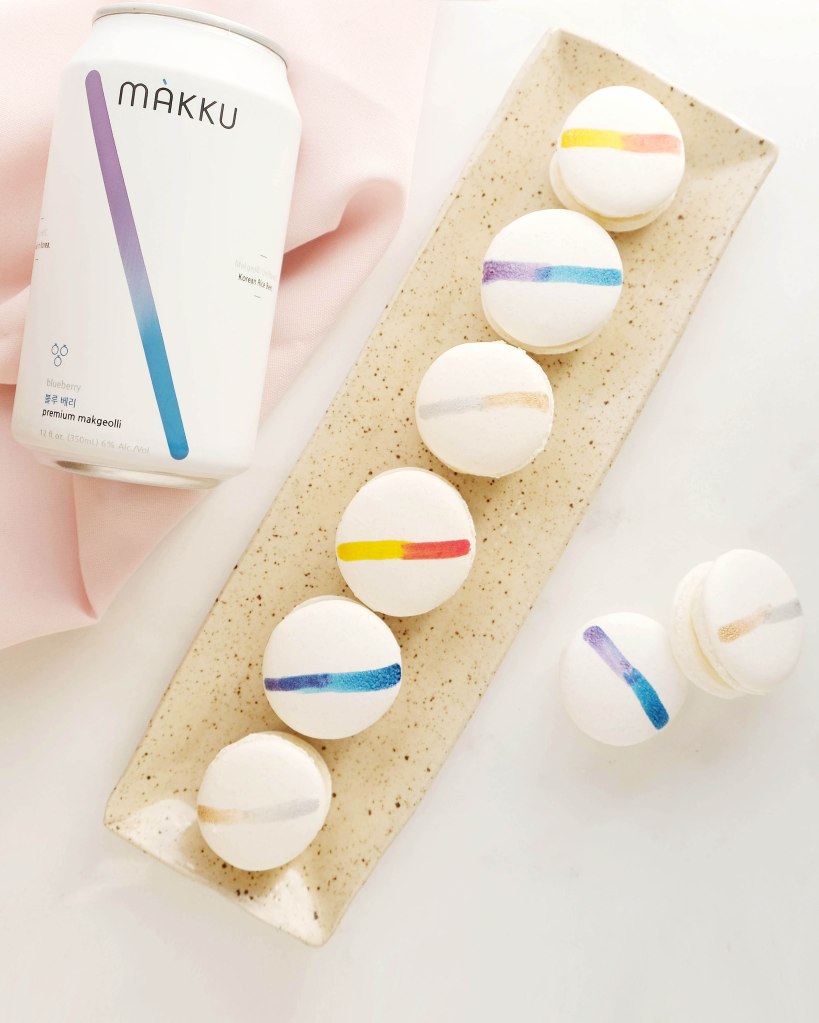
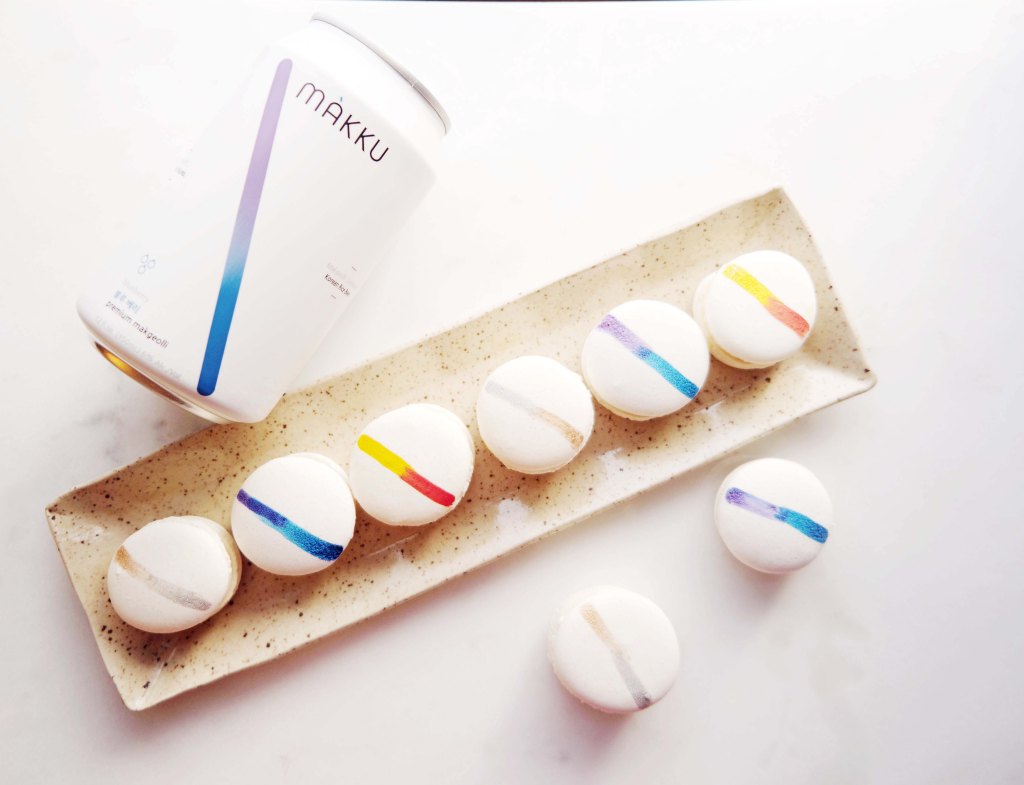
I first time I had this refreshing brew was on a trip to South Korea in 2014, on a sweltering summer day. I met up with an old friend at an outdoor food stall at Dongdaemun market and ate sizzling savory Korean pancakes, which we washed down with a swig of chilled makgeolli was perfection. Even back then, I remember associating makgeolli as something that my grandparents drank but within the past year or so, it’s come back as the new and hip craft brew. Makku definitely fits in that category with the modern packaging and it’s fun and fruity flavors (*whispers* I’m partial to the mango). A dear friend of my sister-in-law, Carol Pak, owns it and she reached out to me to make some macarons inspired by Makku flavors for her employees for Christmas, when times were cheerful. I really admire Carol for her work ethic and bravery in bringing her vision to life. With many small businesses, her company took a hard hit with Covid-19. It was heartwarming to see supportive and kind responses on her IG post about her hardship. In general, it’s been a small light of hope to see people pitching in and showing good will whether it be in healthcare, business or hospitality. Recently, Makku announced that they now ship nationwide, so if you have the means to, try something new and give it a go!

Making makgeolli macarons took a few tries of trial and error. Unlike traditional beer or wine, it has a very subtle flavor that is hard to capture. I tried boiling it down to a syrup consistency, which is my tried and true technique for flavoring frosting, but it failed miserably. The resulting syrup was extremely sour and off-putting. The trick is to replace half of the milk with makgeolli. The resulting macaron is unique, subtle in flavor but definitely makgeolli flavored. It hits you especially at the end.
Makgeolli Macarons (Feat. Makku)

For the Macaron Shells:

Ingredients:
212 g. almond meal (aka almond flour)
212 g. powdered sugar
172 g. egg whites, divided to 82 g. and 90 g (aged, if possible)
236 g. sugar
158 g. water

Instructions:

  1. Line two baking sheets with parchment paper or silicone mats.
  2. In the bowl of a food processor, add the almond meal and powdered sugar and pulse until thoroughly combined.
  3. Sift the mixture over a large mixing bowl, throwing out the lumps as they appear.  Add 82 g. of the egg whites and stir until you get a thick mixture.
  4. In a small pot attached with a candy thermometer, combine the sugar and water over medium heat and boil until the syrup reaches 200˚F.
  5. Once the syrup reaches 200˚F, start whipping the remaining 90 g. in the bowl of your stand mixer with the whisk attachment on medium speed until soft peaks are reached.
  6. Once the syrup reaches 248 ˚F, remove the pot off the burner and slowly pour the syrup down the side of the mixing bowl with the egg whites on medium speed.
  7. Once the egg whites are fully incorporated, increase the speed to medium high until egg whites form glossy, stiff peaks.
  8. Mix a ⅓ of the egg white mix to the almond mixture and stir together until the batter is slightly lighter and less pasty.  From then on, fold in ⅓ of the egg white mixture at a time until the mixture “flows like magma”.  The mixture should be smooth and run thick ribbons off the spatula.
  9. With a pastry bag fitted with a ½ in. plain tip, pipe 1¼ – 1½ in. rounds.
  10. The piped batter may have peaks but should smooth away in a minute or two.
  11. Let the batter stand until the tops of the macarons are dry to the touch, about 30 minutes to 1 hour.
  12. Preheat the oven to 325-350˚F.  If your oven tends to run hot go for 325˚F, if not then 350˚F.
  13. Lower the heat to from 350˚F to 300˚F. (If starting from 325˚F, lower to 275˚F.)
  14. Bake 10-12 minutes, until the feet are formed and the tops are smooth.  The macaron shell is done when you slightly wiggle it and it starts to come off of the parchment paper / silicone mat.
  15. Remove pan from oven and reheat oven to higher temperature for 10 minutes before baking the next tray, lowering the temperature when you start baking it.
  16. Continue until you bake all of the macaron shells.

For the Makgeolli Frosting:

Ingredients:
½ c. whole milk
½ c. makgeolli
3 tbsp. flour
⅛ tsp. salt
8 oz. (2 sticks) unsalted butter, room temperature
1 c. sugar
3-5 tbsp. makgeolli, as needed

Instructions:

  1. In a small saucier over medium heat, whisk milk, ½ c. makgeolli, salt and flour until combined.
  2. Continuously whisk mixture until thickened to a pudding like consistency.
  3. Once thickened, strain through a mesh strainer into a bowl with a spatula to remove lumps.
  4. Place a piece of plastic wrap directly on top of the flour mixture (to prevent skin from forming) and put bowl into the fridge until fully cool.
  5. In a mixer bowl fitted with the whisk attachment, mix the sugar and butter on high speed until fluffy and pale about, 5-10 minutes.
  6. Add the chilled flour mixture and continue to whip on high speed until the sugar is completely dissolved and the mixture is no longer gritty, about 5-10 minutes.
  7. Add 3 tablespoons of makgeolli and whip. If the frosting can use more flavor, add more tablespoons without compromising the texture of the buttercream. If you add too much liquid, the buttercream will break down and separate. Err on the conservative side.
  8. Pipe finished frosting onto cooled macaron shells and enjoy.

National Macaron Day 2020: Black Sesame Macarons


Open sesame. The sesame seed isn’t commonly used in American cuisine except for hamburger buns and it’s definitely not something that is synonymous to desserts. On the other hand, it is regularly used in Asian cuisine from sesame oil to garnishing almost every recipe with the tiny seed. So it’s not surprising that they also use it to flavor their desserts.


You can transform your everyday vanilla frosting into black sesame ones by adding black sesame paste. What does black sesame paste taste like? I would describe it as a nuttier, more roasted peanut buttery flavor or a stronger flavored tahini. It is too intense to eat straight out of the jar, which makes sense because it comes out of a tiny container.  It’s perfect for those who do not like desserts that are too sweet.

I painted my macarons with a little bit of edible food coloring and vodka. I think the black and copper make a pretty cool contrast. As a tip, try and use a drier brush when painting your macarons to keep the surface smooth. Too much liquid will turn the smooth shells into a bumpy texture.

It’s also National Macaron Day! If you’re quarantined and making macarons was something you’ve always wanted to try, this is a great time to hunker down and give these a try. It doesn’t have to be these macarons. I have so many fun flavors to try on the site!

Cereal Macarons with Cereal Milk Frosting
Chocolate Chestnut Macarons
Chocolate Frosted Flake Macarons
Coffee Macarons
Cookies and Cream Macarons
Funfetti Macarons
Injeolmi Macarons
Karamel Sutra Macarons
Lemon Basil Macarons
Okinawan Sweet Potato Macarons
Pumpkin Cookie Butter Macarons
Raspberry Rosé Macarons
Strawberry Macarons

Above all, stay healthy and safe. 🙂

Black Sesame Macarons

For the Macaron Shells:

Ingredients:

212 g. almond meal (aka almond flour)
212 g. powdered sugar
172 g. egg whites, divided to 82 g. and 90 g (aged, if possible)
236 g. sugar
158 g. water

Instructions:

  1. Line two baking sheets with parchment paper or silicone mats.
  2. In the bowl of a food processor, add the almond meal and powdered sugar and pulse until thoroughly combined.
  3. Sift the mixture over a large mixing bowl, throwing out the lumps as they appear.  Add 82 g. of the egg whites and stir until you get a thick mixture.
  4. In a small pot attached with a candy thermometer, combine the sugar and water over medium heat and boil until the syrup reaches 200˚F.
  5. Once the syrup reaches 200˚F, start whipping the remaining 90 g. in the bowl of your stand mixer with the whisk attachment on medium speed until soft peaks are reached.
  6. Once the syrup reaches 248 ˚F, remove the pot off the burner and slowly pour the syrup down the side of the mixing bowl with the egg whites on medium speed.
  7. Once the egg whites are fully incorporated, increase the speed to medium high until egg whites form glossy, stiff peaks.
  8. Mix a ⅓ of the egg white mix to the almond mixture and stir together until the batter is slightly lighter and less pasty.  From then on, fold in ⅓ of the egg white mixture at a time until the mixture “flows like magma”.  The mixture should be smooth and run thick ribbons off the spatula.
  9. With a pastry bag fitted with a ½ in. plain tip, pipe 1¼ – 1½ in. rounds.
  10. The piped batter may have peaks but should smooth away in a minute or two.
  11. Let the batter stand until the tops of the macarons are dry to the touch, about 30 minutes to 1 hour.
  12. Preheat the oven to 325-350˚F.  If your oven tends to run hot go for 325˚F, if not then 350˚F.
  13. Lower the heat to from 350˚F to 300˚F. (If starting from 325˚F, lower to 275˚F.)
  14. Bake 10-12 minutes, until the feet are formed and the tops are smooth.  The macaron shell is done when you slightly wiggle it and it starts to come off of the parchment paper / silicone mat.
  15. Remove pan from oven and reheat oven to higher temperature for 10 minutes before baking the next tray, lowering the temperature when you start baking it.
  16. Continue until you bake all of the macaron shells.

For the Black Sesame Frosting:

Ingredients:
½ c. whole milk
3 tbsp. flour
⅛ tsp. salt
4 oz. (1 stick) unsalted butter, room temperature
½ c. sugar
1 tsp. vanilla extract
2 tsp – 3 tsp black sesame paste

Instructions:

  1. In a small saucier over medium heat, whisk milk, salt and flour until combined.
  2. Continuously whisk mixture until thickened to a pudding like consistency.
  3. Once thickened, strain through a mesh strainer into a bowl with a spatula to remove lumps.
  4. Place a piece of plastic wrap on top of the flour mixture (to prevent skin from forming) and put bowl into the fridge until fully cool.
  5. In a mixer bowl fitted with the whisk attachment, mix the sugar and butter on high speed until fluffy and pale about, 5-10 minutes.
  6. Add the chilled flour mixture and continue to whip on high speed until the sugar is completely dissolved and the mixture is no longer gritty, about 5-10 minutes.
  7. Add the vanilla extract and sesame paste starting with 2 teaspoons and adding more if needed.
  8. Pipe finished frosting onto cooled macaron shells and enjoy.

Baymax Macarons

I’ve always been intimated by shaped macarons. If you look back on my archives, they’re mostly round with details added to them. But recently, I made Hello Kitty macarons and I learned that it is quite easy to do as long as you use a smaller piping tip. The key is understanding that macaron batter is not like frosting, it moves and doesn’t make crisp lines without help.
As you know, I have made Baymax macarons before, but never posted a tutorial on it. So this time, I added tiny hands to make it a little more dimensional and fun. I think that if you’ve made macaron batter before, then this is possibly the easiest shaped macaron you can do.
These were filled with black sesame frosting which was quite interesting, and have their own post coming up. But before I post that one,  I have an amazing chocolate banana bread recipe I want to share. So there is something to look forward to soon!

Baymax Macarons

You will need:

1 batch of basic macaron batter (recipe below)
frosting
edible black marker
wilton decorating tip, #2 (or any tiny round tip)
½ inch round decorating tip

Instructions:

  1. Prepare two piping bags each fitted with the ½ inch round tip and the #2 tip.
  2. Divide ⅞ of the batter into the ½ inch round tip bag and ⅛ of the batter into the #2 tip bag.
  3. On a baking sheet lined with a macaron template and parchment paper, pipe rounds of macarons as you usually would with the ½ inch round tip bag. (as shown in picture #1)
  4. Let the macarons set until dry, about 20 minutes. Then pipe tiny rounds on the bottom half of the macaron circles forming hands with the #2 tip bag. (as shown in picture #2)
  5. Bake macarons as usual. (as shown in picture #3)
  6. Once cool, find a match for each macaron sandwich. Sometimes the hands will not line up perfectly, that is okay.
  7. Using an edible marker, make two dots and a line in the middle forming Baymax’s face. (as shown in picture #4)
  8. Fill each half with frosting and sandwich together.
  9. Enjoy

Basic Macaron Batter

Ingredients:

212 g. almond meal (aka almond flour)
212 g. powdered sugar
172 g. egg whites, divided to 82 g. and 90 g (aged, if possible)
236 g. sugar
158 g. water

Instructions:

  1. Line two baking sheets with parchment paper or silicone mats.
  2. In the bowl of a food processor, add the almond meal and powdered sugar and pulse until thoroughly combined.
  3. Sift the mixture over a large mixing bowl, throwing out the lumps as they appear.  Add 82 g. of the egg whites and stir until you get a thick mixture.
  4. In a small pot attached with a candy thermometer, combine the sugar and water over medium heat and boil until the syrup reaches 200˚F.
  5. Once the syrup reaches 200˚F, start whipping the remaining 90 g. in the bowl of your stand mixer with the whisk attachment on medium speed until soft peaks are reached.
  6. Once the syrup reaches 248 ˚F, remove the pot off the burner and slowly pour the syrup down the side of the mixing bowl with the egg whites on medium speed.
  7. Once the egg whites are fully incorporated, increase the speed to medium high until egg whites form glossy, stiff peaks.
  8. Mix a ⅓ of the egg white mix to the almond mixture and stir together until the batter is slightly lighter and less pasty.  From then on, fold in ⅓ of the egg white mixture at a time until the mixture “flows like magma”.  The mixture should be smooth and run thick ribbons off the spatula.
  9. With a pastry bag fitted with a ½ in. plain tip, pipe 1¼ – 1½ in. rounds.
  10. The piped batter may have peaks but should smooth away in a minute or two.
  11. Let the batter stand until the tops of the macarons are dry to the touch, about 30 minutes to 1 hour.
  12. Preheat the oven to 325-350˚F.  If your oven tends to run hot go for 325˚F, if not then 350˚F.
  13. Lower the heat to from 350˚F to 300˚F. (If starting from 325˚F, lower to 275˚F.)
  14. Bake 10-12 minutes, until the feet are formed and the tops are smooth.  The macaron shell is done when you slightly wiggle it and it starts to come off of the parchment paper / silicone mat.
  15. Remove pan from oven and reheat oven to higher temperature for 10 minutes before baking the next tray, lowering the temperature when you start baking it.
  16. Continue until you bake all of the macaron shells.


Okinawan Sweet Potato Macarons

Okinawan Sweet Potato MacaronsThere isn’t much that I remember about living in Seoul, South Korea as a little girl. But one memory that lingers after all these years is how the streets were perfumed with the scent of roasted sweet potatoes in the winter. I don’t know how it is now, but back then the streets were filled with carts that sold perfectly roasted sweet potatoes. Roasted Korean sweet potatoes are very different from their American counterpart. They are insanely sweet and the flavor is chestnut-like. And unlike American sweet potatoes, they don’t get watery. Instead, they are more fibrous and hold their shape when peeled. For many years, I’ve tried to recapture that memory by roasting Korean sweet potatoes in my oven. The smell was spot on, but I couldn’t get that same roasted taste that I remembered.
Okinawan Sweet Potato MacaronsThere is a Korean market that I stop by for snacks when I’m at my local Laundromat. If you stop by in the colder months, there is a small machine that churns out roasted sweet potatoes and the whole store smells has that warm roasty toasty smell. Anyways, after having one that was properly roasted, I became obsessed with trying to recreate it at home and scoured the internet on how to do it. I finally came upon a blog that featured this pot and after finding it in a Korean supermarket (It’s so much cheaper. I got it for less than $20 because it was on sale), I gave it a try and I finally reached sweet potato nirvana. Tip: The instructions say to roast on medium heat for 20-30 minutes but I found that roasting for about an hour on low heat produces the best results.
Okinawan Sweet Potato MacaronsArmed with my new roasting pot, I wanted to feature sweet potatoes differently and made these macarons. Purple sweet potatoes are just as sweet but not as flavorful as their yellow cousins. However, I couldn’t resist their beautiful purple flesh. I suppose I could’ve made the frosting a vibrant purple by adding a little food dye, but I wanted you to be able to see what it would look like without it. The best part about the frosting is that it takes just one stick of butter and about ¾ cup of powdered sugar (which just might be perfect for filling cakes for babies since you are using minimal sugar).
Okinawan Sweet Potato MacaronsCan you tell that I originally made these for Valentine’s Day? The purple ombre effect is easy to achieve by using an edible food color spray can. They’re easy enough to find on amazon. You want to be careful to be light handed or you will end up spraying the entire macaron purple. This is especially true if your spray can is new. There are so many options out there, I feel like you have a rainbow at your fingertips and it’s an easy way to spruce up a plain macaron.
Okinawan Sweet Potato MacaronsEven if you don’t decorate it, they’re definitely worth giving a try and best eaten within two days. Since the frosting has low butter/sugar content, it will turn your macarons soggy as the days go by.

Okinawan Sweet Potato Macarons

For the macaron shells:

Ingredients:
212 g. almond meal
212 g. powdered sugar
172 g. egg whites, divided to 82 g. and 90 g
236 g. sugar
158 g. water
purple edible spray paint
heart sprinkles
white pearl sprinkles

Instructions:

  1. Line two baking sheets with parchment paper or silicone mats.
  2. In the bowl of a food processor, add the almond meal and powdered sugar and pulse until thoroughly combined.
  3. Sift the mixture over a large mixing bowl, throwing out the lumps as they appear.  Add 82 g. of the egg whites and stir until you get a thick mixture.
  4. In a small pot attached with a candy thermometer, combine the sugar and water over medium heat and boil until the syrup reaches 200˚F.
  5. Once the syrup reaches 200˚F, start whipping the remaining 90 g. in the bowl of your stand mixer with the whisk attachment on medium speed until soft peaks are reached.
  6. Once the syrup reaches 248 degrees, remove the pot off the burner and slowly pour the syrup down the side of the mixing bowl with the egg whites on medium speed.
  7. Once the egg whites are fully incorporated, increase the speed to medium high until egg whites form glossy, stiff peaks
  8. Mix ⅓ of the egg white mix to the almond mixture and stir together until the batter is slightly lighter and less pasty.  From then on, fold in ⅓ of the egg white mixture twice until the mixture “flows like magma”.  The mixture should be smooth and run thick ribbons off the spatula.
  9. Fill batter in a pastry bag fitted with a ½ in. plain tip.
  10. The piped batter may have peaks but should smooth away in a minute or two. Sprinkle the top of the macaron batter with the pearl and heart sprinkles. Let the batter stand until the tops of the macaron batter are dry to the touch, about 30 mins to 1 hour.
  11. Preheat the oven to 350˚F.
  12. Once you place the macarons in the oven, reduce the heat to 300˚F. Bake 10-13 minutes, until the feet are formed and the tops are smooth.  The macarons are done when you slightly wiggle them and they start to come off of the parchment paper / silicone mat.
  13. Once you remove the macarons, reheat the oven to 350˚F for ten minutes before baking another pan of macarons at 300˚F.
  14. Once the shells are cool, spray one side of the macarons lightly about 7 inches away from the surface. Fill with frosting.

Okinawan Sweet Potato Frosting

Ingredients:
1 ½ lb Okinawan sweet potatoes, roasted (about 3 medium potatoes)
4 oz. (one stick) unsalted butter
¾ – 1 c. powdered sugar

Instructions:

  1. Peel the outer skin of the sweet potatoes and put them the food processor.
  2. Puree the sweet potatoes until very smooth and silky. Set aside.
  3. In a bowl of a standing mixer fitted with the whisk attachment, whip the butter until light and fluffy.
  4. Add in ¾ c. of the powdered sugar and the sweet potato puree and whip until a smooth frosting forms. If not sweet enough, add the remaining ¼ c. powdered sugar and whip until smooth. Fill the macarons.

2016: A Year Recap

This was my #1 post this year.

I’m not sorry to see 2016 go. I kind of felt like it could be salvaged until Carrie Fisher died. That kind of gave it the nail in the coffin. It was as if 2016 was saying, “Sayonara, sucker!” while waving a rude gesture. I’m not quite looking forward to 2017 either, the exception being that I am looking forward to creating more projects for you and sharing this and that about my life (hopefully good news, and not bad). By the way, I did finish the holiday cake I was raving about in my last post. Unfortunately, I came down with a severe case of sinusitis and I couldn’t work on the actual post. I think I will save it for 2017. (Side note: I hope unicorns are still relevant by this point next year.)

top posts 2016

Here are the top 10 posts from this year:

  1. Lucky Charms Cake (featured in beginning of post)
  2. Blueberry Cruffins (Croissant + Muffin)
  3. Paw Patrol Cake
  4. Bacon Wrapped Meatloaf with Brown Sugar Ketchup Glaze
  5. Red Velvet Rose Pavlova
  6. Strawberry Ombre Cake
  7. Conversation Heart Macarons with Vanilla Elderflower Frosting
  8. Croquembouche with Vanilla Orange Blossom Pastry Cream
  9. Star Wars Mini Doughnuts – Part 1 & 2
  10. Calcifer Meringues

As always, thank you for sticking with me. I mean every word of it.

Raspberry Rosé Macarons

Raspberry Rosé MacaronSummer is quickly nearing its end and I felt like I had to make something “summer” before it became too late. When I look back on the summer of 2016, I would have to say that it was the summer of rosé. The internet has been buzzing with things from made from rosé such as frozé (frozen, slushy like rosé) and rosé gummy bears with thousands of people on their wait list. It is the prettiest out of all the wines and (for this wine newb) the tastiest.
Rosé MacaronSo I set out to make the prettiest macarons I could dream of. The pinks in the macaron shells are inspired by the many pink hues of rosé and the filling is a raspberry rosé frosting. To get it to taste like rosé, I used sparkling wine flavoring and also boiled down one cup of rosé to a mere 1/4 cup. (The process goes quick because of the alcohol content.)
Raspberry Rosé MacaronsRosés tend to have a fruity note so I wanted to add a raspberry flavoring. The raspberry flavor comes from powdered freeze dried raspberries (I got mine from Trader Joe’s.). As much as I love fresh fruit in my frosting, I knew I was adding more liquid with the rosé so this was a great way to decrease the liquid content without compromising the flavor. The raspberries have seeds in them so if you do not want seeds in your frosting, use a fine mesh strainer to sort them out.
Raspberry MacaronsThe end result is a definite raspberry flavor with a hint of rosé that grows stronger at the end. I think the way you perceive rosé is different for each person. My sister said she barely tasted it while other people said they could definitely taste it. Either way it is not straight up raspberry, there is something different about it.

Raspberry Rosé Macarons

For the macaron shells:

Ingredients:
212 g. almond meal
212 g. powdered sugar
172 g. egg whites, divided to 82 g. and 90 g
236 g. sugar
158 g. water
edible silver stars
edible pink shimmer powder
light pink gel food coloring
pink gel food coloring

Instructions:

  1. Line two baking sheets with parchment paper or silicone mats.
  2. In the bowl of a food processor, add the almond meal and powdered sugar and pulse until thoroughly combined.
  3. Sift the mixture over a large mixing bowl, throwing out the lumps as they appear.  Add 82 g. of the egg whites and stir until you get a thick mixture.
  4. Separate the almond flour mixture into two bowls (253 g. each). Mix one bowl with light pink gel food coloring and the other with pink food coloring.
  5. In a small pot attached with a candy thermometer, combine the sugar and water over medium heat and boil until the syrup reaches 200˚F.
  6. Once the syrup reaches 200˚F, start whipping the remaining 90 g. in the bowl of your stand mixer with the whisk attachment on medium speed until soft peaks are reached.
  7. Once the syrup reaches 248 degrees, remove the pot off the burner and slowly pour the syrup down the side of the mixing bowl with the egg whites on medium speed.
  8. Once the egg whites are fully incorporated, increase the speed to medium high until egg whites form glossy, stiff peaks
  9. Mix a ⅙ of the egg white mix to the light pink almond mixture and stir together until the batter is slightly lighter and less pasty.  From then on, fold in ⅙ of the egg white mixture twice until the mixture “flows like magma”.  The mixture should be smooth and run thick ribbons off the spatula. Repeat with the pink almond mixture.
  10. With a pastry bag fitted with a ½ in. plain tip, paint stripes in the inside of the pastry bag with the pink gel food coloring.
  11. Fill half of the pastry bag with the light pink and the other half with the pink batter. Pipe 1¼ – 1½ in. rounds.
  12. The piped batter may have peaks but should smooth away in a minute or two. Sprinkle the top of the macaron batter with tiny silver stars. Let the batter stand until the tops of the macaron batter are dry to the touch, about 30 mins to 1 hour.
  13. Preheat the oven to 350˚F.
  14. Once you place the macarons in the oven, reduce the heat to 275˚F. Bake 10-13 minutes, until the feet are formed and the tops are smooth.  The macarons are done when you slightly wiggle them and they start to come off of the parchment paper / silicone mat.
  15. Once you remove the macarons, reheat the oven to 350˚F for ten minutes before baking another pan of macarons at 275˚F.
  16. Let cool and dust the tops with pink shimmer dust. Fill with frosting.

Raspberry Rosé Frosting

Ingredients:
1 c. whole milk
¼ c. flour
a pinch of salt
8 oz. (2 sticks) unsalted butter, room temperature
1 c. sugar
1 ½ tsp. sparkling wine flavor
1 c. rosé wine
3 tbsp. powdered freeze dried raspberries

Instructions:

  1. In a small pot, boil 1 c. of wine until ¼ c. remains. Let cool and set aside.
  2. In a saucier pan, put milk, salt and flour and whisk until combined on medium heat.
  3. Continuously whisk mixture until thickened to a pudding like consistency.
  4. Once thickened, strain through a mesh strainer into a bowl with a spatula to remove lumps.
  5. Place a piece of plastic wrap on top of the flour mixture and put into the fridge until fully cool.
  6. In a mixer bowl fitted with the whisk attachment, mix the sugar and butter on high speed until fluffy and pale about, 5-10 minutes.
  7. Add the chilled flour mixture and continue to whip on high speed until the sugar is completely dissolved and the mixture is no longer gritty, about 5-10 minutes.
  8. Add the rosé, freeze dried raspberries, sparkling wine flavoring and mix until combined.

Giant Macaron Ice Cream Sandwich Cake

Giant Macaron Ice Cream Sandwich CakeYou guys, I’m obsessed with the tv show, ”Girls”. That is the reason why this post is so late. All of my free time has been going to binge watching this show. If you’ve never watched it, I would describe it as “Friends” and “Sex and the City” put together except it doesn’t have the laugh track and is somehow more real and dark and relatable and freaking awesome. Before the show, I always wondered why they casted Adam Driver as Kylo Ren in “Star Wars: The Force Awakens”. But after watching this show, I realized that the man can act. I love his character, Adam, in “Girls” because he’s SO weird and so honest. I always find weird people fascinating, and this is probably why he is so intriguing to me.
Giant Macaron Ice Cream Sandwich CakeI originally wanted to post this before Memorial Day because to me, Memorial Day is the green light of the year to start eating ice cream again. I know, I know… True die-hard fans of ice cream always say that you can have ice cream any day of the year, but when I’m freezing and my fingertips feel like ice, ingesting something that is as just cold is unpleasant to me. But Memorial Day has now passed and this needs to be shared with the internet community as soon as possible.
Giant Macaron Ice Cream Sandwich CakeMacaron ice cream sandwiches are just like regular ice cream sandwiches but instead of cookies, you use macaron shells. Since my sister’s birthday was coming up, and she loves ice cream, coffee and only the shells of macarons (not so much the filling, which I never understood) I figured that this was the perfect cake for her. Filled with layers of homemade crunchies, Ben and Jerry’s coffee coffee buzz buzz buzz (my sister’s favorite ice cream), and layered with two giant macaron shells, it’s chocolaty, cold, and smooth with crunchy and chewy textural differences from the macaron shells and the crunchies.
Giant Macaron Ice Cream Sandwich CakeI did make a pattern for the top macaron shell by drawing streaks of gel food coloring on the inside of my piping bag, but it’s not necessary for the cake. Basically, if you made macaron shells before, it’s pretty much the same thing except that you are making two giant shells. You will have leftover batter which you can use to make regular sized macaron shells. You should also take caution and remember that the batter will spread a bit. I didn’t think of this possibility, which made my macaron shells a little larger than I wanted, but in hindsight, it gave me enough room to cover the outside with cool whip, which helped give it a super smooth outside and keep the ice cream from leaking and hold its shape.
Giant Macaron Ice Cream Sandwich CakeIt is so worth the time. If you like macarons and ice cream, this is the cake for you. The best part? You can totally customize this by coloring the macaron shell and changing up the ice cream flavors.
Giant Macaron Ice Cream Sandwich CakeNot really feeling this ice cream cake? Here are some of my previous ice cream cake recipes:

The Ultimate Oreo Ice Cream Cake with Homemade Crunchies
Tiramisu Crunch Ice Cream Cake

Giant Macaron Ice Cream Sandwich Cake

You will need:

Two 8-inch macaron shells (recipe below)
4 pints of Ben and Jerry’s coffee coffee buzz buzz buzz, softened
1 batch of homemade crunchies (recipe below)
cool whip

Instructions

  1. Try to prep the ice cream cake a day before you want to serve it. You want the ice cream layer to be as firm as possible.
  2. In an 8-inch cake pan with high sides (at least 3-inches), use plastic wrap to line the bottom and the sides, letting it overhang over the pan.
  3. Spread a third of the homemade crunchies on the bottom, then layer 2 pints of the ice cream on top.
  4. Layer another third of the crunchies on top of the ice cream, and then layer the other 2 pints of ice cream, finally topping the top with the last third of the crunchies.
  5. Wrap the cling film over the top of the ice cream cake and place in the freezer. Freeze until firm, preferably overnight.
  6. When you are ready to assemble your ice cream cake, place one macaron shell, flat-side facing up on a cake stand.
  7. Remove the cake pan from the freezer and slide the ice cream layer out and place it on top of the macaron shell.
  8. Place the other macaron shell, domed side facing up on top of the ice cream layer.
  9. Use the cool whip around the ice cream layer to smooth the cake trying not to get it on the macaron shell. You want it to have smooth sides and look like an even ice cream sandwich.
  10. Place back in the freezer for at least two hours, or until cool whip is firm to the touch.
  11. The colder the ice cream cake is, the cleaner the cuts you will make.

Giant Macaron Shells

Ingredients:
212 g. almond meal
212 g. powdered sugar
172 g. egg whites, divided to 82 g. and 90 g
236 g. sugar
158 g. water
brown food color

Instructions:

  1. On a parchment paper that is the size of a baking sheet, draw an 8 inch circle with a pencil. Repeat with another parchment paper.
  2. Line two baking sheets with the parchment paper, pencil side down.
  3. In the bowl of a food processor, add the almond meal and powdered sugar and pulse until thoroughly combined.
  4. Sift the mixture over a large mixing bowl, throwing out the lumps as they appear.  Add 82 g. of the egg whites and stir until you get a thick mixture.
  5. Add the brown food coloring to the almond paste to get the color you desire.
  6. In a small pot attached with a candy thermometer, combine the sugar and water over medium heat and boil until the syrup reaches 200˚F.
  7. Once the syrup reaches 200˚F, start whipping the remaining 90 g. in the bowl of your stand mixer with the whisk attachment on medium speed until soft peaks are reached.
  8. Once the syrup reaches 248 degrees, remove the pot off the burner and slowly pour the syrup down the side of the mixing bowl with the egg whites on medium speed.
  9. Once the egg whites are fully incorporated, increase the speed to medium high until egg whites form glossy, stiff peaks
  10. Mix a ⅓ of the egg white mix to the almond mixture and stir together until the batter is slightly lighter and less pasty.  From then on, fold in ⅓ of the egg white mixture at a time until the mixture “flows like magma”.  The mixture should be smooth and run thick ribbons off the spatula.
  11. In a pastry bag fitted with the largest plain piping tip that you have, paint about 8 vertical lines along the inside of the piping bag using a clean food-use-only paintbrush and the brown food gel color.
  12. Fill the piping bag with the macaron batter.
  13. Pipe the batter onto the parchment paper in a tight spiral pattern until you get to the edge of the 8-inch circle that you drew. You should have a concentric circle pattern of brown circles. Take a toothpick and draw lines into the center through the brown circles to create a pattern. This will be the top macaron shell.
  14. Fill the piping bag with more batter and pipe another large circle. There may or may not be a pattern here because you already piped out the first circle. If there isn’t, there is no need to stress because this will be the bottom shell.
  15. If there is leftover batter, feel free to pipe out some normal sized macarons for later use.
  16. The piped batter may have peaks but should smooth away in a minute or two.  Let the batter stand until the tops of the macaron batter are dry to the touch, about 30 mins to 1 hour.
  17. Preheat the oven to 350˚F.
  18. Once you place the macarons in the oven, reduce the heat to 275˚F. Bake 15-18 minutes for the large shells, 10-13 for the small shells, until the feet are formed and the tops are smooth.
  19. Once you remove the macarons, reheat the oven to 350˚F for ten minutes before baking another pan of macarons at 275˚F.
  20. Let cool and fill.

Homemade Crunchies

Ingredients:
30 Oreo cookies
1 – 7.25 oz. bottle of Magic Shell ice cream topping

Instructions:

  1. Using a food processor, Crush Oreos into even crumbs.
  2. In a medium bowl, mix cookie crumbs and ice cream topping until each crumb is well coated.
  3. Reserve for later use.

*Homemade crunchies recipe from Our Best Bites.

Jackson Pollock Macarons

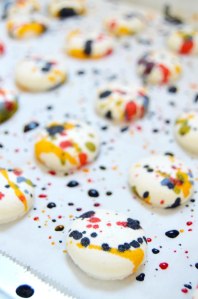
Jackson Pollock MacaronsThere is a store called “Marbles: The Brain Store” in my local mall. As the name suggests, the store mainly sells puzzles and games that exercise your brain. I ended up stopping by a few years ago with my friends and while we were browsing, we noticed a display of various puzzles. When one of us picked up a jigsaw puzzle of Jackson Pollock’s Convergence, a store clerk leaned over to us and commented, “I’ve never seen anyone complete it.” Of course after a comment like that, we HAD to take it home and try to solve it. A few years later, it’s still incomplete and sitting in my room.Jackson Pollock MacaronsJackson Pollock MacaronsThese macarons are inspired by my incomplete puzzle. I’ve done paint strokes on my macarons before and the difference between the strokes and the splatters is the amount of liquid you add to the food coloring. In order to make your splatters look imperfect and messy, you need to dilute your gel food coloring with a generous dose of vodka.Jackson Pollock MacaronsJackson Pollock Macarons Jackson Pollock Macarons Jackson Pollock MacaronsJackson Pollock Macarons Jackson Pollock MacaronsI’ve done the splatters two ways, and I believe it works the best when you arrange your macarons side by side as if you’re creating a blank canvas for a painting. If you leave the gaps in between the macarons like my first try, you’ll miss the trail of paint that makes it look so convincing and similar to Pollock’s work. I absolutely love the effect that it makes. Try to get a small bit of each color on every macaron so that when you get the full effect for each macaron.
Jackson Pollock MacaronsJackson Pollock MacaronsAs fun as it is to splatter food coloring everywhere, I will leave you with a word of warning. The food coloring will get everywhere. It will get on your counter, on your clothes, and on your skin. My best advice is to lay a layer of paper towels on your work surface and wear an apron before you start. Now go satisfy your inner artist and have fun.Jackson Pollock MacaronsJackson Pollock Macarons

Jackson Pollock Macarons

You will need:

1 batch of vanilla macarons (recipe below)
1 batch vanilla frosting (recipe below)
red gel food coloring
yellow gel food coloring
blue gel food coloring
black gel food coloring
vodka

Instructions:

  1. Cover your work surface with a layer of paper towels.
  2. Arrange your unfilled macaron shells closely in a square/rectangular shape.
  3. In four plastic cups, place a few drops of gel food coloring in each cup.
  4. Dilute each color with a tablespoon of vodka and mix until your desired color is reached.
  5. Using a clean, food use only paint brush, saturate your brush with the yellow paint and use a flicking motion with your wrist to create a splatter pattern on your macarons.
  6. Once done, thoroughly clean your brush with water and dry as well as you can with a paper towel before repeating step 5 with a different color.
  7. Let macarons dry completely before filling and sandwiching them with your vanilla frosting.

Vanilla Macarons

Ingredients:

212 g. almond meal
212 g. powdered sugar
172 g. egg whites, divided to 82 g. and 90 g
236 g. sugar
158 g. water

Instructions:

  1. Line two baking sheets with parchment paper or silicone mats.
  2. In the bowl of a food processor, add the almond meal and powdered sugar and pulse until thoroughly combined.
  3. Sift the mixture over a large mixing bowl, throwing out the lumps as they appear.  Add 82 g. of the egg whites and stir until you get a thick mixture.
  4. In a small pot attached with a candy thermometer, combine the sugar and water over medium heat and boil until the syrup reaches 200˚F.
  5. Once the syrup reaches 200˚F, start whipping the remaining 90 g. in the bowl of your stand mixer with the whisk attachment on medium speed until soft peaks are reached.
  6. Once the syrup reaches 248 degrees, remove the pot off the burner and slowly pour the syrup down the side of the mixing bowl with the egg whites on medium speed.
  7. Once the egg whites are fully incorporated, increase the speed to medium high until egg whites form glossy, stiff peaks
  8. Mix a ⅓ of the egg white mix to the almond mixture and stir together until the batter is slightly lighter and less pasty.  From then on, fold in ⅓ of the egg white mixture at a time until the mixture “flows like magma”.  The mixture should be smooth and run thick ribbons off the spatula.
  9. With a pastry bag fitted with a ½ in. plain tip, pipe 1¼ – 1½ in. rounds.
  10. The piped batter may have peaks but should smooth away in a minute or two.  Let the batter stand until the tops of the macaron batter are dry to the touch, about 30 mins to 1 hour.
  11. Preheat the oven to 350˚F.
  12. Once you place the macarons in the oven, reduce the heat to 275˚F. Bake 10-13 minutes, until the feet are formed and the tops are smooth.  The macarons are done when you slightly wiggle them and they start to come off of the parchment paper / silicone mat.
  13. Once you remove the macarons, reheat the oven to 350˚F for ten minutes before baking another pan of macarons at 275˚F.
  14. Let cool and fill.

Vanilla Frosting

Ingredients:

1 c. whole milk
¼ c. flour
a pinch of salt
8 oz. (2 sticks) unsalted butter, room temperature
1 c. sugar
2 tsp. vanilla extract

Instructions:

  1. In a saucier pan, put milk, salt and flour and whisk until combined on medium heat.
  2. Continuously whisk mixture until thickened to a pudding like consistency.
  3. Once thickened, strain through a mesh strainer into a bowl with a spatula to remove lumps.
  4. Place a piece of plastic wrap on top of the flour mixture and put into the fridge until fully cool.
  5. In a mixer bowl fitted with the whisk attachment, mix the sugar and butter on high speed until fluffy and pale about, 5-10 minutes.
  6. Add the chilled flour mixture and continue to whip on high speed until the sugar is completely dissolved and the mixture is no longer gritty, about 5-10 minutes.
  7. Add the vanilla extract and mix until combined.


Lucky Charms Cake

lucky charms cakeI’m pretty sure everyone is already saying this, but how is it already March? I’m definitely not complaining since I absolutely adore warm weather and I’m dying to be able to wear dresses without tights. As spring quickly approaches, the next holiday around the corner would be St. Patrick’s Day. Even closer is National Cereal Day, which is on March 7th. So I figured that I might as well tie up both and make this cake.
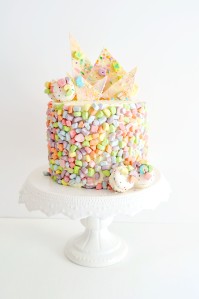
DSC_0584I’ve been thinking of something similar to this when I bought a bag full of “Lucky Charms” marshmallows. I say it in quotes because while it tastes very similar to the marshmallows in the cereal, the shapes of these marshmallows are less detailed and smaller. (I’m thinking it’s a copyright issue.) Either way, I wasn’t about to pick out each marshmallow from a box of Lucky Charms cereal, so I used this to decorate the outside of the cake. What is really funny is, that over time, the marshmallows will rehydrate from the frosting giving it a similar flavor and texture to a dehydrated marshmallow that was sitting in a pool of milk. They become darker in color and squishy and so this cake is best eaten the day it is baked.
DSC_0504The inside of the cake is frosted with cereal milk frosting, (like the one I posted in my cereal macaron post) but instead of Frosted Flakes, I used Lucky Charms cereal. The cereal milk turns a pale green and I think it’s perfect for the theme. The cake itself is funfetti since I was going along with the rainbow color scheme.
DSC_0526My absolute favorite part of the cake is the Lucky Charms bark I made from the marshmallows, different colors of candy melts and chock full of every kind of decorative sprinkle. You start off with a melted slab of white candy melt and swirl different colors of melted candy melts using a toothpick and then swipe along the top with an offset spatula. It blends beautifully and makes a watercolored candy bark. Then you pretty much go ham with however you want to top it. I think it’s important to restrain yourself when you do this so that you can still see the colors of the bark.
DSC_0578I had some confetti macaron shells leftover from a baking order, so I stuck some marshmallow pieces on top of it and decorated the cake, but really, I don’t think it’s worth baking a whole batch of macarons for this. If you have it, great and if it not, it still looks beautiful without it. I should warn you that this is a very sweet cake. I suppose it shouldn’t come as a surprise given the funfetti inside and the marshmallows and candy outside. But it’s so stunning, I think it’s worth the sugar overload.

Lucky Charms Cake

Funfetti Buttermilk Cake (recipe below)
Lucky Charms Cereal Milk Frosting (recipe below)
Vanilla Swiss Meringue Buttercream (recipe below)
Lucky Charms Marshmallows
Lucky Charms Bark (recipe below)
Funfetti Macarons (optional, recipe in this post)

Instructions:

  1. Evenly fill and stack each layer of funfetti cake with cereal milk frosting.
  2. Crumb coat the cake with a thin layer of the remaining cereal milk frosting
  3. Place cake in freezer for 5 minutes until the frosting on the outside sets firmly.
  4. Once crumb coat is set, frost the entire cake with swiss meringue buttercream.
  5. Take a handful of marshmallows and slowly cup the outside of the cake, patting it to ensure full coverage.
  6. Let the outside set in freezer for 5 minutes.
  7. Take cake out and top the cake with shards of Lucky Charms bark and macarons if desired.

Funfetti Buttermilk Cake

Ingredients:

2 c. cake flour
1⅓ c. sugar
¾ tbsp. baking powder
¼ tsp. salt
¾ c. buttermilk, divided
6 oz. unsalted butter, room temperature
3 eggs, room temperature
1 ½ egg yolks
1 ½ tsp. vanilla extract
¾ c. rainbow sprinkles

Instructions:

  1. Preheat the oven to 350˚F and line four 6-inch cake pans with parchment paper.
  2. In a bowl of a standing mixer with the paddle attachment, add flour, sugar, baking powder, and salt. Mix until combined.
  3. On low speed, add ½ c. buttermilk and butter and mix until combined.
  4. In a separate bowl, whisk eggs, egg yolks, ¼ c. buttermilk, and vanilla extract until homogeneous.
  5. On low speed, slowly add the egg mixture to the flour mixture.
  6. Increase speed to medium, and mix until combined.
  7. Fold in sprinkles into the batter.
  8. Evenly divide cake batter into the four cake pans.
  9. Bake about 20-25 minutes until cake is done or until a toothpick inserted into the center comes out clean.
  10. Let cool in pan for 10 minutes, and then move onto a cooling rack until completely cool.

Lucky Charms Cereal Milk Frosting (for the filling)

Ingredients:

1½ c. cereal milk (recipe below)
1/4 c. flour
½ tsp. kosher salt
8 oz. (2 sticks) unsalted butter, room temperature
¾ c. sugar
½ tsp. vanilla extract

Instructions:

  1. In a small pot over medium heat, whisk milk, salt and flour until combined.
  2. Continuously whisk mixture until thickened to a pudding like consistency.
  3. Once thickened, strain through a mesh strainer into a bowl with a spatula to remove lumps.
  4. Place a piece of plastic wrap on top of the flour mixture (to prevent skin from forming) and put bowl into the fridge until fully cool.
  5. In a mixer bowl fitted with the whisk attachment, mix the sugar and butter on high speed until fluffy and pale about, 5-10 minutes.
  6. Add the chilled flour mixture and continue to whip on high speed until the sugar is completely dissolved and the mixture is no longer gritty, about 5-10 minutes.
  7. Add the vanilla extract and mix until combined.

Cereal Milk

Ingredients:

3 ½ c. Lucky Charms cereal
4 c. whole milk, cold

Instructions:

  1. In a large bowl, mix cereal and milk and steep for 30 minutes, until cereal is soggy.
  2. Strain mixture through a fine mesh strainer. (Do not force mixture through mesh strainer. The resulting milk will be starchy and thicker than what you started with.)

Vanilla Meringue Buttercream (for the outside)

Ingredients:

1 c. sugar
4 large egg whites
3 sticks unsalted butter
1 tsp. vanilla extract

Instructions:

  1. Simmer an inch of water in a medium pot.
  2. In the bowl of a standing mixer, whisk egg whites and sugar together.
  3. Place the bowl over the pot of simmering water and whisk the egg white and sugar mixture continuously until the mixture becomes lighter and no longer grainy.
  4. Remove the bowl from the pot and transfer the bowl into the mixer fitted with a whisk attachment.
  5. Mix on high until mixture becomes white and fluffy, and cool (check for this by seeing if the outside of the bowl is cool to the touch).
  6. Add in vanilla extract and butter one stick at a time until a silky smooth frosting forms.

Lucky Charms Bark

Ingredients:

white candy melts
yellow candy melts
orange candy melts
sky blue candy melts
pink candy melts
purple candy melts
Lucky Charms cereal marshmallows
any type of sprinkles you would like to use

Instructions:

*Note: You want to move fast before the candy melts set. Try to have all of the sprinkles, marshmallows, and candy melts out and on hand before you start this recipe.

  1. Line a sheet pan with wax paper.
  2. Melt white candy melts in a bowl and spread thinly in a rectangular shape onto the wax paper.
  3. On a separate plate, melt about 3-4 disks of each color of the candy melt separately,
  4. Using a toothpick, make swirls of different colors all over the slab of white candy melt.
  5. Using an offset spatula, smooth the top of the bark in one fluid horizontal stroke.
  6. Place the marshmallows and sprinkles before the candy bark sets.
  7. Before the candy bark sets completely, (when it is similar to very soft chocolate) take a sharp knife and score shards of candy bark by making triangular shapes into the candy melt.
  8. When the candy bark sets, break along the lines you made with your knife.

Weekday Update

pink swirl cakeIt’s been a quiet few weeks on the busy spatula. Mostly, I’ve been busy filling cake orders and baking here and there. Not enough photos to write an actual blog about, but just enough for a glimpse of what’s been going on. (If you follow me on Instagram, you probably saw some of these already.)

Pink and Gold Swirl Cake – It’s such a whimsical cake, I couldn’t help taking close up photos of this one. Swirled with pastel pink and white frosting then filled to the brim with pearls, gold stars, and dragees. It was four layers of chocolate cake filled with toffee coffee frosting.

DSC_0487DSC_0428DSC_0475DSC_0477

Baymax Macarons – I wanted to post these for Valentine’s Day, but I never had the time. Place a few red heart sprinkles on each macaron and draw in two circles and connect with a line with a black edible color marker. I filled the inside with some leftover strawberry frosting. So simple and very cute.

baymax macarons baymax macarons

Pink Ombre Ranunculus Cake – The inside of this cake was layered with layers of pink ombre cake. Filled with fresh strawberry frosting and topped with fresh ranunclus, it was so pretty. I originally wanted peonies, but the florist didn’t have any that were in bloom. Did you know that you had to order peonies in advance? I never knew.

pink ombre flower cakeranunculus flowers on cake