What are you doing this Valentine’s Day? I think Mr. Spatula and I are going to stay in and cook up something tasty. It’s a little different from our usual tradition which consists of going out to a good restaurant and eating delicious food while people-watching other couples. I’d like to think that while many restaurants are no-gos for many of us, that we are all enjoying a delicious meal with our loved ones. Because breaking bread together is always one of the best ways to share love.
This cheesecake bar really is a marriage of a lemon bar with the hint of lemon and the shortbread crust and a creme brûlée cheesecake. The sugar torched topping is not an option. It really gives it the perfect crisp shell for a dessert that is fitting for Valentine’s day. I used Meyer lemons because they’re in season and they’re less intense than lemons. But if you can’t get your hands on Meyer lemons, please feel free to use regular lemons. Just expect a more lemon-y punch. 🙂
Left: Before Torching | Right: After Torching
Meyer Lemon Creme Brûlée Cheesecake Makes about 12 servings, pending on how you large you make your squares
Ingredients:
For the crust: 8 tbsp. (1 stick) unsalted butter, room temp. ½ c. (100 g.) sugar 1 tbsp. Meyer lemon zest (be careful to not grate the pith of the lemon – the white part) ½ tsp. vanilla extract 1 c. (120 g.) all purpose-flour ¼ tsp. kosher salt
For the filling: 8 oz. (1 box) cream cheese, softened 14 oz. sweetened condensed milk 1 egg, large, room temp. 1 tbsp. Meyer lemon zest (be careful to not grate the pith of the lemon – the white part) ⅓ c. Meyer lemon juice a pinch of kosher salt
For the burnt sugar crust: Granulated sugar, as needed (if you have caster sugar, this is the time to use it)
Instructions:
Preheat the oven to 350°F. Grease and line an 8×8 inch baking pan with parchment paper. (This will make it much easier to remove the cheesecake.)
In the bowl of a standing mixer fitted with the paddle attachment, mix the butter, sugar, lemon zest and vanilla on medium speed until well combined.
Switch the mixer speed to low and in the flour and salt, mixing until just combined.
Press the dough into the prepared baking pan, trying to get it as even of a layer as possible.
Refrigerate the baking pan with the dough while you prepare the cheesecake layer.
In the bowl of a standing mixer fitted with the paddle attachment (or in another bowl using a handheld mixer), mix the cream cheese on medium speed until smooth. Scrape down the sides.
Add the sweetened condensed milk, mix on medium speed and scrape down the sides again.
Add the egg, lemon zest and juice and mix on medium-low speed, scrape down the sides and mix again until homogenous.
Remove the pan from the fridge, pour in the cheesecake filling and bake in the oven for about 20-25 minutes, or until the filling does not jiggle when you lightly shimmy the pan.
Remove cheesecake from the oven, and let cool completely.
Refrigerate cheesecake until firm.
Cut the cheesecake into the number of slices that you want.
Sprinkle sugar over the cheesecake evenly, and use your kitchen torch to heat the tops of the cheesecake until amber – a spotted dark brown. (If you don’t have a kitchen torch, you can apparently do this under a broiler. But I’ve never tried and would advise that you keep a close eye on the caramelizing sugar.)
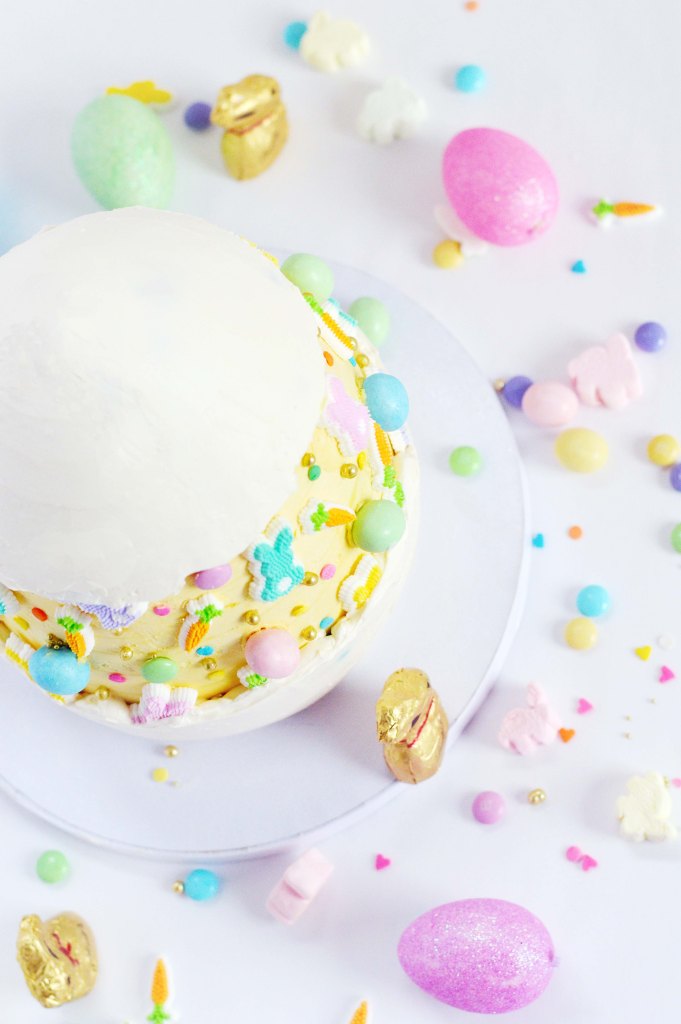
I can’t believe Easter is this Sunday! I don’t know about you, but personally, all the days seem to blend together these days. (I honestly thought today was Saturday and was panicking that I didn’t write this up fast enough for you guys.) Like most holidays, Easter was the most memorable to me as a kid. While I never got to participate in Easter egg hunts, I knew I would get some sort of treat at church. Whether it was opening up the contents of a hollow plastic egg, or getting a chocolate bunny, it was a day of celebration and joy. As an adult, Easter arrives with a depth of meaning but that undertone of childlike excitement still persists in my heart.
A year ago, faultline cakes became super popular. A cake that has a fracture in the center of a cake to display a fun interior was a novel design that took the Instagram world by storm. It was always an idea that I had pinned in the back of my mind but never got to try. So with Easter coming, it was natural to marry those ideas together. This faultline cake features super cute Easter sprinkles and pastel hued candy. The pastel candy against the yellow buttercream background cheers me up just by looking at it.
From Left to Right: Carrot Cake, Milk Crumbs, Graham Crust
The cake itself is inspired by Momofuku’s carrot cake. It features a graham cracker frosting, their signature milk crumb, a cheesecake filling and a sunken in carrot cake that serves as a pie crust like layer for the filling. Is it a lot of work? Yes. Is it worth it? A resounding YES. If you prepare for the cake in advance and make each component a few days ahead, it’ll save you time and sanity.
And yes, I had to shape the cake into an egg shape. The top of the cake is actually a molded cake ball out of all the cut scraps of the cake, so you don’t waste any of the delicious bits. Unlike a traditional cake that has more structure, this was not a clean cut project. You try your best to make it into an egg shape and stop cutting if you think you are shaving off too much. You can always add a bit more frosting to cover up your mistakes. But shaping the cake is an optional task. All of this is. If you want to just make the cake without decoration? That’s cool. If you want to decorate the cake without shaping it? That’s awesome. If you just want to bake the liquid cheesecake filling and eat it with a spoon? I caution you that it’s addictive and please, save me some. The point is, do what brings you the most joy and go with it. Happy Easter.
Easter Egg Faultline Cake (Milk Bar Carrot Cake)
You will need:
1 batch of carrot cake (recipe below) 1 batch of liquid cheesecake (recipe below) 1batch of milk crumbs (recipe below) 1 batch of graham frosting (recipe below) 1 batch of vanilla swiss meringue frosting, ¼ of the batch tinted yellow (recipe below) assortment of Easter candies 5 inch cake board thick straws
Assembly:
On a cake board, place one 6-inch cake with the concave side facing up.
Using an offset spatula spread a third of the liquid cheesecake in an even layer over the cake. The cake layer should now be a flat and even surface.
Sprinkle one-third of the milk crumbs evenly over the cheesecake. Use the back of your hand to anchor them in place.
Using an offset spatula spread an even layer of graham frosting taking care to smooth the edges of the cake.
Chill cake until firm in freezer. About 10-20 minutes.
Remove cake from freezer.
Top the cake with the 7-inch cake with the concave side facing up.
Fill with liquid cheesecake, and layer milk crumbs and graham frosting.
Chill cake until firm in freezer. About 10-20 minutes.
Remove cake from freezer.
Place a 5 inch cake board in the center of the cake and trace outline of the cake board. Remove cake board.
Mark halfway between the center of the cake and the center of the traced circle at the 12, 3, 6, and 9 o’clock position.
Insert a straw into the 12 o’clock mark on the cake and snip the straw where the straw sticks out of the cake. Continue for the 3, 6, and 9 o’clock position.
Place the 5 inch cake board back on the center of the cake. The cake is now stable and will not sink from the extra weight of the upper layers.
Place one 6-inch cake with the concave side facing up.
Fill with liquid cheesecake, and layer milk crumbs and graham frosting.
Chill cake until firm in freezer. About 10-20 minutes.
Remove cake from freezer.
Top the cake with the 5-inch cake with the concave side facing up.
Fill with liquid cheesecake, and layer milk crumbs and graham frosting.
Chill cake until firm in freezer. About 10-20 minutes.
Carve the cake to an egg like shape.
Take the cake scraps, liquid cheesecake, and milk crumbs and mix to make a large cake ball. Add some graham frosting if the cake ball won’t hold together.
Shape it to be the pointed part of the cake.
Chill cake.
Remove cake and crumb coat the entire cake with a thin layer of graham frosting.
Chill cake.
Remove cake and frost a thin, smooth layer of yellow buttercream in the center of the cake, and decorate the cake with sprinkles and candies.
Chill cake.
Remove cake and using a piping bag with a large, round decorating tip, pipe the upper and lower half of the cake as high as you desire.
Scrape off the extra frosting with a cake scraper for a smooth finish.
Enjoy.
For the Carrot Cake
Ingredients:
1 ½ c. vegetable oil 2 c. sugar 4 large eggs 2 c. all-purpose flour 2 tsp. baking powder 2 tsp. baking soda 1 tsp. salt 1 tsp. cinnamon ½ tsp. freshly ground nutmeg 3 cups finely grated, peeled carrots (about 1 pound)
Instructions:
Preheat oven to 325˚F and grease and line your baking pans with parchment paper. If you are planning on making the cake egg shaped, bake your cake in one 5-inch pan, two 6-inch pans, and one 7-inch pan. If you are making a standard cake, use four 6-inch pans.
In a medium bowl, whisk together flour, baking powder, baking soda, salt, cinnamon and nutmeg.
In the bowl of a standing mixer fitted with a paddle attachment, beat the sugar and oil together on medium speed until combined. Add eggs, one at a time, mixing well after each egg.
On low speed add the dry mixture and mix until just combined.
Take the bowl off of the standing mixer and fold in the grated carrots.
Divide the batter evenly into your prepared pans. (If you are using different sized pans, divide the batter so the batter comes up evenly amongst all the pans. So if it comes up ¼ way up the pan for 5-inch pan, it should also come up ¼ way up the side of your 6-inch pan). Bake about 20-25 minutes until the top is golden brown and until a toothpick poked in the middle comes out clean. Note: The cake will be sunken in the middle. This is done on purpose to have a pie crust-like cake for the filling.
Cool cakes on cooling rack until ready to assemble.
For the Liquid Cheesecake
Ingredients:
16 oz. cream cheese, room temp 1 ½ c. sugar 2 tbsps. cornstarch 1 tsp. kosher salt ¼ c. milk 2 large eggs
Instructions:
Heat the oven to 350° F.
In a medium bowl, whisk together the cornstarch and salt. Whisk in the milk in a slow, steady stream, then whisk in the egg until homogenous.
In the bowl of a stand mixer fitted with a paddle attachment, add the cream cheese and mix on low speed for 2 minutes. Scrape down the sides of the bowl with a spatula. Add the sugar and mix for 1 to 2 minutes, until the sugar has been completely incorporated.
Turn the mixer to medium-low speed, and stream in the egg slurry. Mix for 3 to 4 minutes, until the mixture is smooth.
Line the bottom and sides of an 8×8 inch baking pan with parchment paper. Pour the batter into the pan, put the pan in the oven, and bake for 20 minutes. Gently shake the pan. The cheesecake should be set on the outer edges of the baking pan but still wobble in the very center. If the cheesecake is not set at all, bake for 5 more minutes. Avoid browning the cheesecake at all. If it does brown, remove immediately.
Cool the cheesecake on a wire rack. Once completely cool, it is ready for use. If making ahead of time, the cheesecake can be wrapped and stored in an airtight container in the fridge for up to 1 week.
For the Milk Crumb
Ingredients:
½ c. milk powder ¼ c. flour 2 tbsp. cornstarch 2 tbsp. sugar ½ tsp. kosher salt 4 tbsp. (½ stick) butter, melted ¼ c. milk powder 3 oz. (90g) white chocolate, melted
Instructions:
Heat the oven to 250° F.
Combine the ½ c. milk powder, the flour, cornstarch, sugar, and salt in a medium bowl. Add the melted butter and mix using a spatula, until the mixture starts to come together and form small clusters.
Spread the clusters on a parchment- or Silpat-lined sheet pan and bake for 20 minutes. The crumbs should have sand like appearance. Cool the crumbs completely.
Crumble any milk crumb clusters that are larger than ½ inch in diameter and put the crumbs in a medium bowl. Add the ¼ c. milk powder and toss together until it is evenly distributed throughout the mixtures.
Pour the white chocolate over the crumbs and toss until your clusters are enrobed. Then continue tossing them every 5 minutes until the white chocolate hardens and the clusters are no longer sticky. The crumbs will keep in an airtight container in the fridge or freezer for up to 1 month.
For the Graham Frosting
Ingredients:
1 recipe Graham Crust ⅔ c. milk ¾ tsp. kosher salt 12 tbsp. butter, at room temperature 2 tbsp. light brown sugar, tightly packed 2 tbsp. confectioners’ sugar 1 tsp. ground cinnamon ¼ tsp. kosher salt
Instructions:
Combine the graham crust, milk, and ¾ tsp. salt in a blender, turn the speed on to medium-high, and puree until smooth and homogenous. It will take 1 to 3 minutes.
In the bowl of a stand mixer fitted with the paddle attachment, cream the butter, sugars, cinnamon, and ¼ tsp. on medium-high for 2 to 3 minutes, until fluffy and lighter in color. Scrape down the sides of the bowl with a spatula.
On low speed, add in the graham mixture from blender. Mix on medium speed until the color is a uniform tan and silky smooth.
Use the frosting immediately, or store it in an airtight container in the fridge for up to 1 week.
For the Graham Crust
Ingredients:
1½ c. graham cracker crumbs ¼ c. milk powder 2 tbsp. sugar ¾ tsp. kosher salt 4 tbsp. (½ stick) butter, melted, or as needed ¼ c. heavy cream
Instructions:
In a medium bowl, add and mix the graham crumbs, milk powder, sugar, and salt.
In a small bowl, whisk the butter and heavy cream together. Add to the dry ingredients and mix again to evenly distribute. The butter will act as a glue, adhering to the dry ingredients and turning the mixture into small clusters. The mixture should hold its shape if squeezed tightly in the palm of your hand. If it is not moist enough to do so, melt an additional 1 to 1½ tablespoons butter and mix it in.
Eat immediately, or use as directed in a recipe. Stored in an airtight container, graham crust will keep fresh for 1 week at room temperature or for 1 month in the fridge or freezer.
For the Swiss Meringue Frosting
Ingredients:
1 ¼ c. sugar 5 large egg whites 2 c. (4 sticks) unsalted butter 2 tsp. vanilla extract a pinch of kosher salt
Instructions:
Bring a small pot filled with about an inch of water to a simmer.
In a bowl of a standing mixer, whisk the egg whites, sugar, and salt together.
Place the bowl on top of the pot and whisk continuously until the mixture becomes slightly foamy and you cannot feel the grittiness of the sugar, about 5-8 minutes. The mixture will be hot. Be careful.
Move the bowl to the standing mixer fitted with the whisk attachment and whip the egg mixture until the bowl feels cool to the touch.
Add in the butter, and continue to whip until a smooth buttercream forms.
Add in the vanilla extract and continue to whip until incorporated.
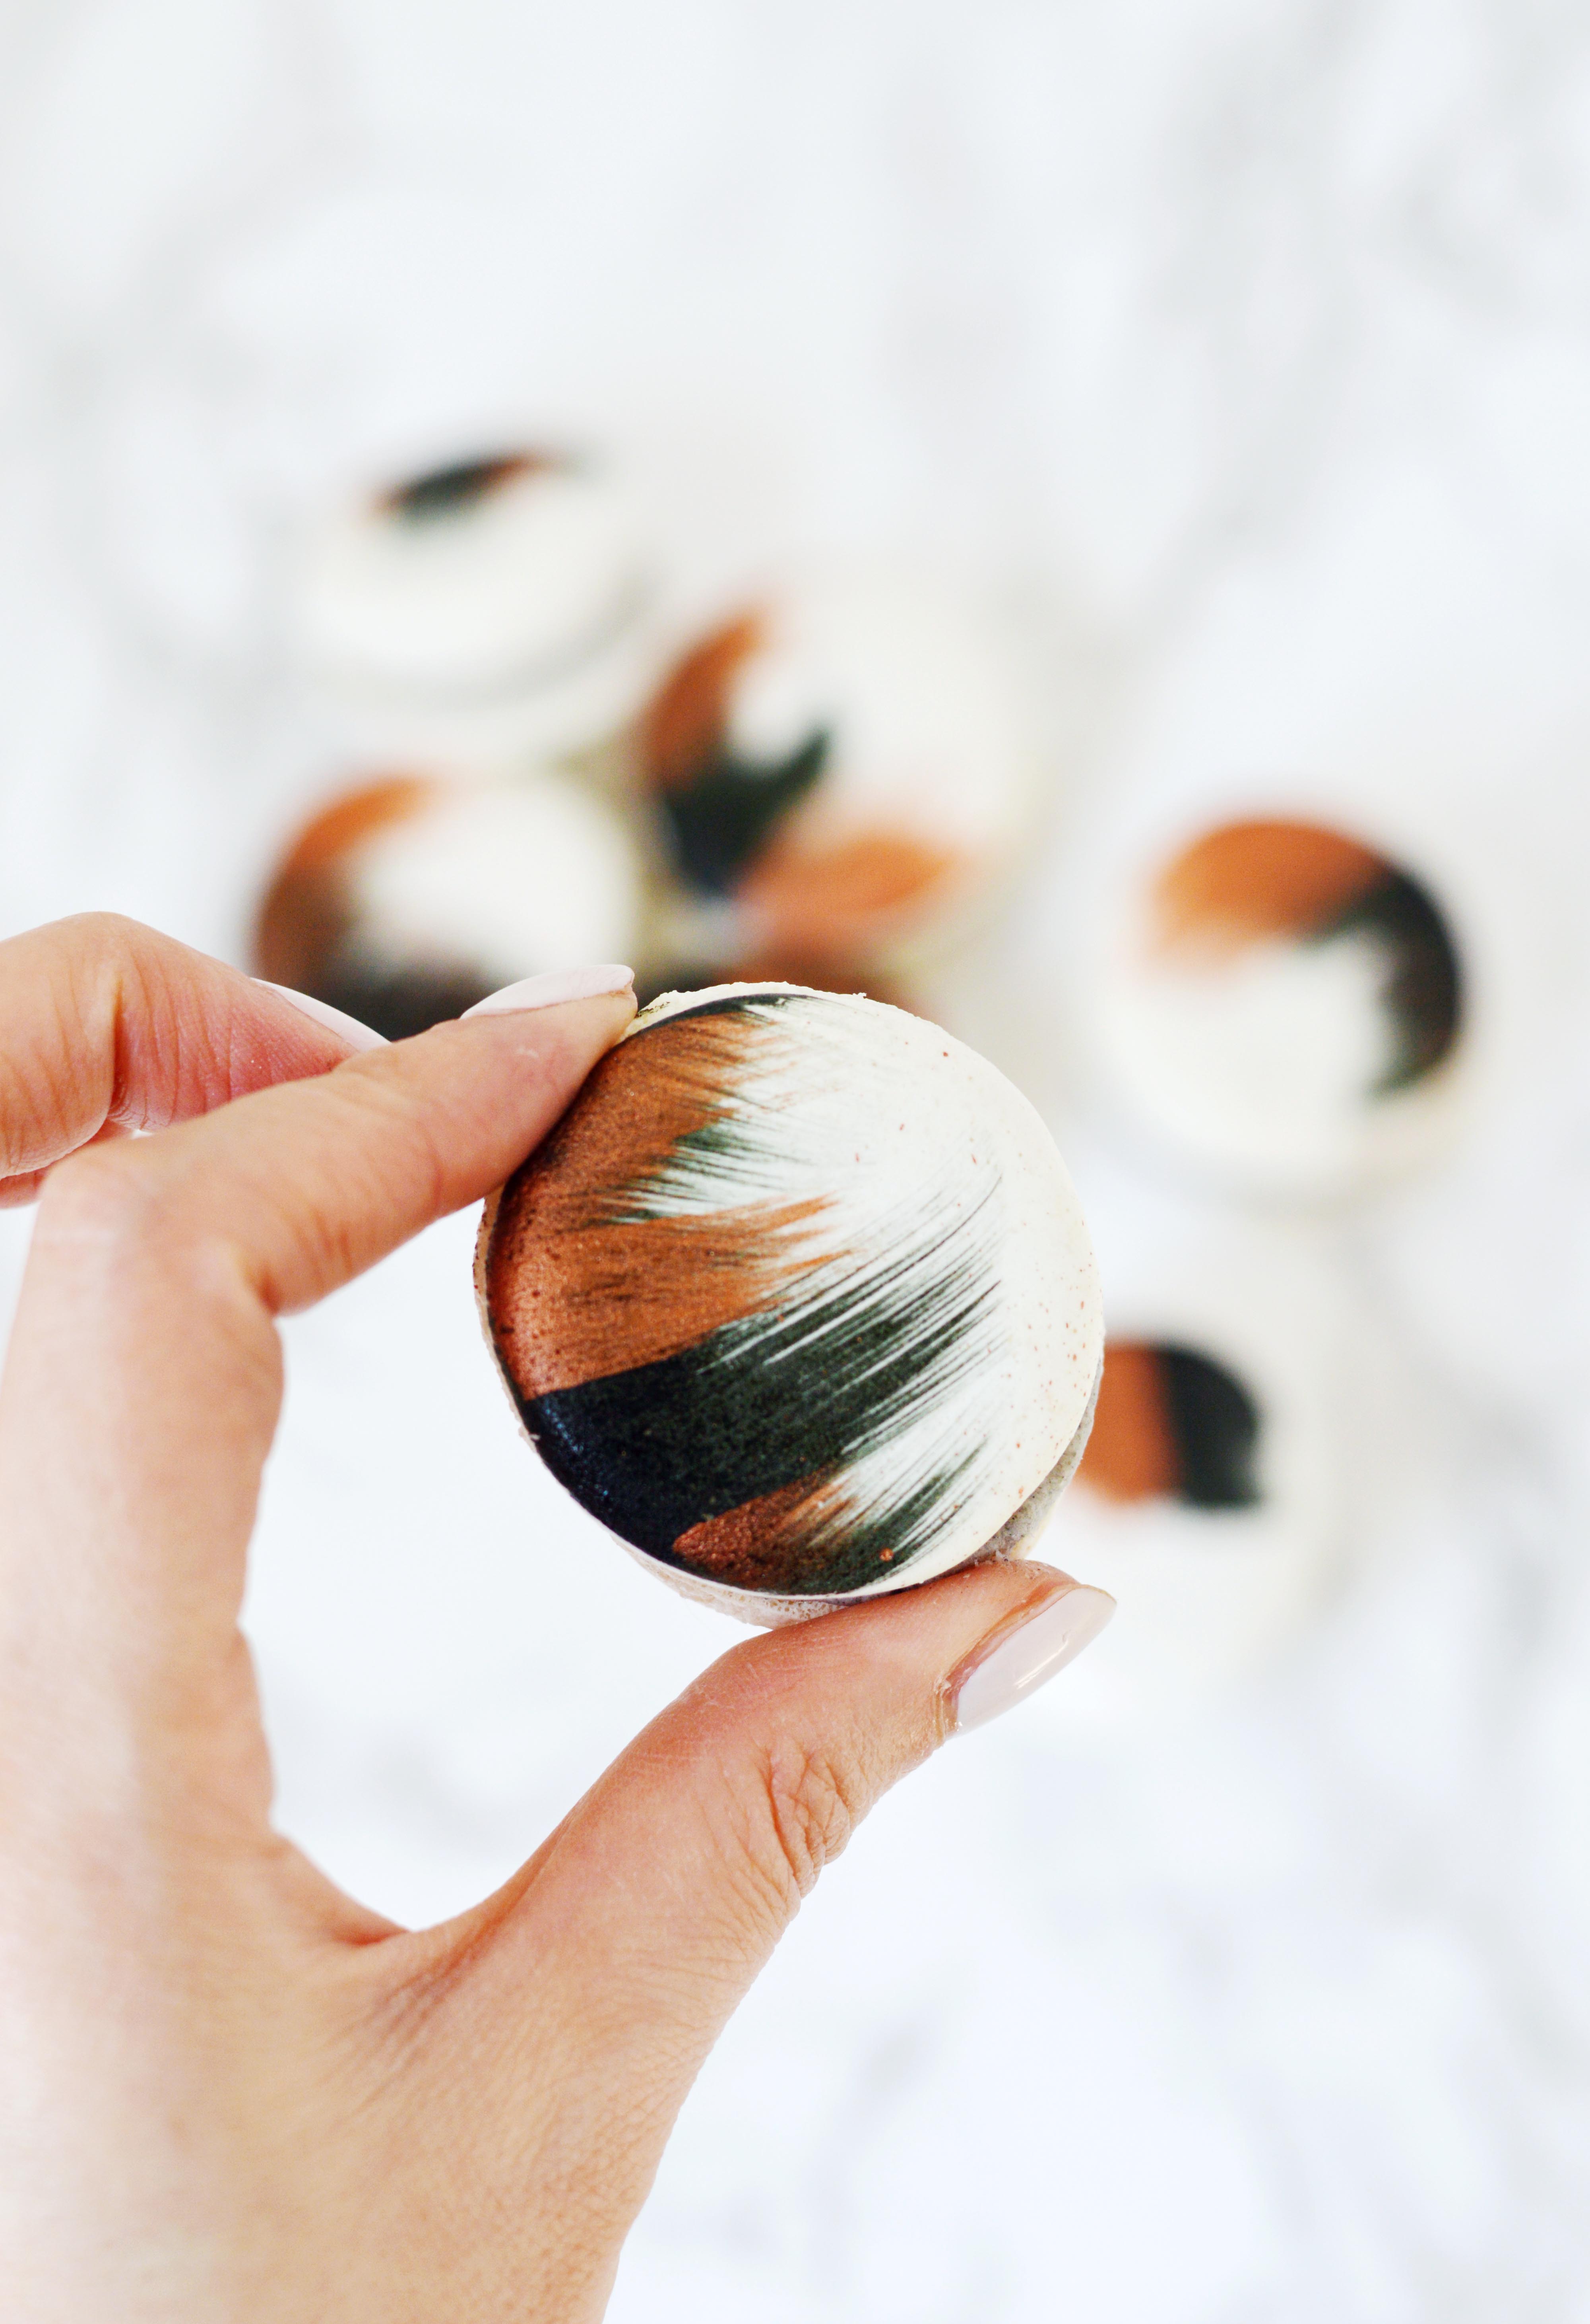
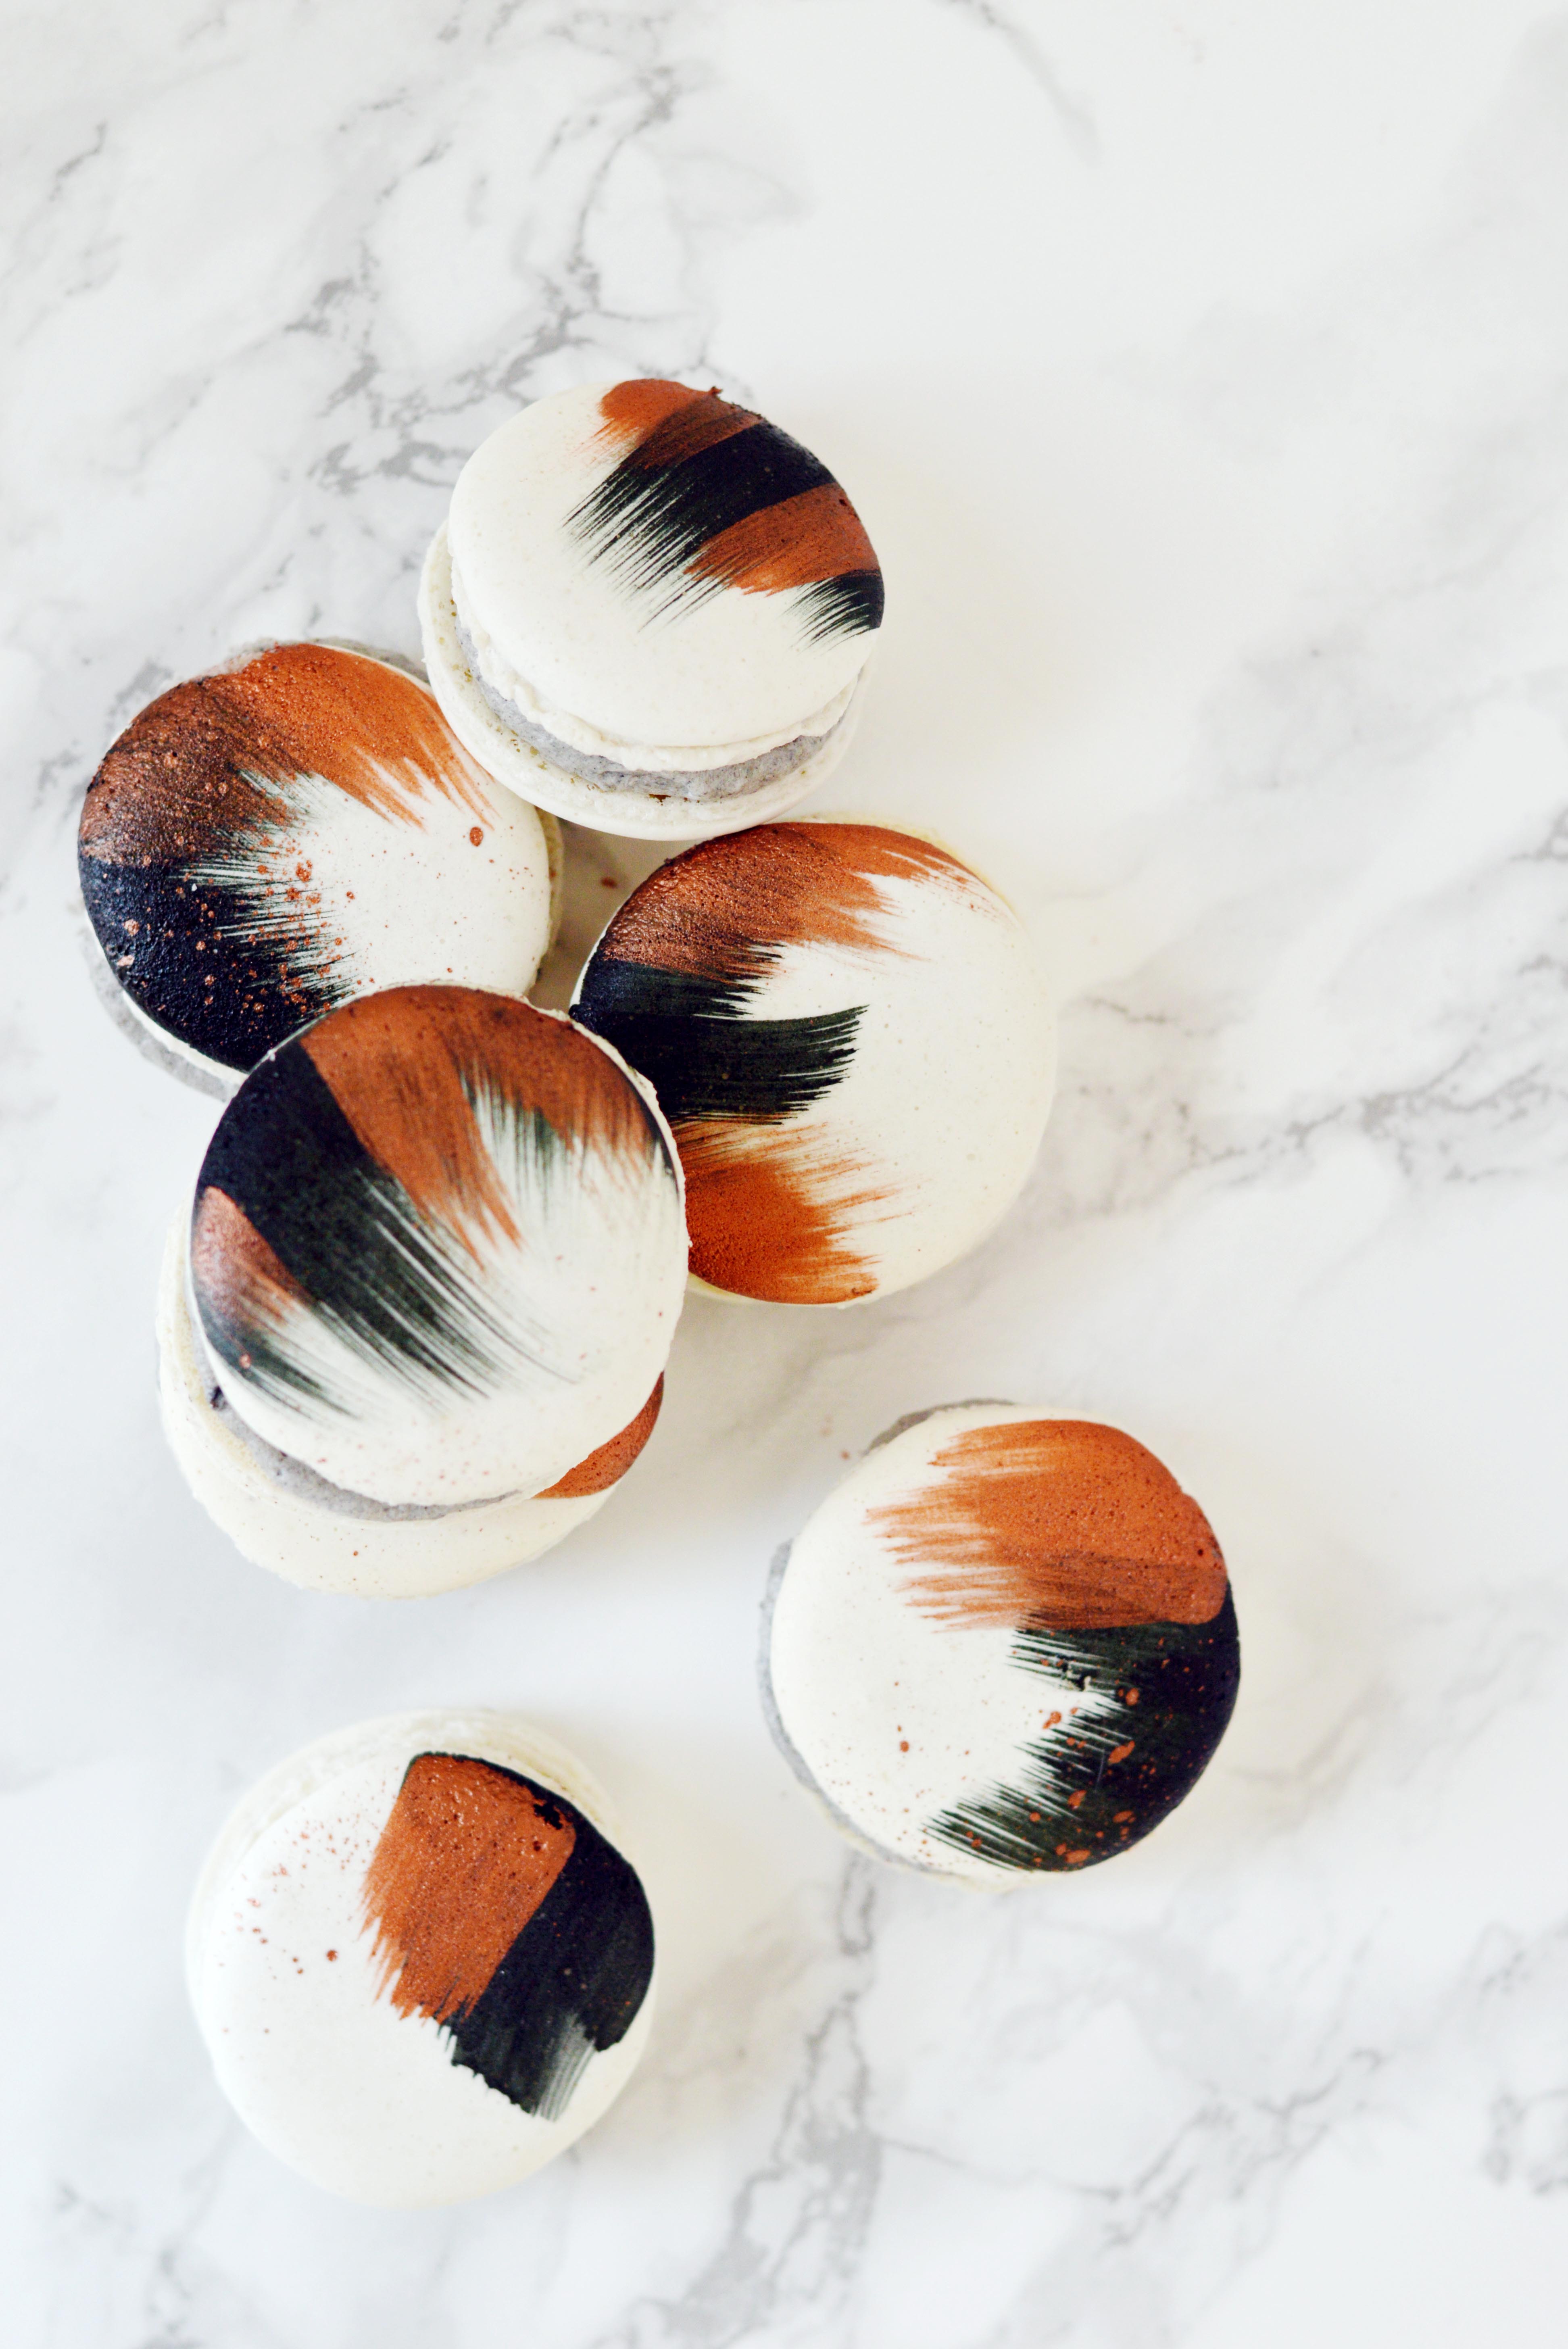
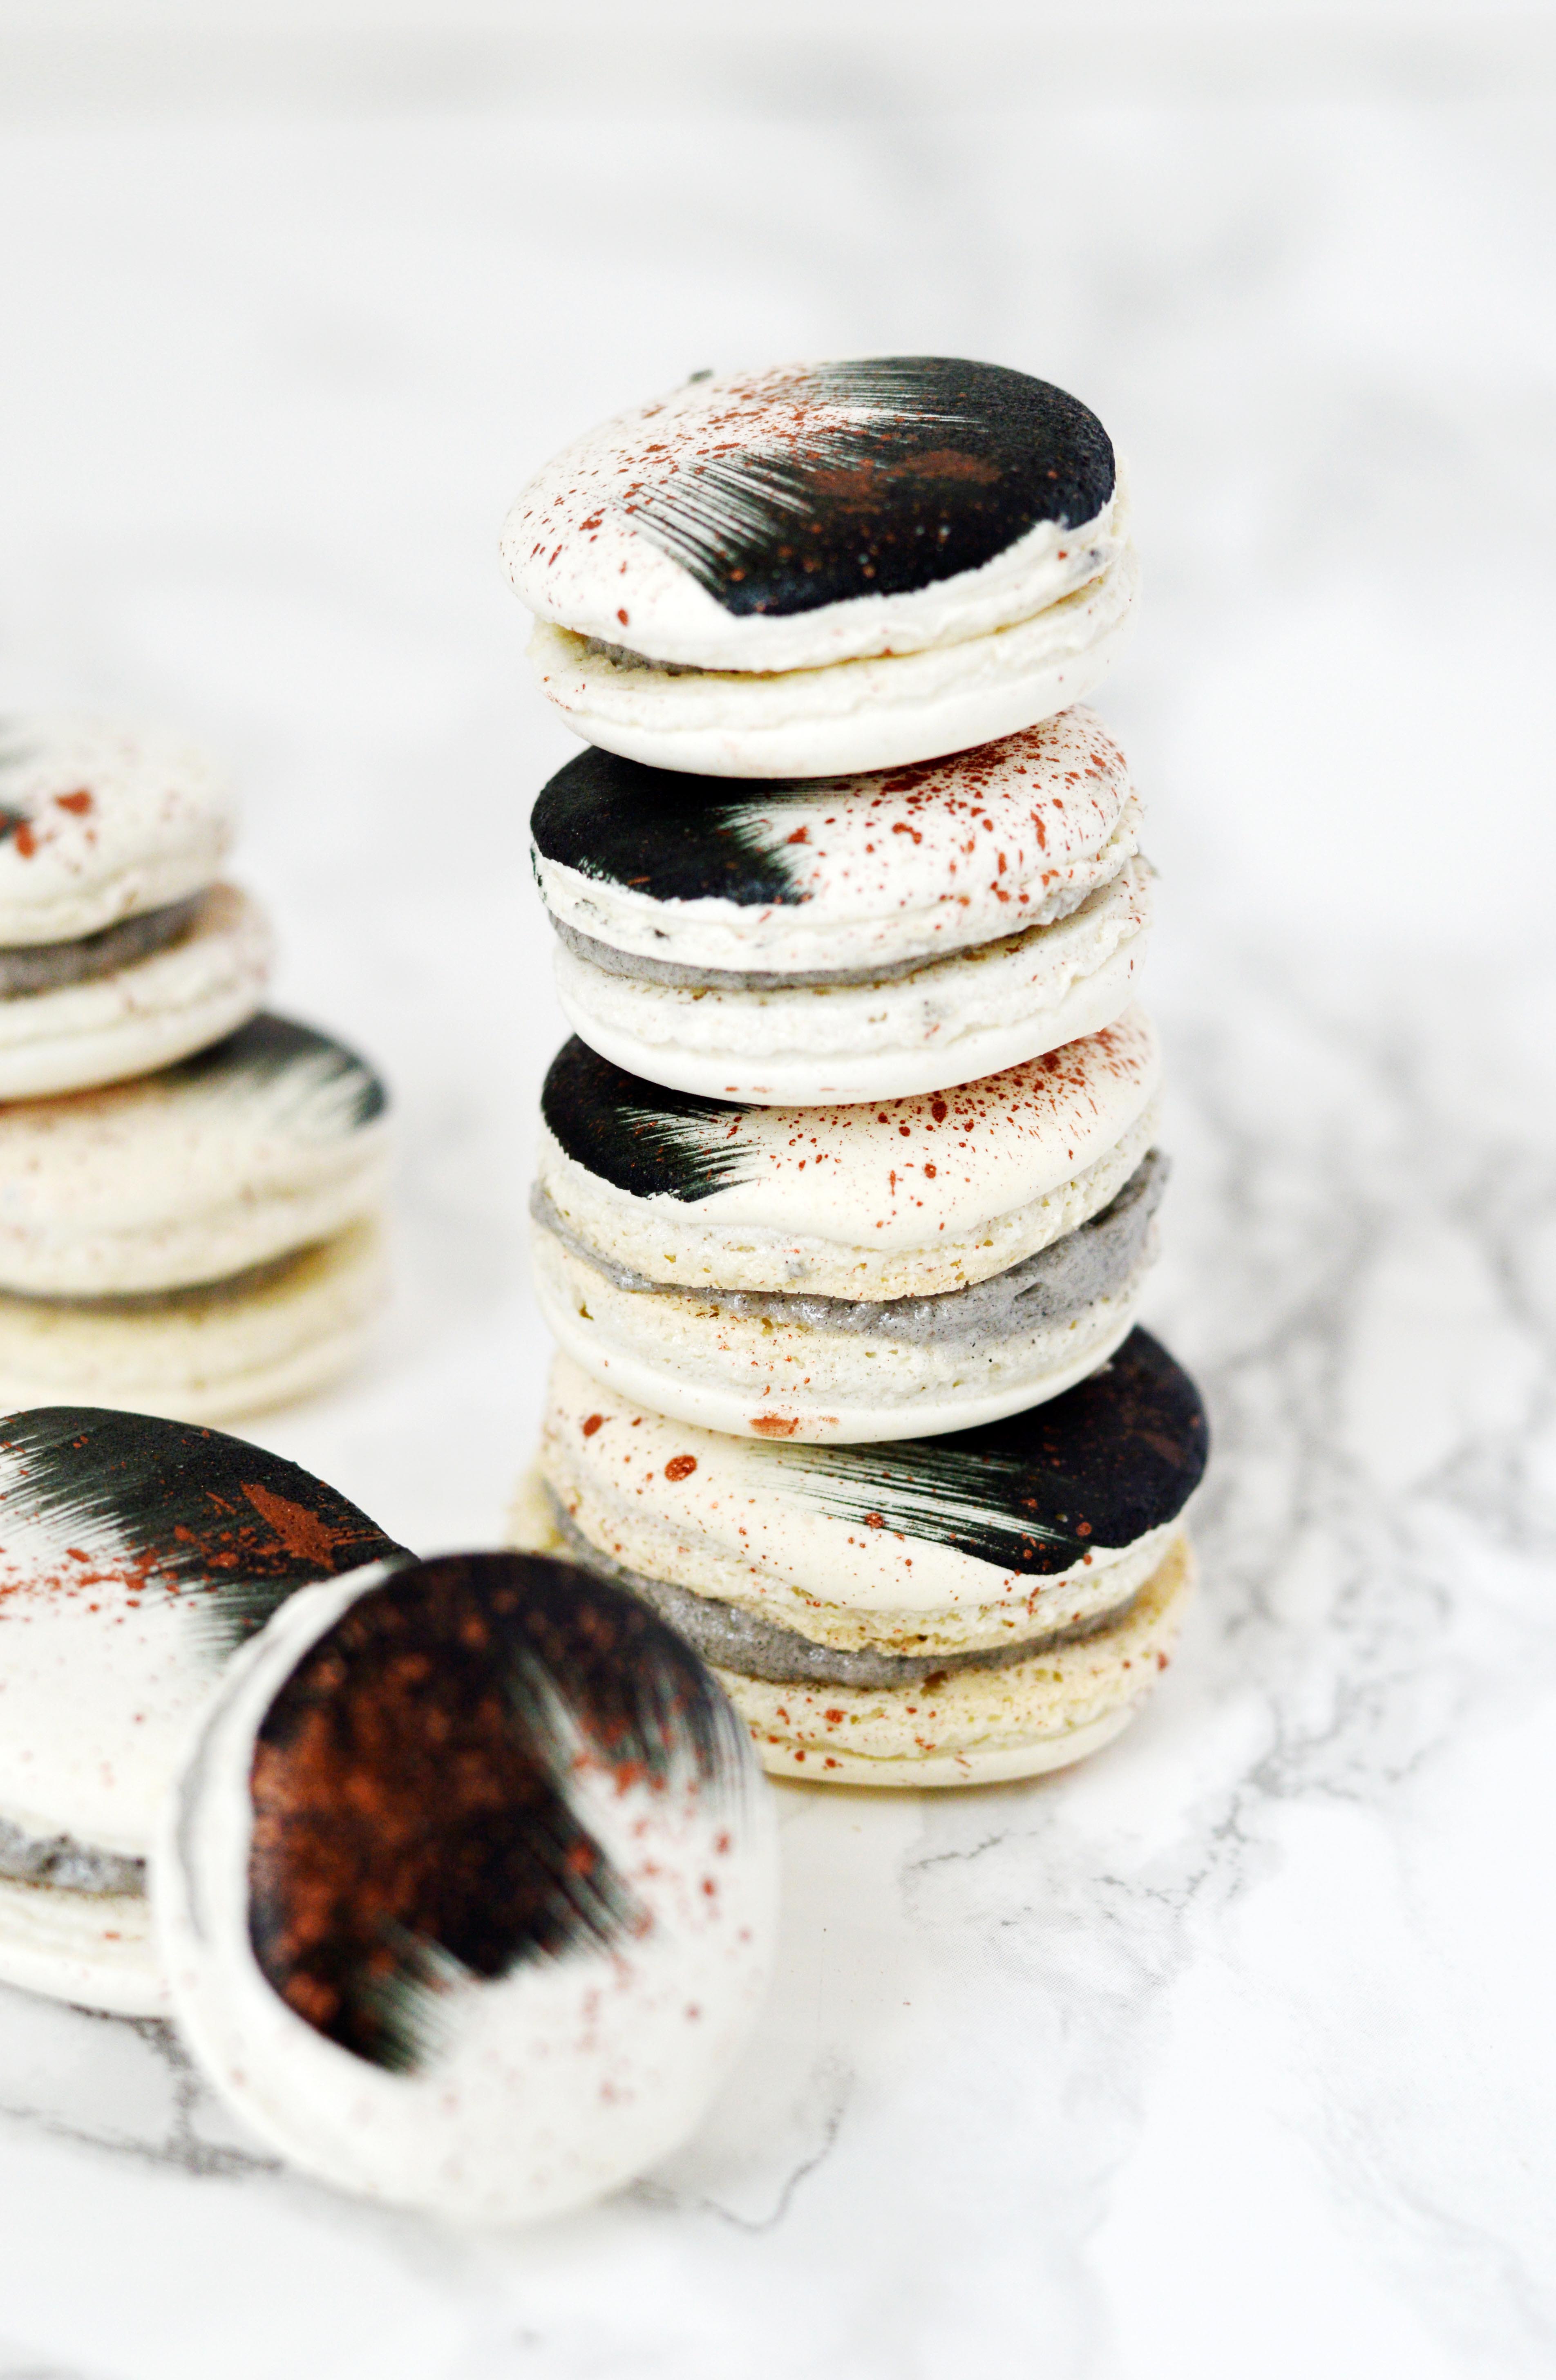
Open sesame. The sesame seed isn’t commonly used in American cuisine except for hamburger buns and it’s definitely not something that is synonymous to desserts. On the other hand, it is regularly used in Asian cuisine from sesame oil to garnishing almost every recipe with the tiny seed. So it’s not surprising that they also use it to flavor their desserts.
You can transform your everyday vanilla frosting into black sesame ones by adding black sesame paste. What does black sesame paste taste like? I would describe it as a nuttier, more roasted peanut buttery flavor or a stronger flavored tahini. It is too intense to eat straight out of the jar, which makes sense because it comes out of a tiny container. It’s perfect for those who do not like desserts that are too sweet.
I painted my macarons with a little bit of edible food coloring and vodka. I think the black and copper make a pretty cool contrast. As a tip, try and use a drier brush when painting your macarons to keep the surface smooth. Too much liquid will turn the smooth shells into a bumpy texture.
It’s also National Macaron Day! If you’re quarantined and making macarons was something you’ve always wanted to try, this is a great time to hunker down and give these a try. It doesn’t have to be these macarons. I have so many fun flavors to try on the site!
212 g. almond meal (aka almond flour)
212 g. powdered sugar
172 g. egg whites, divided to 82 g. and 90 g (aged, if possible)
236 g. sugar
158 g. water
Instructions:
Line two baking sheets with parchment paper or silicone mats.
In the bowl of a food processor, add the almond meal and powdered sugar and pulse until thoroughly combined.
Sift the mixture over a large mixing bowl, throwing out the lumps as they appear. Add 82 g. of the egg whites and stir until you get a thick mixture.
In a small pot attached with a candy thermometer, combine the sugar and water over medium heat and boil until the syrup reaches 200˚F.
Once the syrup reaches 200˚F, start whipping the remaining 90 g. in the bowl of your stand mixer with the whisk attachment on medium speed until soft peaks are reached.
Once the syrup reaches 248 ˚F, remove the pot off the burner and slowly pour the syrup down the side of the mixing bowl with the egg whites on medium speed.
Once the egg whites are fully incorporated, increase the speed to medium high until egg whites form glossy, stiff peaks.
Mix a ⅓ of the egg white mix to the almond mixture and stir together until the batter is slightly lighter and less pasty. From then on, fold in ⅓ of the egg white mixture at a time until the mixture “flows like magma”. The mixture should be smooth and run thick ribbons off the spatula.
With a pastry bag fitted with a ½ in. plain tip, pipe 1¼ – 1½ in. rounds.
The piped batter may have peaks but should smooth away in a minute or two.
Let the batter stand until the tops of the macarons are dry to the touch, about 30 minutes to 1 hour.
Preheat the oven to 325-350˚F. If your oven tends to run hot go for 325˚F, if not then 350˚F.
Lower the heat to from 350˚F to 300˚F. (If starting from 325˚F, lower to 275˚F.)
Bake 10-12 minutes, until the feet are formed and the tops are smooth. The macaron shell is done when you slightly wiggle it and it starts to come off of the parchment paper / silicone mat.
Remove pan from oven and reheat oven to higher temperature for 10 minutes before baking the next tray, lowering the temperature when you start baking it.
Continue until you bake all of the macaron shells.
For the Black Sesame Frosting:
Ingredients:
½ c. whole milk
3 tbsp. flour
⅛ tsp. salt
4 oz. (1 stick) unsalted butter, room temperature
½ c. sugar
1 tsp. vanilla extract
2 tsp – 3 tsp black sesame paste
Instructions:
In a small saucier over medium heat, whisk milk, salt and flour until combined.
Continuously whisk mixture until thickened to a pudding like consistency.
Once thickened, strain through a mesh strainer into a bowl with a spatula to remove lumps.
Place a piece of plastic wrap on top of the flour mixture (to prevent skin from forming) and put bowl into the fridge until fully cool.
In a mixer bowl fitted with the whisk attachment, mix the sugar and butter on high speed until fluffy and pale about, 5-10 minutes.
Add the chilled flour mixture and continue to whip on high speed until the sugar is completely dissolved and the mixture is no longer gritty, about 5-10 minutes.
Add the vanilla extract and sesame paste starting with 2 teaspoons and adding more if needed.
Pipe finished frosting onto cooled macaron shells and enjoy.
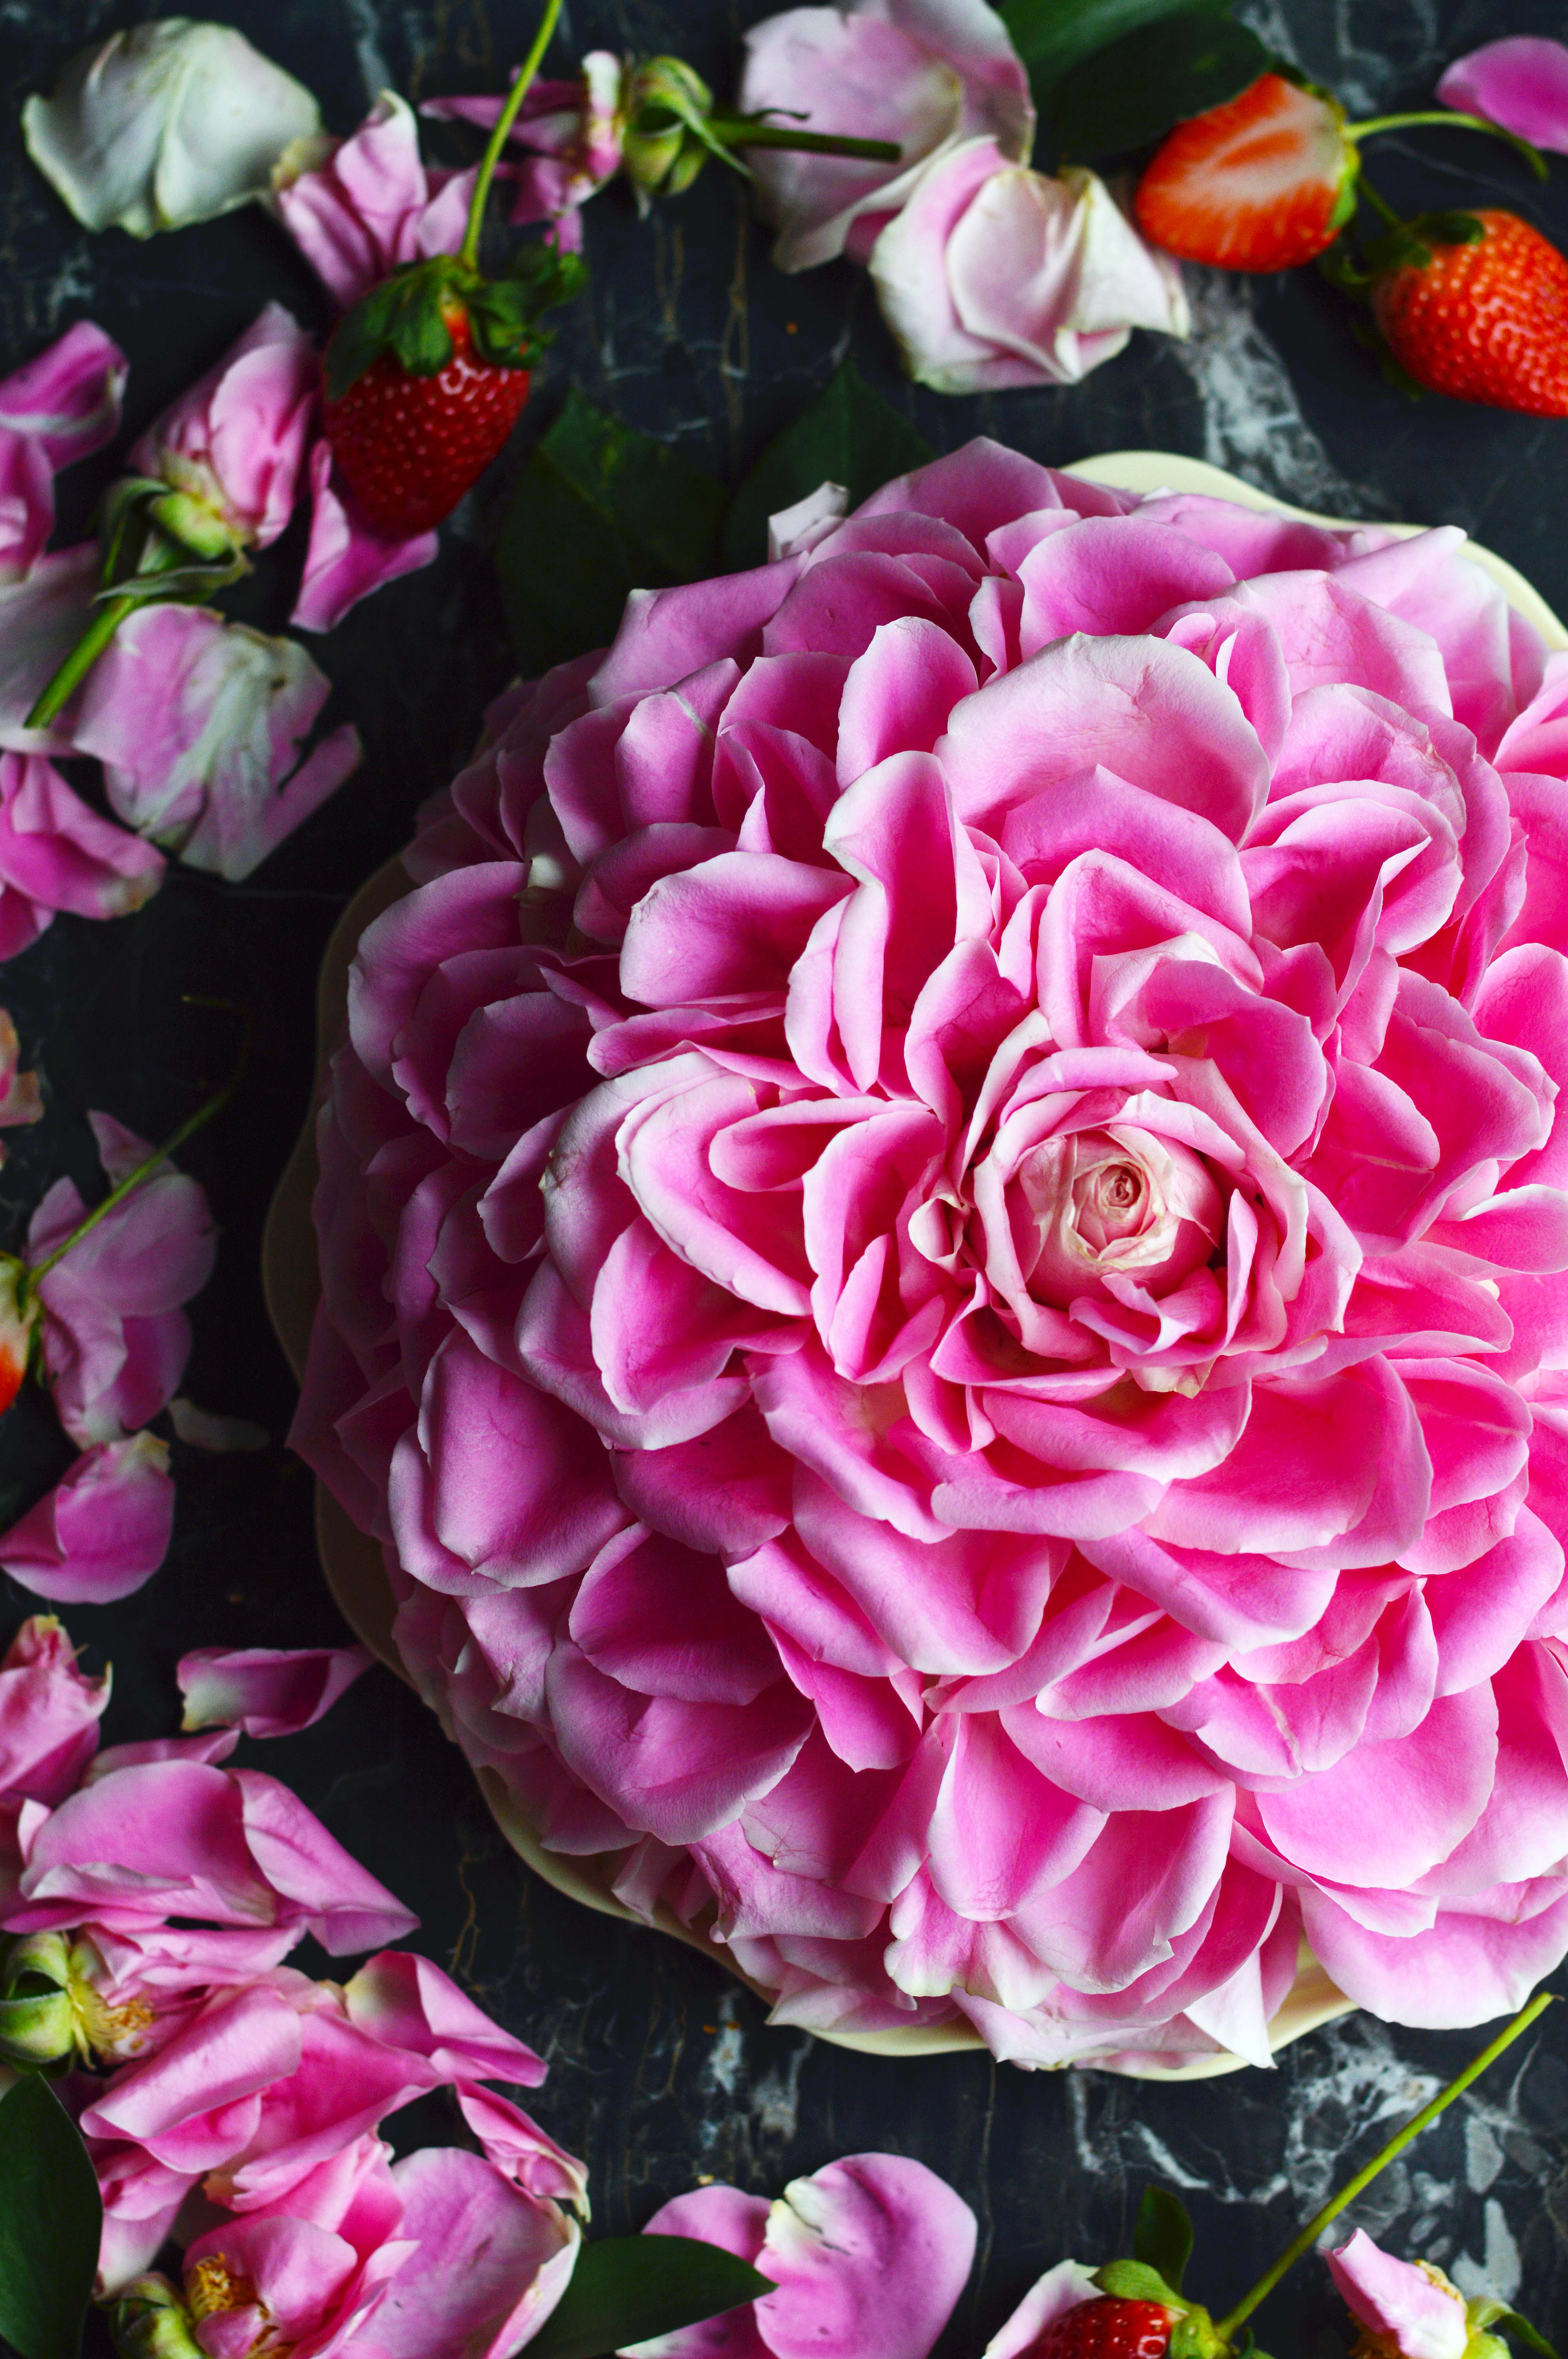
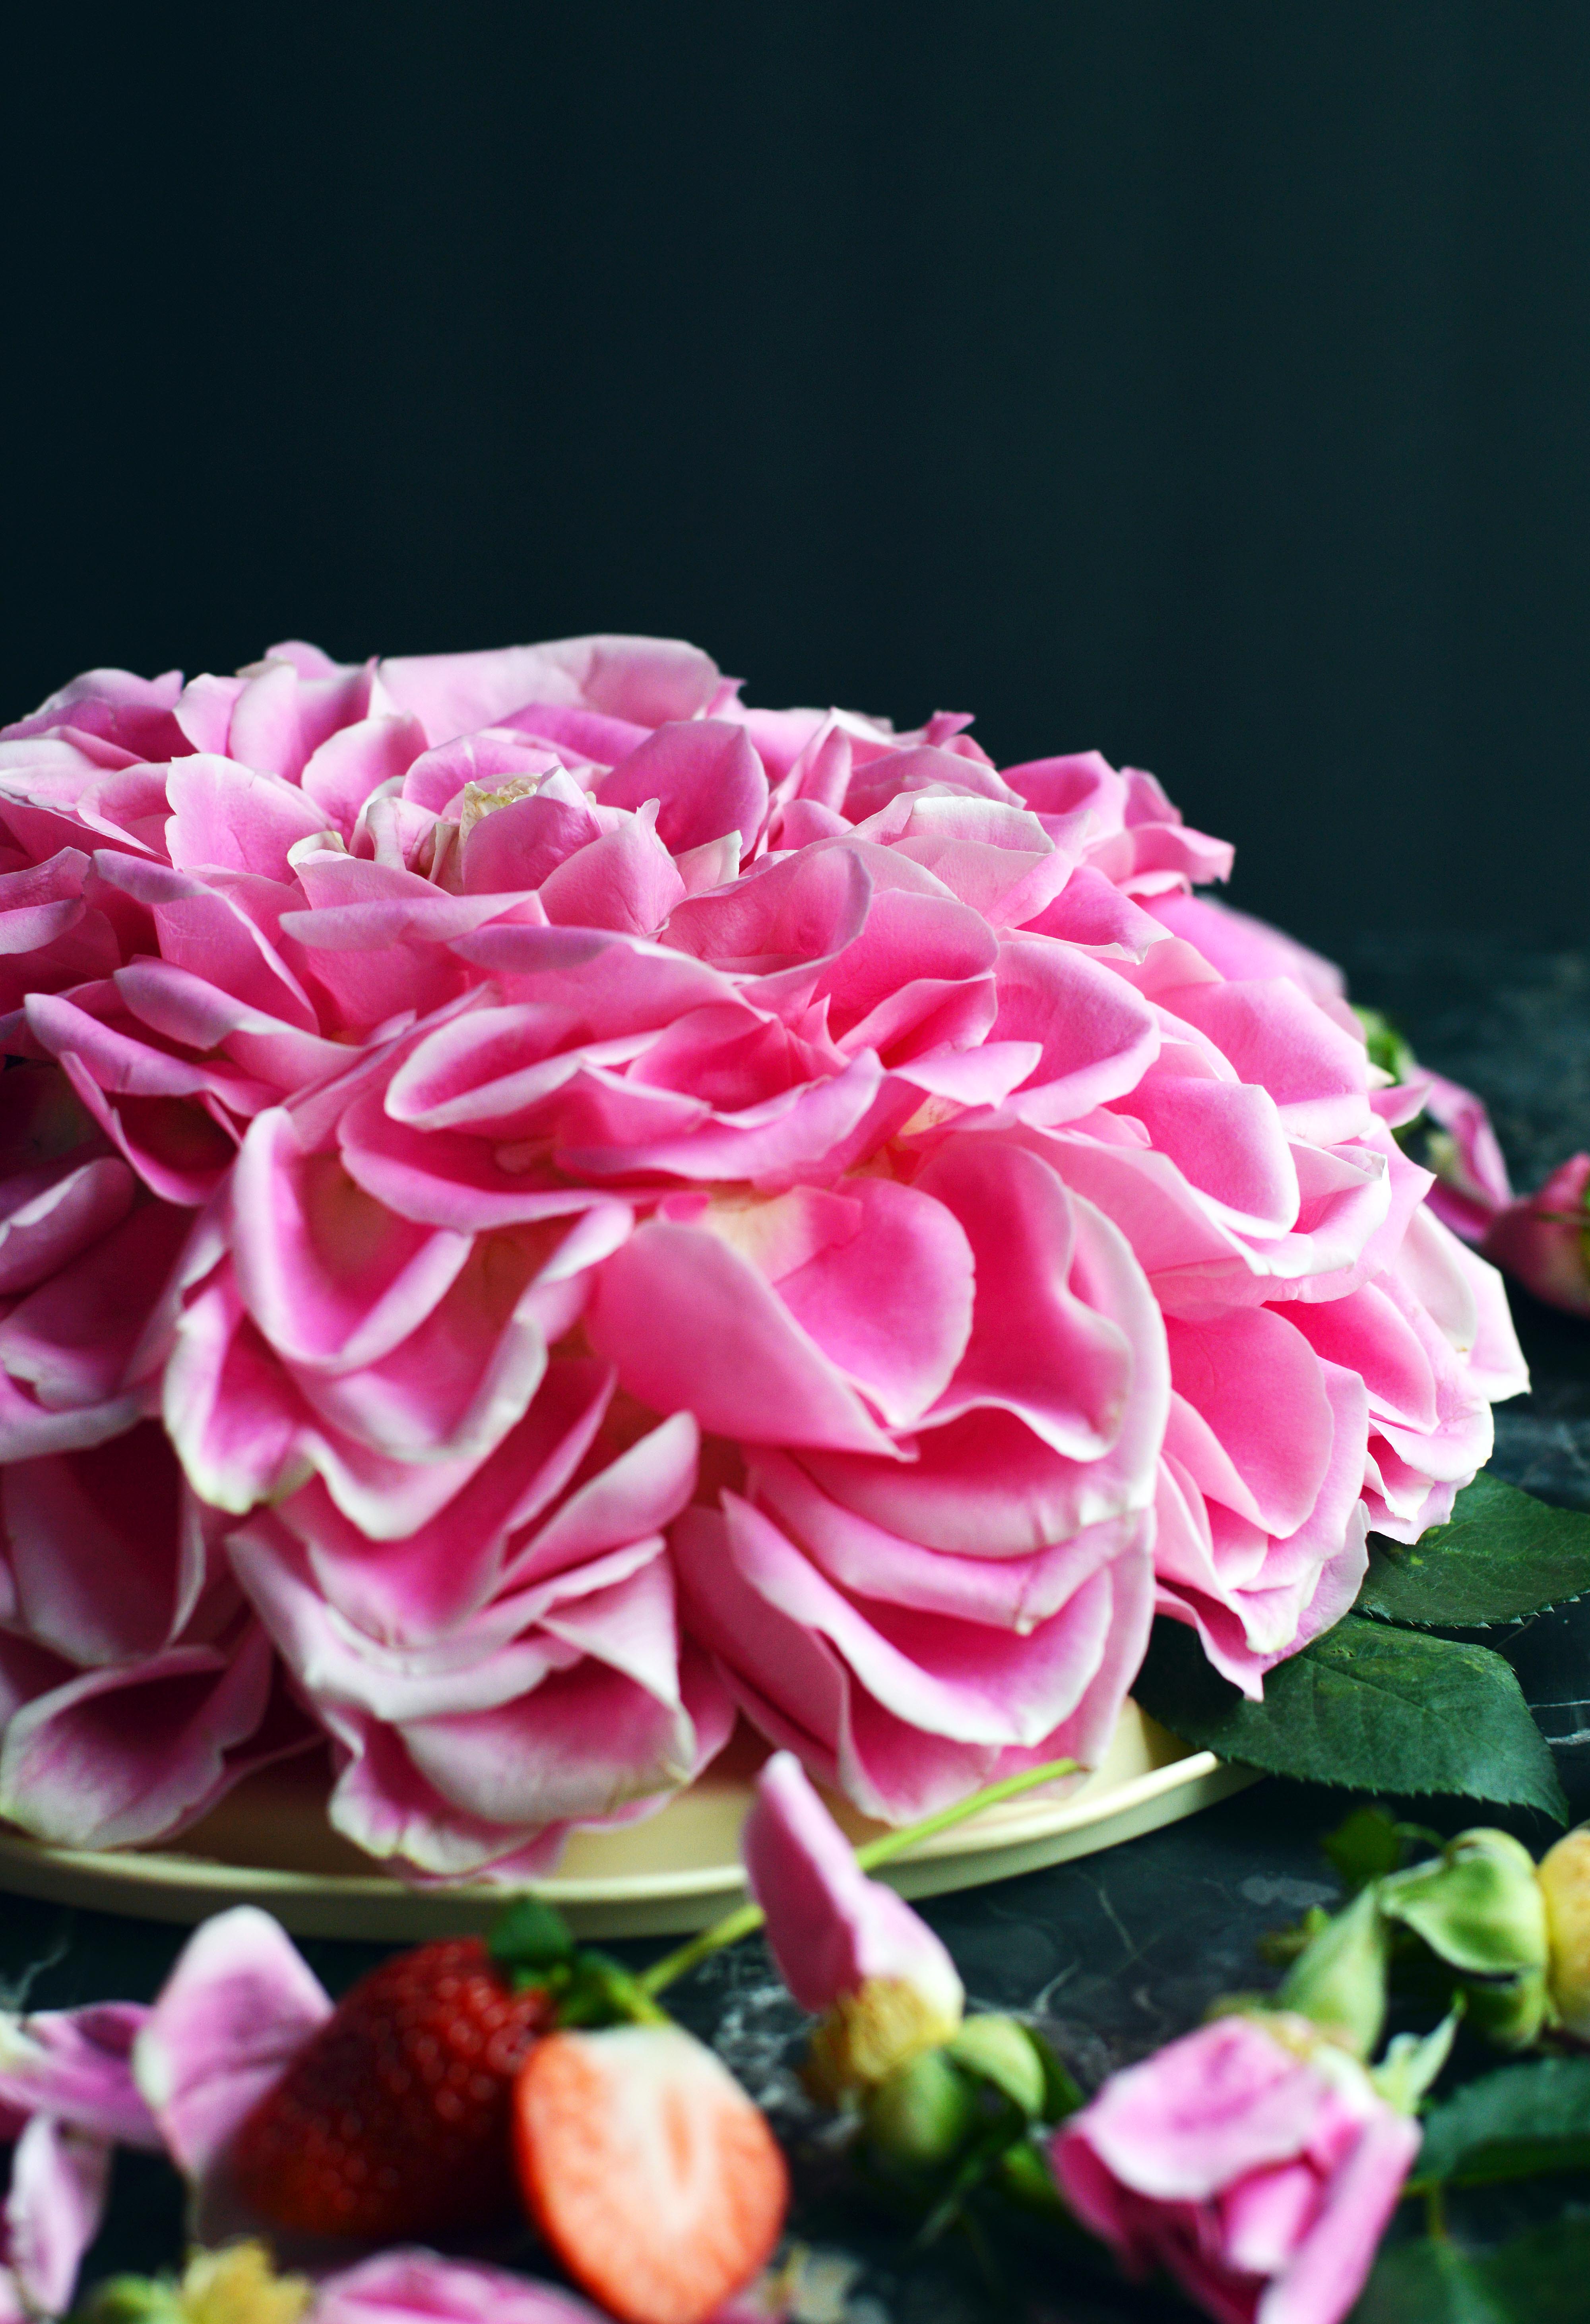
Happy Valentine’s Day! As someone who loves all things pink and feminine, Valentine’s Day décor is right up my alley. This cake was inspired by Ron Ben Israel’s rose cake which I’ve been obsessed with as soon as I laid my eyes on it. It was always on my “to-try” list but I never got the chance to take on the challenge. Recently, there was a blog post by NYC Cake Girl who used to work with Ron Ben Israel with a how-to on the very cake I loved. The amount of work and the detail work was perfection (as always), and I knew I simply didn’t have the time (and possibly even the skill) to recreate the cake. So I created this cake which looks similar and uses real rose petals. As for the cake itself, I used half of my giant doughnut cake pan instead of baking a round cake and carving it into a dome like the tutorial. A similar effect could be produced with a shallow bundt cake, but I think the smooth exterior of the doughnut pan really makes things easier. The cake flavor is red velvet (because it is THE cake of Valentine ’s Day), and is layered on the inside with fresh strawberries and vanilla frosting. I know I know, I almost felt like it was sacrilege not to use cream cheese frosting, but I didn’t have cream cheese in the fridge so, vanilla it is. Please feel free to use cream cheese frosting if you prefer it. I picked a bouquet of flowers that varied in shades of pink in hopes of making an ombre effect. However, once the petals were stripped from the flowers, they kind of ended up being the same color. I saved the lightest rose for the center though. Although in hindsight, I think I should’ve just picked the flower that had the least blemishes. You essentially layer the petals one by one in alternating layers around the cake to form a giant rose. It is a bit time consuming and is not completely symmetrical like the fondant petals from the original cake. But, I think it kind of gives it a homemade vibe that people can appreciate.I went a little heavy with the pictures because it was SO STUNNING. Like… the photos can’t do it justice. I loved even how the slices had petals on them fanning out the back, like a very fancy cape or headdress. I can almost guarantee that you will get “wows” and surprised looks when you bring this cake. It won’t disappoint. I hope all of you got some sort of recognition of love this Valentine’s Day. If not, I baked this cake for you. 😉
Red Velvet Strawberry Rose Cake
You will need:
1 batch red velvet cake, baked in a dome shape (recipe below)
1 batch vanilla frosting (recipe below)
About ½ pint strawberries, sliced horizontally (enough to cover the area of the cake twice)
1 dozen roses (pesticide-free)
Instructions:
Slice the red velvet cake in half (horizontally), and smooth a thin layer of vanilla frosting.
Layer it with fresh strawberry slices and repeat layer with vanilla frosting and fresh strawberries using frosting to fill in any gaps. (shown in picture #2)
Place the top half of the cake onto the frosting layer and crumb coat the entire cake with a thin layer of frosting. (shown in picture #3)
Put cake in freezer for about 10-15 minutes until the frosting is set and then remove from fridge and give it a full coating. (shown in picture #4)
Pick the flower you will be using as your center flower. Trim and place it in the center of the cake. (shown in picture #5)
Get a few petals and fill in the gaps around the hole. (shown in picture #6)
Now start layering the bottom part of the cake by pressing the petals into the frosting of the cake. Try to press the bottom edge of the petal only. (shown in picture #7)
Try to use the largest petals you have for the bottom layer and go all around the cake. (shown in picture #8)
Layer the next row of petals around the cake. (shown in picture #9)
Try to alternate the position of the petals. As in, try to place the petal of the next layer between two petals of the bottom layer. (shown in picture #10)
Repeat until you get to the center of the cake, try to use smaller petals as you get to the top of the cake. I had to replace some of the lighter petals because the lower petals turned out to be too pink to get a more seamless look. (shown in picture #11)
Get ready to stun the room. 😉
Red Velvet Cake
Ingredients
1 ½ cups all-purpose flour
1 ½ cups cake flour
3 tablespoons unsweetened cocoa powder
¾ tsp. salt
3 large eggs, at room temperature
¾ (1 ½ sticks) cup butter, at room temperature
2 ¼ cups granulated white sugar
2 tsp. vanilla extract
1 ounce bottle of red food coloring (2 Tablespoons)
1 ¼ cups buttermilk
1 ½ teaspoons baking soda
1 ½ teaspoons vinegar
Directions:
Preheat oven to 350°F, spray either your bundt pan or the top half of your giant doughnut cake pan with nonstick spray. (I highly suggest using either pam for baking or baker’s joy for extra insurance of “nonstickage”.)
In a medium bowl, whisk together flour, cocoa powder and salt. Set aside.
In the bowl of a standing mixer, beat butter on medium speed for 30 seconds.
Add sugar and vanilla, and beat until combined.
Add eggs one at a time on medium speed.
Lower speed to low and add in food coloring.
Add ⅓ of flour mixture to the egg mixture on low and add ½ of the buttermilk.
Repeat with ⅓ flour mix and the rest of the buttermilk.
Finish mixing with the rest of the flour mixture. Mix until just combined.
Stir together baking soda and vinegar in a small bowl. Add to cake batter and beat just until combined.
Fill cake pan until ⅔ full, bake 30-40 minutes or until a cake tester comes out clean.
Cool pan on rack for about 15-20 minutes. Try to use a small spatula around the edges to ensure a clean removal. Remove cake from pan.
Let cool completely.
Vanilla Frosting
Ingredients:
1 c. whole milk
¼ c. flour
¼ tsp. salt
8 oz. (2 sticks) unsalted butter, room temperature
1 c. sugar
2 tsp. vanilla extract
Instructions:
In a saucier pan, put milk, salt and flour and whisk until combined on medium heat.
Continuously whisk mixture until thickened to a pudding like consistency.
Once thickened, strain through a mesh strainer into a bowl with a spatula to remove lumps.
Place a piece of plastic wrap on top of the flour mixture and put into the fridge until fully cool.
In a mixer bowl fitted with the whisk attachment, mix the sugar and butter on high speed until fluffy and pale about, 5-10 minutes.
Add the chilled flour mixture and continue to whip on high speed until the sugar is completely dissolved and the mixture is no longer gritty, about 5-10 minutes.
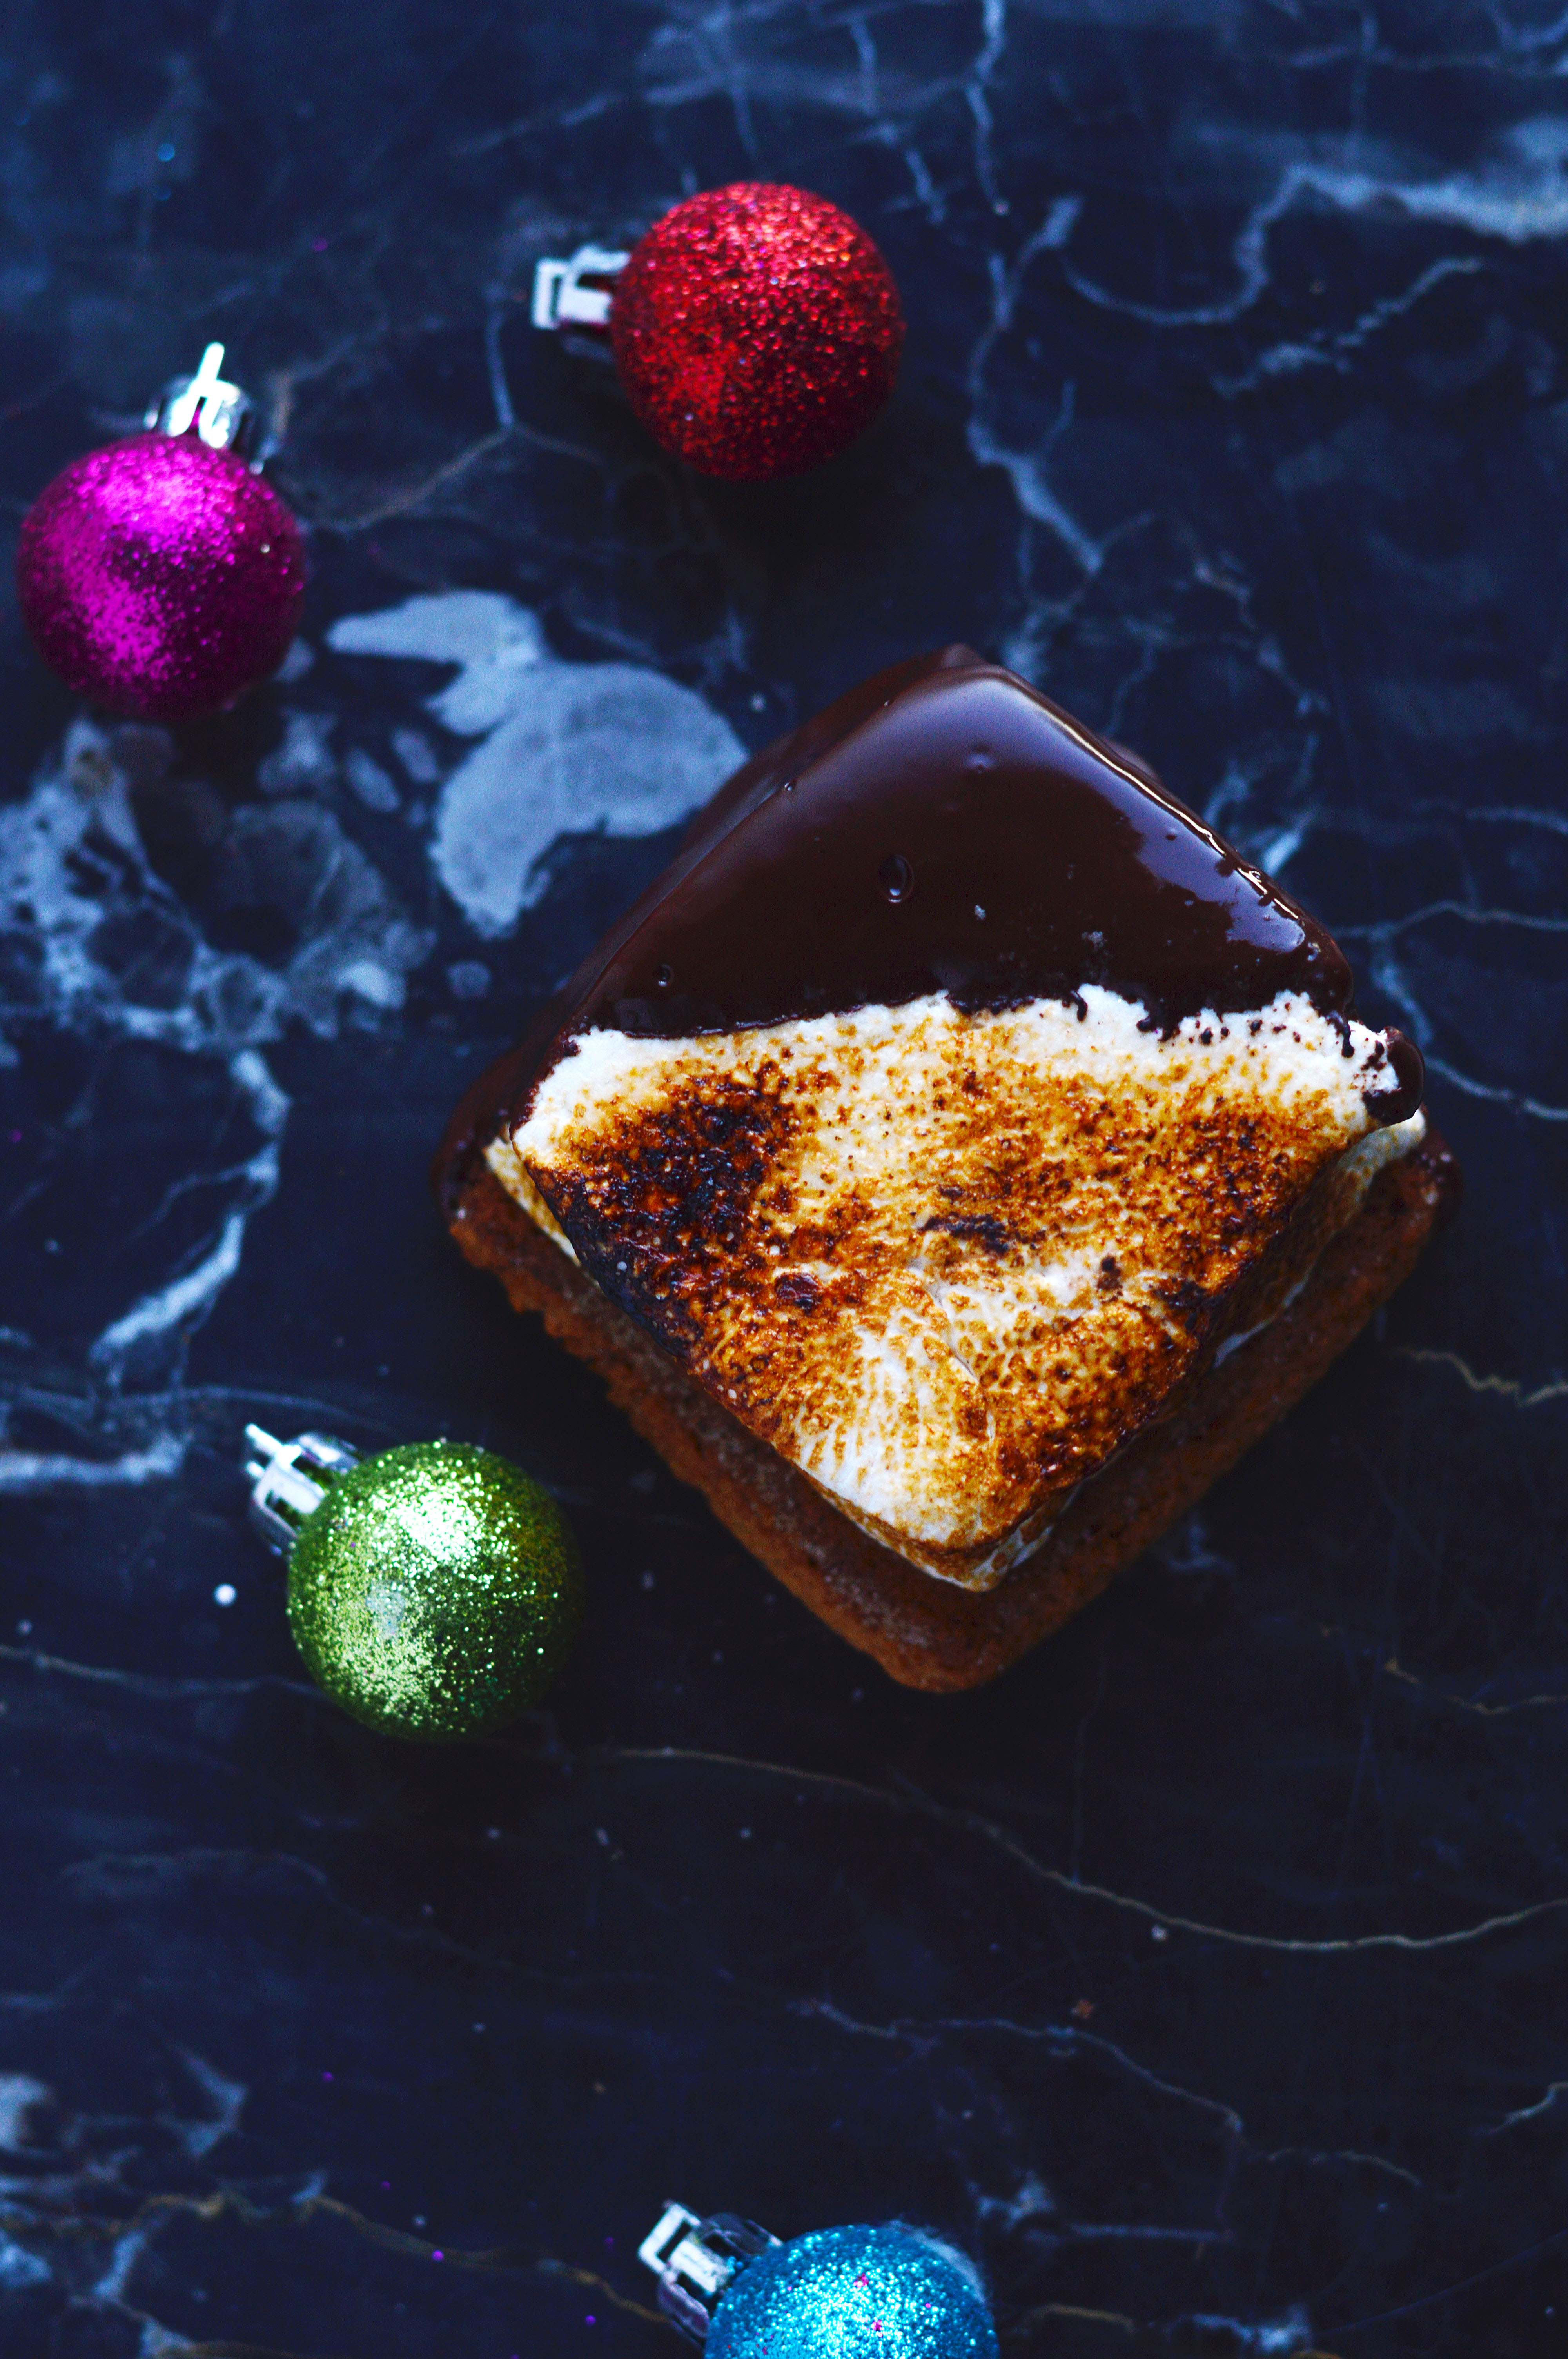
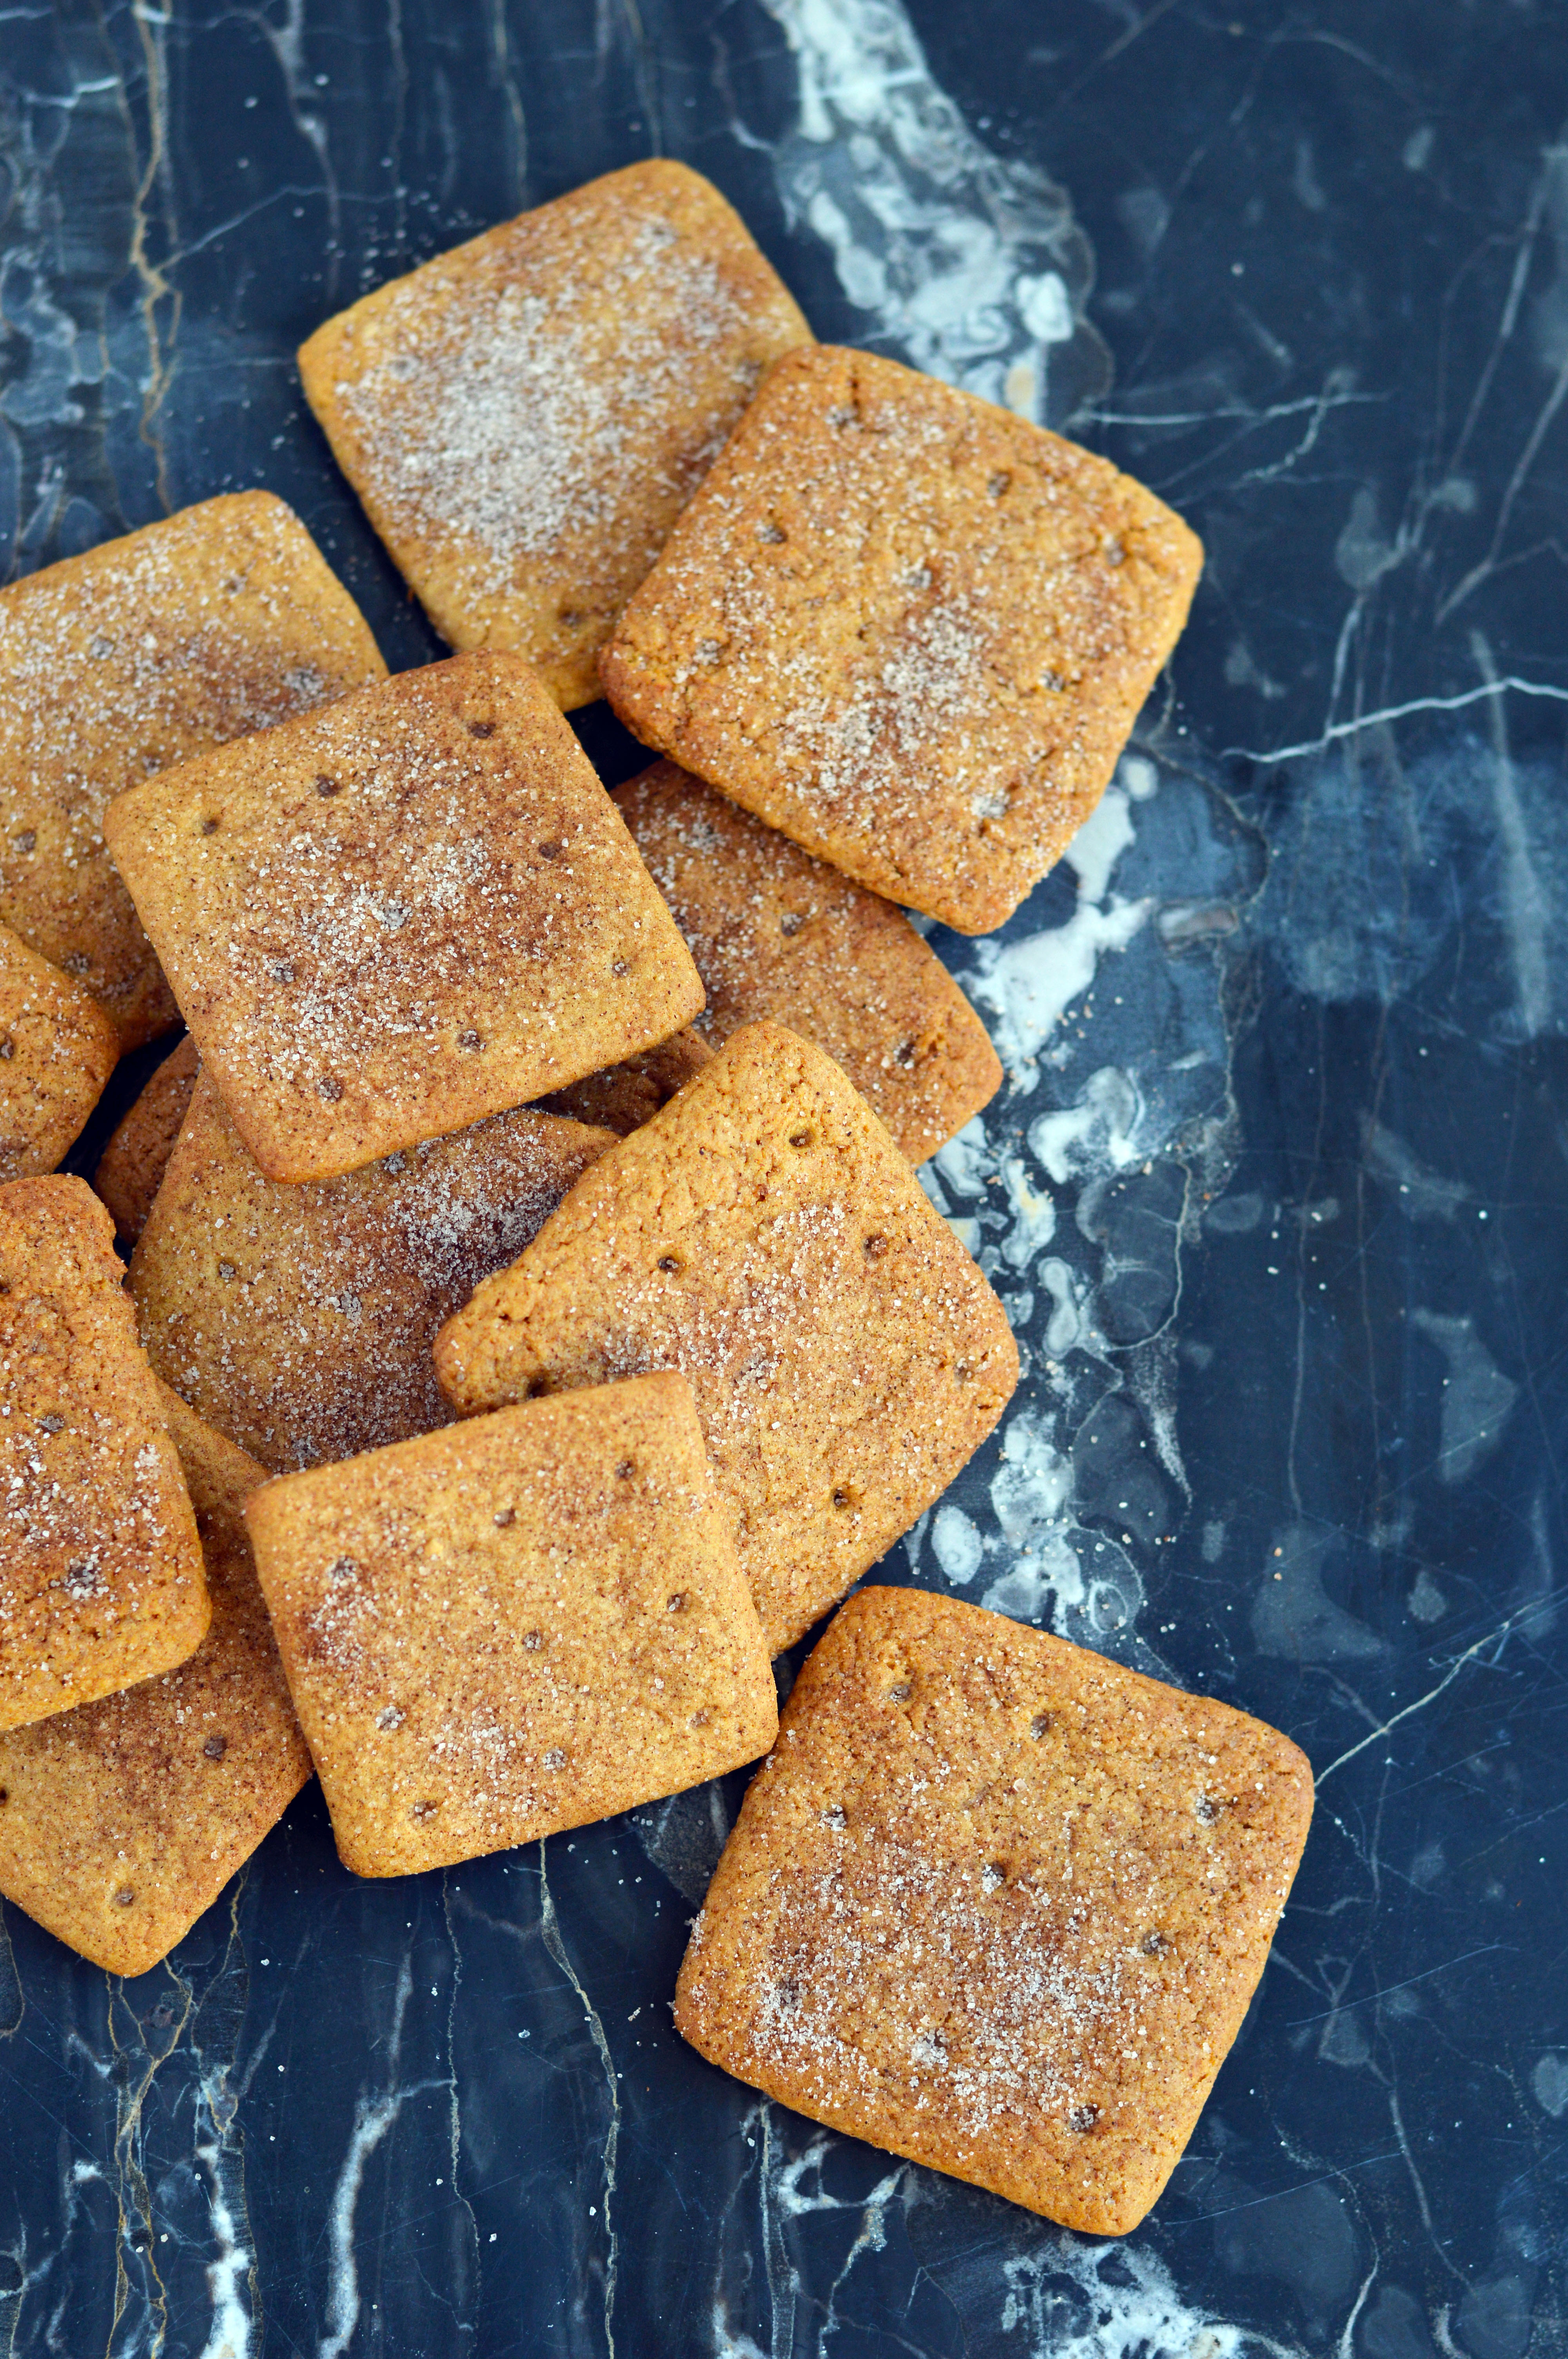
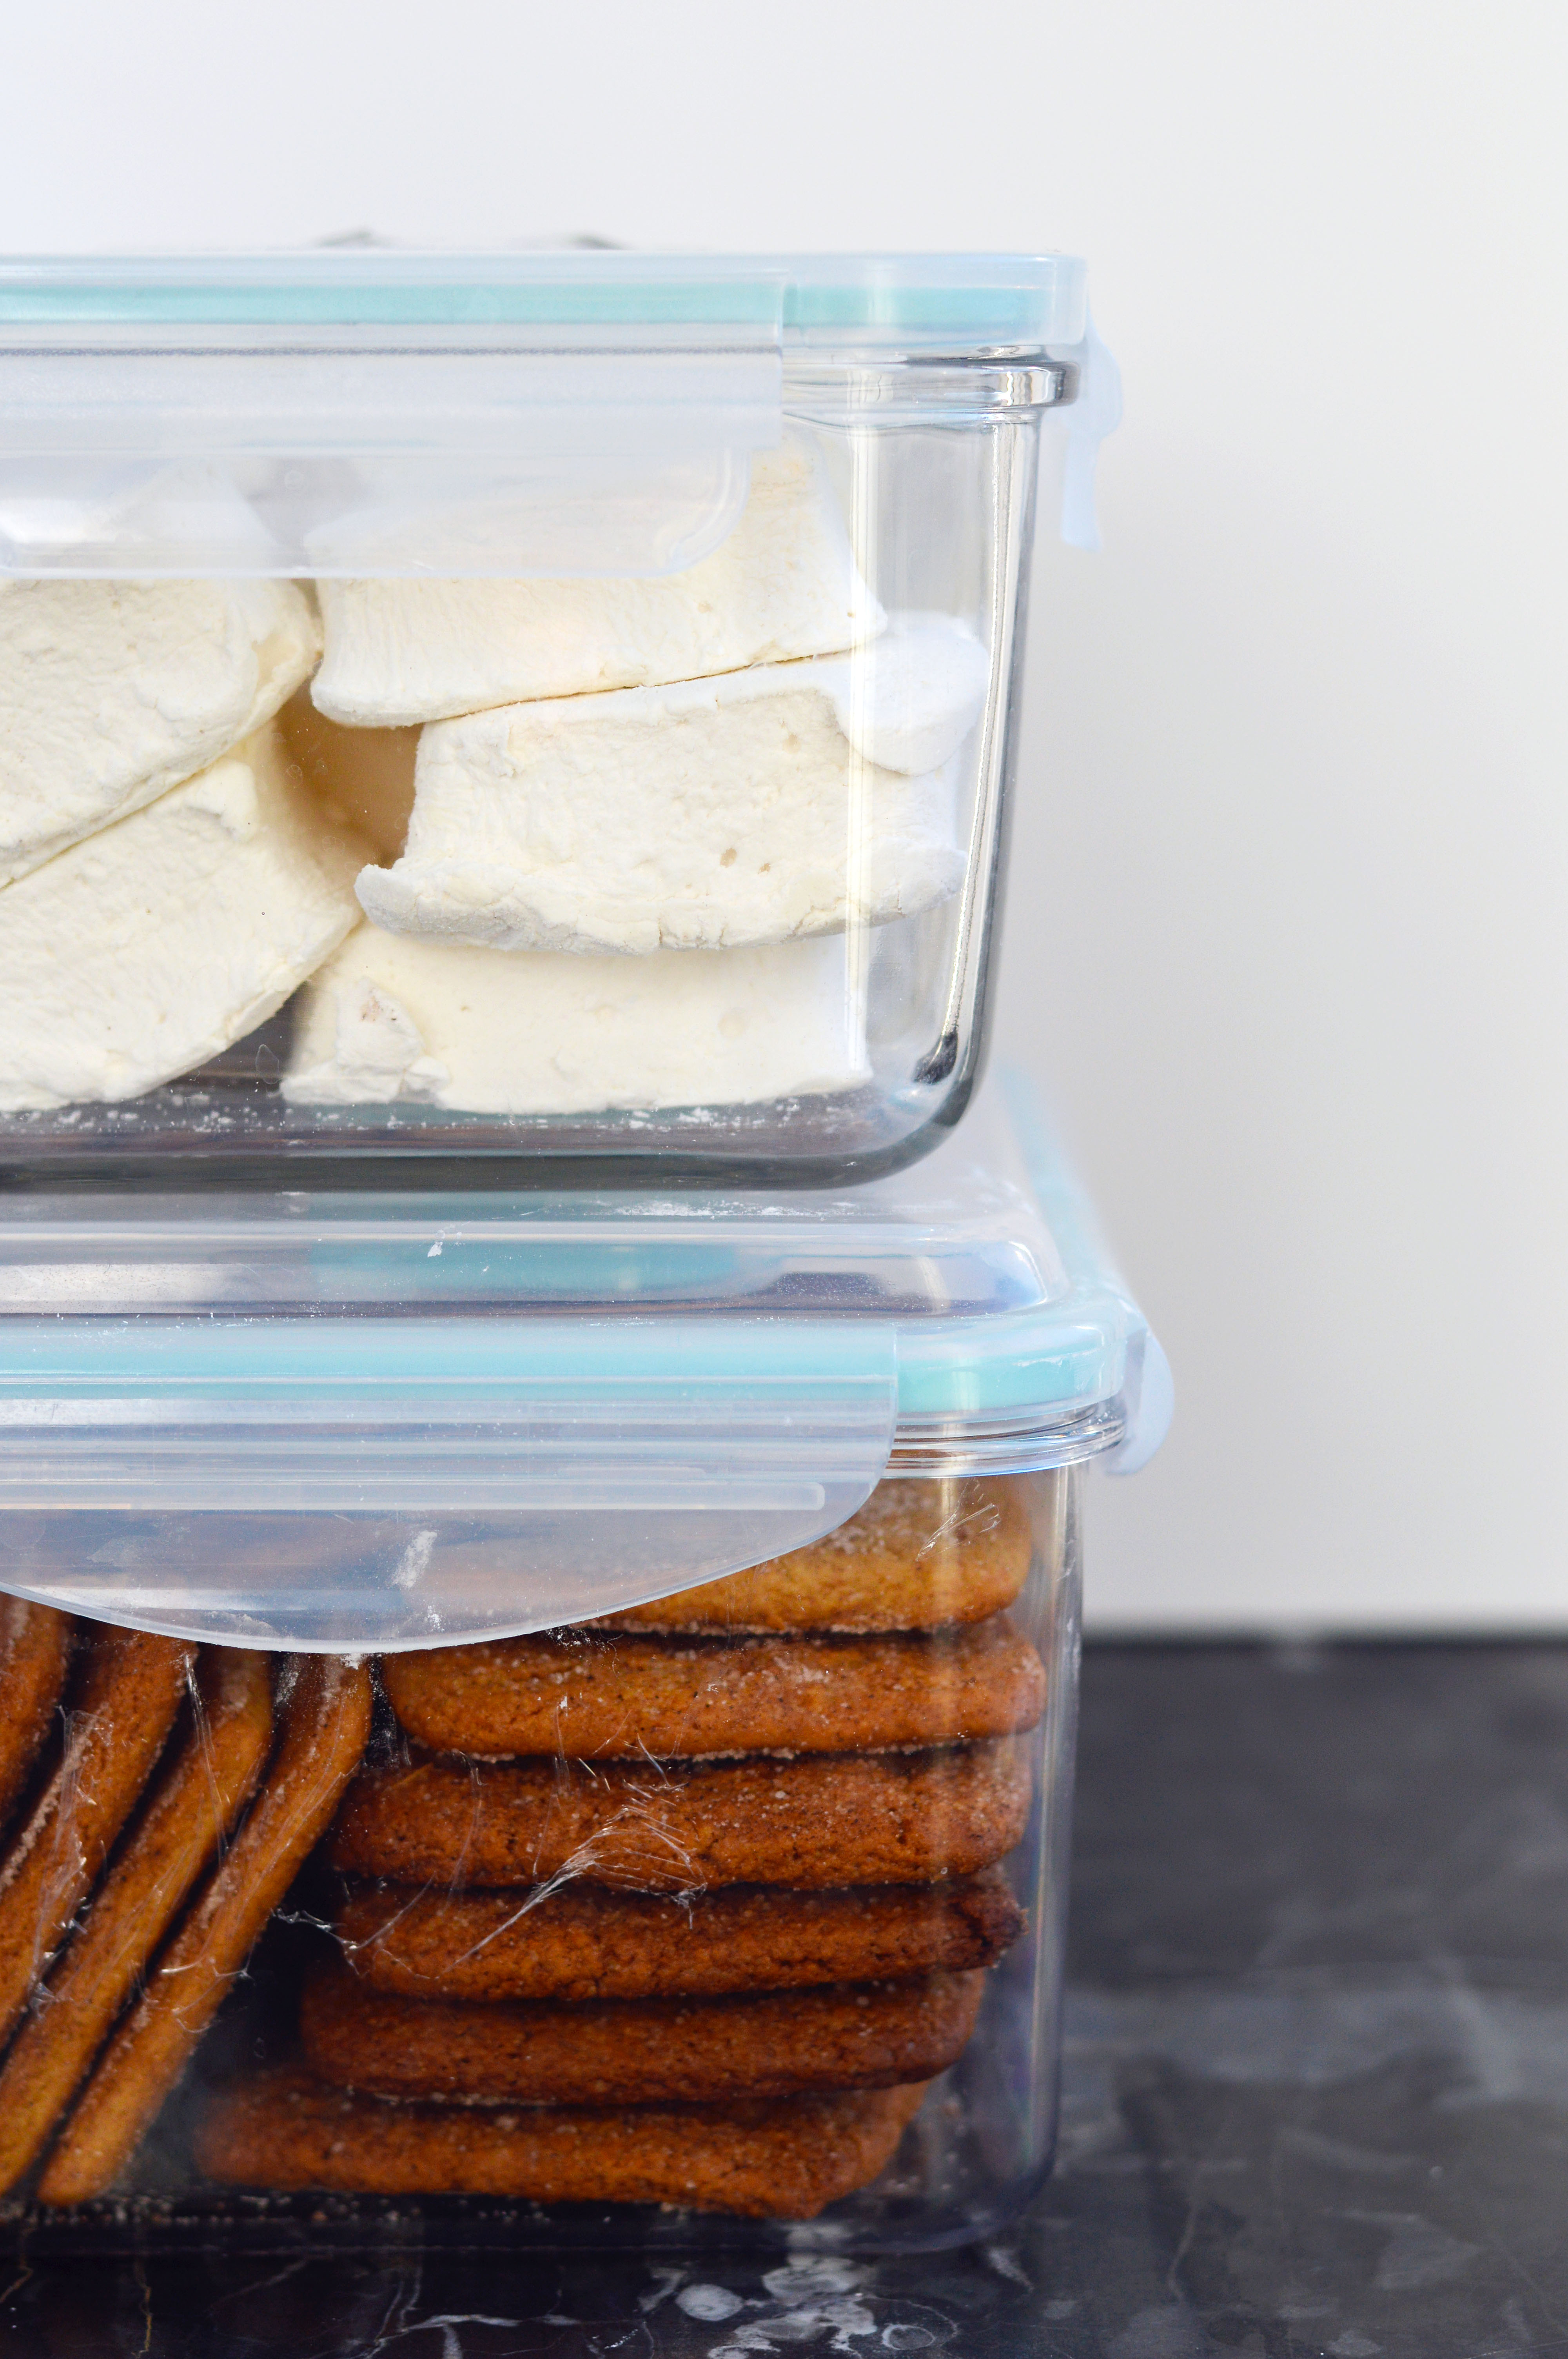
Why is s’mores a “summer” thing? Toasted marshmallows and melty chocolate seem more suited for winter, no? Because I like it so much, I decided to go homemade on all the components of it. I’m not knocking on my ol’ standby of Honey Maid graham crackers, Jet-Puffed marshmallows and Hershey’s chocolate, but sometimes a girl’s gotta do some from-scratch projects. I guess (for most people) the deciding factor boils down to: is it worth it? I won’t lie that the store-bought s’mores are almost as good and are way quicker to make, but do you see the char on that homemade marshmallow? You just can’t get the same toast on a ready-made version. If there was one component of the cookie that is worth making, it would be the marshmallows. The texture and flavor is unbeatable when compared to its commercial counterpart.A couple of notes about making marshmallows: 1) It is very sticky. Do not wrestle with it or try to get every bit out of the mixer. 2) Gelatin smells. When you whip up the gelatin and hot sugar mixture, it will smell awful. It’s hard to explain…but to me, it kind of smells like a farm? (I once took a class in college that required me to take care of a cow. It takes me back to that experience every time.) Either way, it is not a pleasant smell, but it will dissipate when the mixture cools. 3) You NEED a thermometer. There is no way around it. My thermapen might be the most used kitchen gadget and is worth every penny. Please, do not try and buy the $10 thermometers on Amazon. I promise you, you will not regret it.Homemade graham crackers are more flavorful and you can cut them into any shape and thickness that you want. Plus, you know every single ingredient that goes in it. And as for the chocolate coating, you can use way better quality chocolate. Oh! I tried using the sous vide cooker to temper chocolate and I’m not kidding, the best way to do it, EVER. We were having lunch as a group the other day and I was talking smack about my sous vide cooker… how it takes forever, how it’s only good for making steaks. But after this experience, I take it all back. I’m sorry I talked smack about you, I love you forever. S’mores is one of my favorite cookies because it combines everything I like: crisp cookie, a soft-chewy marshmallow and rich chocolate. So I decided to share it with you guys along with a bunch of other cookies from my very talented blogger friends! Seriously, the list is outrageously delicious. If a recipe stands out to you, please visit and show them some love!
Homemade graham crackers (recipe below)
Homemade marshmallows (recipe below)
8 oz. chocolate, tempered (I used the sous vide method here)
Toppings, optional
Instructions:
Put all the chocolate in a tall container for easier dipping. I used a 2-cup pyrex measuring cup.
Have a sheet pan lined with a parchment paper ready.
Place one square of marshmallow on top of the graham cracker and lower both on an angle so you get a crisp line. Work quickly so your chocolate doesn’t fall out of temper.
Sprinkle the chocolate covered side with any toppings you want. Above, I used nonpareils, freeze dried strawberries, royal icing poinsettias, and flaky salt. The flaky salt looked the least impressive, but tasted the best.
Let set. Toast marshmallow with a kitchen torch before eating for best taste. The chocolate melts a little when you toast the marshmallow, giving you the s’mores effect.
Homemade Graham Crackers
Ingredients:
2 ½ c. plus 2 tbsp. all purpose-flour
1 c. dark brown sugar, lightly packed
1 tsp. baking soda
¾ tsp. kosher salt
7 tbsp unsalted butter, cut into 1-inch cubes and frozen
1/3 c. honey
5 tbsp. whole milk
2 tbsp. vanilla extract
In a food processor fitted with the steel blade, pulse together the flour, brown sugar, baking soda and salt.
Add in the chunks of frozen butter and pulse until the mixture looks very crumbly, or a coarse meal.
In a small bowl, mix the honey, milk and vanilla extract and add it to the flour mixture.
Pulse the mixture until the dough barely comes together. Do not over process, the cookies will become tough.
Wrap the dough in a large piece of plastic wrap. The dough will be sticky, so try to avoid using your hands and use the sides of the plastic wrap to form the dough into a large rectangle. Refrigerate the dough for two hours, or overnight.
Take the dough out and divide it in half, refrigerate the half that you are not using.
Roll out the dough (remember, the dough is sticky, so use flour as needed) about ⅛ inch thick, and use a square 2 ½ inch cutter to cut out squares.
Place them on a baking sheet lined with parchment paper.
Take the thicker end of a skewer and poke nine holes in each square, like a cracker.
In a small bowl, mix the sugar and ground cinnamon for the topping.
Sprinkle the tops of the cookies with the topping and refrigerate for about 30-45 minutes until firm. Repeat with the remaining dough. Once you cut out all the squares, put the scraps together and re-roll and cut out more squares.
Preheat the oven to 350˚F and bake the cookies about 10-15 minutes, or until the cookies are golden brown.
Homemade Marshmallows
Ingredients:
3 envelopes of unflavored gelatin
1 c. ice cold water, divided
1 ½ c. sugar
1 c. light corn syrup
¼ tsp. kosher salt
1 tsp, vanilla extract
¼ c. powdered sugar
¼ c. cornstarch
Instructions:
Place the gelatin into a bowl of a standing mixer fitted with the whisk attachment. Add ½ c. ice water and let bloom.
In a small pot either fitted with a candy thermometer (or not, if you’re using an instant-read thermometer), combine ½ c. water, sugar, corn syrup and salt.
Heat mixture over medium high heat and cook until the mixture hits 240˚F, which should take about 6-8 minutes depending on the type of pot you used and the heat of the stove.
Once the mixture hits 240˚F, take it off the heat and start your mixer on low speed.
Add the hot sugar to the gelatin mixture slowly, avoid hitting the whisk.
Once all of the sugar is mixed in gradually raise the speed of the mixer to high.
Mix for about 12-15 minutes, or until the side of the bowl is luke warm and the mixture becomes very thick. Add in the vanilla in the last minute of mixing, taking care to lower the speed while you add it in, so you don’t fling extract everywhere (like I did. Ha!).
Prepare an 8×8 pan, with high sides (at least 2 inches), by spraying the inside with nonstick spray and lining the inside with parchment paper.
Spread the sugar mixture into the 8×8 pan using a silicone spatula also sprayed with nonstick spray. Try to smooth it down the best you can.
In a small bowl, mix the powdered sugar and cornstarch together. Use a mesh strainer to dust the top of the marshmallow mixture and wrap with plastic wrap overnight to cool and set. Save the rest of the powdered sugar mixture for the next day.
When the marshmallow is set, overturn it on a cutting board dusted with the powdered sugar mixture.
Use a 2 ½ in. square cutter to cut out squares of marshmallows. Dust the cutter with the powdered sugar to avoid sticking.
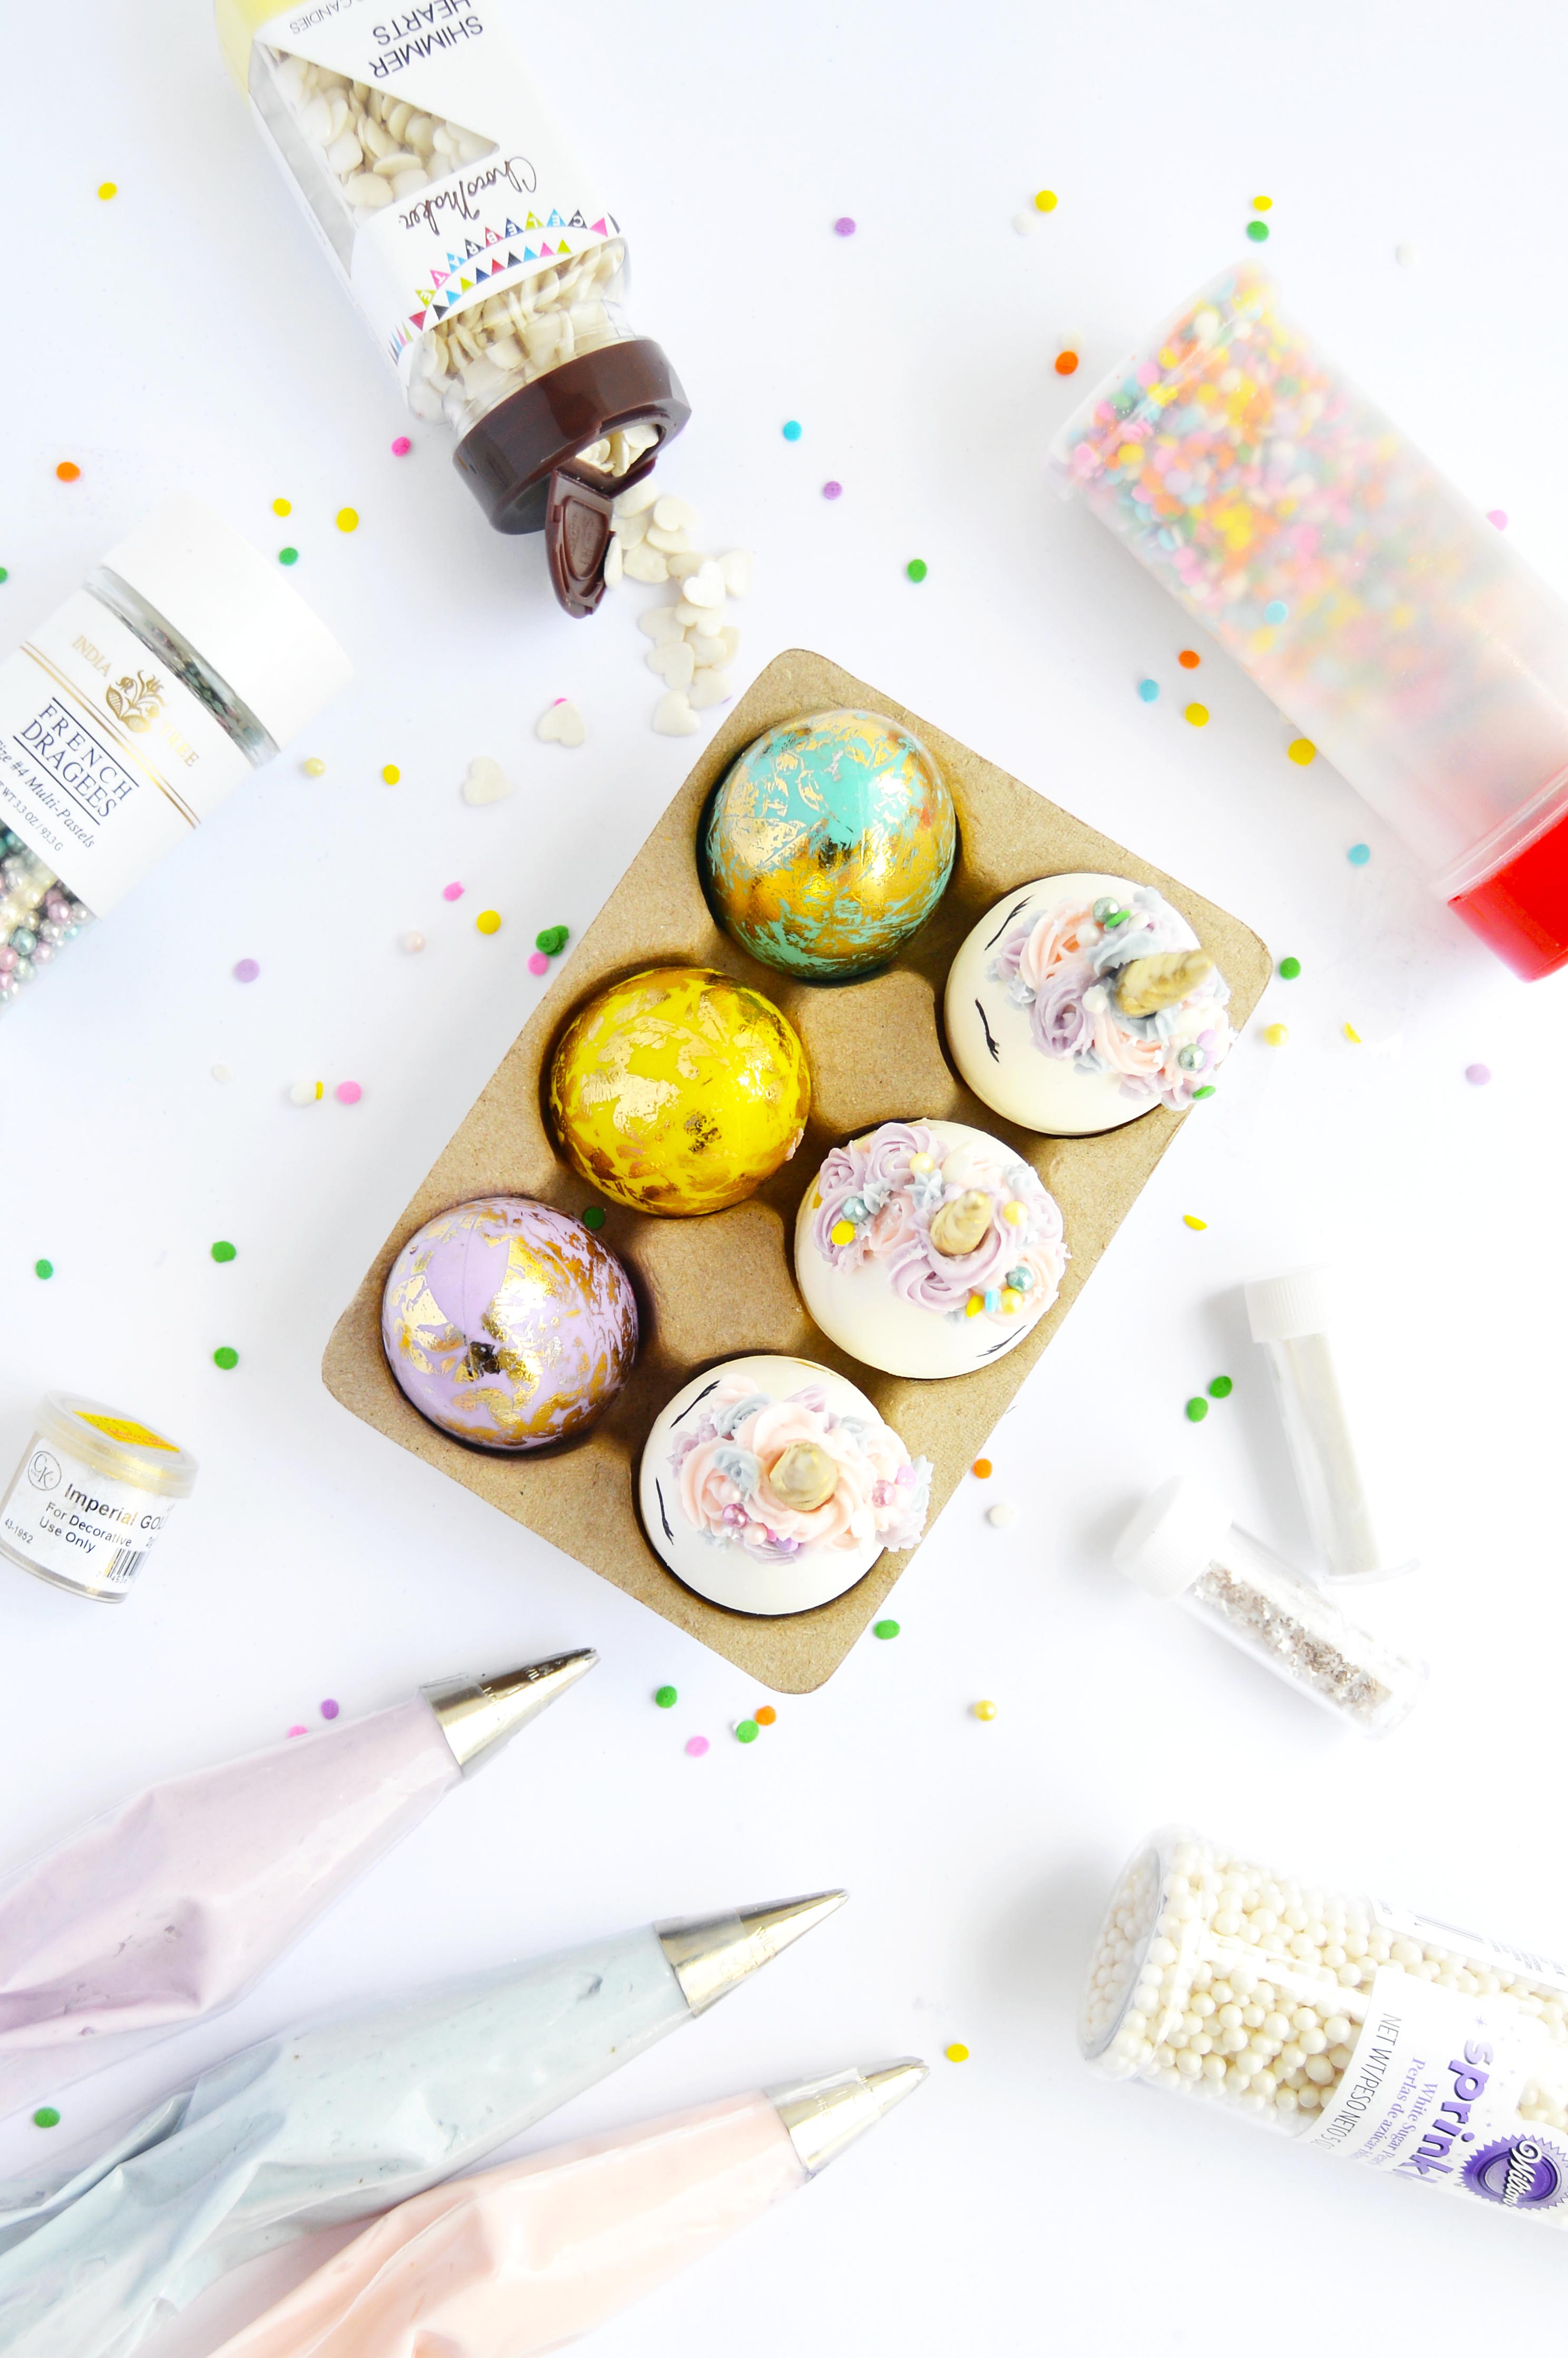
I know it’s been a while! If you follow my Instagram feed, you would know that I’ve been making some cakes during my weekends off and that took time away from blogging. But I hurried my butt to share this project with you this week, because I could not wait another year for an Easter post. These unicorn eggs are made of hollow candy melt shells, with swirls of pastel buttercream and adorned with a golden fondant horn and pearls and stars. I originally wanted the eggs to be filled with a rainbow mousse that would have beautiful layers when you cut into the candy melt. But I had the toughest time molding the eggs. The eggs are made with an egg shaped Jell-O mold that I used for my tiramisu eggs a while back. As much as I appreciate the mold, I have a deep love/hate relationship with it. It fails to close properly unless you use excessive force (this might be because my mold is old), and it’s hard to fill because of the small opening on top. But it does make the perfect egg shape when it is molded properly. The tiramisu had a cracked shell look to it, so I didn’t need a perfect shape. Unfortunately, this project required a whole egg shape and it made it more difficult. If I’m being honest, I almost gave up after failing to mold the eggs on my first attempt. I wasted a whole afternoon of prepping everything, and gathering all the supplies and decorations. But I just had to make it, even if the mousse was a long lost dream. After trying it a second time, I was somewhat successful and 3 out of 6 eggs were usable, and I was a little worried but the end result was so cute that it made the journey worth it.
Chocolate Unicorn Easter Eggs
You will need:
jello egg mold*
1 c. white chocolate candy melts
½ batch vanilla buttercream
a small amount of white fondant
purple gel food color
blue gel food color
pink gel food color
gold luster dust
vodka
edible silver stars
tiny confetti sprinkles
colored edible pearls
metallic edible pearls
black edible ink marker
white pearl dust
Assembly:
Roll out a small amount of fondant with your palms to create a thin white rod. Twist two rods together to create a horn shape. Taper the end of the rod to create a unicorn horn.
Mix a few drops of vodka with a small amount of gold luster dust and paint the unicorn horn. Set aside to set.
Place white chocolate in a microwave safe bowl/cup with a spout.
Melt the white chocolate melts in the microwave in 15 second intervals until completely melted.
Thoroughly spray the inside of your egg mold with a non-stick cooking spray.
Use the spout of your bowl/cup to pour white chocolate into the egg about ¼ of the way.
Start rotating your egg mold (left, right, and upside down) until it starts to set. (When flipping the egg mold upside down, do so above your melted chocolate so the excess can drip back into the bowl.)
Once set, repeat steps 4 and 5 two more times to ensure through covering and place in freezer to completely set. (4-5 minutes)
While the eggs are setting, fit three disposable piping bags with small star tips (I used wilton tip #16, 15, and 17), color your buttercream and fill your piping bags with each color.
Take the eggs out of the freezer and carefully unmold the chocolate. It may stick a little. Just wiggle it around gently, and it should come out in one piece.
Use the frosting to swirl different colors to give your unicorn a mane. Leaving a small gap at the tip of the egg for the unicorn horn. Tip: Use the largest star tip to give the mane a general shape and use the smaller tip to make the mane fuller. Use the smallest tip to fill in the tiny gaps in between the large and small swirls.
Use a tweezer (kitchen use only tweezers) to place pearls, stars, and confetti sprinkles to give the eggs a little more dimension. You can pretty much use any sprinkle you desire. Just make sure it is small so that you don’t lose the swirls of the unicorn mane.
Place the eggs in the freezer for the buttercream to harden, about 3-5 minutes.
Remove eggs from the freezer and with the edible marker, draw on the eyes.
Use a food-safe brush to brush on pearl powder around the egg to give it some sheen.
Squeeze a little swirl of buttercream right where you want the unicorn horn and place the unicorn horn in the center of the swirl.
Display eggs in an egg carton to really sell the “egg” look.
*After doing extensive research, the egg mold I used has been discontinued. I did find some eBay listings for them. Look up the term “jello egg mold” and it should give you purchasing options.
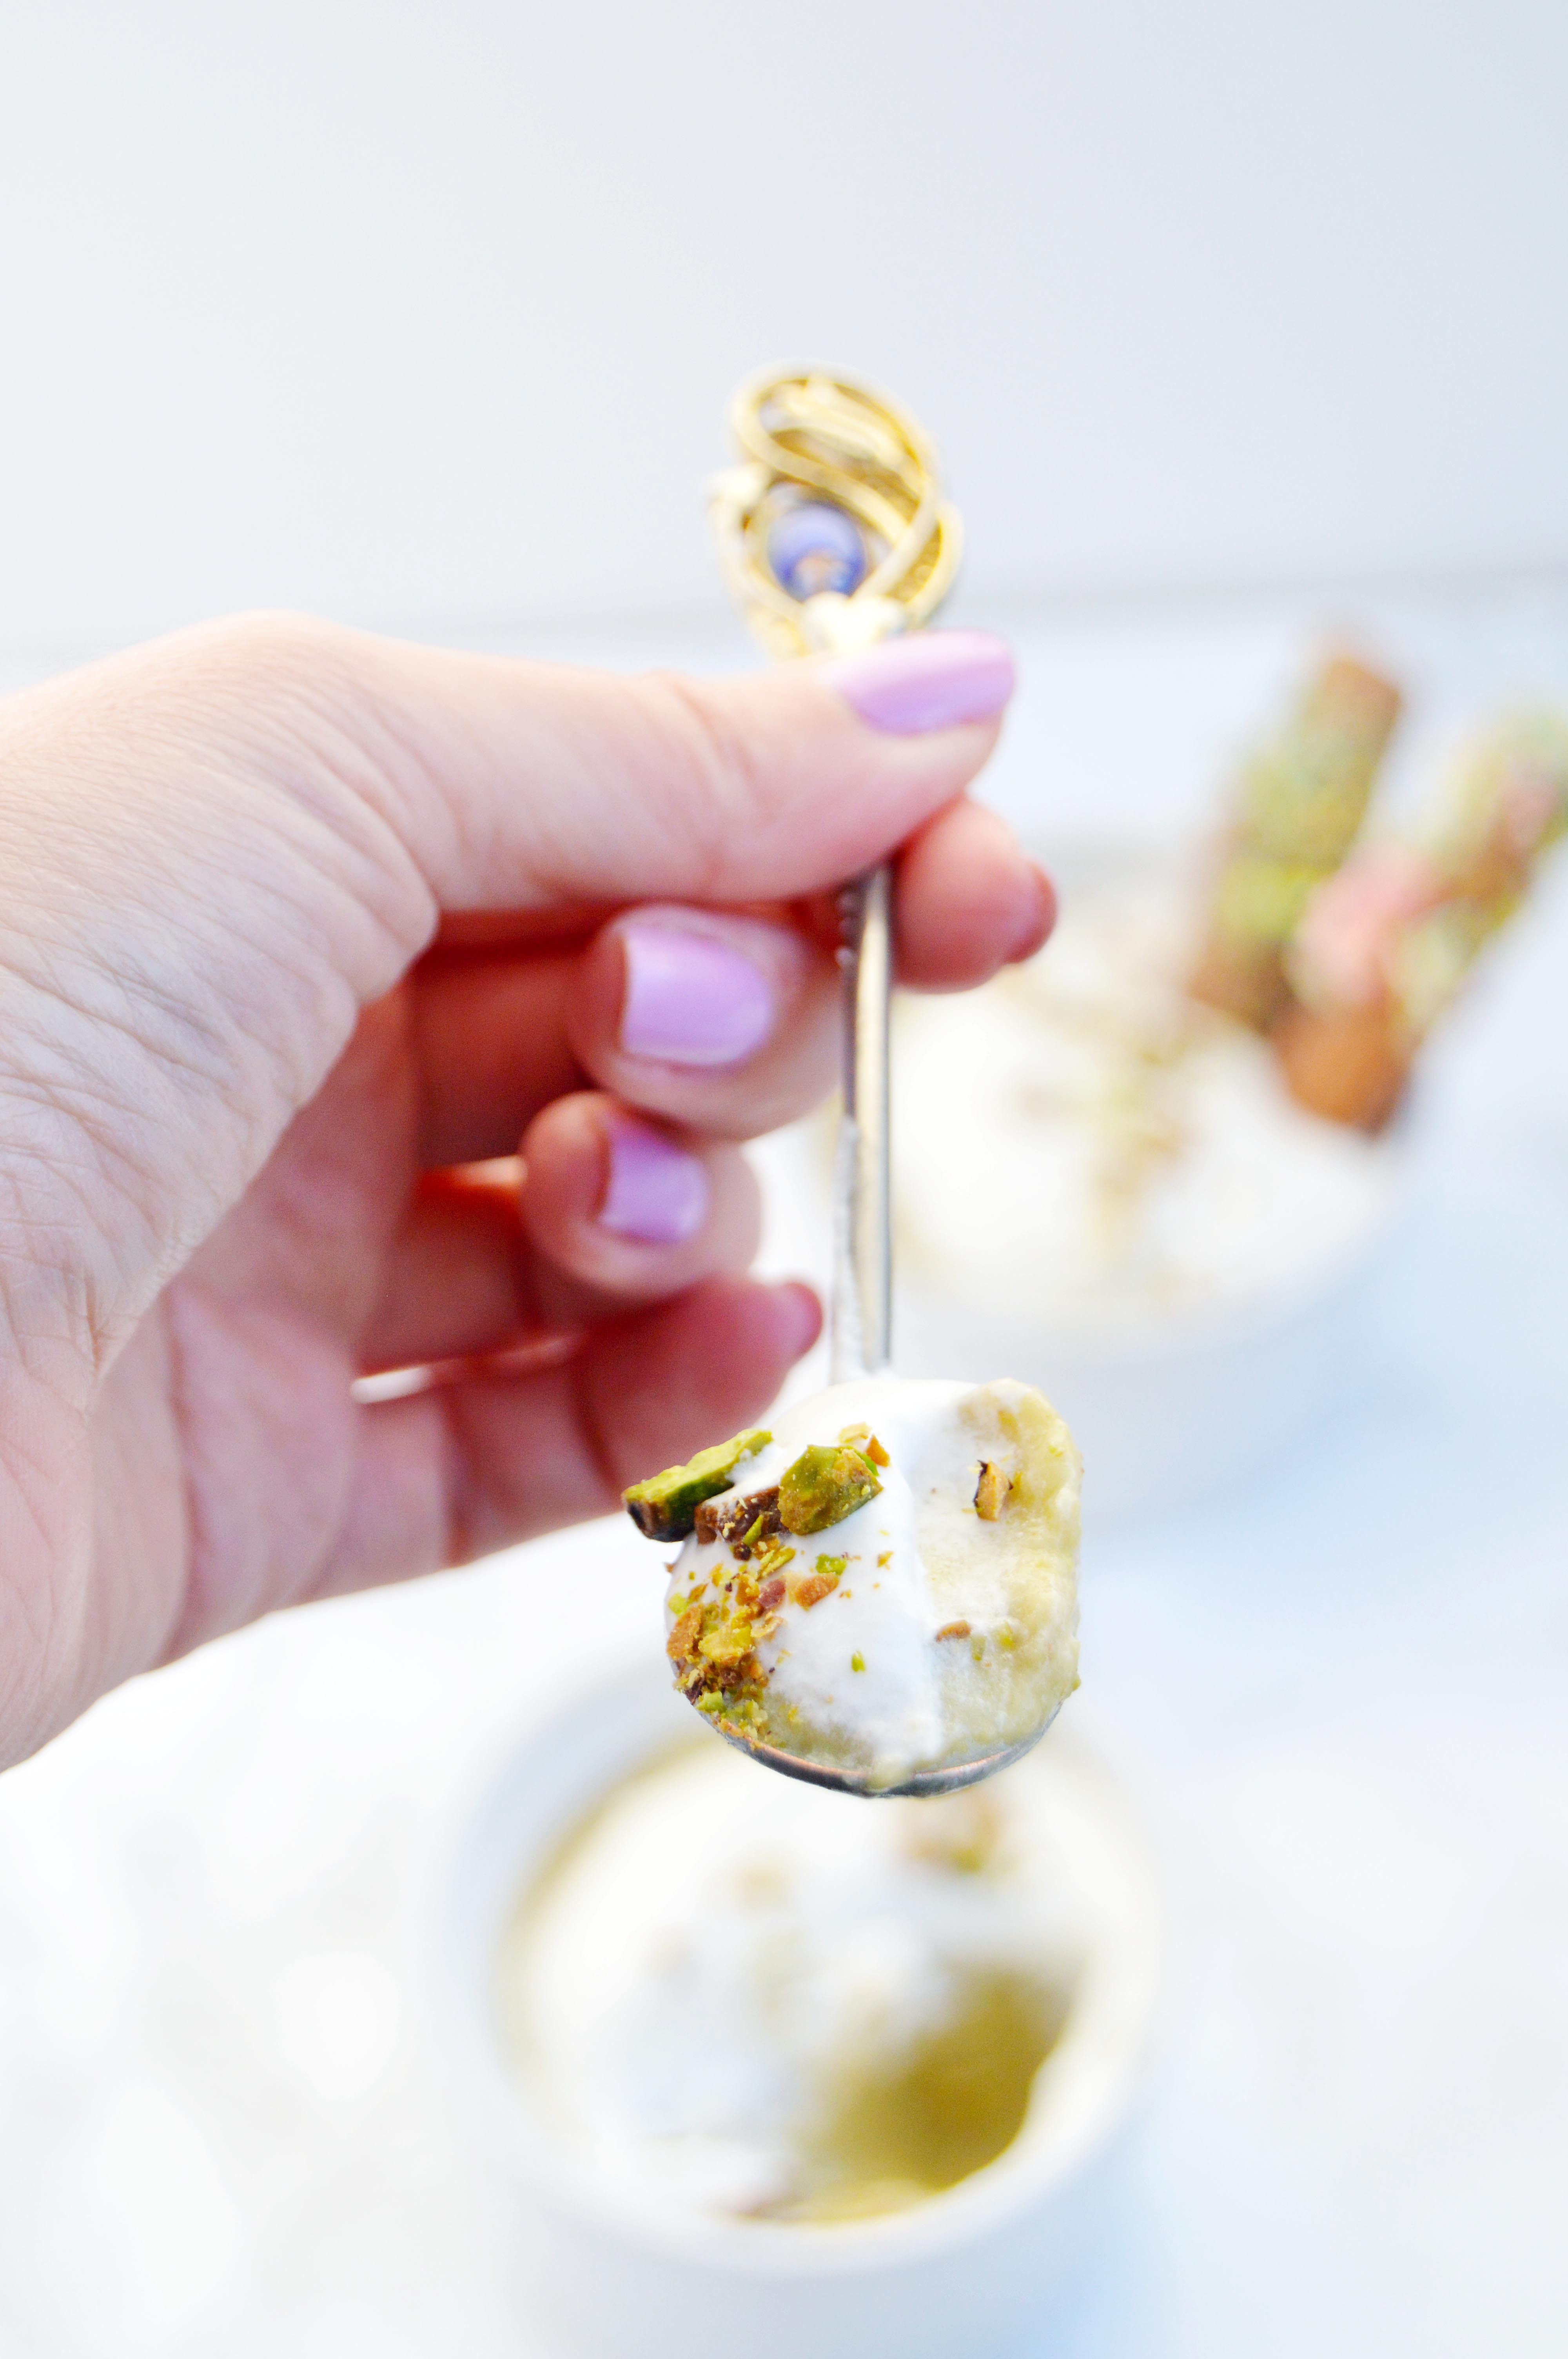
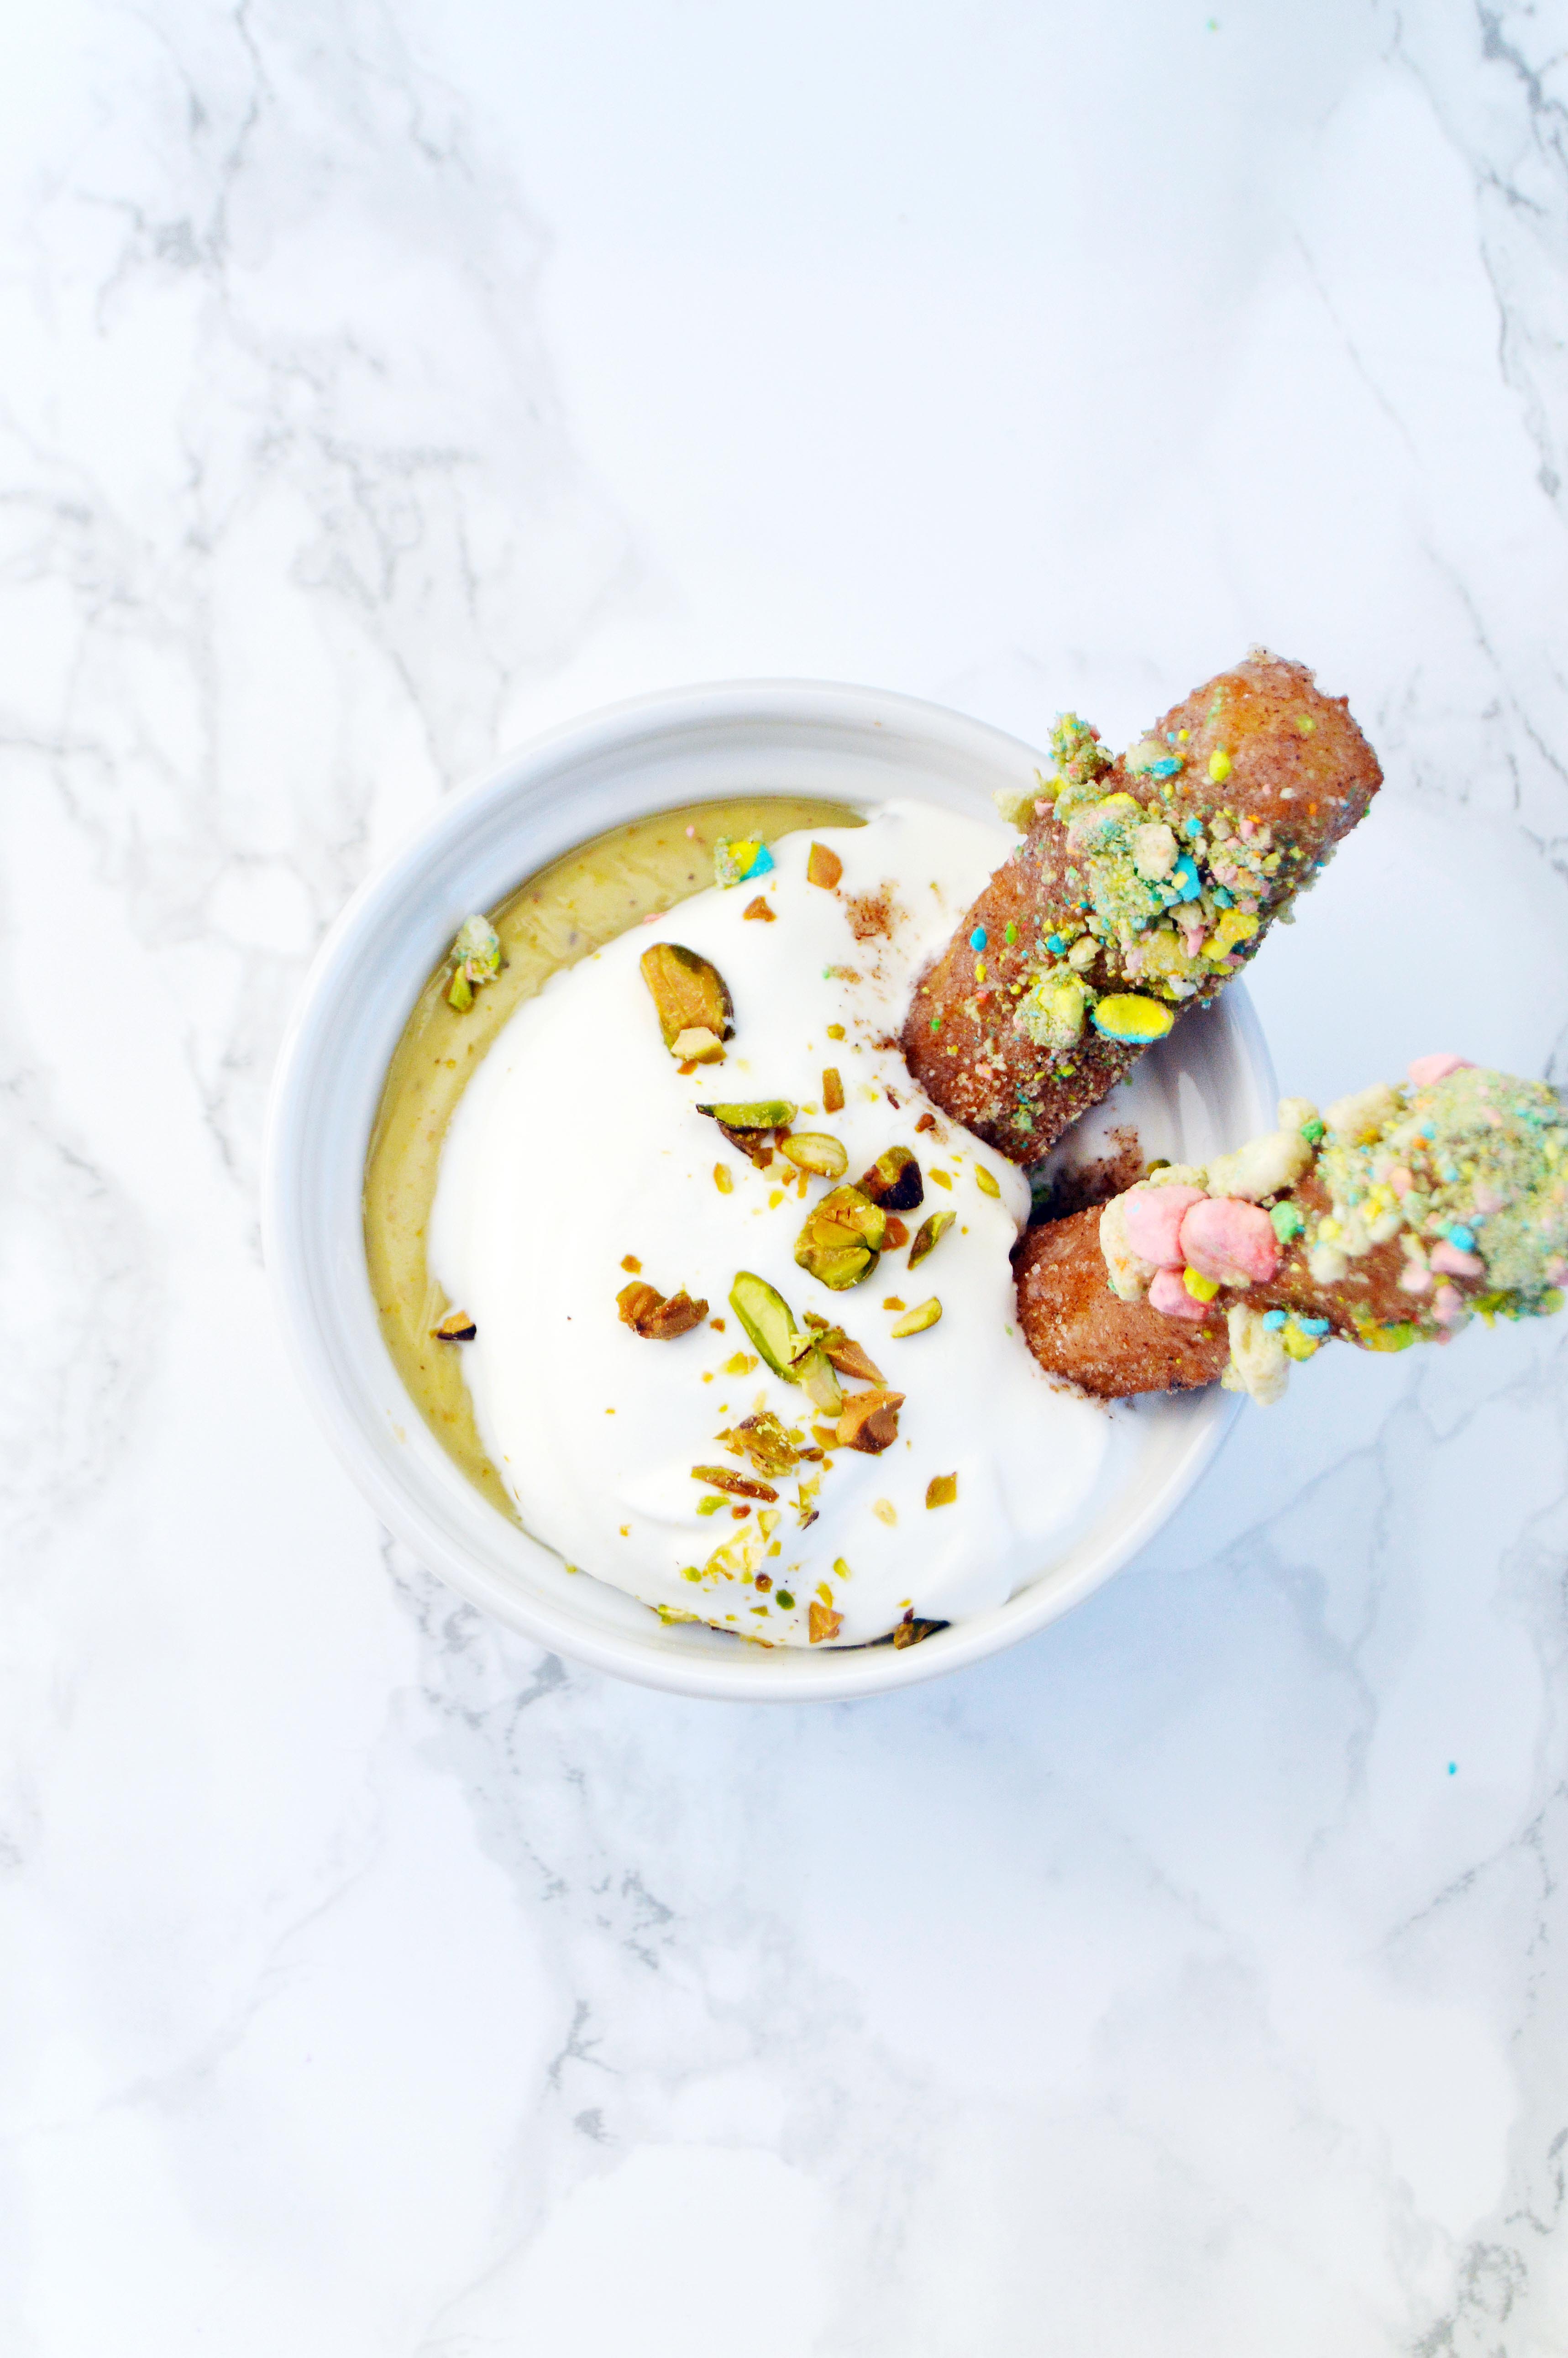
It’s almost St. Patrick’s Day and I’m part of a virtual St. Patrick’s Day Party! If there was one word to describe the holiday for me, it would be: green. When it comes to desserts there aren’t many green colored options, and I decided to do something with pistachios. I’ve made pistachio flavored cupcakes before but I used jello pudding mix which gave it an artificial taste. I’m not knocking on pistachio pudding mix; I’ve actually grown to like that artificial pistachio flavor. Much like how I’ve grown to love maraschino cherries. The pistachio flavor of the pudding isn’t assertive. If I had to describe the flavor, I would say it’s very similar to the Häagen-Dazs pistachio ice cream only in pudding form, especially once it’s topped with a dollop of whipped cream. It’s dreamy and luscious, and pale green in color. And because I wanted to add lucky charms into the whole thing, I made some lucky charms churros. Funny thing is they look entirely different from now I imagined them. I wanted them to have lots of marshmallows and cereal pieces stuck on them. Unfortunately, when I did put whole pieces of the cereal onto the churros, they looked chunky and unappealing. So I crushed them and stuck them on there, similar to sprinkles. A little more whimsical, but it doesn’t really scream “lucky charms”. Oh well. The churros btw, are delicious. They’re crisp on the outside and chewy on the inside. Don’t get scared and take them out of the oil too early or you’ll end up with doughy insides. Now excuse me while I oogle at these awesome dishes that everyone else contributed to our party… You’re of course, welcome and encouraged to check them out too. 😉
Ingredients:
½ c salted pistachios, shelled
⅓ c. sugar
2 tbsp. water
Instructions:
In the bowl of a food processor, pulse pistachios until finely ground.
Add sugar and water and continue to blend until smooth.
For the Pistachio Pudding Makes about 4 ramekins
Ingredients:
1 batch pistachio paste (recipe above)
2 c. whole milk
2 egg yolks
⅓ c. sugar
2 tbsp. corn starch
pinch of salt
1 tsp. vanilla extract
2 tbsp. unsalted butter
½ c. heavy whipping cream
1 tbsp. powdered sugar
a handful pistachios, chopped
Instructions:
In a small pot, whisk pistachio paste and milk together and heat until simmering.
While the pistachio milk comes to a simmer, whisk egg yolks, sugar, cornstarch and salt in a small bowl to form a smooth paste.
Slowly whisk in the hot pistachio milk by the ladleful into the egg mixture until you use up half of the pistachio milk.
Add the rest of the egg mixture back into the pot and whisk on medium heat until pudding is thickened.
Remove pot from heat and whisk in butter and vanilla extract until smooth.
Spoon pudding into ramekins, and wrap with plastic wrap and push the plastic onto the surface so it doesn’t form a skin.
Refrigerate 4 hours or overnight.
Before serving, whip heavy cream and powdered sugar together until stiff peaks form, place a dollop of whipped cream on top and garnish with chopped pistachios.
For the Lucky Charms Churros
For the churros
Ingredients:
½ c. sugar
1 ½ tsp. cinnamon
1 c. water
1 ½ tbsp. sugar
2 tbsp. vegetable oil
½ tsp. salt
1 c. all-purpose flour
2 qt. vegetable oil (for frying)
vanilla glaze (recipe below)
about 1 cup of crushed lucky charms cereal (with mostly marshmallows; less cereal)
Instructions:
In a shallow bowl, combine ½ c. sugar and cinnamon and set aside.
In a small saucepan over medium heat, whisk water, sugar, 2 tbsp. vegetable oil, and salt together and bring to a boil.
Once the mixture is boiling, turn off the heat, add in the flour and stir with a wooden spoon until a ball of dough forms.
In a large heavy pot clipped with a candy thermometer, heat the vegetable oil until 375 degrees.
While the oil heats, transfer the dough into a piping bag fitted with a large star tip. The dough is dense and tough to push through the piping bag so use a heavy-duty bag.
On a sheet pan lined with parchment paper, pipe the length of the churros you would like and cut it off with either a sharp knife or scissors until you use up the dough.
Once the oil is heated, slowly place the churro dough into the hot oil. Do not drop the dough into the oil for it will splatter. Place about 3-4 pieces and fry until golden brown, about 2-4 minutes.
Lightly shake off the excess oil, and place the cooked churros onto a plate lined with paper towels.
Drain churros for two minutes and then toss in the cinnamon sugar.
Repeat with the remaining churro dough.
Once the churros are cool, drizzle the top half of the churros with the vanilla glaze and dip into the crushed marshmallows.
Vanilla Glaze
Ingredients:
1 c. powdered sugar
1 ½ tbsp. milk
¼ tsp. vanilla extract
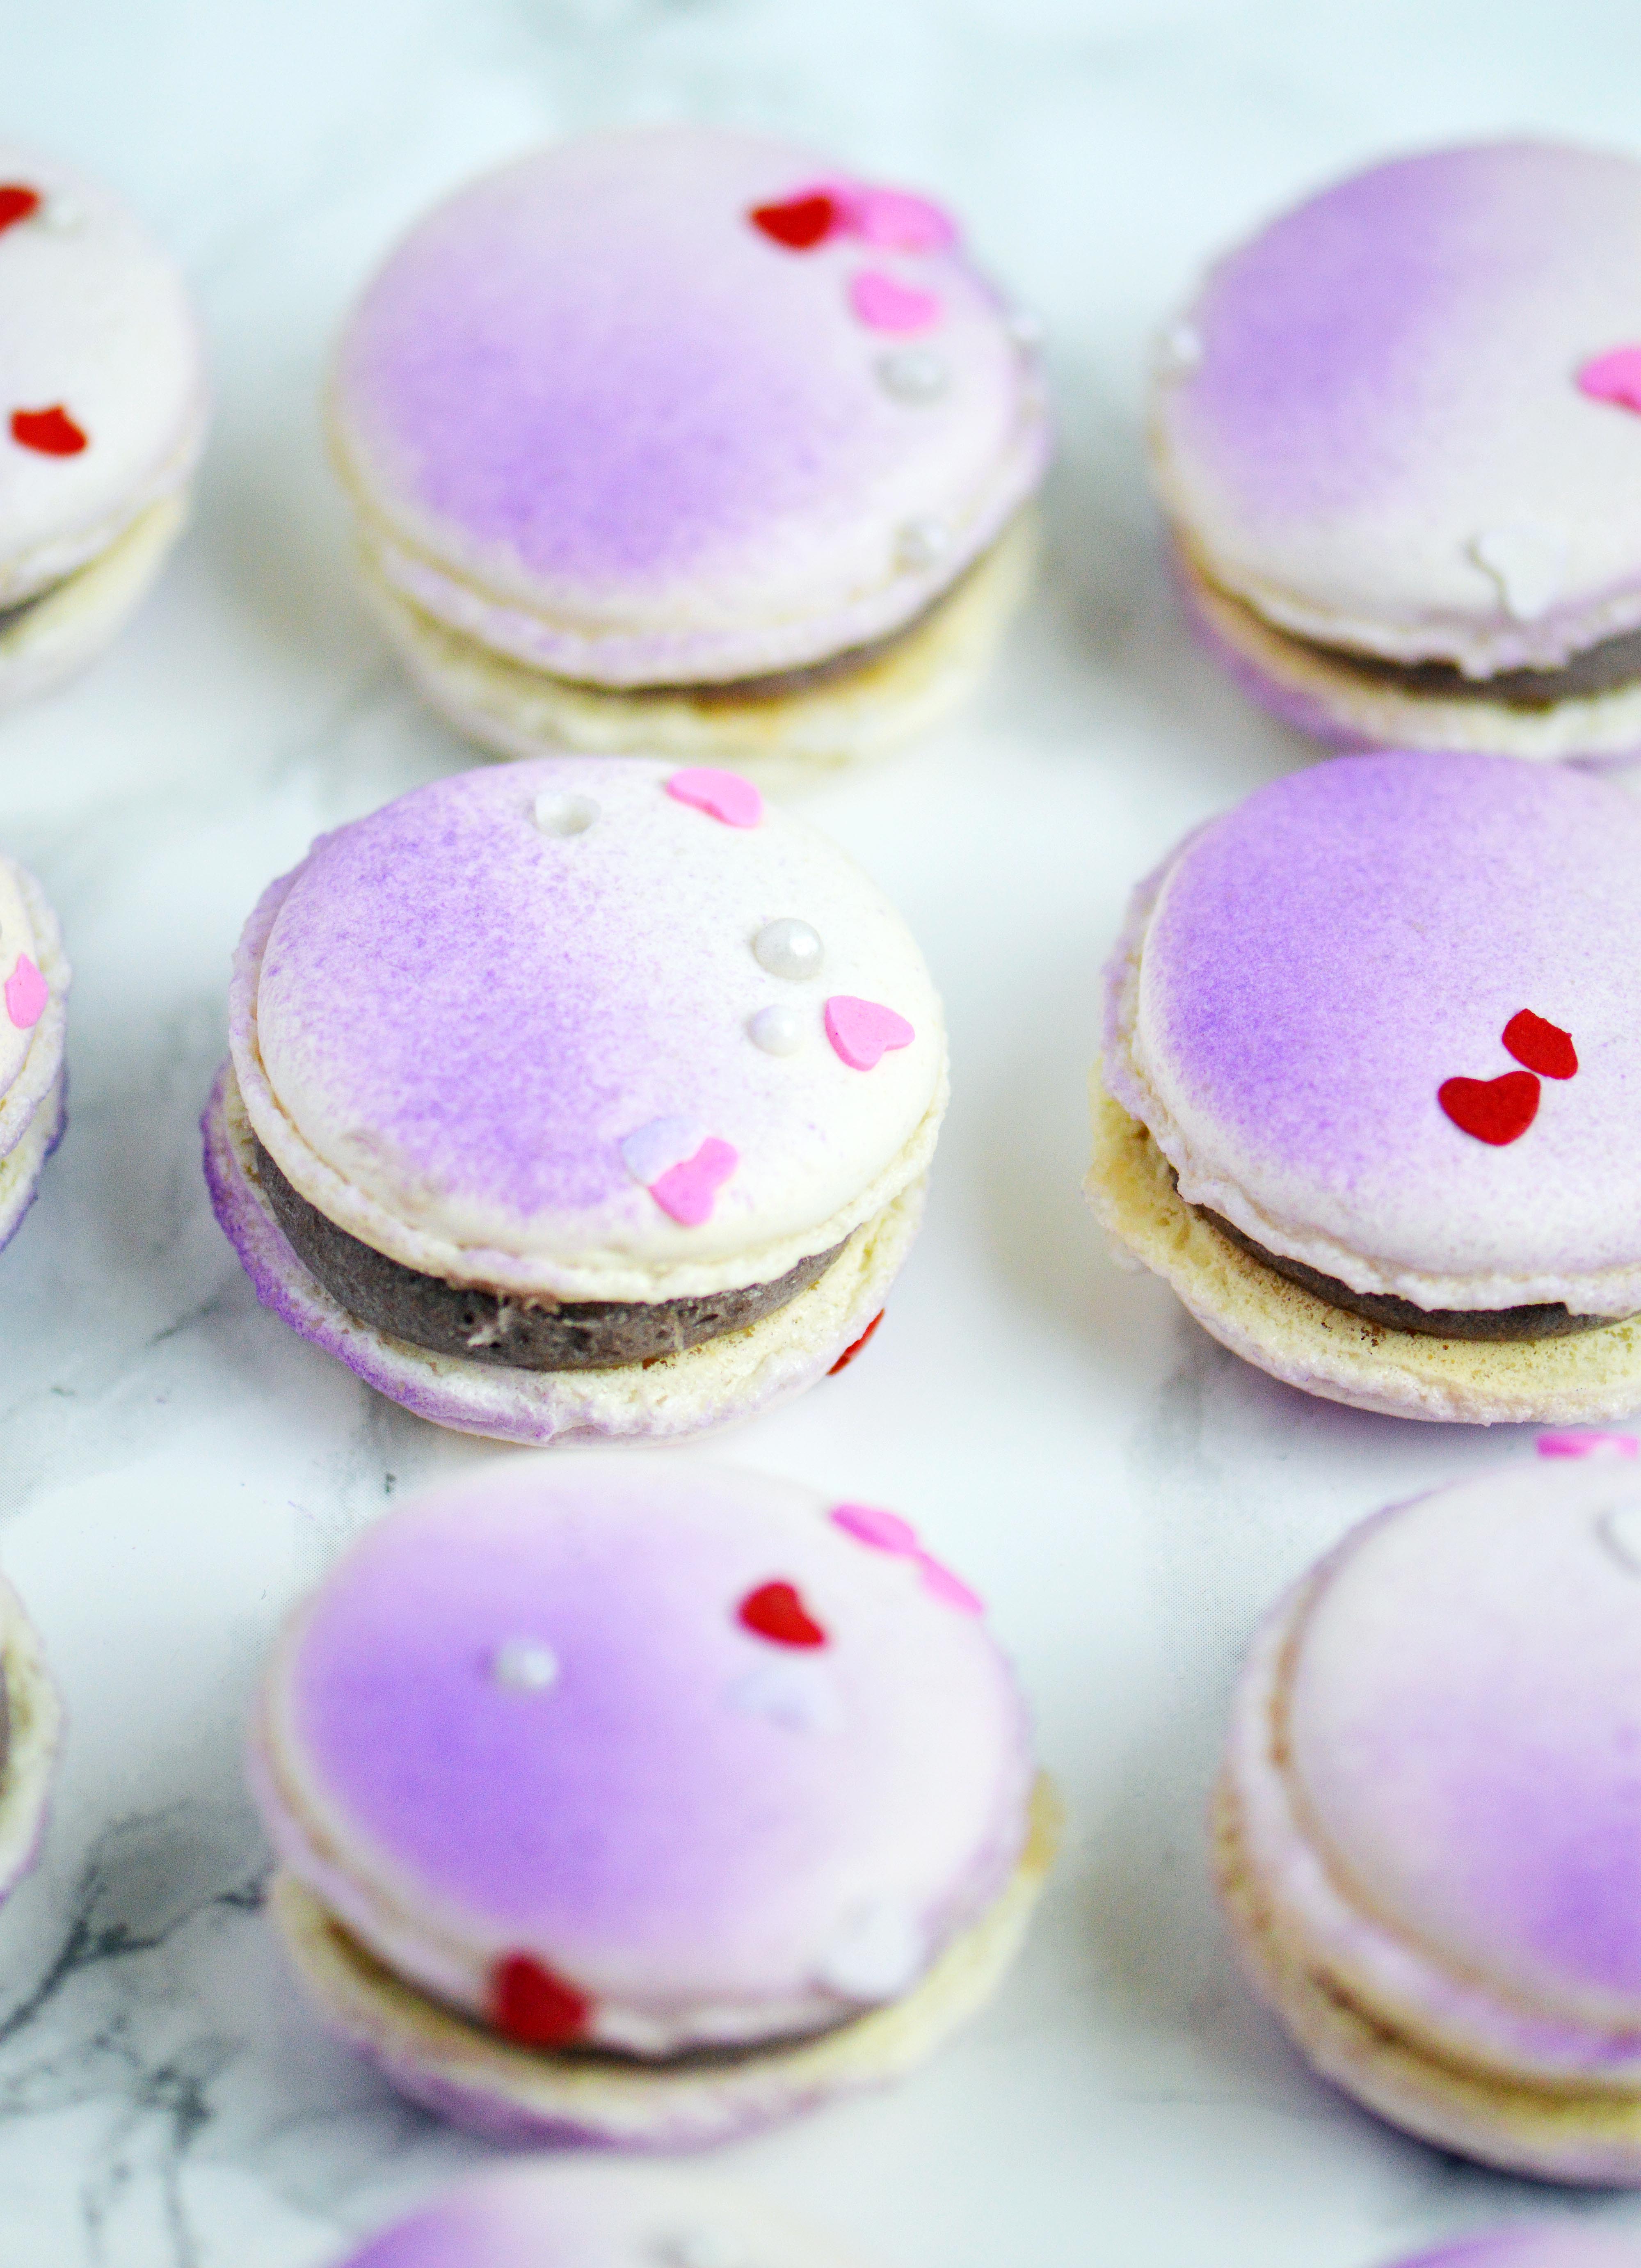
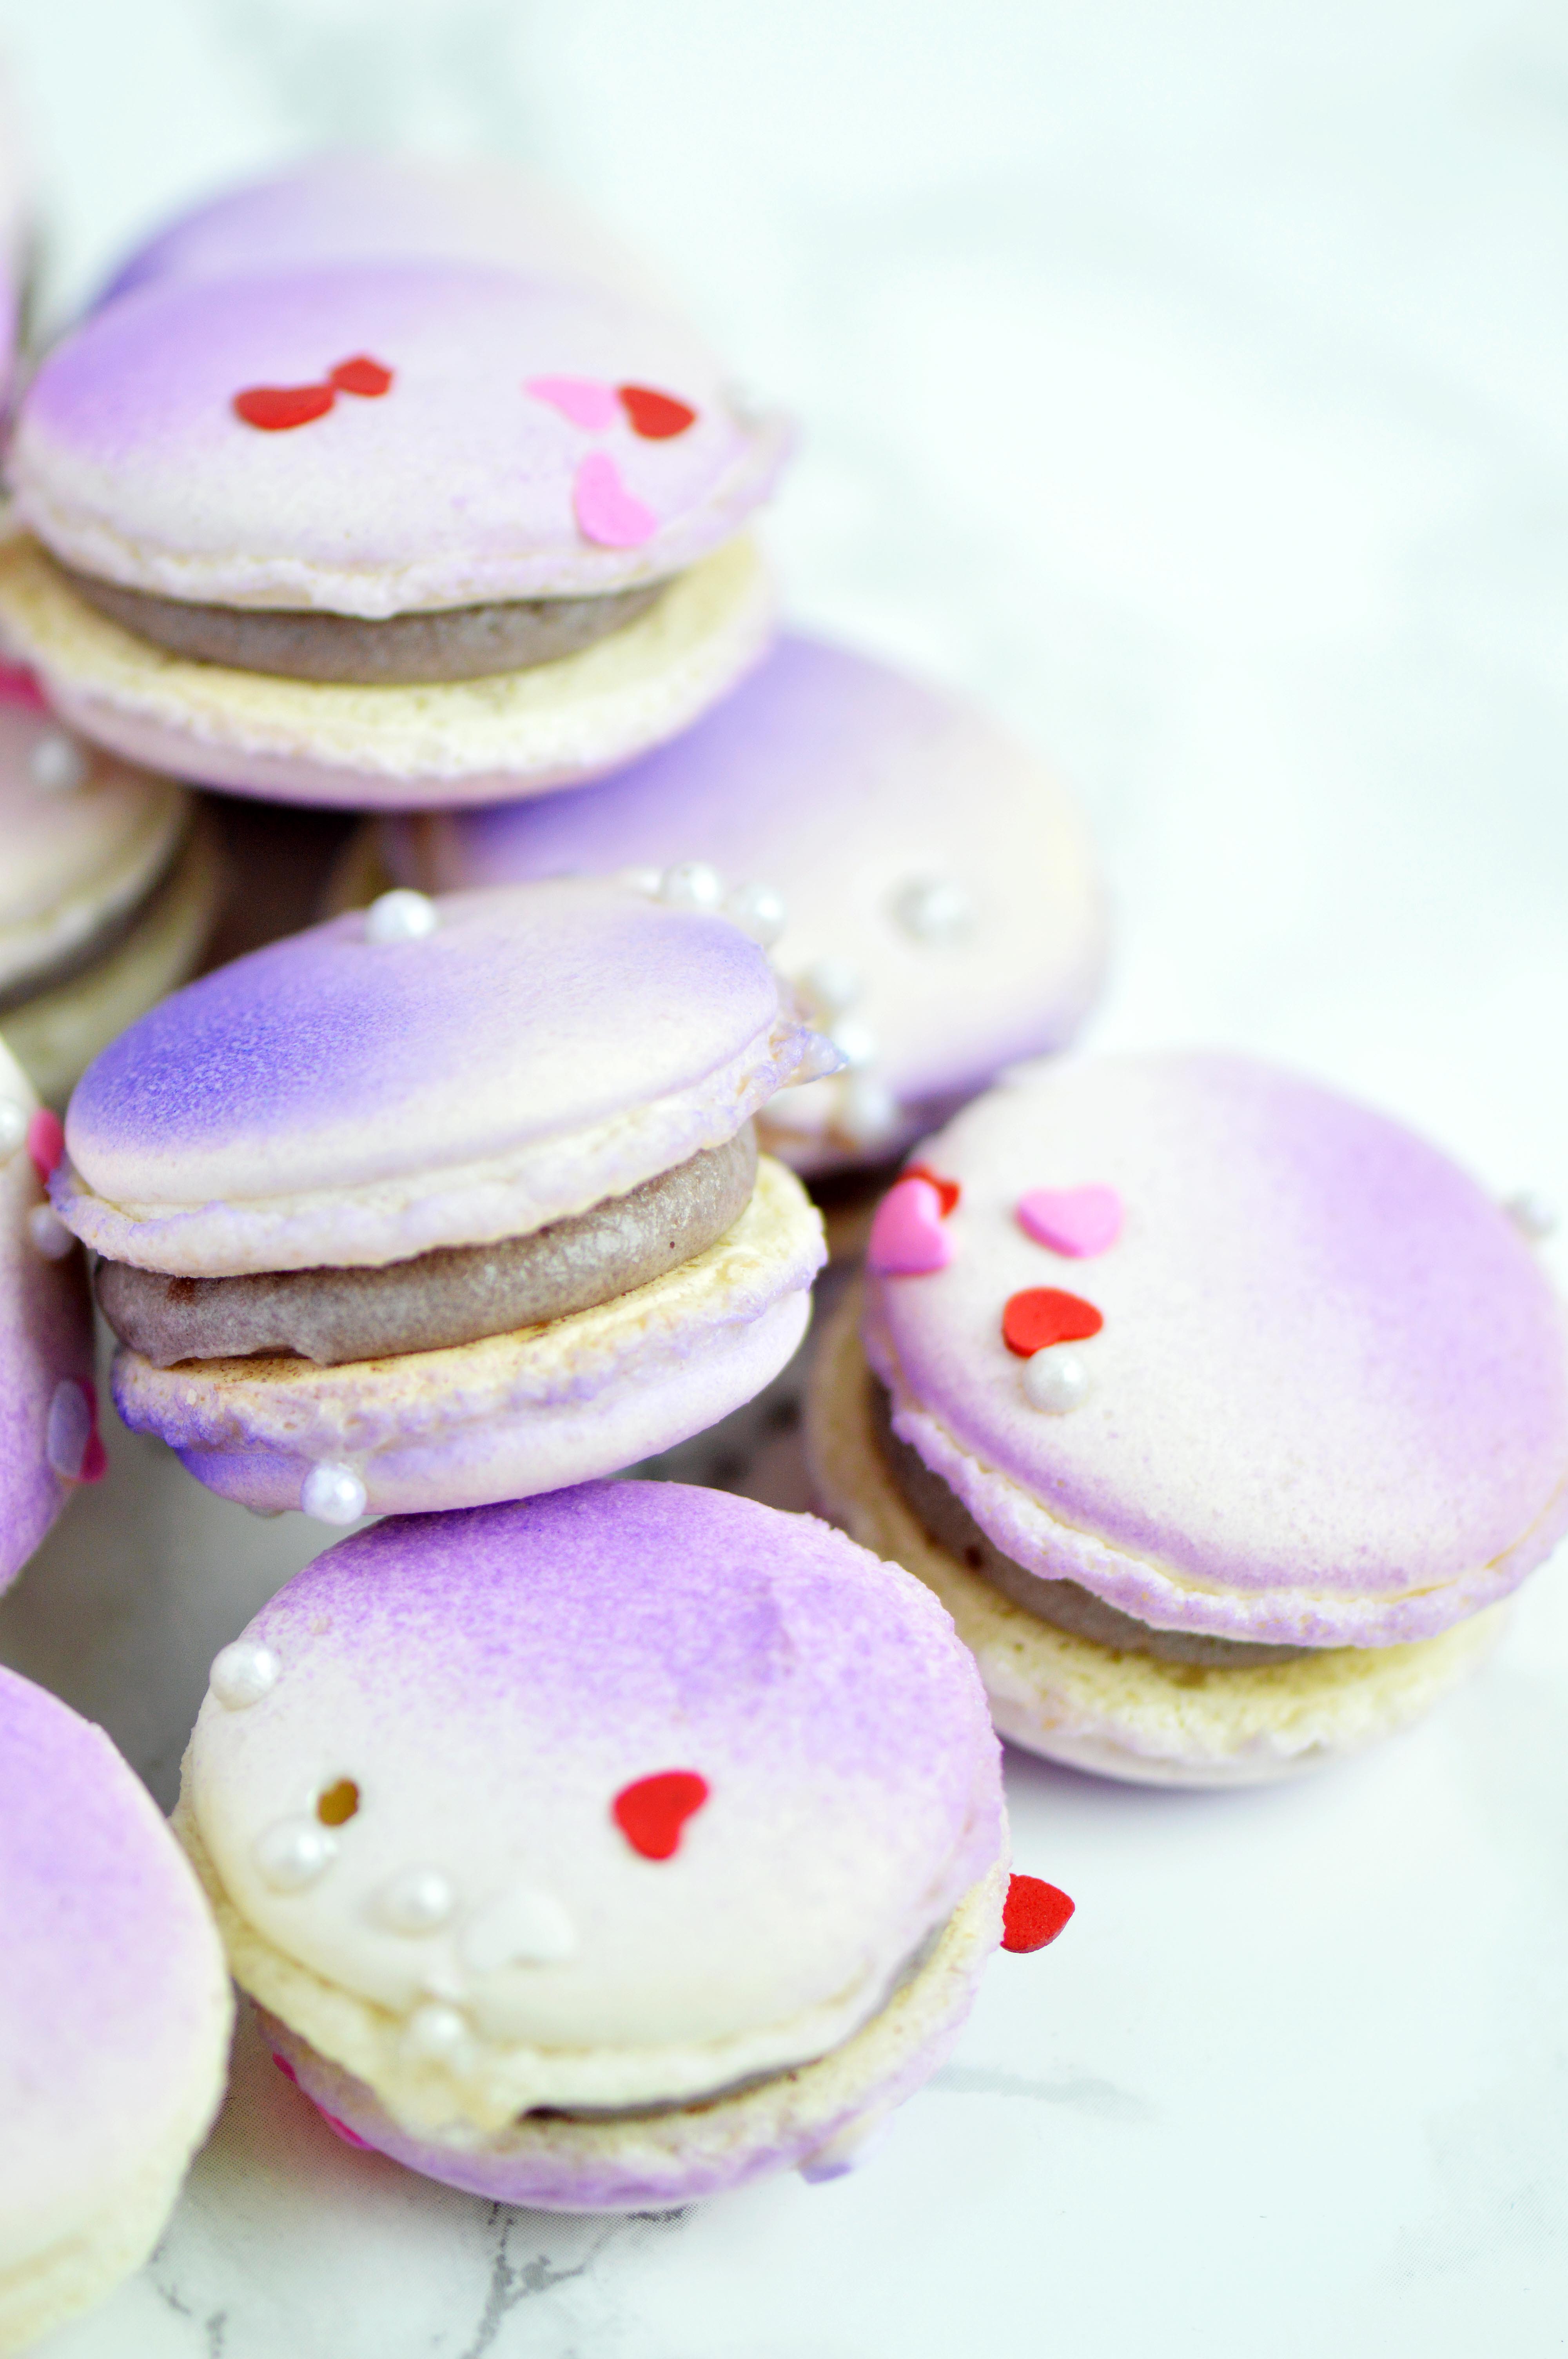
There isn’t much that I remember about living in Seoul, South Korea as a little girl. But one memory that lingers after all these years is how the streets were perfumed with the scent of roasted sweet potatoes in the winter. I don’t know how it is now, but back then the streets were filled with carts that sold perfectly roasted sweet potatoes. Roasted Korean sweet potatoes are very different from their American counterpart. They are insanely sweet and the flavor is chestnut-like. And unlike American sweet potatoes, they don’t get watery. Instead, they are more fibrous and hold their shape when peeled. For many years, I’ve tried to recapture that memory by roasting Korean sweet potatoes in my oven. The smell was spot on, but I couldn’t get that same roasted taste that I remembered. There is a Korean market that I stop by for snacks when I’m at my local Laundromat. If you stop by in the colder months, there is a small machine that churns out roasted sweet potatoes and the whole store smells has that warm roasty toasty smell. Anyways, after having one that was properly roasted, I became obsessed with trying to recreate it at home and scoured the internet on how to do it. I finally came upon a blog that featured this pot and after finding it in a Korean supermarket (It’s so much cheaper. I got it for less than $20 because it was on sale), I gave it a try and I finally reached sweet potato nirvana. Tip: The instructions say to roast on medium heat for 20-30 minutes but I found that roasting for about an hour on low heat produces the best results. Armed with my new roasting pot, I wanted to feature sweet potatoes differently and made these macarons. Purple sweet potatoes are just as sweet but not as flavorful as their yellow cousins. However, I couldn’t resist their beautiful purple flesh. I suppose I could’ve made the frosting a vibrant purple by adding a little food dye, but I wanted you to be able to see what it would look like without it. The best part about the frosting is that it takes just one stick of butter and about ¾ cup of powdered sugar (which just might be perfect for filling cakes for babies since you are using minimal sugar). Can you tell that I originally made these for Valentine’s Day? The purple ombre effect is easy to achieve by using an edible food color spray can. They’re easy enough to find on amazon. You want to be careful to be light handed or you will end up spraying the entire macaron purple. This is especially true if your spray can is new. There are so many options out there, I feel like you have a rainbow at your fingertips and it’s an easy way to spruce up a plain macaron. Even if you don’t decorate it, they’re definitely worth giving a try and best eaten within two days. Since the frosting has low butter/sugar content, it will turn your macarons soggy as the days go by.
Okinawan Sweet Potato Macarons
For the macaron shells:
Ingredients:
212 g. almond meal
212 g. powdered sugar
172 g. egg whites, divided to 82 g. and 90 g
236 g. sugar
158 g. water
purple edible spray paint
heart sprinkles
white pearl sprinkles
Instructions:
Line two baking sheets with parchment paper or silicone mats.
In the bowl of a food processor, add the almond meal and powdered sugar and pulse until thoroughly combined.
Sift the mixture over a large mixing bowl, throwing out the lumps as they appear. Add 82 g. of the egg whites and stir until you get a thick mixture.
In a small pot attached with a candy thermometer, combine the sugar and water over medium heat and boil until the syrup reaches 200˚F.
Once the syrup reaches 200˚F, start whipping the remaining 90 g. in the bowl of your stand mixer with the whisk attachment on medium speed until soft peaks are reached.
Once the syrup reaches 248 degrees, remove the pot off the burner and slowly pour the syrup down the side of the mixing bowl with the egg whites on medium speed.
Once the egg whites are fully incorporated, increase the speed to medium high until egg whites form glossy, stiff peaks
Mix ⅓ of the egg white mix to the almond mixture and stir together until the batter is slightly lighter and less pasty. From then on, fold in ⅓ of the egg white mixture twice until the mixture “flows like magma”. The mixture should be smooth and run thick ribbons off the spatula.
Fill batter in a pastry bag fitted with a ½ in. plain tip.
The piped batter may have peaks but should smooth away in a minute or two. Sprinkle the top of the macaron batter with the pearl and heart sprinkles. Let the batter stand until the tops of the macaron batter are dry to the touch, about 30 mins to 1 hour.
Preheat the oven to 350˚F.
Once you place the macarons in the oven, reduce the heat to 300˚F. Bake 10-13 minutes, until the feet are formed and the tops are smooth. The macarons are done when you slightly wiggle them and they start to come off of the parchment paper / silicone mat.
Once you remove the macarons, reheat the oven to 350˚F for ten minutes before baking another pan of macarons at 300˚F.
Once the shells are cool, spray one side of the macarons lightly about 7 inches away from the surface. Fill with frosting.
Okinawan Sweet Potato Frosting
Ingredients:
1 ½ lb Okinawan sweet potatoes, roasted (about 3 medium potatoes)
4 oz. (one stick) unsalted butter
¾ – 1 c. powdered sugar
Instructions:
Peel the outer skin of the sweet potatoes and put them the food processor.
Puree the sweet potatoes until very smooth and silky. Set aside.
In a bowl of a standing mixer fitted with the whisk attachment, whip the butter until light and fluffy.
Add in ¾ c. of the powdered sugar and the sweet potato puree and whip until a smooth frosting forms. If not sweet enough, add the remaining ¼ c. powdered sugar and whip until smooth. Fill the macarons.
I’m not sorry to see 2016 go. I kind of felt like it could be salvaged until Carrie Fisher died. That kind of gave it the nail in the coffin. It was as if 2016 was saying, “Sayonara, sucker!” while waving a rude gesture. I’m not quite looking forward to 2017 either, the exception being that I am looking forward to creating more projects for you and sharing this and that about my life (hopefully good news, and not bad). By the way, I did finish the holiday cake I was raving about in my last post. Unfortunately, I came down with a severe case of sinusitis and I couldn’t work on the actual post. I think I will save it for 2017. (Side note: I hope unicorns are still relevant by this point next year.)
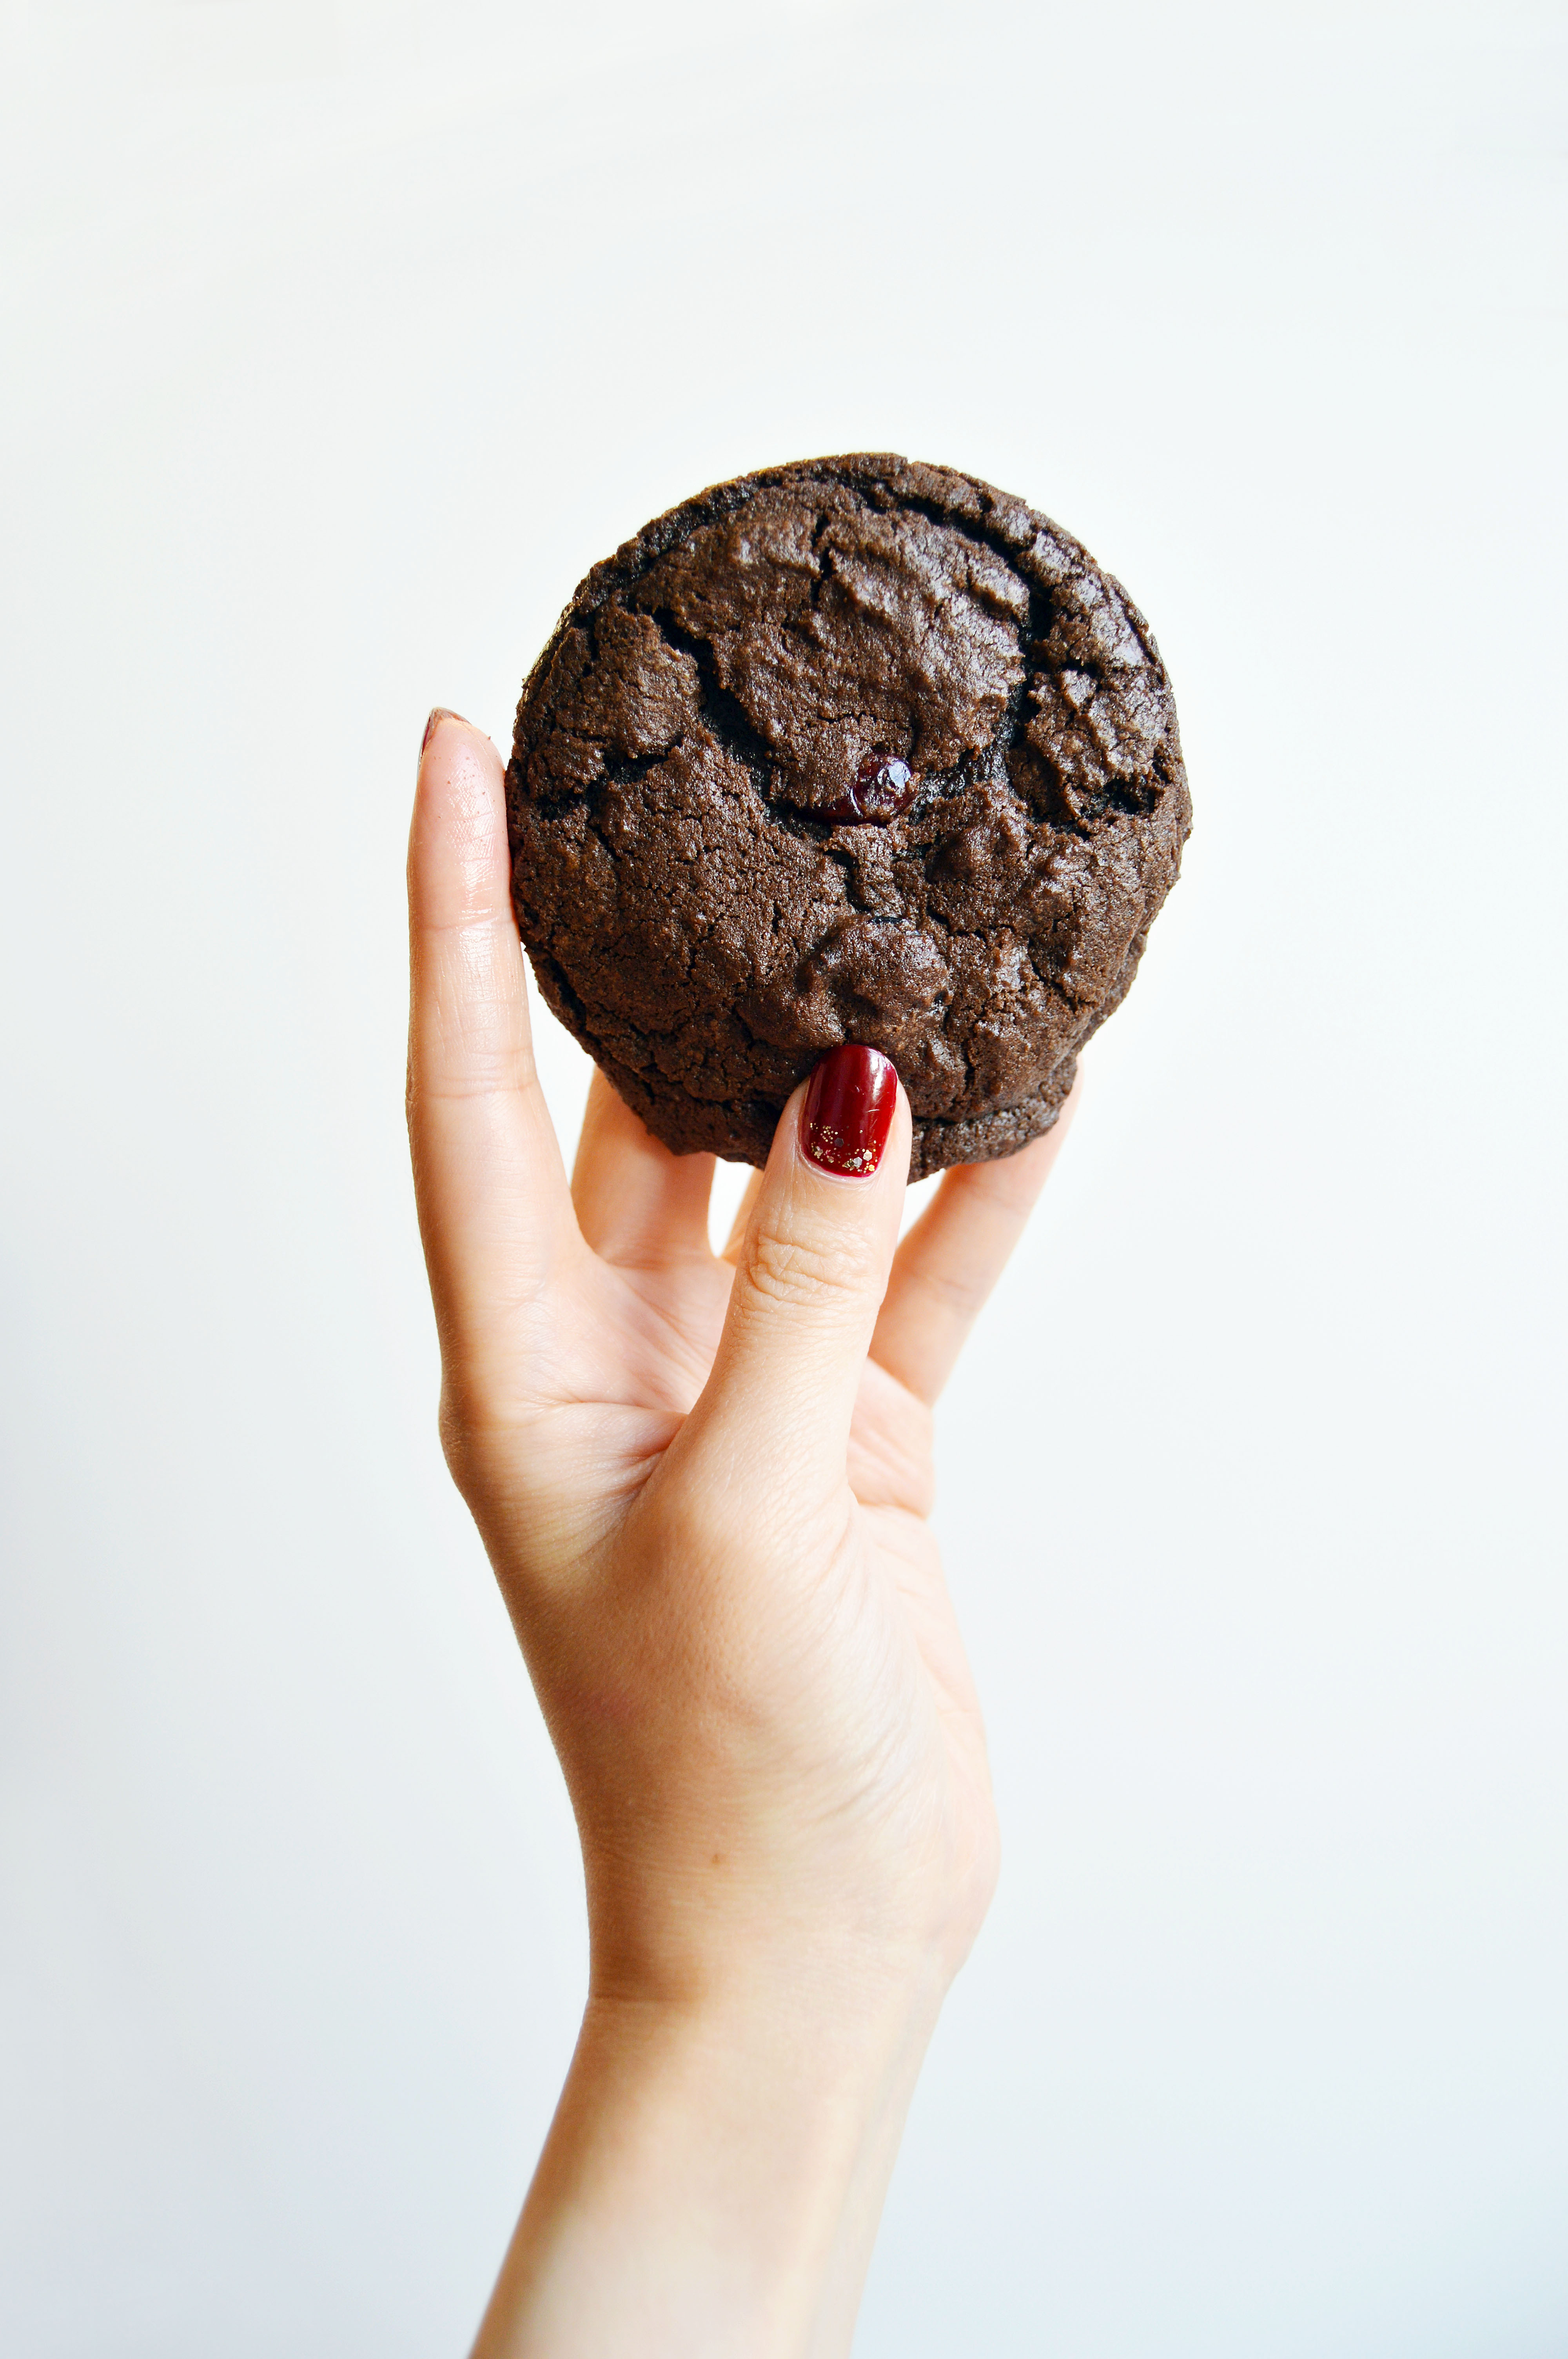
It seems like Friendsgiving is kind of a big deal this year, which makes me kind of wish I thought of hosting one. I used to have a Thanksgiving potluck with my church members after Thanksgiving and it was always such a great time. And giving thanks for what we have…twice? It makes you appreciate it even more. Even if you aren’t going to a Friendsgiving, holiday potlucks/parties are just around the corner and these cookies fit the bill. I know these cookies aren’t much in terms of looks. But I’m telling you, every single time I’ve made these cookies (for home or for other people to bring to potlucks) they always get a hit review. Super fudgy with a crisp edge and the sweetness is toned down by the tart dried cranberries, which makes it a perfect holiday cookie. Oh, and you can make it in one bowl for easy clean up. Can’t believe Thanksgiving is in a few days! Uh… I still haven’t done my shopping yet (except for my two 12 pound turkeys). I’ll probably do the rest today. Wish me luck!
Cranberry White Chocolate Fudge Cookies
Makes about 24 large cookies
Ingredients:
8 oz. (two sticks) butter, room temperature
1 c. sugar
1 c. brown sugar
2 egg, room temperature
2 tsp. vanilla extract
⅓ c. Dutch-processed cocoa powder
⅓ c. natural unsweetened cocoa powder
2 c. all-purpose flour
1 tsp. baking soda
1 tsp. kosher salt
1 c. white chocolate chips (or chunks)
1 ½ c. dried cranberries
Instructions:
In the bowl of a stand mixer fitted with the paddle attachment, beat butter, sugar and brown sugar until lighter in color and fluffy.
Add eggs and vanilla on medium speed and mix until glossy.
Add cocoa and mix until homogeneous.
Change the speed to low and add the flour, baking soda, and salt. Mix until just combined.
Fold in white chocolate and cranberries.
Preheat oven to 350˚F and line two large cookie sheets with parchment paper.
Dose 1 tablespoon of cookie dough onto parchment paper. Spacing each ball 2 inches from each other.
Bake about 9 minutes, until the edges just set. (Rotating the baking sheet halfway if your oven heats unevenly.)