
 You guys, I’m obsessed with the tv show, ”Girls”. That is the reason why this post is so late. All of my free time has been going to binge watching this show. If you’ve never watched it, I would describe it as “Friends” and “Sex and the City” put together except it doesn’t have the laugh track and is somehow more real and dark and relatable and freaking awesome. Before the show, I always wondered why they casted Adam Driver as Kylo Ren in “Star Wars: The Force Awakens”. But after watching this show, I realized that the man can act. I love his character, Adam, in “Girls” because he’s SO weird and so honest. I always find weird people fascinating, and this is probably why he is so intriguing to me.
 I originally wanted to post this before Memorial Day because to me, Memorial Day is the green light of the year to start eating ice cream again. I know, I know… True die-hard fans of ice cream always say that you can have ice cream any day of the year, but when I’m freezing and my fingertips feel like ice, ingesting something that is as just cold is unpleasant to me. But Memorial Day has now passed and this needs to be shared with the internet community as soon as possible.
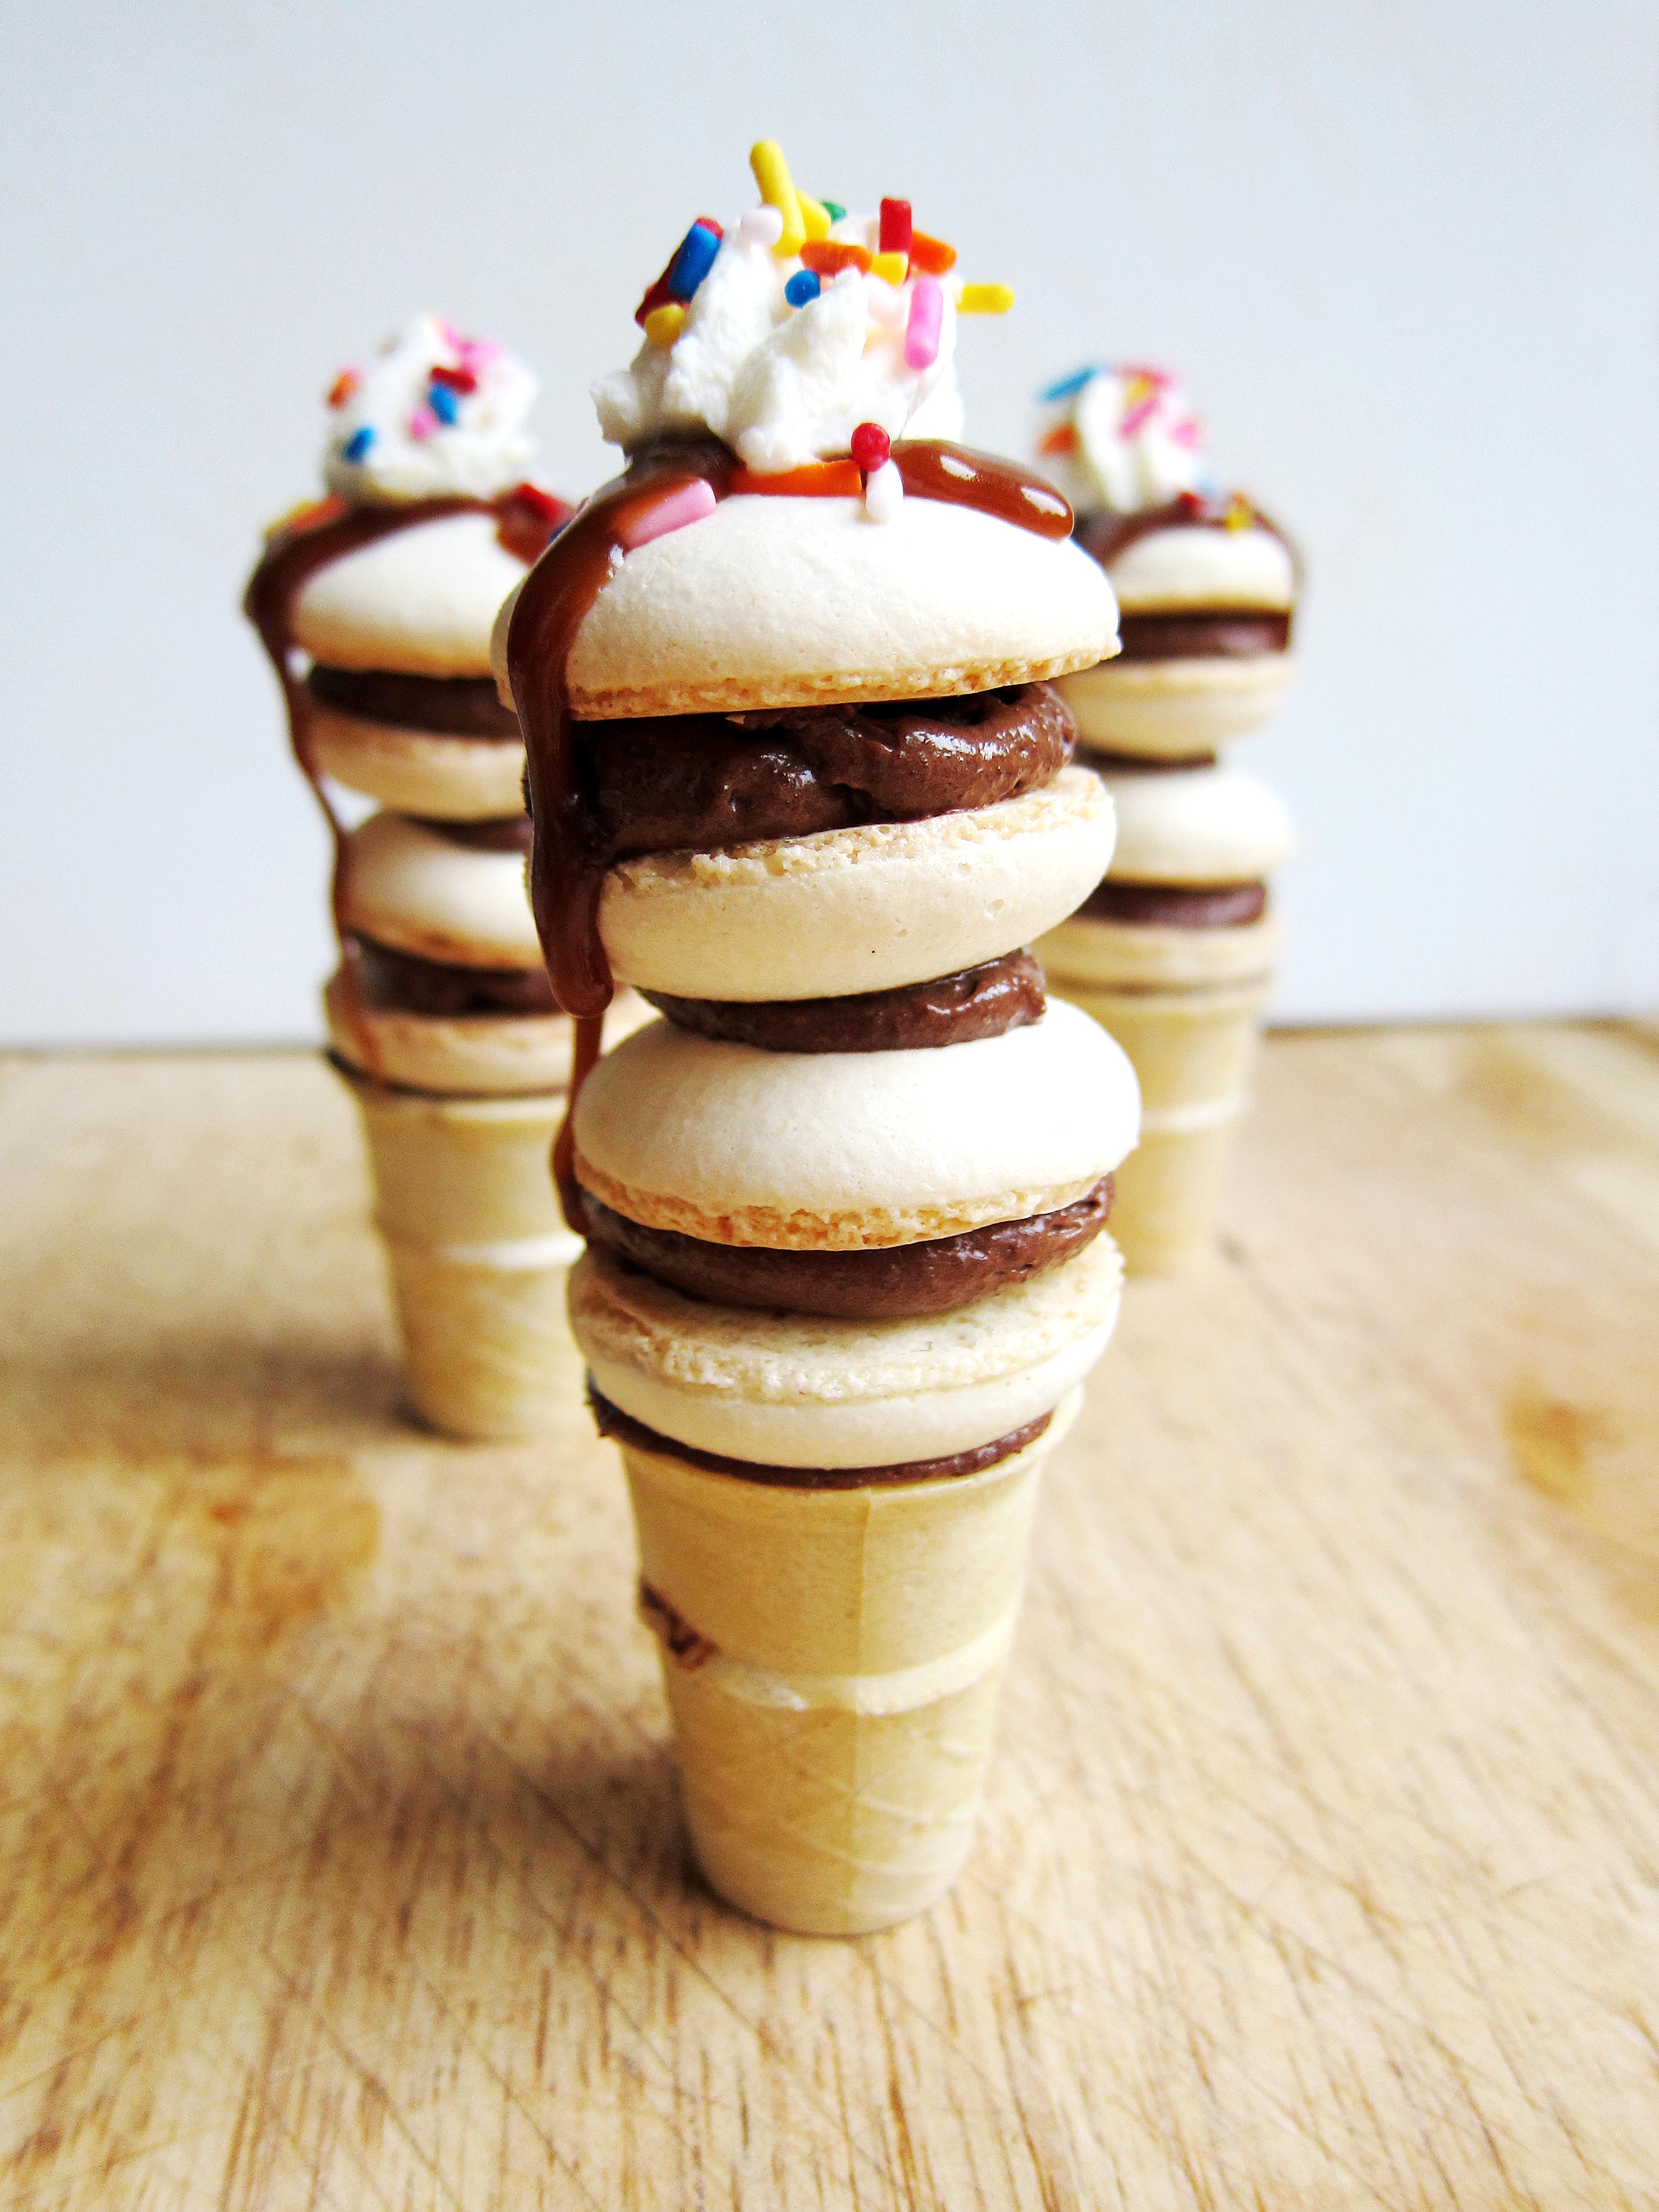
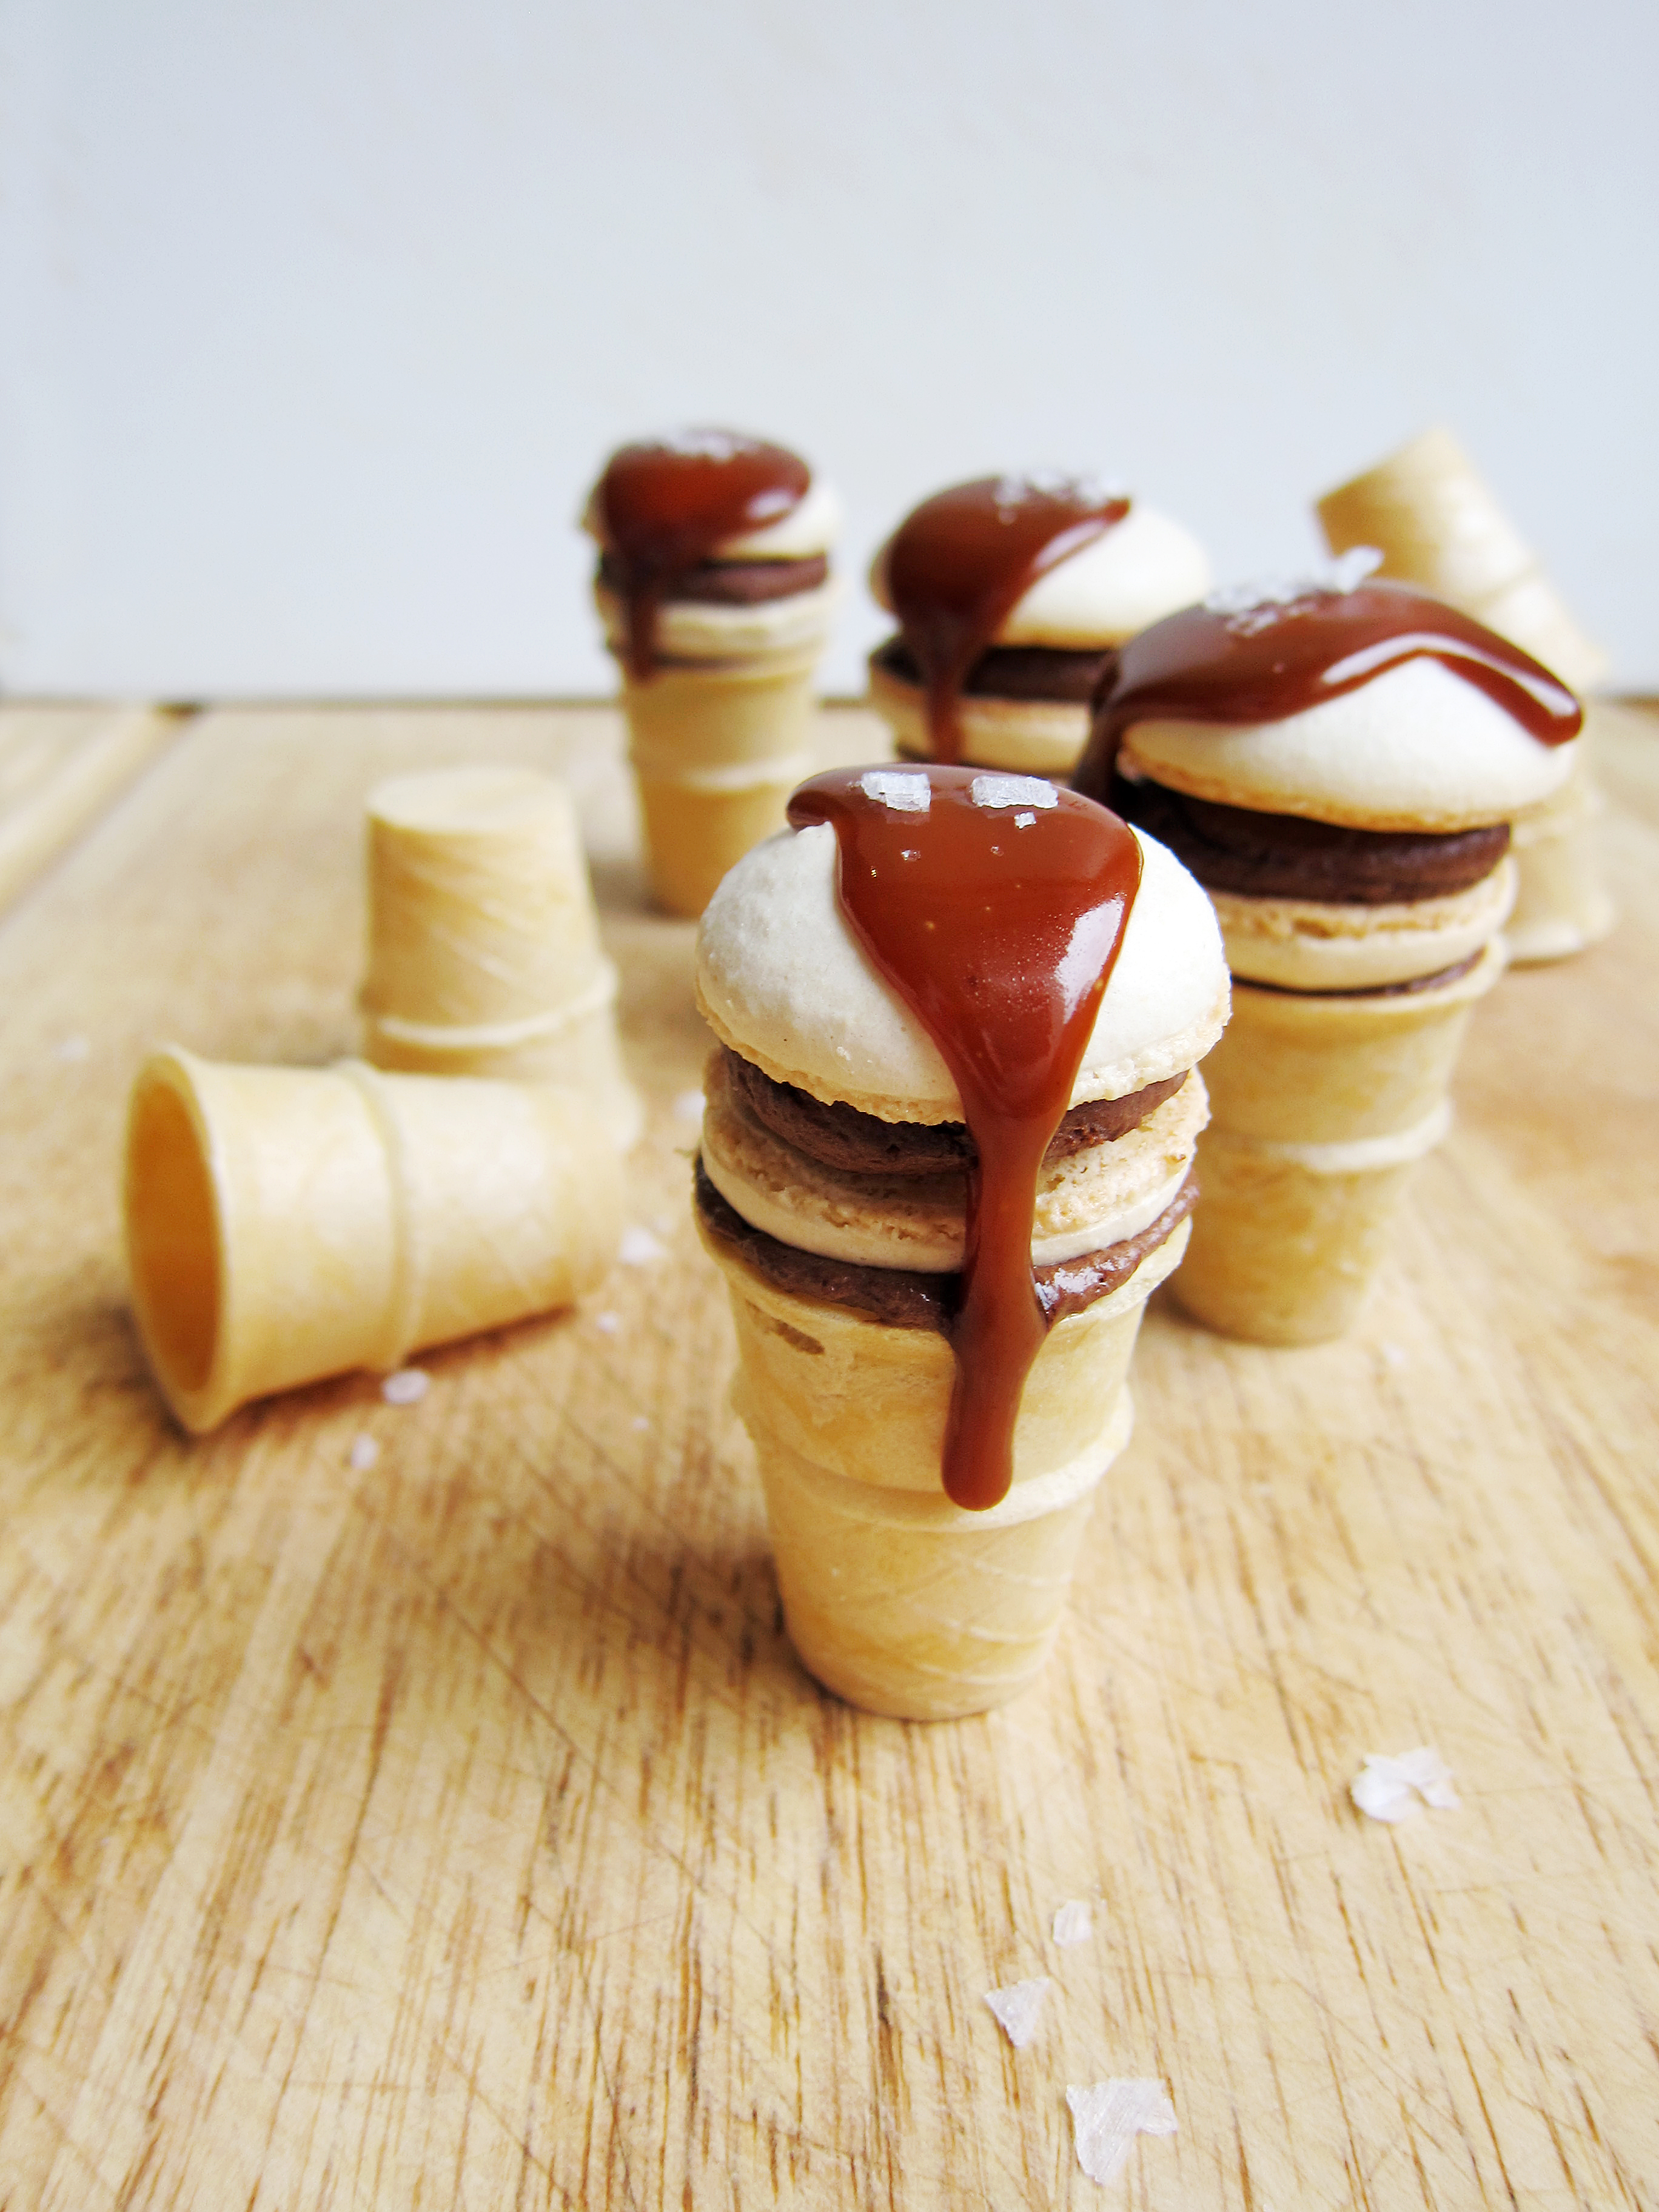
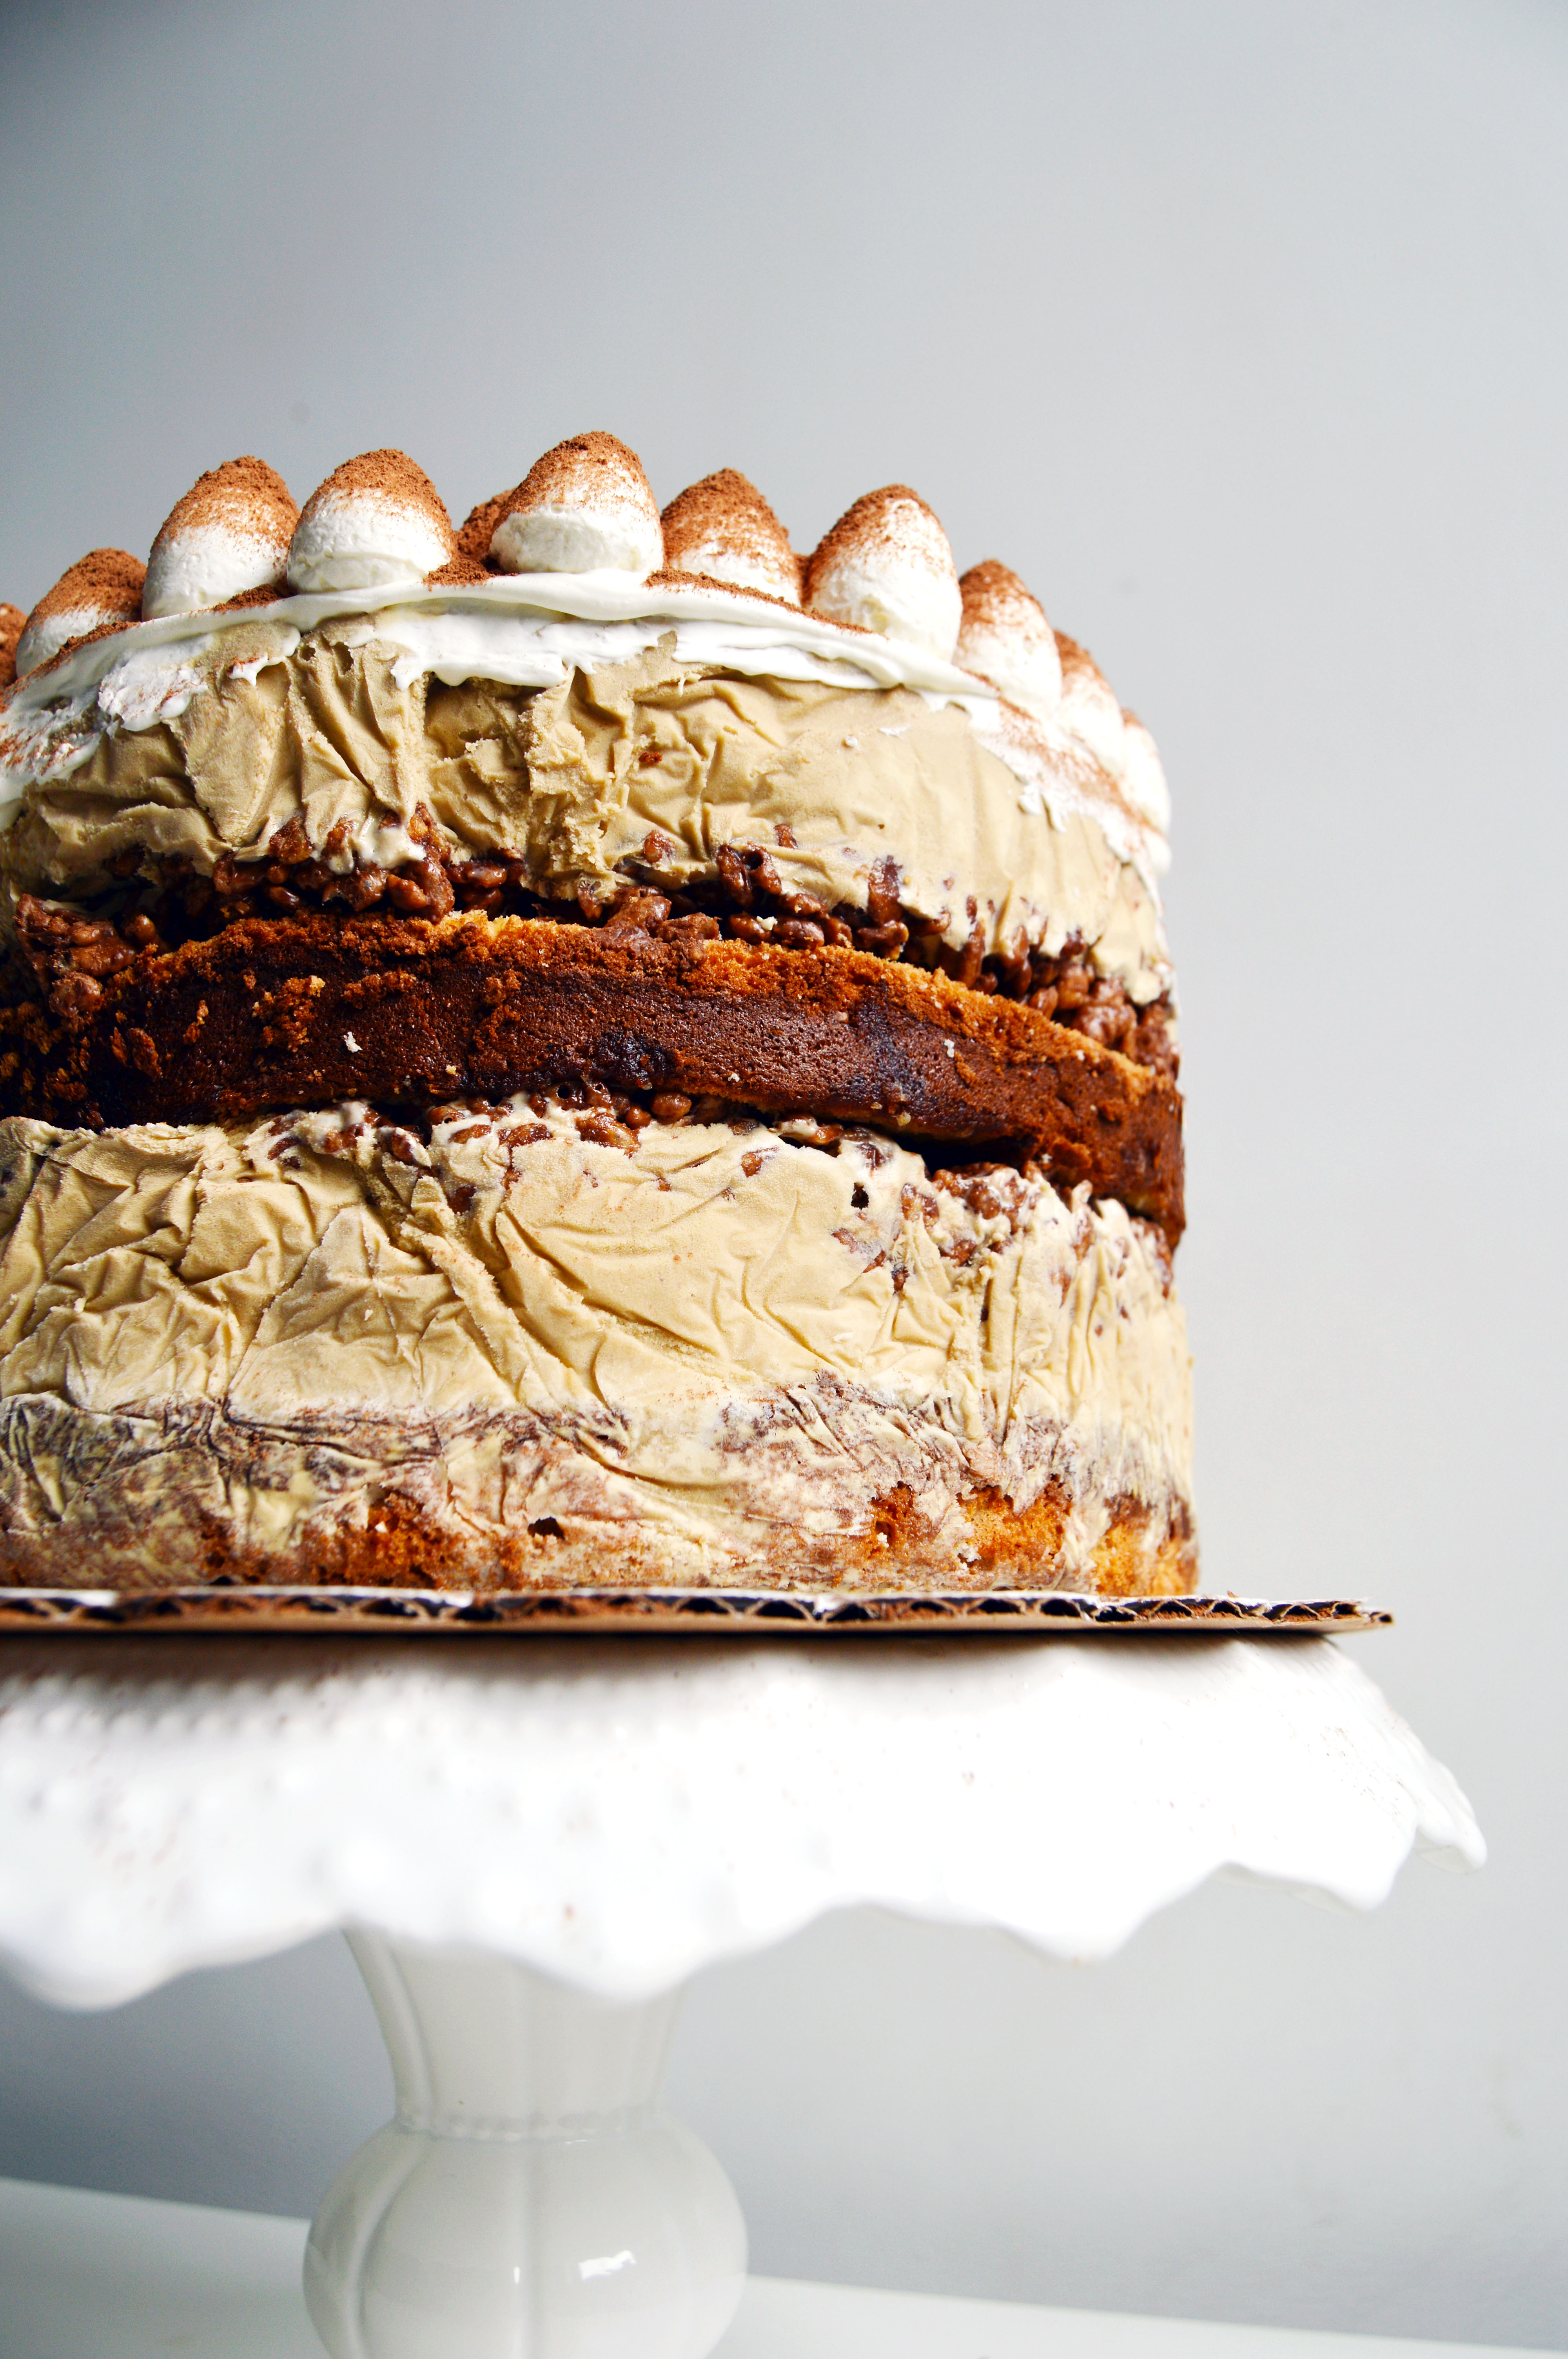
 Macaron ice cream sandwiches are just like regular ice cream sandwiches but instead of cookies, you use macaron shells. Since my sister’s birthday was coming up, and she loves ice cream, coffee and only the shells of macarons (not so much the filling, which I never understood) I figured that this was the perfect cake for her. Filled with layers of homemade crunchies, Ben and Jerry’s coffee coffee buzz buzz buzz (my sister’s favorite ice cream), and layered with two giant macaron shells, it’s chocolaty, cold, and smooth with crunchy and chewy textural differences from the macaron shells and the crunchies.
 I did make a pattern for the top macaron shell by drawing streaks of gel food coloring on the inside of my piping bag, but it’s not necessary for the cake. Basically, if you made macaron shells before, it’s pretty much the same thing except that you are making two giant shells. You will have leftover batter which you can use to make regular sized macaron shells. You should also take caution and remember that the batter will spread a bit. I didn’t think of this possibility, which made my macaron shells a little larger than I wanted, but in hindsight, it gave me enough room to cover the outside with cool whip, which helped give it a super smooth outside and keep the ice cream from leaking and hold its shape.
 It is so worth the time. If you like macarons and ice cream, this is the cake for you. The best part? You can totally customize this by coloring the macaron shell and changing up the ice cream flavors.
 Not really feeling this ice cream cake? Here are some of my previous ice cream cake recipes:
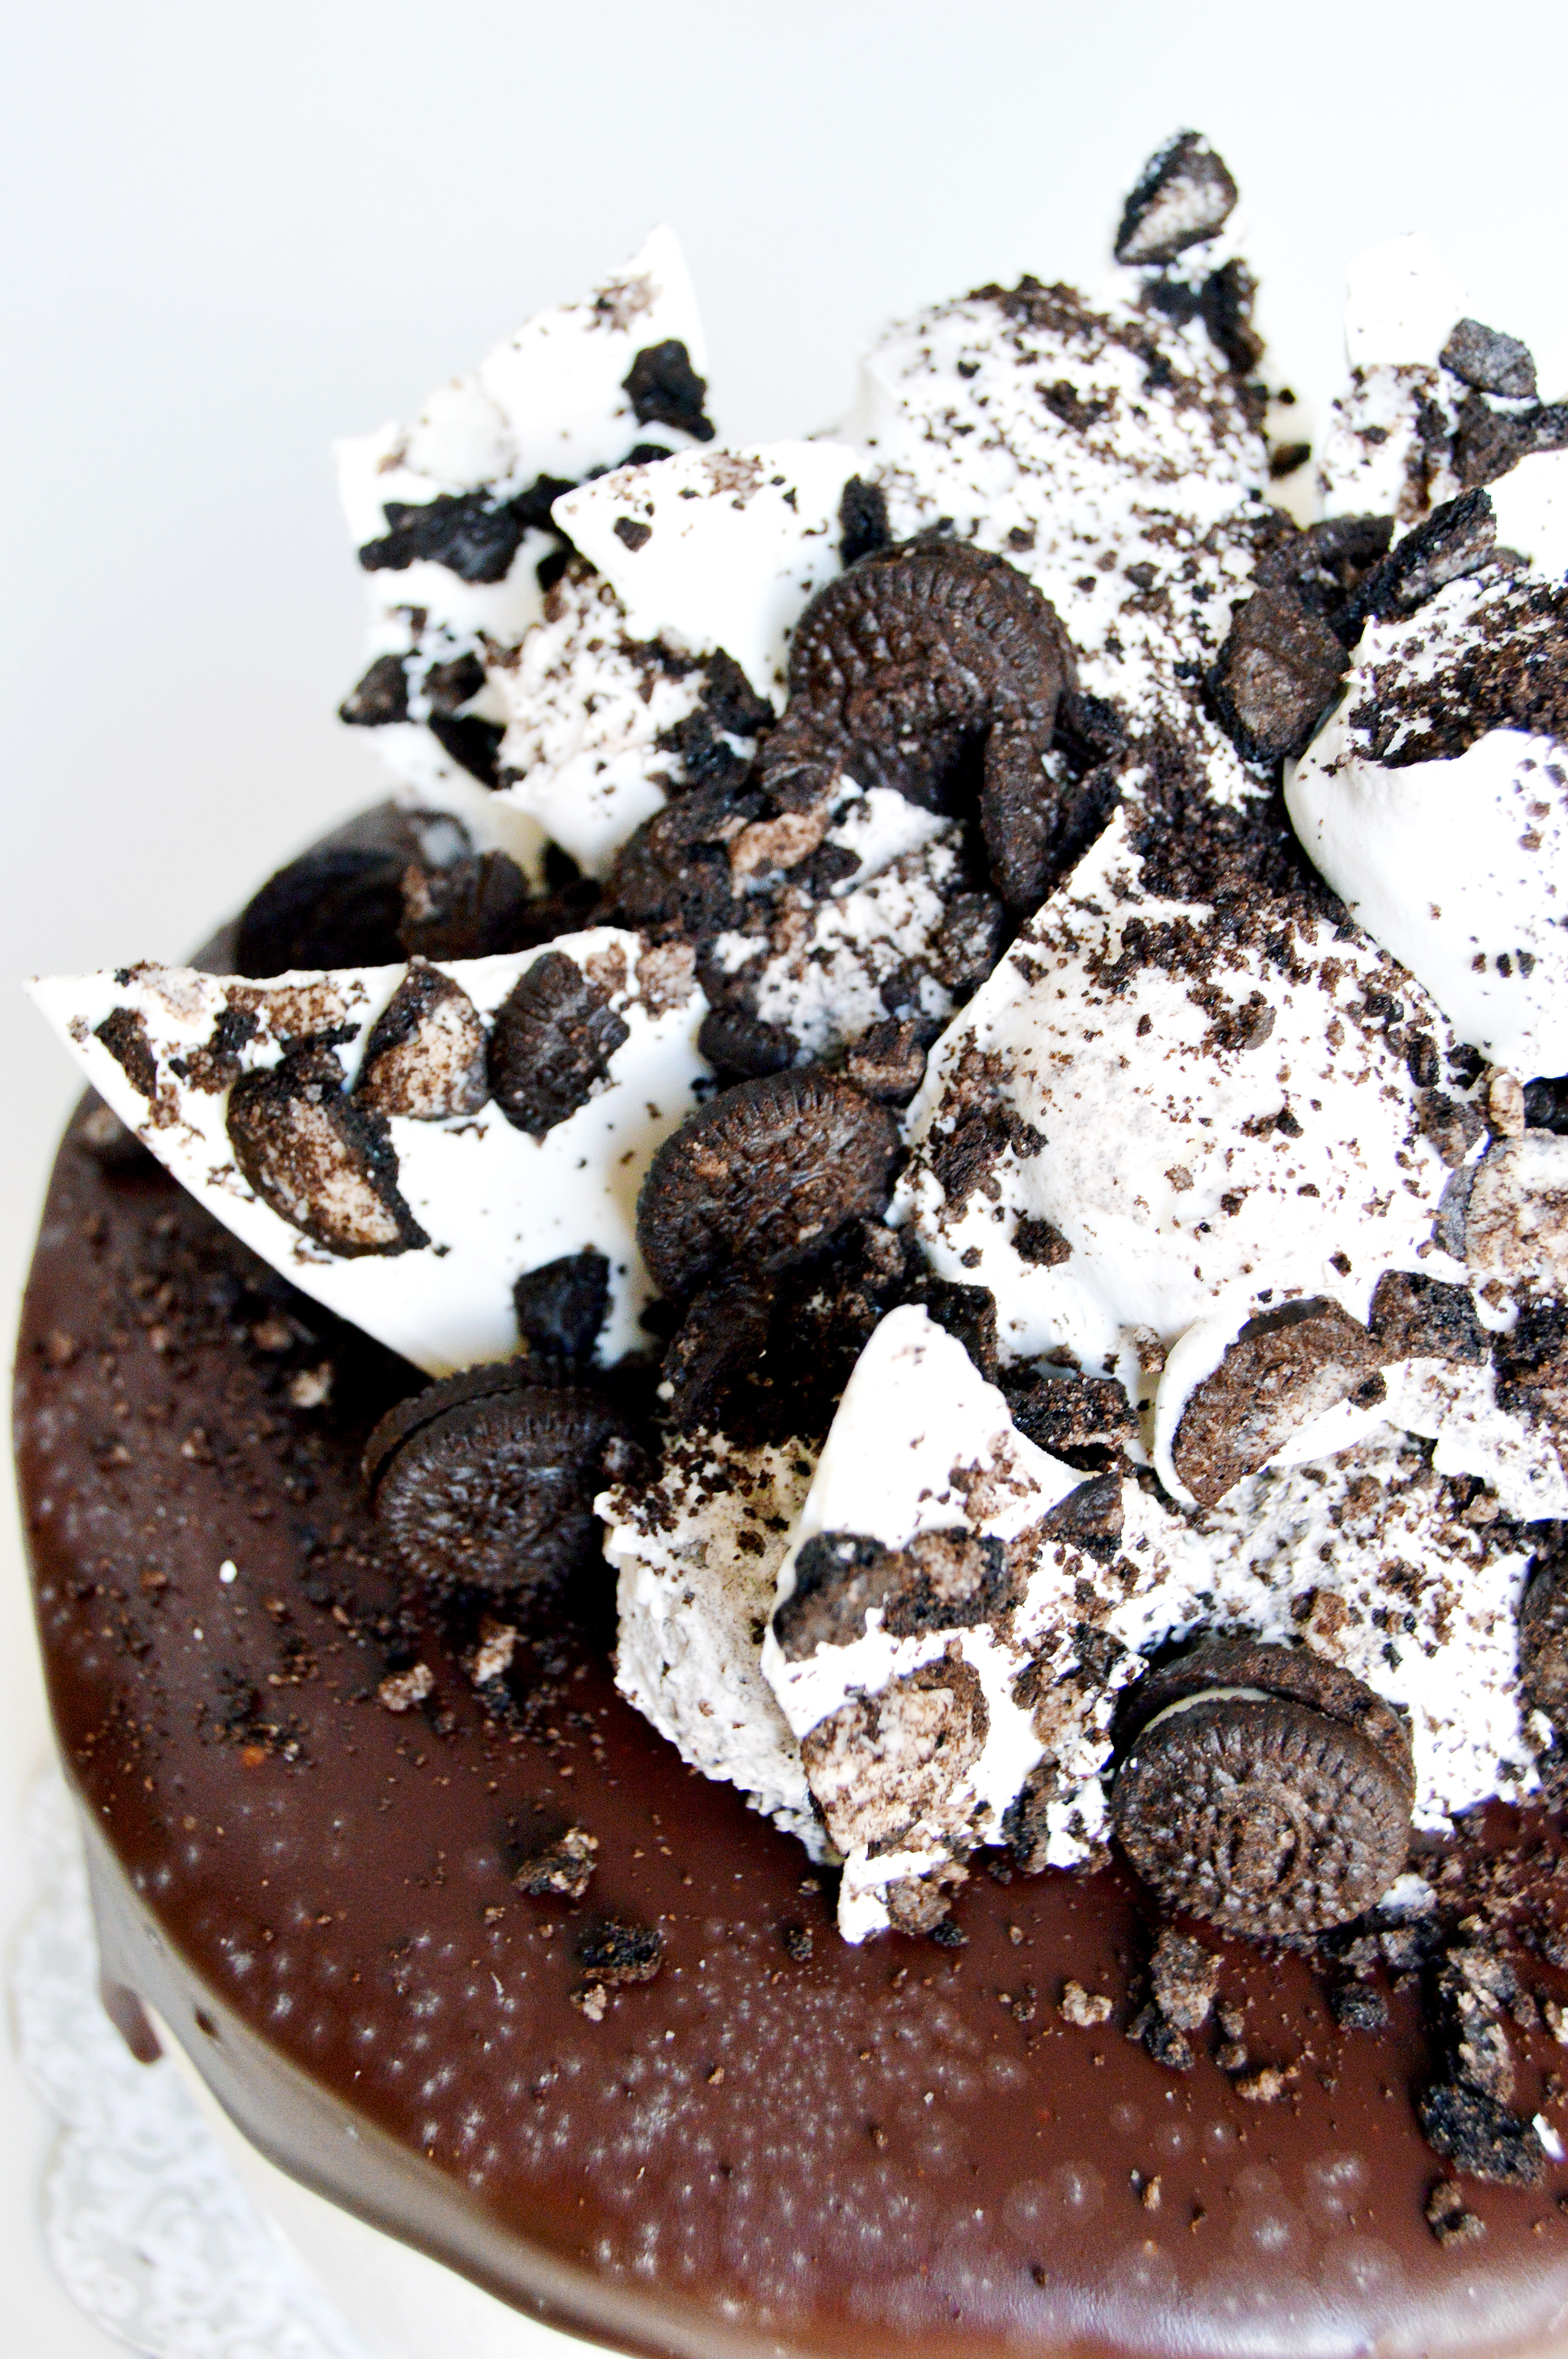
The Ultimate Oreo Ice Cream Cake with Homemade Crunchies
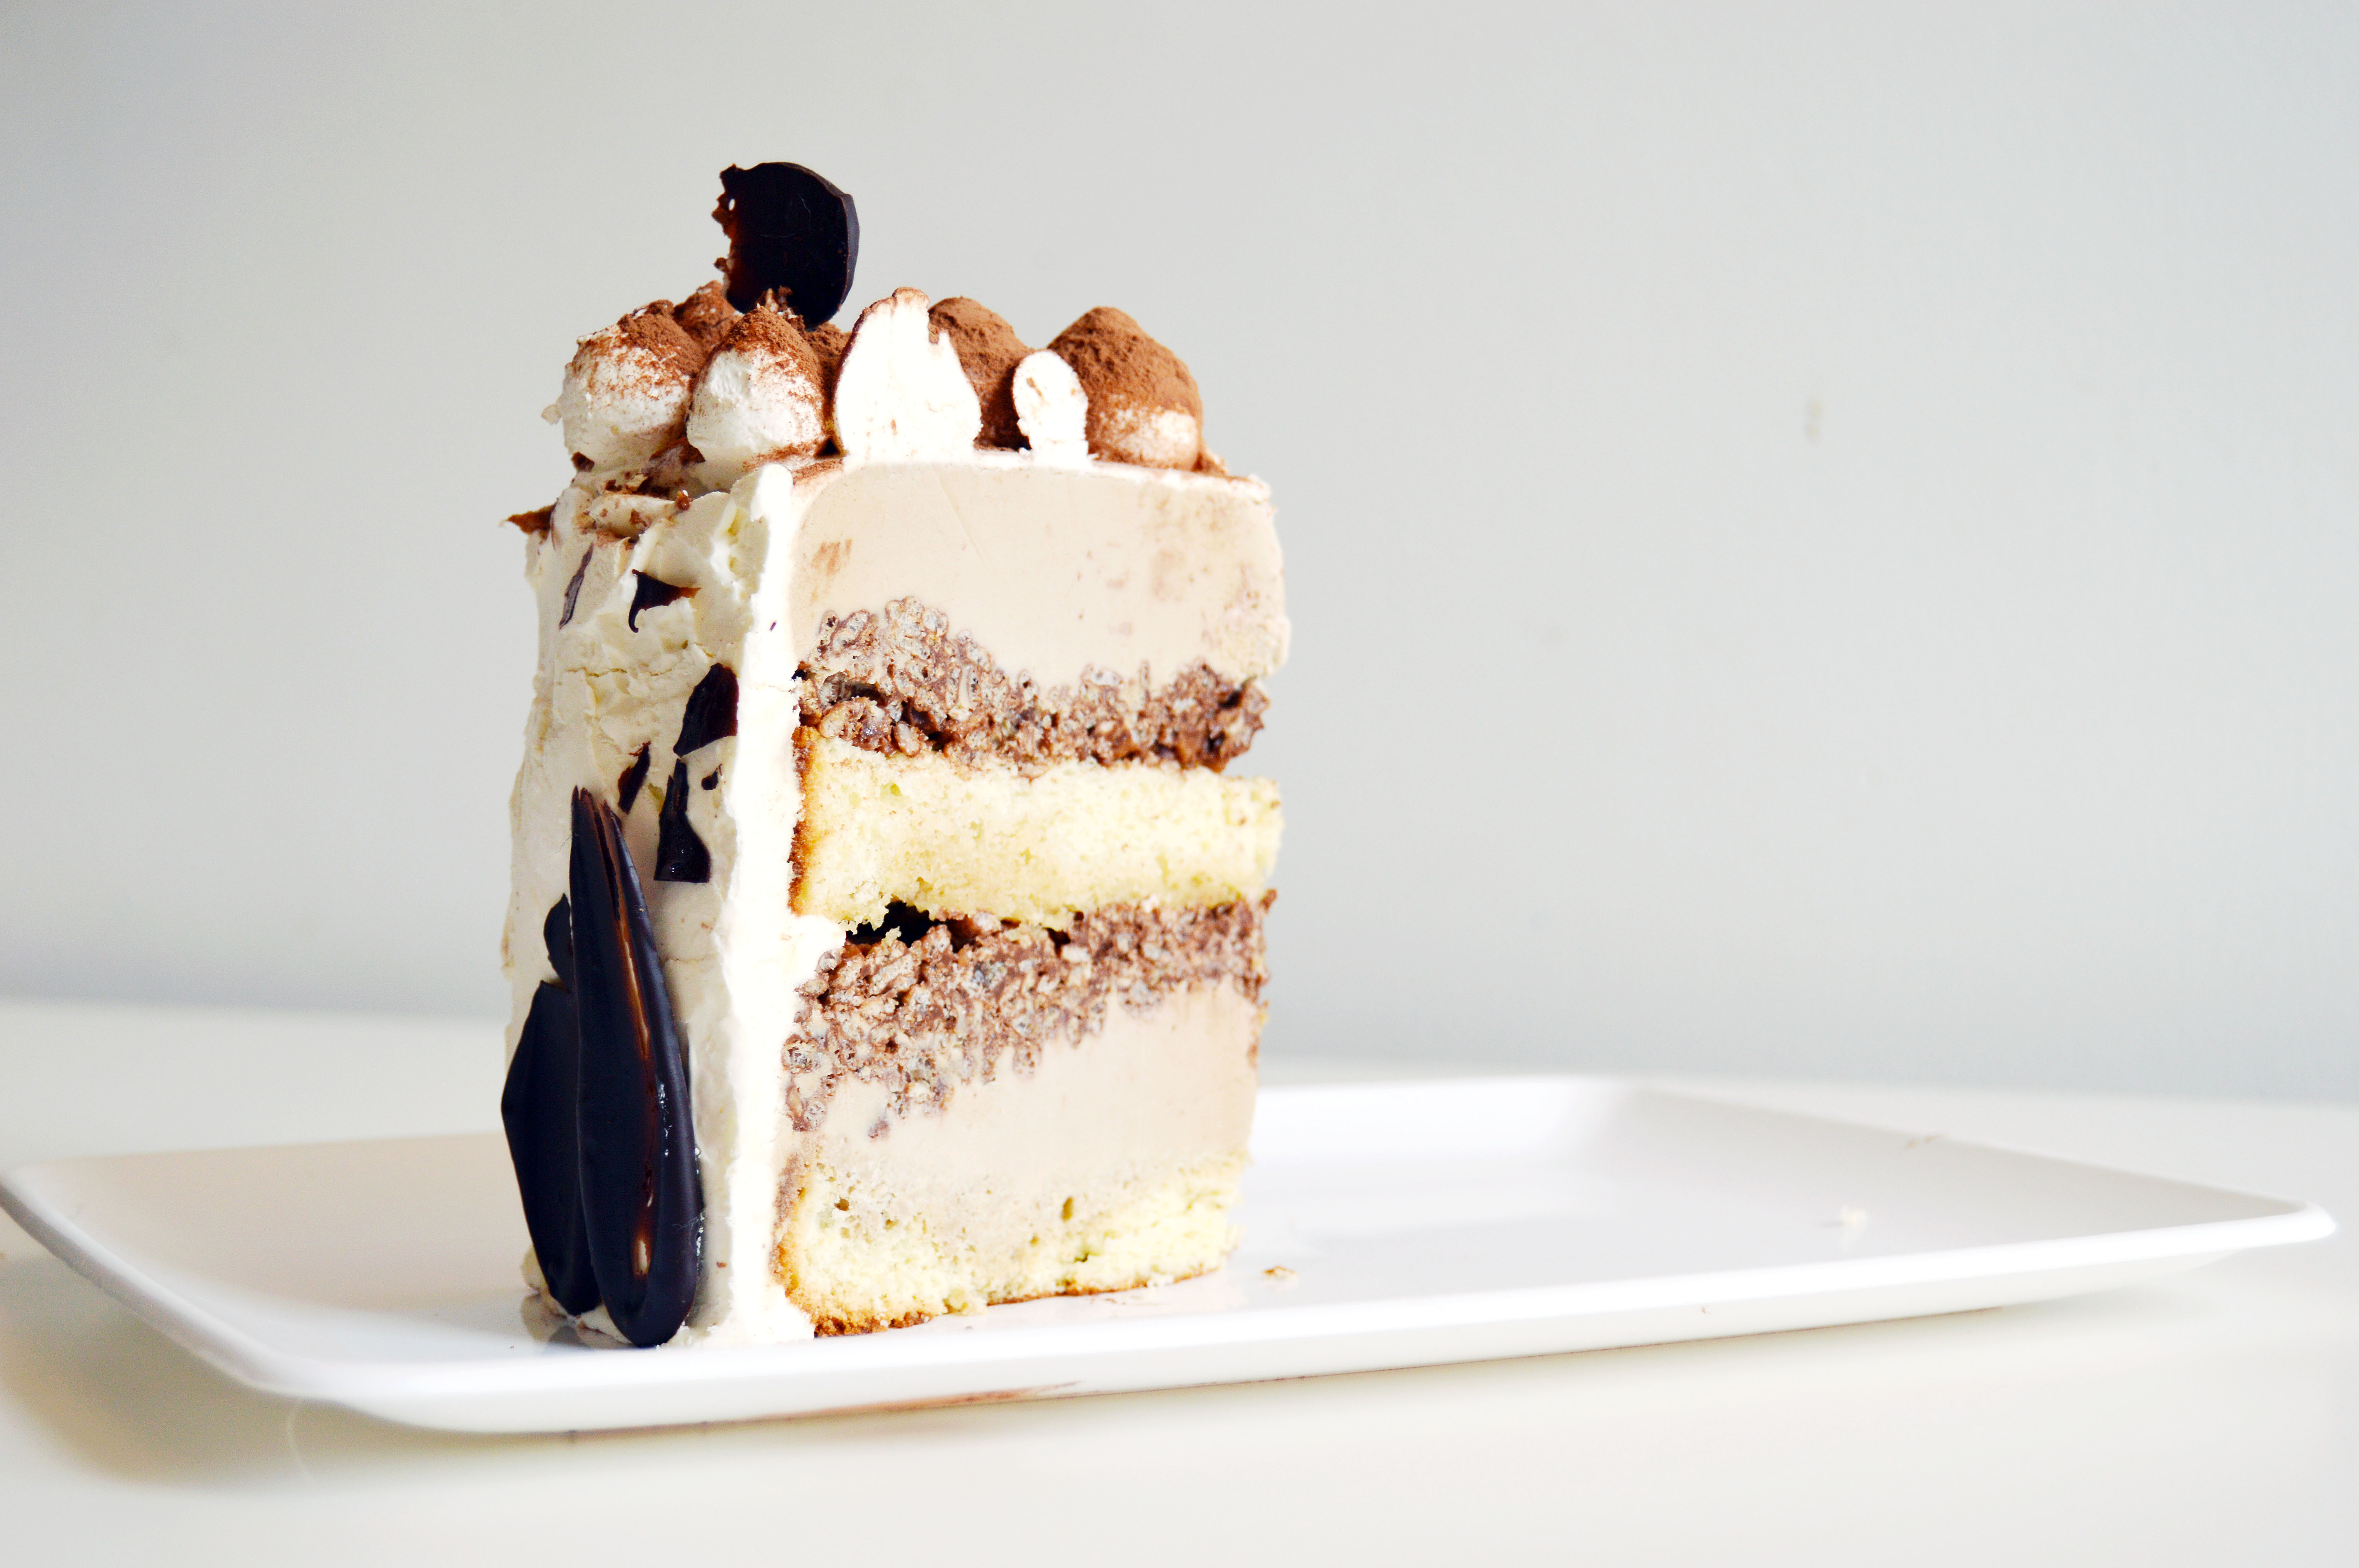
Tiramisu Crunch Ice Cream Cake
Giant Macaron Ice Cream Sandwich Cake
You will need:
Two 8-inch macaron shells (recipe below)
4 pints of Ben and Jerry’s coffee coffee buzz buzz buzz, softened
1 batch of homemade crunchies (recipe below)
cool whip
Instructions
- Try to prep the ice cream cake a day before you want to serve it. You want the ice cream layer to be as firm as possible.
- In an 8-inch cake pan with high sides (at least 3-inches), use plastic wrap to line the bottom and the sides, letting it overhang over the pan.
- Spread a third of the homemade crunchies on the bottom, then layer 2 pints of the ice cream on top.
- Layer another third of the crunchies on top of the ice cream, and then layer the other 2 pints of ice cream, finally topping the top with the last third of the crunchies.
- Wrap the cling film over the top of the ice cream cake and place in the freezer. Freeze until firm, preferably overnight.
- When you are ready to assemble your ice cream cake, place one macaron shell, flat-side facing up on a cake stand.
- Remove the cake pan from the freezer and slide the ice cream layer out and place it on top of the macaron shell.
- Place the other macaron shell, domed side facing up on top of the ice cream layer.
- Use the cool whip around the ice cream layer to smooth the cake trying not to get it on the macaron shell. You want it to have smooth sides and look like an even ice cream sandwich.
- Place back in the freezer for at least two hours, or until cool whip is firm to the touch.
- The colder the ice cream cake is, the cleaner the cuts you will make.
Giant Macaron Shells
Ingredients:
212 g. almond meal
212 g. powdered sugar
172 g. egg whites, divided to 82 g. and 90 g
236 g. sugar
158 g. water
brown food color
Instructions:
- On a parchment paper that is the size of a baking sheet, draw an 8 inch circle with a pencil. Repeat with another parchment paper.
- Line two baking sheets with the parchment paper, pencil side down.
- In the bowl of a food processor, add the almond meal and powdered sugar and pulse until thoroughly combined.
- Sift the mixture over a large mixing bowl, throwing out the lumps as they appear. Add 82 g. of the egg whites and stir until you get a thick mixture.
- Add the brown food coloring to the almond paste to get the color you desire.
- In a small pot attached with a candy thermometer, combine the sugar and water over medium heat and boil until the syrup reaches 200˚F.
- Once the syrup reaches 200˚F, start whipping the remaining 90 g. in the bowl of your stand mixer with the whisk attachment on medium speed until soft peaks are reached.
- Once the syrup reaches 248 degrees, remove the pot off the burner and slowly pour the syrup down the side of the mixing bowl with the egg whites on medium speed.
- Once the egg whites are fully incorporated, increase the speed to medium high until egg whites form glossy, stiff peaks
- Mix a ⅓ of the egg white mix to the almond mixture and stir together until the batter is slightly lighter and less pasty. From then on, fold in ⅓ of the egg white mixture at a time until the mixture “flows like magma”. The mixture should be smooth and run thick ribbons off the spatula.
- In a pastry bag fitted with the largest plain piping tip that you have, paint about 8 vertical lines along the inside of the piping bag using a clean food-use-only paintbrush and the brown food gel color.
- Fill the piping bag with the macaron batter.
- Pipe the batter onto the parchment paper in a tight spiral pattern until you get to the edge of the 8-inch circle that you drew. You should have a concentric circle pattern of brown circles. Take a toothpick and draw lines into the center through the brown circles to create a pattern. This will be the top macaron shell.
- Fill the piping bag with more batter and pipe another large circle. There may or may not be a pattern here because you already piped out the first circle. If there isn’t, there is no need to stress because this will be the bottom shell.
- If there is leftover batter, feel free to pipe out some normal sized macarons for later use.
- The piped batter may have peaks but should smooth away in a minute or two. Let the batter stand until the tops of the macaron batter are dry to the touch, about 30 mins to 1 hour.
- Preheat the oven to 350˚F.
- Once you place the macarons in the oven, reduce the heat to 275˚F. Bake 15-18 minutes for the large shells, 10-13 for the small shells, until the feet are formed and the tops are smooth.
- Once you remove the macarons, reheat the oven to 350˚F for ten minutes before baking another pan of macarons at 275˚F.
- Let cool and fill.
Homemade Crunchies
Ingredients:
30 Oreo cookies
1 – 7.25 oz. bottle of Magic Shell ice cream topping
Instructions:
- Using a food processor, Crush Oreos into even crumbs.
- In a medium bowl, mix cookie crumbs and ice cream topping until each crumb is well coated.
- Reserve for later use.
*Homemade crunchies recipe from Our Best Bites.


 I understand if you are a little overwhelmed by it. But trust me, it is worth every minute you spend making it. 😉

 The weather has been ridiculously hot this past week, and the thought of turning my oven was a major turn off. (Insert HIMYM joke here.) So with Piña Coladas on the brain, I started a journey for a pineapple coconut frozen yogurt. I’ve always loved pineapples, but coconuts have been a love-hate relationship until a few years ago when out of nowhere I became a coconut fiend. Dried, toasted, grated, shredded, fresh – I ate it all until like all good things, I eventually got tired of it. But this recipe has sparked the love again, and I’m back on the coconut train.
 Instead of using only shredded coconut as most recipes call for, I added a good dose of coconut cream into the yogurt base. To make coconut cream, refrigerate a can of full fat coconut milk overnight. When you’re ready, open up the can and the cream should’ve separated from the coconut water. Scoop up the thickened cream and reserve the coconut water for another use. So easy, yet it adds a surprising coconut element that you can’t put your finger on.
 I have to say, this frozen yogurt was not easy to photograph. Because of the added water content of the coconut cream and the pineapple, it is icier than your normal frozen yogurt. This translated into melting quickly and causing me much grief. If I could do this again, I would make them into popsicles. I had half a mind to just scrap the project, but it was too tasty not to share. Onto the next one …


