Croquembouche with Vanilla Orange Blossom Pastry Cream

Croquembouche with Vanilla Orange Blossom Pastry CreamThere are a few things every experienced baker thinks of trying in their lifetime. They are recipes that are known to be notoriously finicky and difficult, usually French. The kind of desserts you buy at the bakery because it’s not worth the trouble making in your own kitchen. One of these recipes is the croquembouche. In fact, if you google “difficult desserts to make”, the croquembouche makes the list almost every time.
pate a choux cream puffs
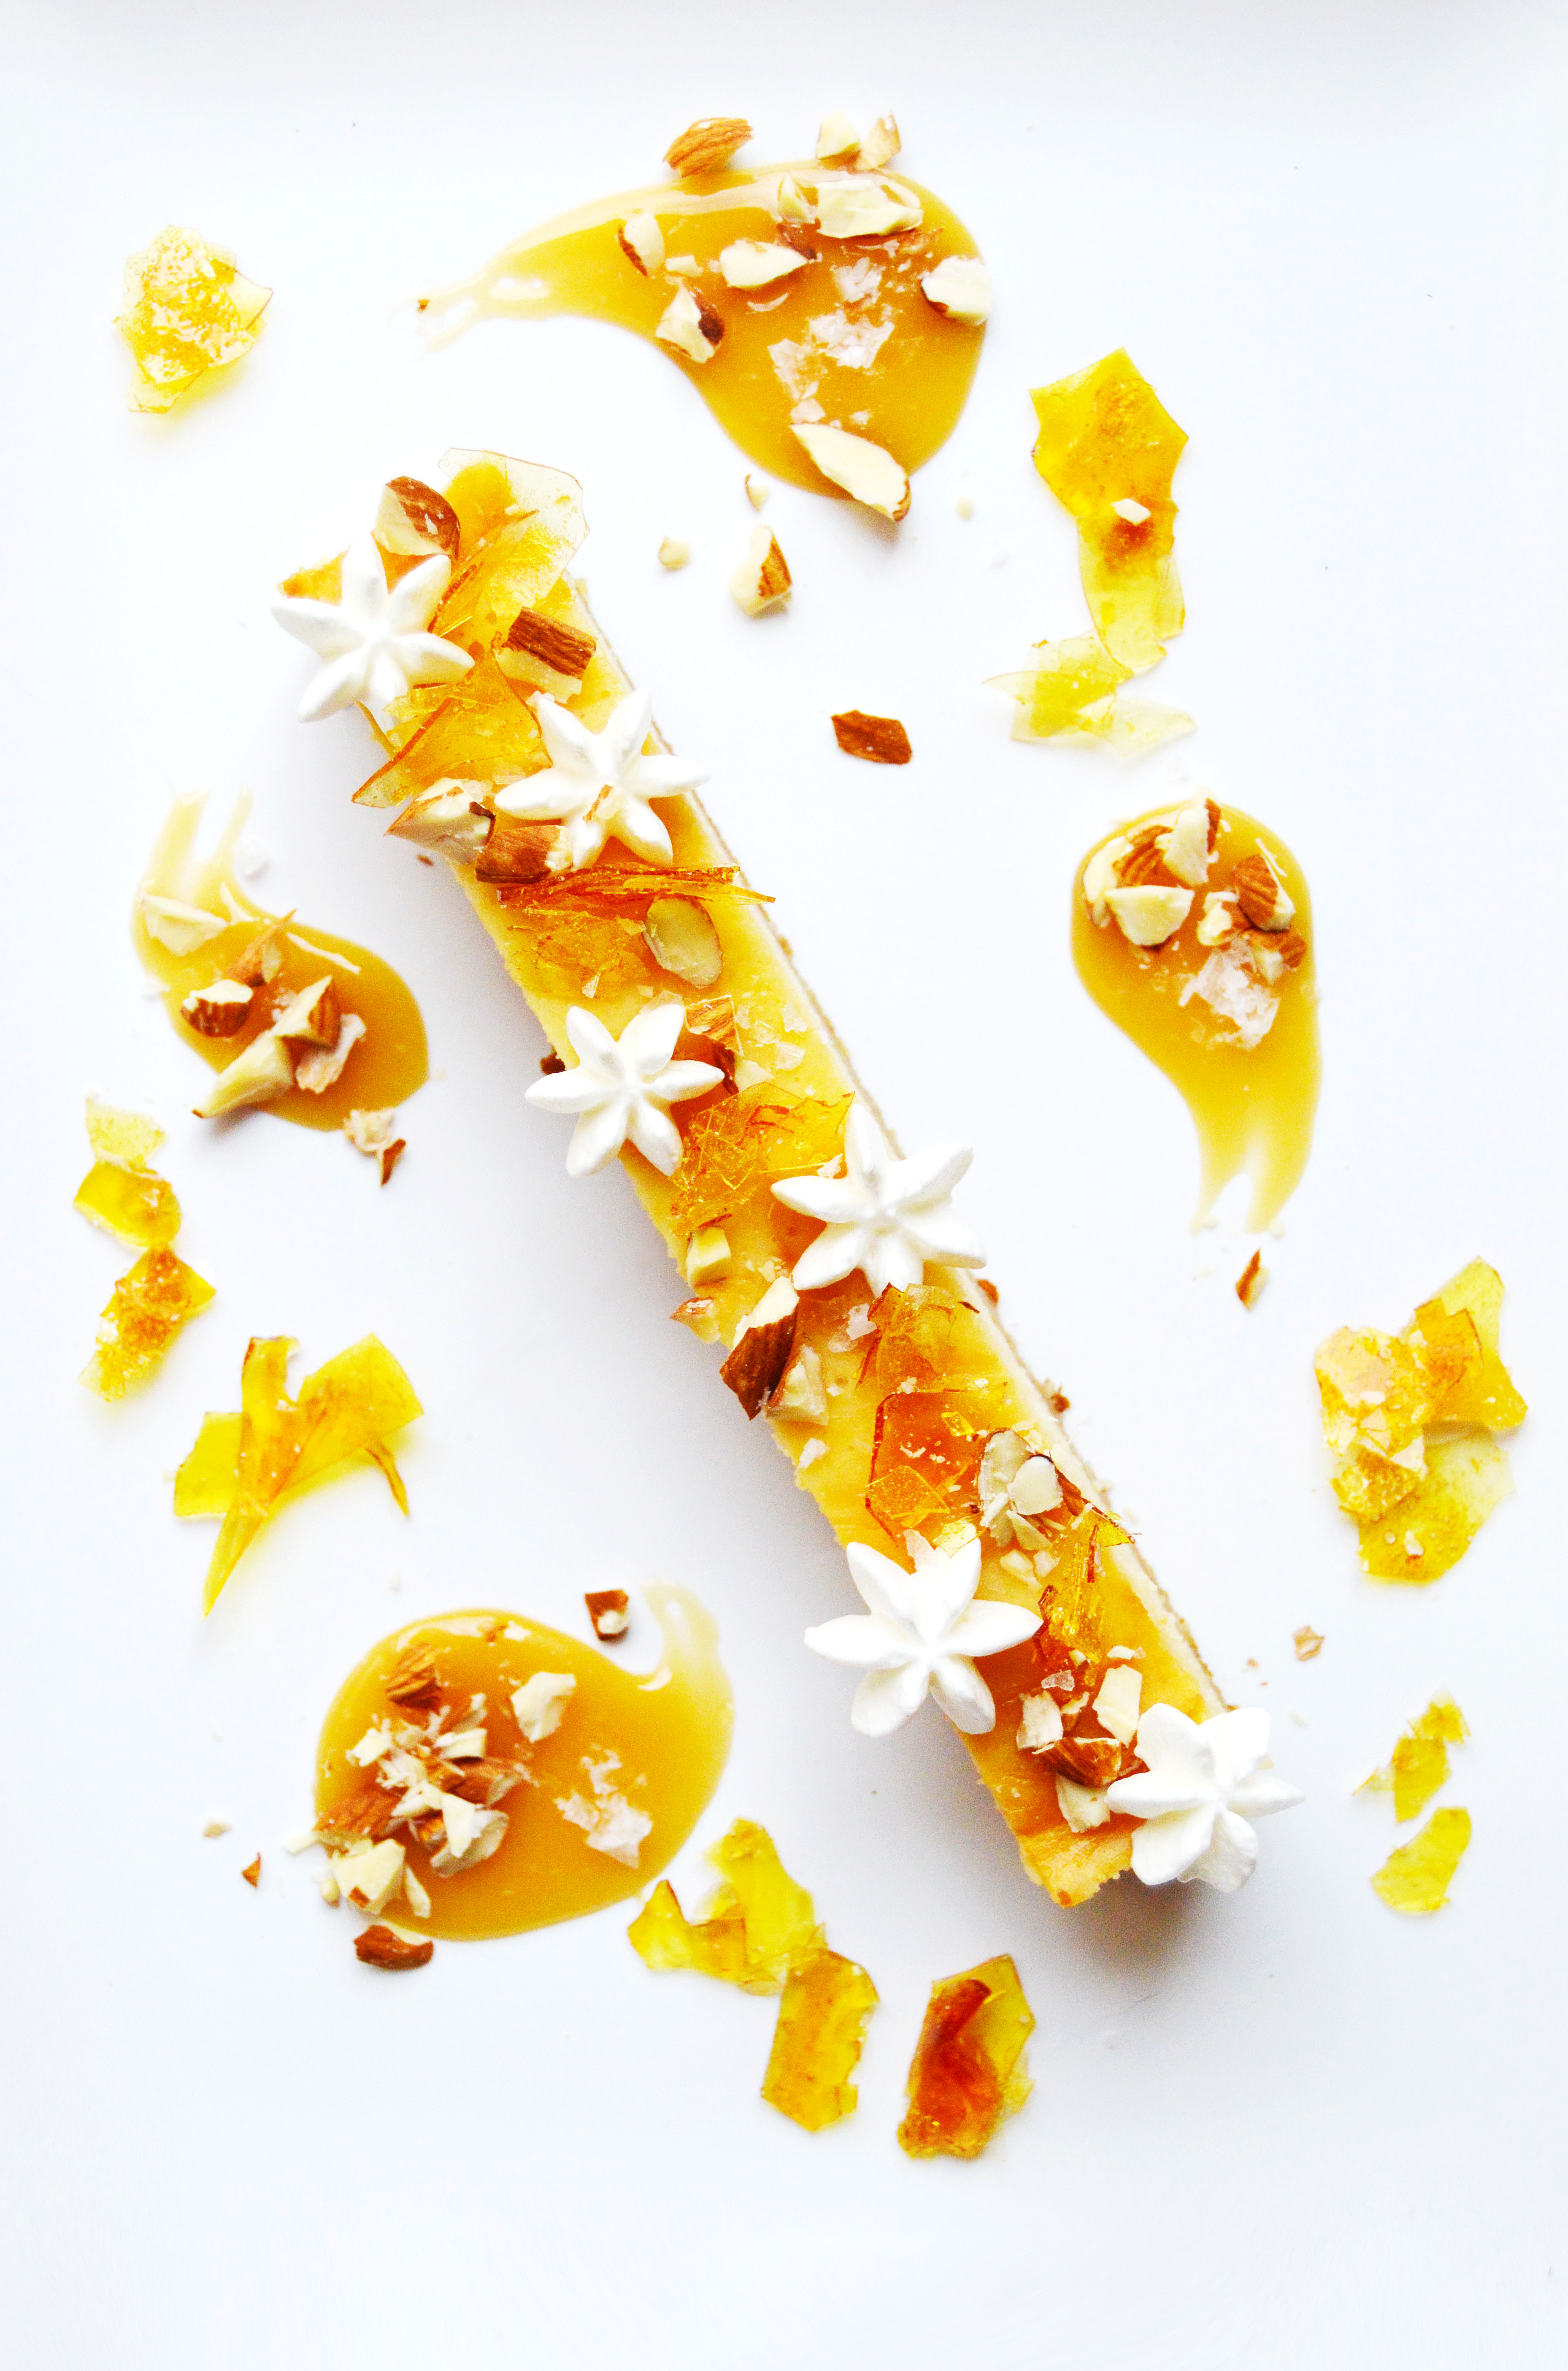
So what is a croquembouche? I would describe it as a tower of caramelized cream puffs, held together only by caramel and covered by delicate sugar threads. It’s definitely looks impressive and I can see why some people would choose one over a traditional wedding cake. Plus, that crunch of the caramel over the cream puff is really delicious. Almost like a crème brûlée wrapped up in a cream puff.
ombre cream puffsThis was a trial run that I did before a friend’s bridal shower and I learned that it takes a lot of time if you try to do it all in one day. What I did learn was that it’s not very difficult if you divide the work between three days. If you make the pastry cream two days before, and bake the cream puffs the day before and fill, dip and assemble it the day of, it is quite manageable in a decent amount of time. Here are my thoughts on the process:
croqeumbouche
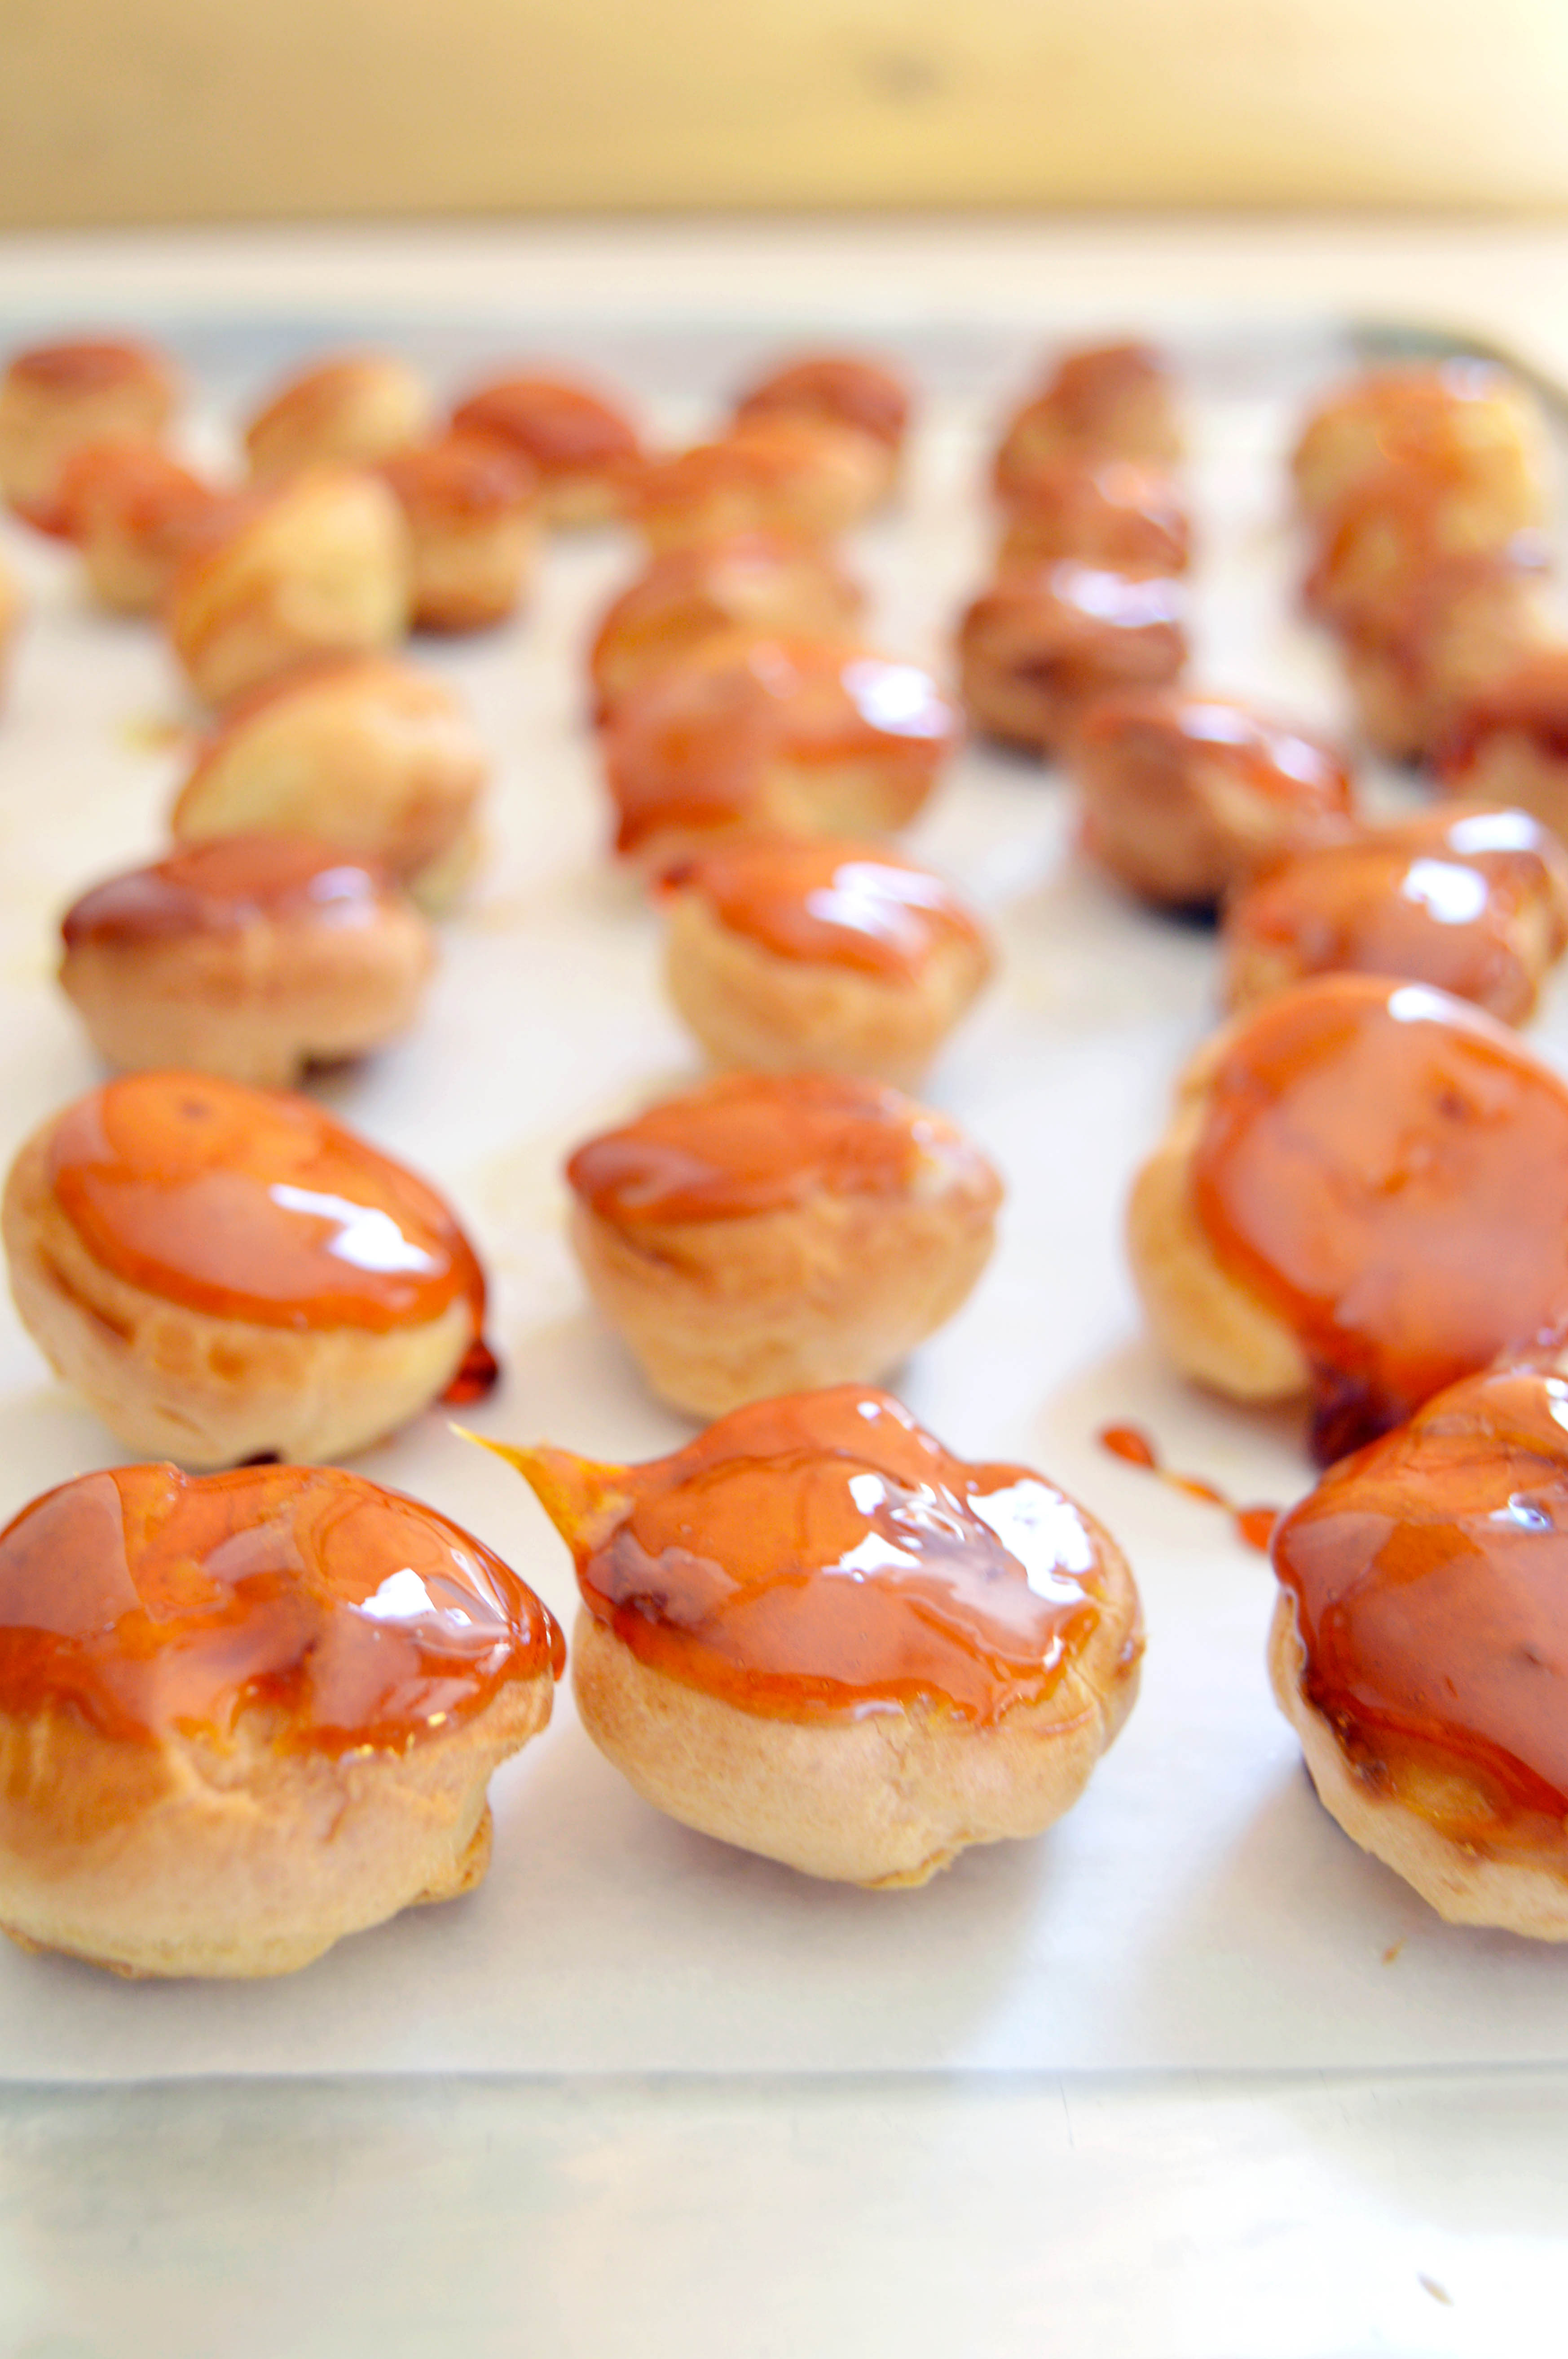
1) I think the most difficult/scary part of making this is the hot caramel. I am not embarrassed to admit that I burned my fingers a few times while making this. Have a bowl of ice water on hand just in case you do burn yourself. Your gut reaction may be to put the finger in your mouth to cool it (at least mine was), but that will not help the burn. Take your time when dipping the creampuff into the caramel, and if the cream puff gets stuck in the sugar, then use a spoon to fish it out. DO NOT attempt to take it out using your fingers. This is not something that can be done in a hurry, so make sure you have plenty of time before doing this step.
croqeumbouche
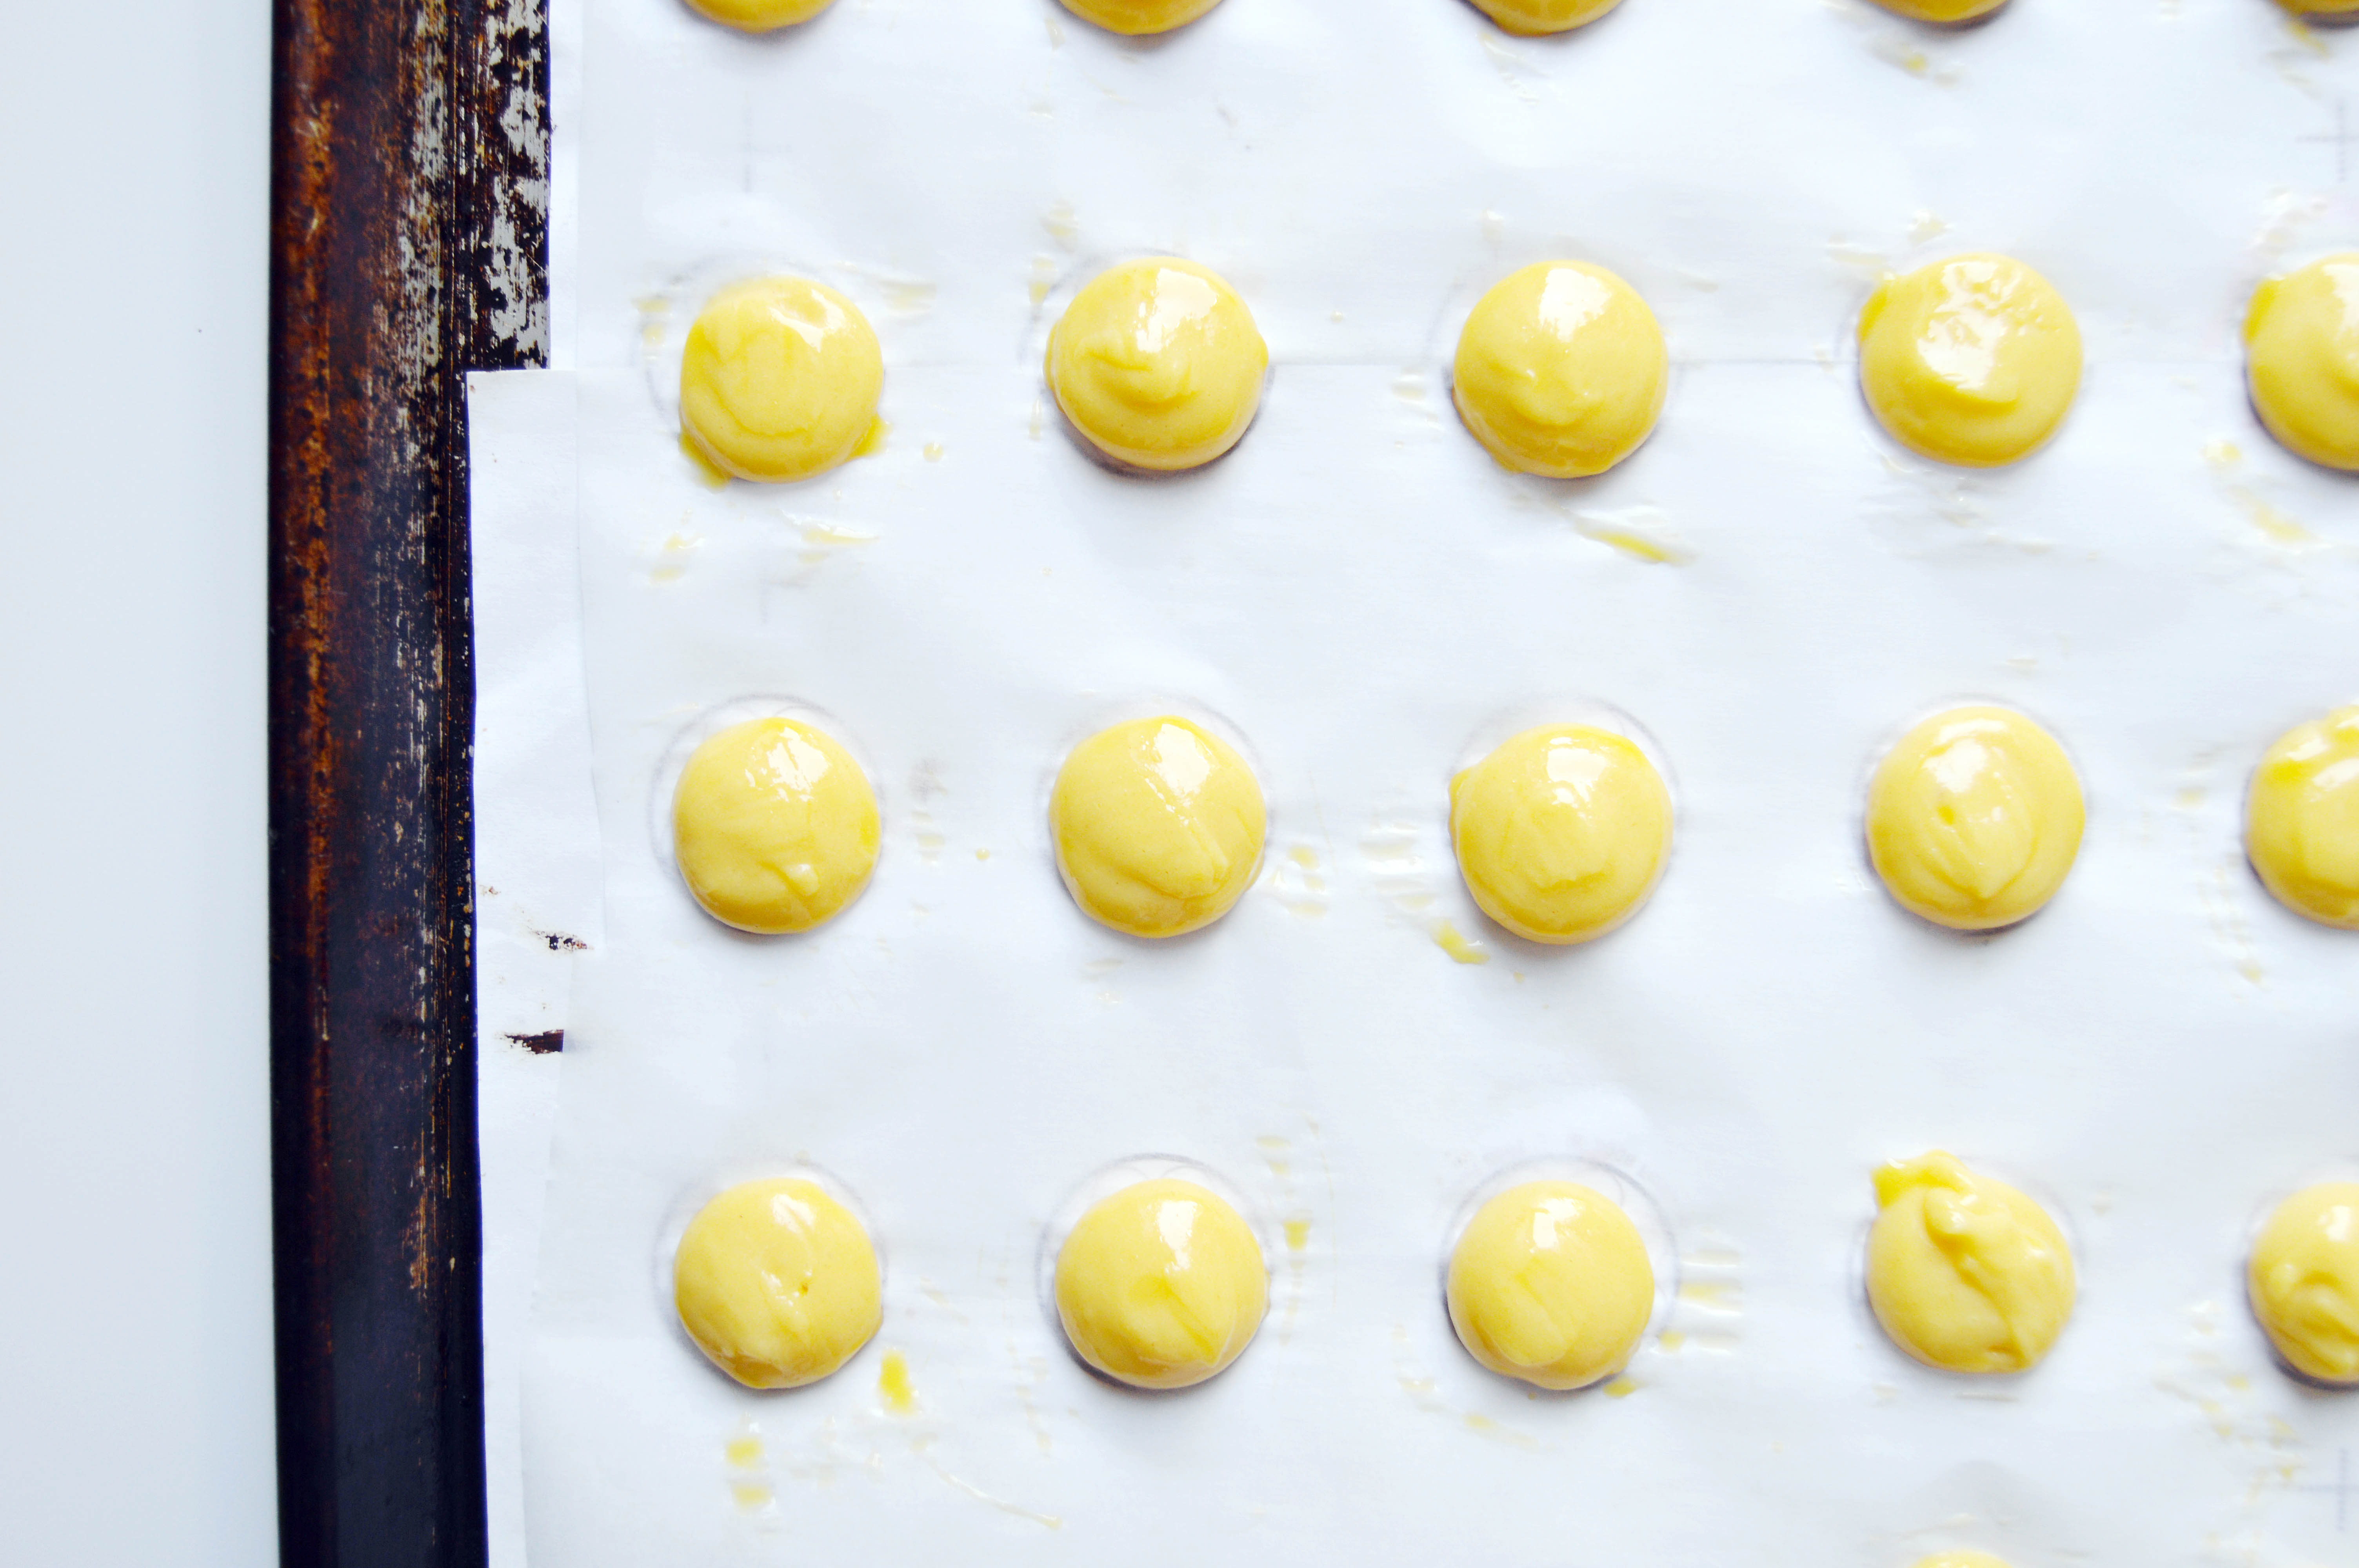
2) No matter how carefully and evenly you try to pipe the pâte à choux (the cream puff batter), you will end up with unique looking cream puffs. At first, you may be disappointed, but the funny shapes come in handy later on when you’re assembling the croquembouche. It becomes kind of like a game of Tetris, where you try to find that perfect piece to fit that nook.
croqeumbouche3) The most fun part is making the sugar threads. When the caramel is somewhat cool, you take your fork and spin it around the croquembouche making a fine web of sugar strings. It makes you feel like a spider and you can do as much or as little as you like.
croqeumbouche
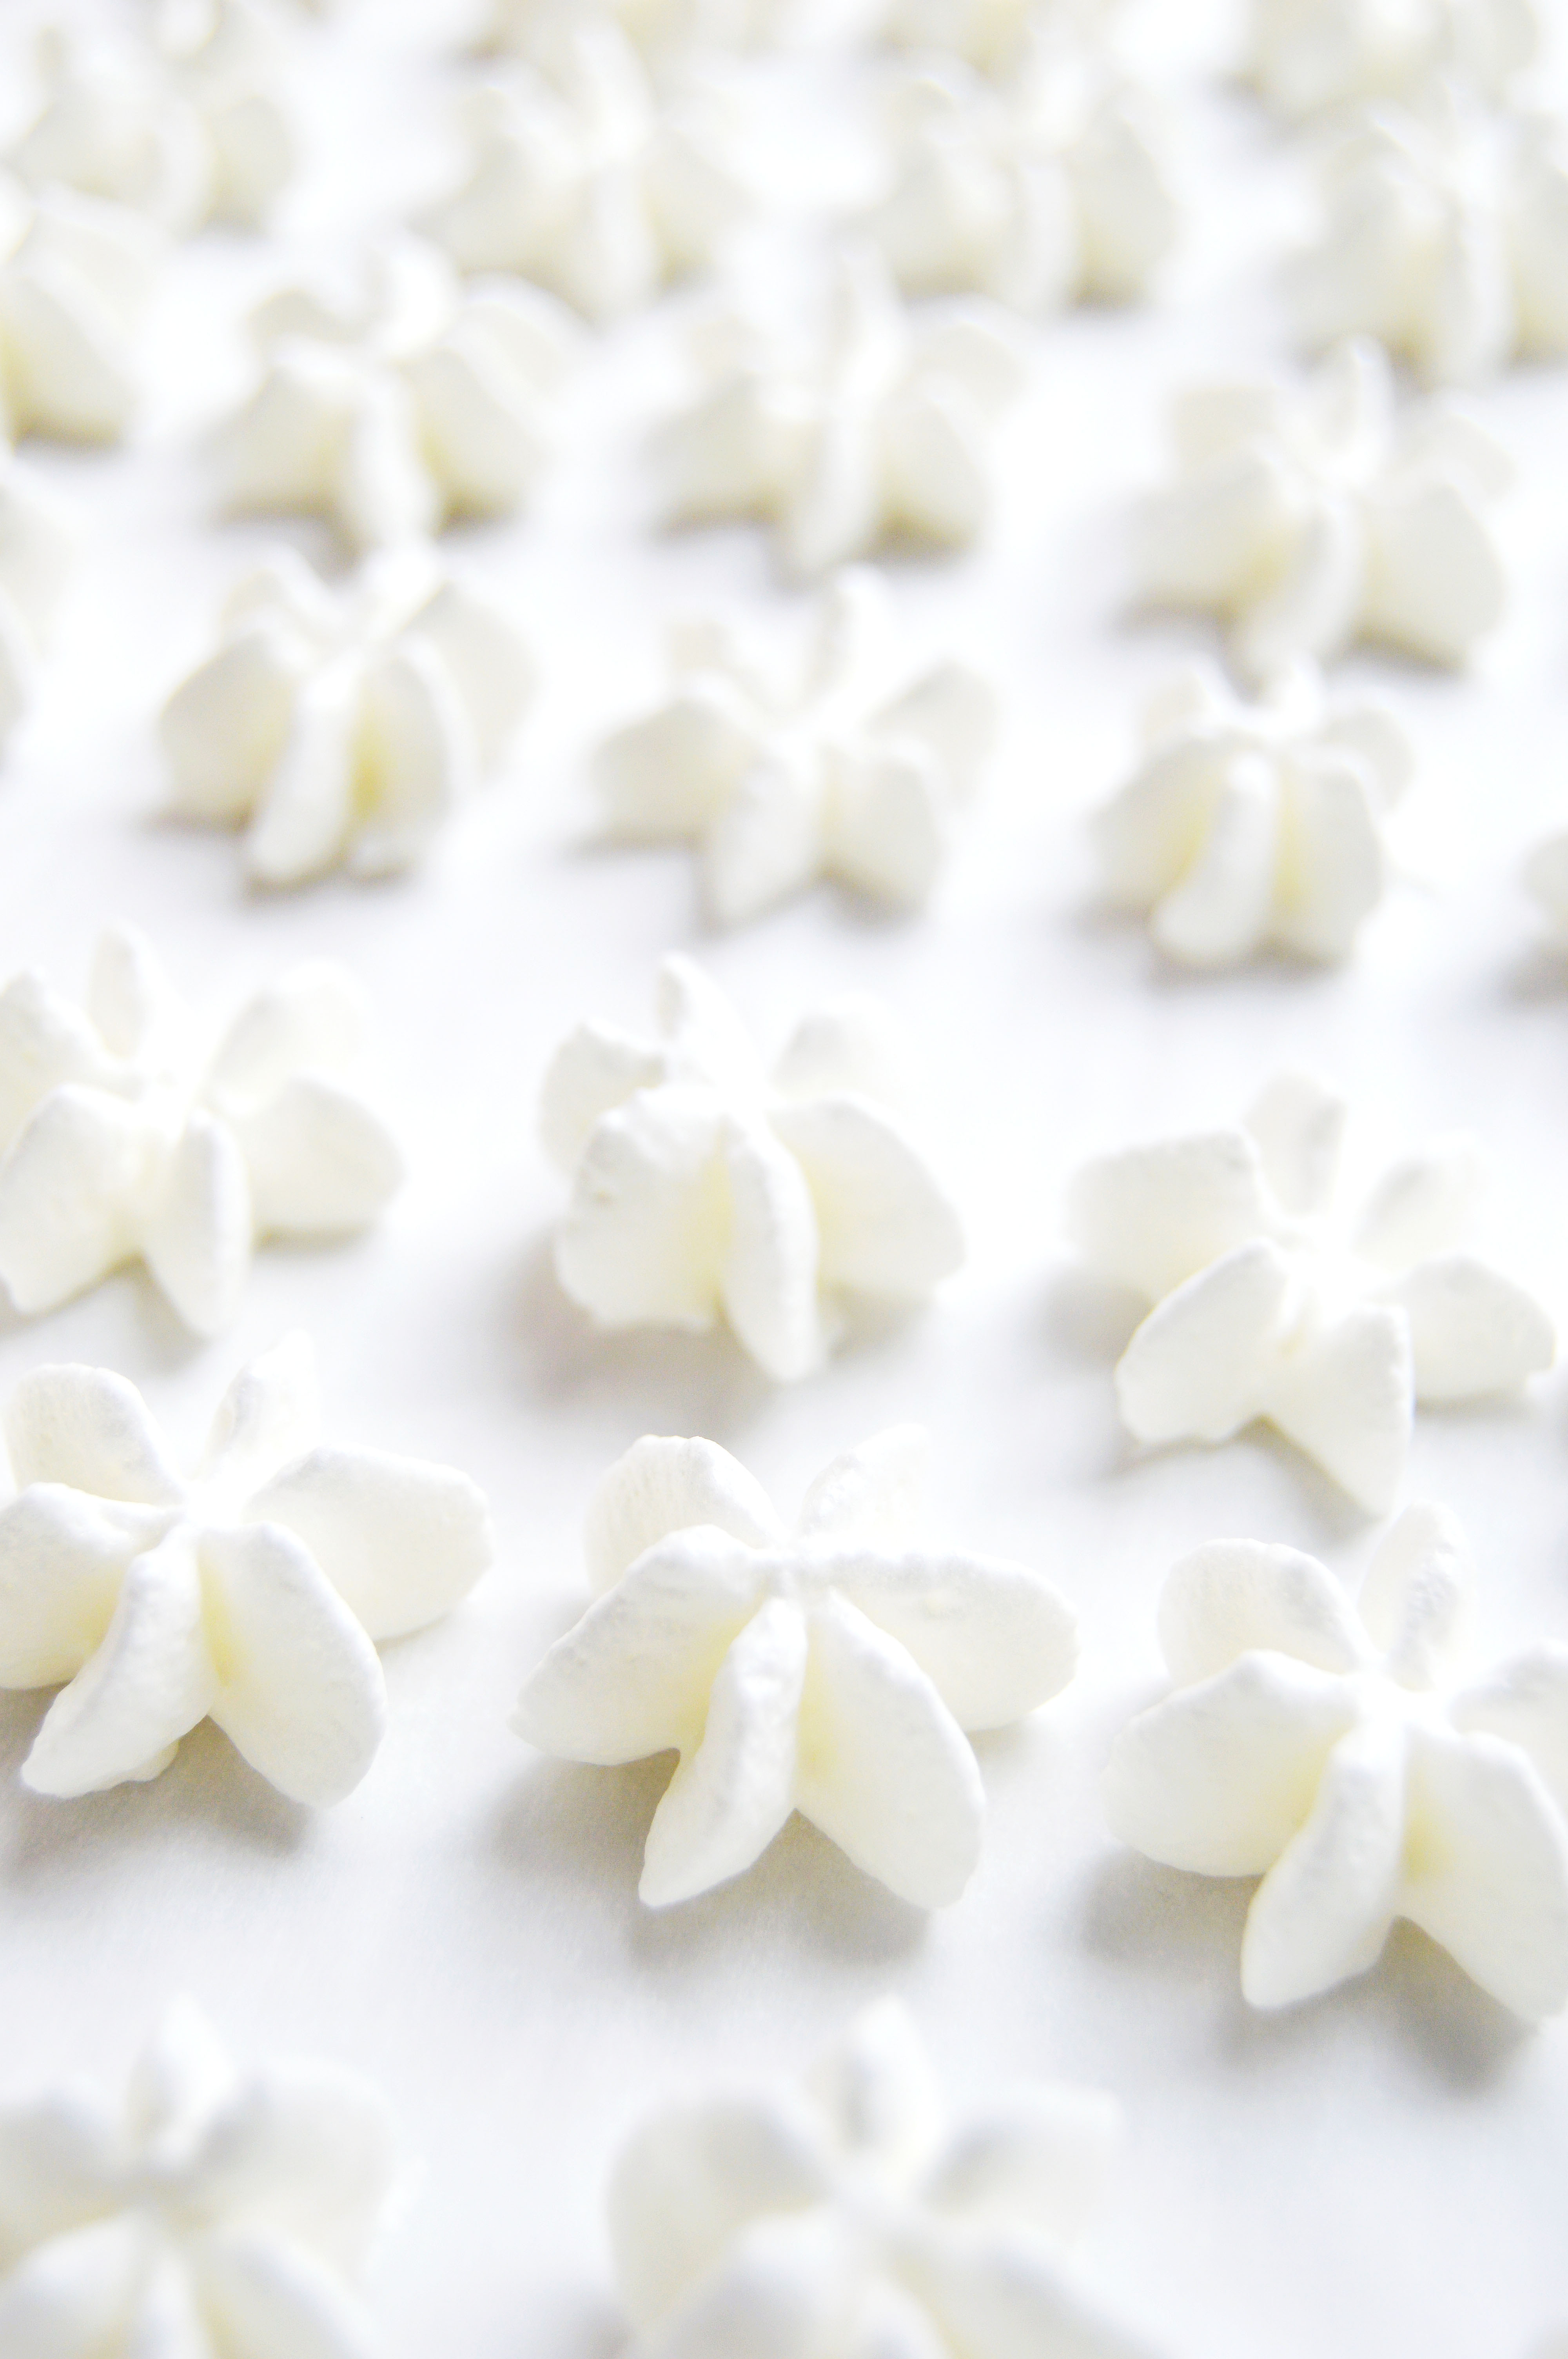
4) I tried to put fondant flowers on it and realized it was not worth it. The fine sugar threads harden as soon as they touch the cream puffs and there is no way for the fondant to stick to it. I just wedged it in between the gaps that were created. I wouldn’t recommend trying it. It wasn’t worth the work.

Croquembouche with Vanilla Orange Blossom Pastry Cream
Makes 1 medium-sized croquembouche

For the pâte à choux:

Ingredients:
1 c. water
4 oz. (1 stick) unsalted butter
½ tsp. salt
1 ½ tsp. granulated sugar
1 c. all-purpose flour
4-5 large eggs, plus an extra egg for the egg wash

Instructions:

  1. Line baking sheets with parchment paper and preheat the oven to 425˚F.
  2. In a large saucepan, bring the water, butter, salt, and sugar to a boil.
  3. Once the mixture reaches a boil, remove pan from heat and dump in flour at once and quickly stir with a wooden spoon.
  4. Once all the flour is incorporated, return the pan to the heat and cook the mixture for 30-60 seconds by continuing to stir the mixture with a wooden spoon until a thin film forms on the bottom of the pan.
  5. Move the dough into a mixing bowl of a standing mixer fitted with a paddle attachment and mix for about 1-3 minutes until the dough is cool enough for you to stick your finger in. After that point, add 4 eggs, one at a time until incorporated. If the dough does not fall off the paddle in a “V” shape, add the fifth egg.
  6. In a pastry bag fitted with a large plain piping tip, pipe 1 inch circles of dough.
  7. In a separate bowl, make an egg wash by mixing 1 egg and 1 ½ tsp. water with a fork until well mixed.
  8. Use a pastry brush and lightly brush dough with your egg wash, brushing down any peaks you may have formed when you piped out the dough.
  9. Bake your cream puffs one baking sheet at a time in the center rack of your oven. Bake for 7 minutes and reduce the heat to 375˚F and bake for 10 minutes until golden brown.
  10. As soon as they come out of the oven, poke holes in each puff with a toothpick to release trapped steam.
  11. Once cool, use a small star pastry tip to make holes on the bottom of all the puffs

For the vanilla orange blossom pastry cream:

Ingredients:

4 c. whole milk
1 c. granulated sugar, divided
3 egg yolks
2 large eggs
½ c. corn starch
1 pinch of salt
4 tbsp. unsalted butter
2 tsp. vanilla extract
¼ tsp. orange blossom water

Instructions:

  1. In a large saucepan, bring milk and ½ c. sugar to a boil.
  2. While the milk is heating, whisk egg yolks, eggs, ½ c. sugar, cornstarch and salt in a medium mixing bowl.
  3. When the milk boils, slowly add milk to the egg mixture while whisking, one ladleful at a time.
  4. Once half of the milk mixture is added, add the egg mixture back into the milk mixture.
  5. Continuously whisk the mixture over medium heat until the cream thickens.
  6. Once thickened, take the mixture off the heat and mix in the butter until completely incorporated.
  7. Stir in the vanilla extract and orange blossom water.
  8. Strain the mixture through a sieve and place a piece of plastic wrap directly on top of the pastry cream to prevent a skin from forming. Refrigerate until ready for use.

For the caramel:

Ingredients:

2 ½ c. granulated sugar
2 tbsp. light corn syrup
½ c. water

Instructions:

  1. Prepare a metal bowl with ice water.
  2. In a saucepan, boil sugar, corn syrup and water until light amber. Do not stir while the sugar is cooking, it can cause crystals.
  3. Once the caramel becomes light amber, place pan into the ice water to prevent further cooking and cool the caramel.

Assembly:

  1. Place a 5 ½ inch cake board on a sheet of parchment paper.
  2. Fill the cream puffs with the pastry cream.
  3. Dip the top of each cream puff into the hot caramel, reheating it if caramel becomes too hard to dip. (CAUTION: Be careful not to touch the hot caramel, the hot sugar will stick to your skin and burn you. Keep a bowl of ice water on hand just in case to cool the burn asap.)
  4. Use the larger cream puffs for the bottom of the croqeumbouche.
  5. Dip the bottom of the first creampuff and stick to the outside of the cake board.
  6. Dip the next cream puff on the bottom and to the side, to stick to cream puff that is already on the cake board. Repeat the process until the first layer is done.
  7. When doing the second layer of cream puffs, arrange the cream puff in between each cream puff on the first layer, to create a stable tower.
  8. Continue to dip and build, heating the caramel if it becomes too hard.
  9. Once the tower is built, cool the caramel until it forms a thread when you lift it from the pot with a fork.
  10. Dip the fork into the caramel and circle around the croqeumbouche to create a web of caramel strings around it.

Pâte à choux recipe adapted from food network.
Pastry cream recipe adapted from all recipes.
Caramel recipe adapted from bon appetit.

Honey Caramel Cheesecake with Crispy Meringue Bits and Almonds

Honey Caramel Cheesecake 7This is the prettiest dessert I’ve plated so far. I’ve never really mastered the art of plating, but for some reason, I couldn’t help myself when arranging this dessert. It might be because there are so many components to it, or because I was just excited to do something intricate for once, but this one is a stunner for sure, both on the eyes and on the palate.
Honey Caramel Cheesecake 4Honey Caramel Cheesecake 2Sometimes I look at certain recipes and wonder, “Uh…. Yeah, right. Who has the time for that??” I’m thinking this recipe will probably give a lot of people the same thought. I honestly set out with a simple recipe in mind: a honey caramel swirled cheesecake topped with meringue bits. But when I tried this new method of making meringues, I botched the first try and baked the sugar for way too long which resulted in caramelized sugar bits. Luckily, the second time was successful. I have to say, it was worth the trouble because I’ve always had a tough time making meringues that don’t crack or stay perfectly white and this method worked wonders.
meringue flowers caramel shardsIt’s crunchy, crispy, creamy, smooth, nutty, sweet, salty, rich and light. It’s pretty much a party in your mouth.
Honey Caramel Cheesecake 1
Honey Caramel Cheesecake with Crispy Meringue Bits and Almonds

Ingredients:

Honey caramel cheesecake (recipe below)
Honey caramel (recipe below)
Crispy meringue bits (recipe below)
Caramelized sugar bits (recipe below)
Almonds, chopped into small pieces
Maldon sea salt

Instructions:

  1. Trim the edges of the cheesecake to get neat sides.
  2. With a sharp knife, cut cheesecake into long strips, wiping the blade of the knife down after each cut.
  3. Top each cheesecake pieces with crisp meringue bits, caramelized sugar bits, almonds and sea salt.
  4. Optional: put dollops of honey caramel around the edges of the plate and top with sea salt and almond pieces.

Honey Caramel Cheesecake

Ingredients:

½ c. butter, softened
½ c. sugar
1 c. all-purpose flour
1 ½ tsp. vanilla extract, divided
¼ tsp. kosher salt
8 oz. cream cheese, softened
14 oz. sweetened condensed milk
1 egg
6 tbsp. heavy cream
honey caramel (recipe below)

Instructions:

  1. Preheat oven 350˚F and line an 8-inch square pan with parchment paper.
  2. In a large bowl, combine butter, sugar, flour, vanilla and salt until a dough forms.
  3. Press dough into an even layer on the bottom of the pan.
  4. In the bowl of a standing mixer fitted with the paddle attachment, mix cream cheese and sweetened condensed milk until homogenous.
  5. Add egg and heavy cream and mix until combined.
  6. Pour cream cheese mixture on top of the flour mixture.
  7. Put dollops of honey caramel and swirl with a toothpick to form swirls.
  8. Bake 20-25 minutes in a preheated oven until cheesecake is set.
  9. Cool on a wire rack and refrigerate until thoroughly chilled.

Honey Caramel

Ingredients:

½ c. honey
¼ c. heavy cream
1 tbsp. unsalted butter
½ tsp. vanilla extract
¼ tsp. kosher salt

Instructions:

  1. In a saucepan over medium high heat, combine honey and cream.
  2. Cook until mixture reaches 238˚F.
  3. Remove from heat; stir in butter, vanilla and salt.
  4. Cool, and refrigerate if storing for future use.

Crispy Meringue Bits

Ingredients:

150 g. superfine sugar
75 g. egg whites, room temperature
1 pinch of cream of tartar

Instructions:

  1. Preheat oven to 400˚F and line a rimmed baking sheet with parchment paper.
  2. Spread sugar in an even layer over parchment.
  3. In the bowl of a standing mixer fitted with the whisk attachment, add the egg whites and the cream of tartar.
  4. Place sugar into the oven and bake until the edges of the sugar begins to melt but not brown, about 5 minutes.
  5. Once the sugar begins to melt, turn the mixer onto high.
  6. Remove baking sheet from the oven and the eggs whites should be foamy.
  7. Turn the mixer to medium high and slowly pour the hot sugar from the parchment paper into egg whites.
  8. Once all the sugar is added, turn the mixer onto high and mix until stiff, shiny peaks form.
  9. Reduce oven to lowest setting 140˚F.
  10. Line another baking sheet with parchment paper.
  11. Fill a pastry bag fitted with a closed star tip, make small flower shapes until you have used up all of the meringue.
  12. Bake about 10-20 minutes until they are crisp and hollow.
  13. Turn off oven and let it dry out for about 30 minutes to an hour.
  14. Remove meringues out of the oven and store in a cool, dry place.

Caramelized Sugar Bits

Ingredients:

50 g. superfine sugar

Instructions:

  1. Preheat oven to 400˚F and line a rimmed baking sheet with parchment paper.
  2. Spread sugar in a thin even layer over parchment.
  3. Place sugar into oven until it becomes liquefied and golden brown.
  4. Remove and let stand until completely cool.
  5. Break into small shards of crisp sugar.

{Simple Sundays} Salted Milk Jam aka Dulce de Leche

salted dulce de lecheThe weather is finally turning warm! Flowers are blooming, the sun is shining and pollen is flying… I’m lucky enough to not have seasonal allergies, but I am sure many of you are suffering from it. It might be best to just stay in and make this milk jam. Making this milk jam (or dulce de leche) is so ridiculously easy, I don’t know if I should even write a recipe for it. It uses two ingredients: sweetened condensed milk and fleur de sel.  I’m almost embarrassed to admit that my devotion to sweetened condensed milk borders on idolatry. I believe that anything with sweetened condensed milk is delicious and so many tasty things are born from it. Banana pudding, Thai iced tea, flan, tres leches cake, even my favorite recipe for pumpkin pie has sweetened condensed milk in it. If you’ve never had it, you must try it. It is life changing.
dulce de leche recipeI can’t say dulce de leche is very close to a caramel because it has a distinctively different taste from it. I would say that it is more complex instead of the bold one note sweetness you get from caramel. The traditional way would be to boil down a lot of milk and sugar for many hours and constantly stir it until you get your desired shade of brown. The method I used is a shortcut. You take a can of sweetened condensed milk, put it in a pot of water and keep it at a gentle simmer for 2-3 hours. Cool. Open. Enjoy. Top liberally with fleur de sel if desired. (You know, if you’re into that sweet-salty thing. Let’s face it though, who isn’t?)
salted milk jamThe layer of the light colored dulce de leche is a mistake that I made. When I say gentle simmer, I mean simmer. I was scared about simmering too strongly so I kept it at a bare simmer for two hours. When I opened the jar, it was too pale to be called dulce de leche yet too dark to still be considered sweetened condensed milk. Don’t be like me. Put the pedal to the metal.how to make dulce de leche 
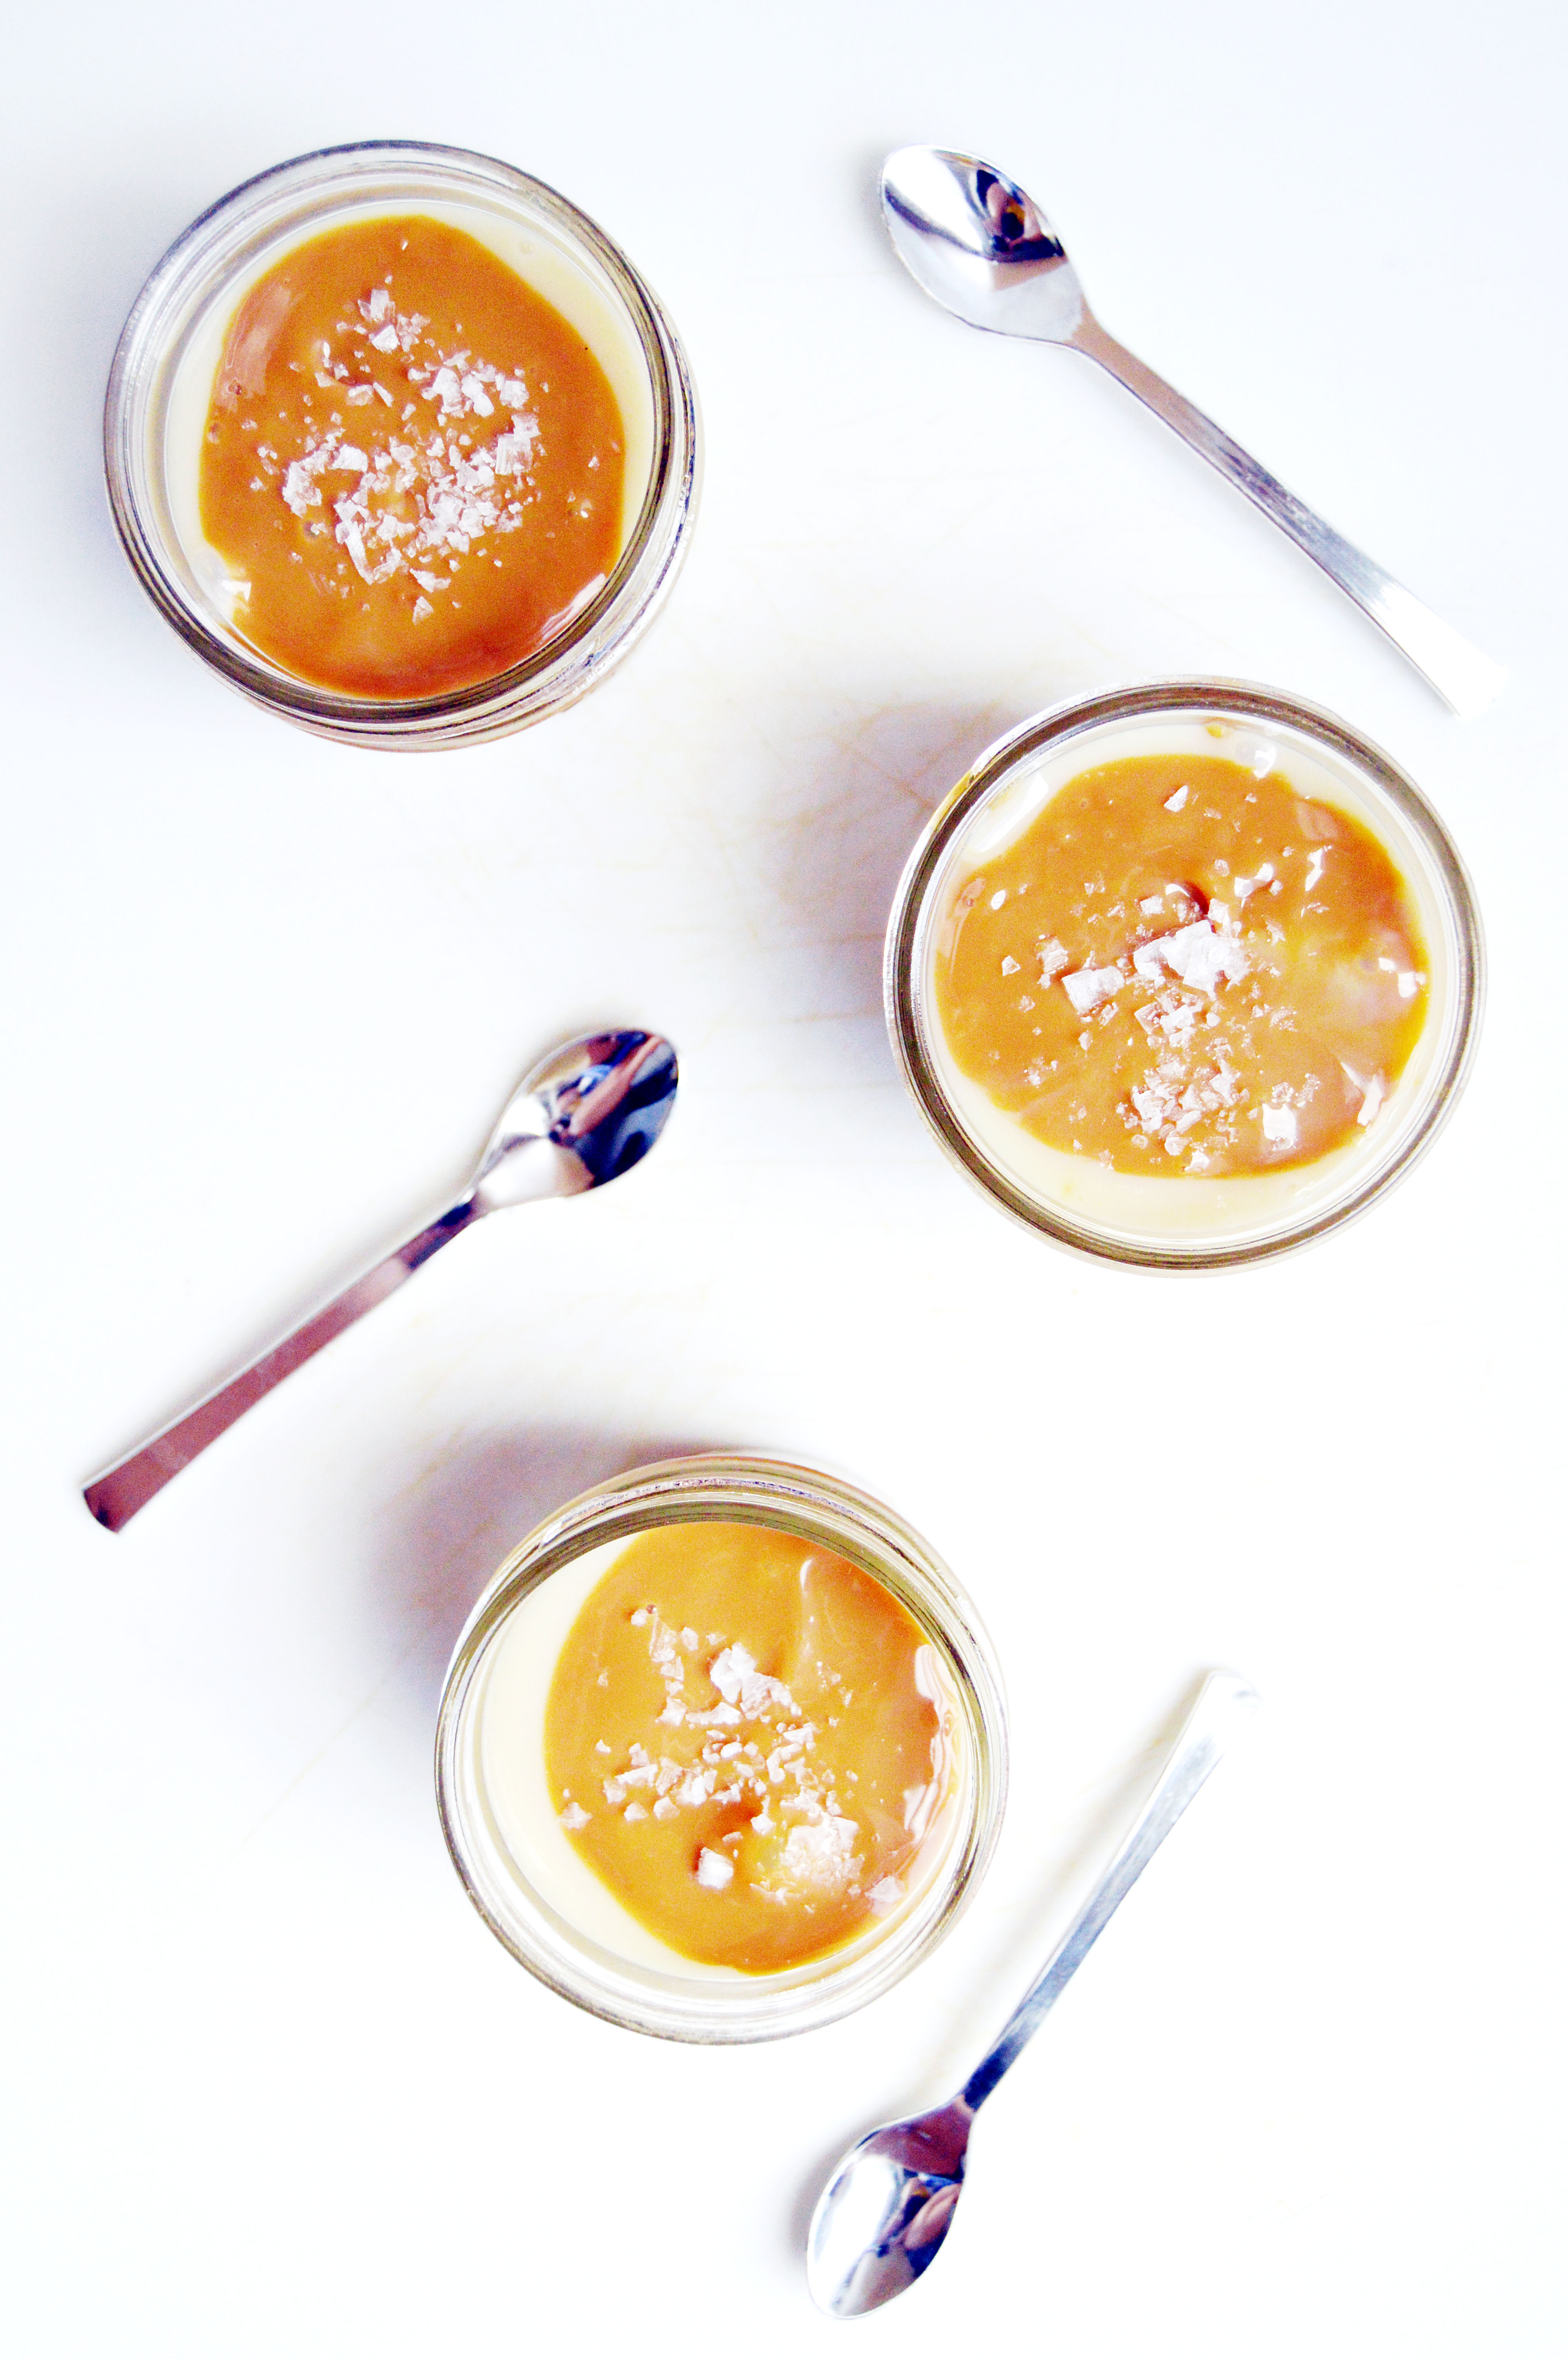
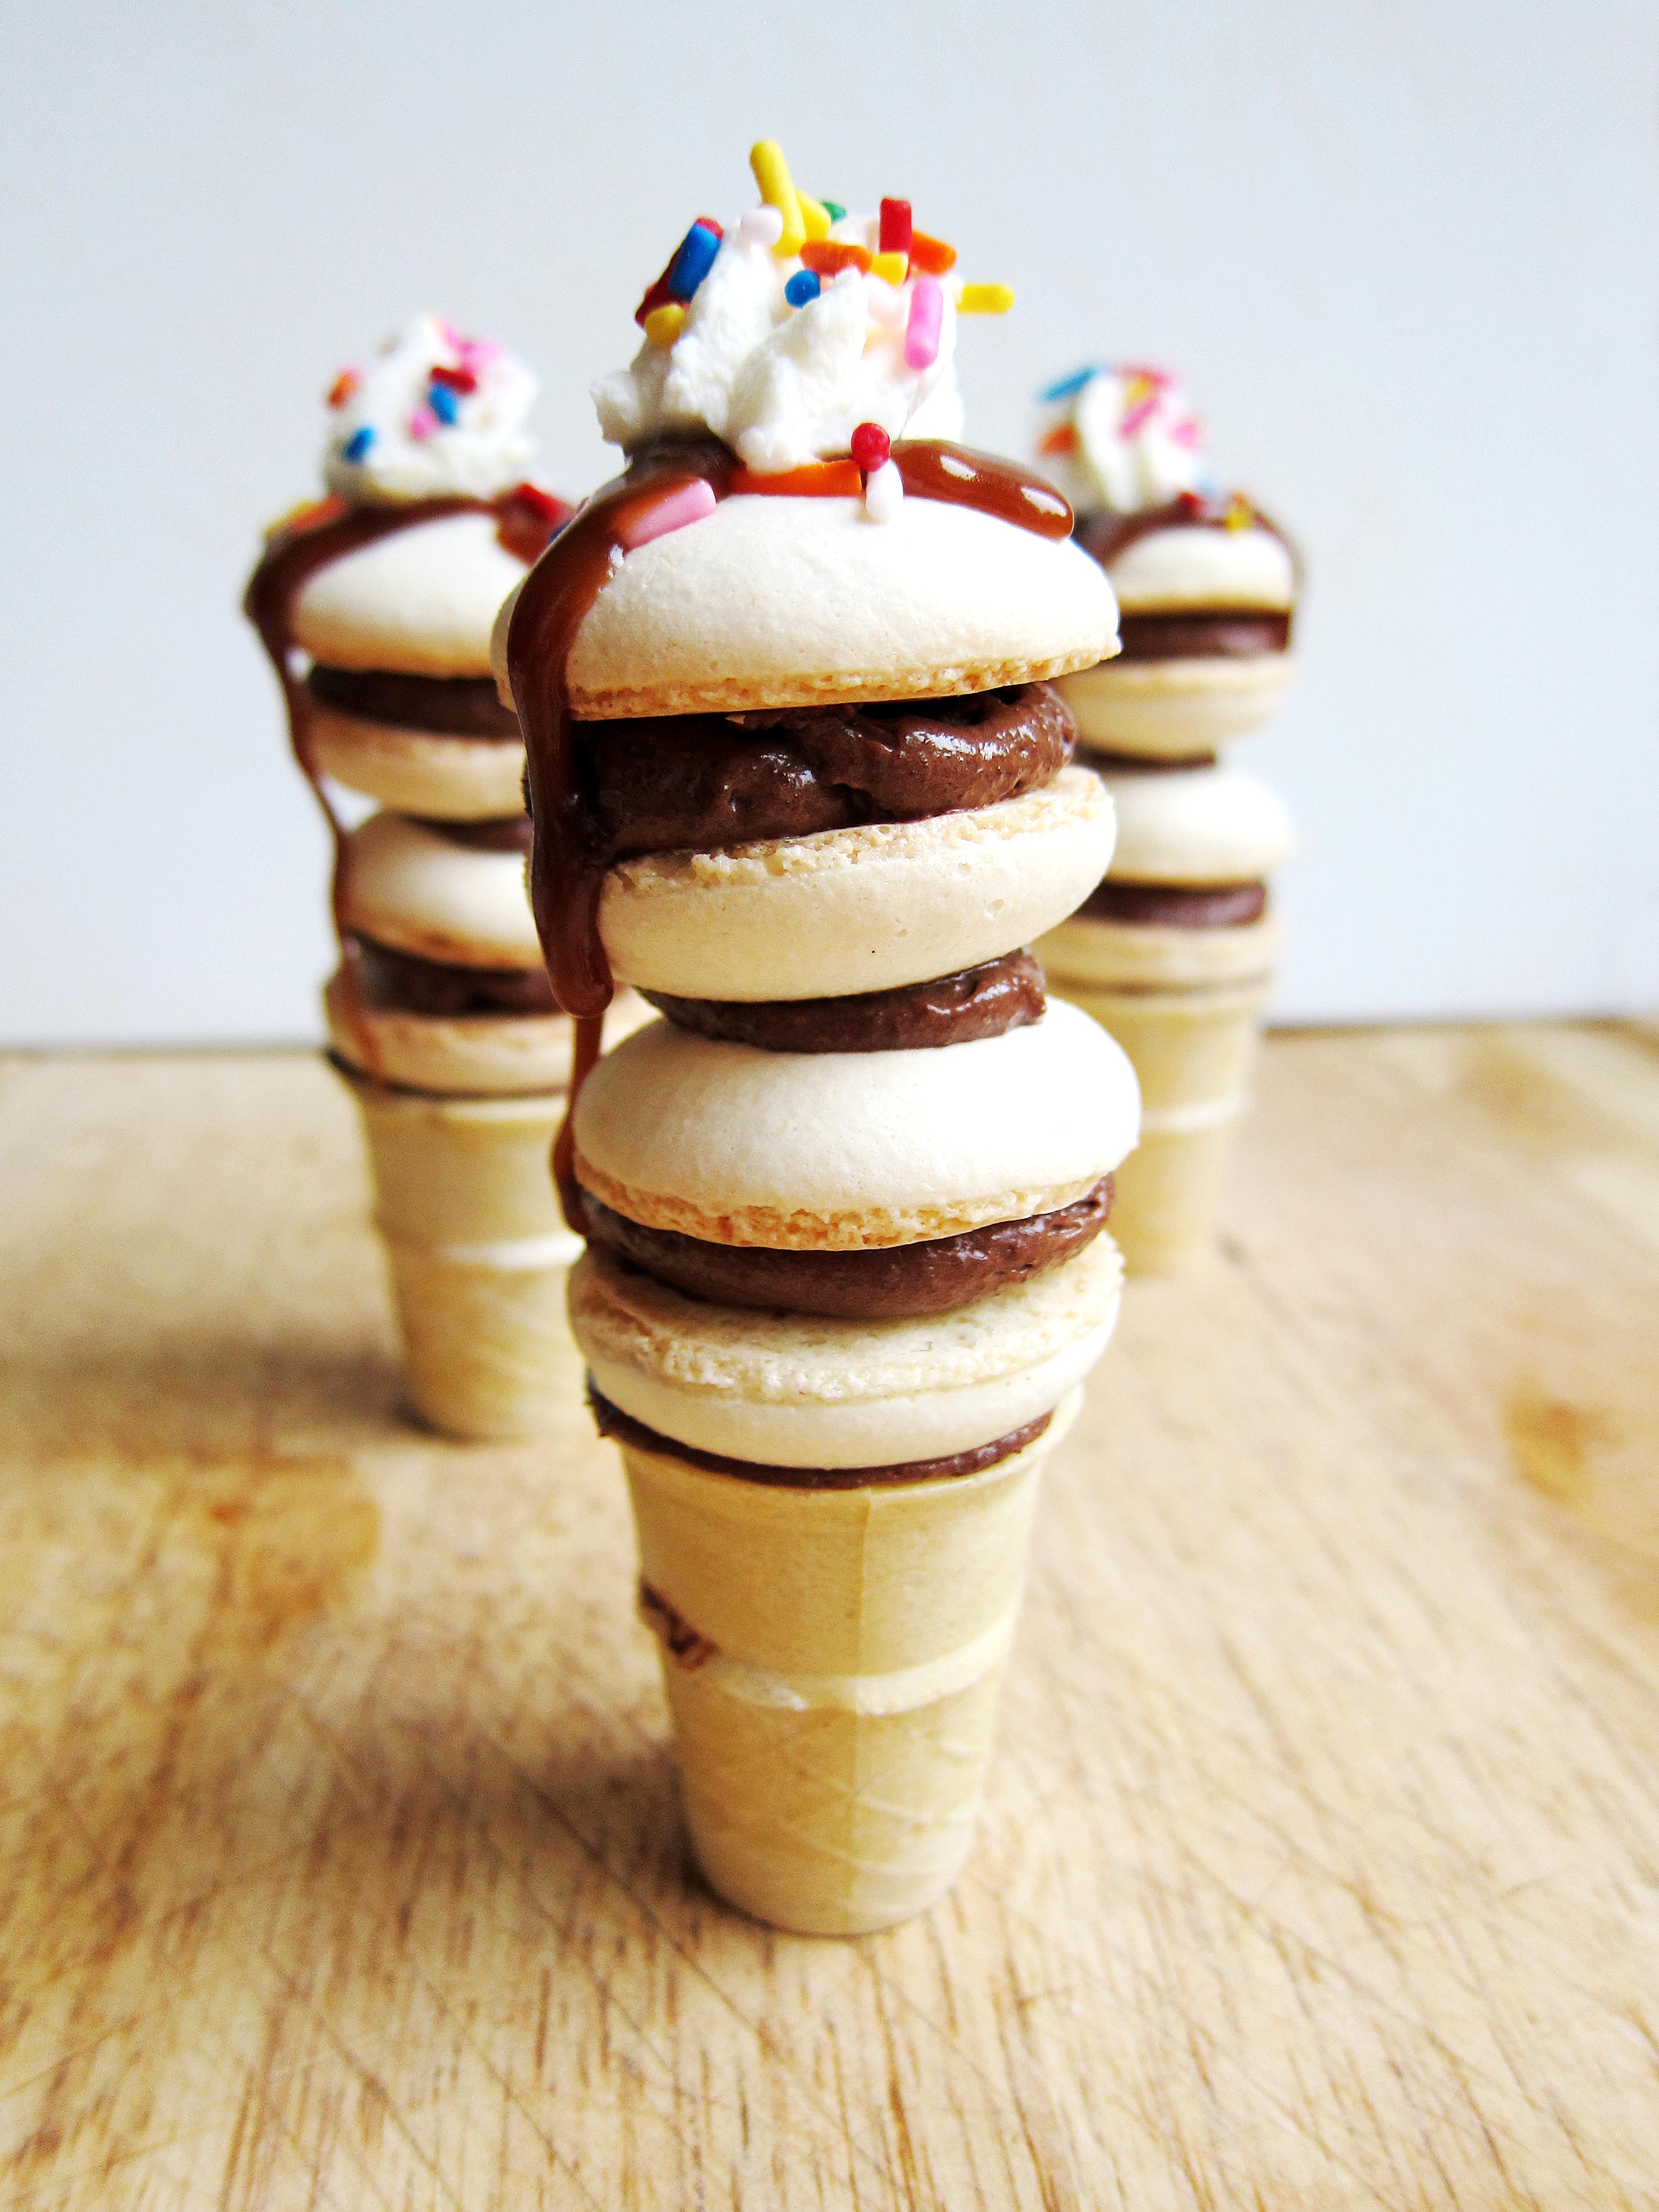
You can use dulce de leche on so many things. You can top ice cream, or pound cake or toast or crackers. You can also use it to fill a cake, sandwich in between cookies (alfajores!!) or macarons, or my favorite, eat it straight out of the jar, with a spoon. Seriously, the possibilities are endless! Or if you are feeling especially kind, you can also put them in little mason jars and gift them.

Salted Milk Jam

Ingredients:
1 can sweetened condensed milk
fleur de sel (optional, but recommended)
water (for submerging can in water)

Instructions:

  1. Remove the label off of the can of sweetened condensed milk.
  2. Place can in a large pot and fill pot with water, making sure the can is completely submerged. (At least 2 inches above the can.)
  3. Heat pot until water is simmers. Simmer can for 1½ hours, making sure that the water level does not fall below 1 inch above the can.
  4. Turn can upside down, simmer for another 1 – 1½ hours. Continue to monitor the water level, making sure the can is completely submereged.
  5. Remove can from water and let cool.
  6. Open can, top liberally with fleur de sel. Add salt to taste, pending on how much of a salty –sweet contrast you like.

Caramel Apple Monkey Bread

Caramel Apple Monkey Bread 1There are a few things that scream “autumn”. Pumpkins, apples, fall foliage, football and Thanksgiving are at the top of my list. A couple several weeks ago, I went apple picking with a group of friends and came home with a big ol’ bag of apples. Apples are notorious for lasting along time (as long as they are not bruised) and I have plans for the other ones I have in my fridge. But for now, I have this recipe for you.
Caramel Apple Monkey Bread 2 Caramel Apple Monkey Bread 3 Caramel Apple Monkey Bread 4If you’ve never had monkey bread, you’re missing out on some serious yum. If you took cinnamon rolls but made them bite sized and decided to glue them together with some cinnamon sugar, you’ve got monkey bread. Cut up some fresh apple chunks and stuff them in the sweet dough and you have fall in bread form.
Caramel Apple Monkey Bread 5I have to be honest. I’ve made and shot this recipe weeks ago and I started writing the first paragraph last week, but things became hectic and that’s as far as I got. But to be fair, I threw a Star Wars Rebels themed party and that kept me quite busy for a several days. I’m excited to share it with you on my next post!
Caramel Apple Monkey Bread  6Caramel Apple Monkey Bread

Ingredients:

1 ¼ c. milk
2 tsp. instant yeast
4 c. all-purpose flour
5 tbsp. sugar
1 tsp. salt
1 egg
5 tbsp. unsalted butter, melted
3 apples, peeled, cored and cut into small bits
1 ¼ c. firmly packed dark brown sugar
2 tsp. cinnamon
½ c. (1 stick) unsalted butter, melted and cooled

Instructions:

  1. Generously spray the inside of a 10 in. Bundt pan with nonstick cooking spray.
  2. In a small bowl, warm your milk, add the yeast and whisk to dissolve. (Do not warm it above 110˚F or you will kill the yeast).
  3. In the bowl of a standing mixer fitted with the paddle attachment, beat the flour, 5 tbsp. sugar, egg, and salt until combined.
  4. Slowly add in the milk mixture until combined. Add the 5 tbsp. melted butter and mix until the dough comes together.
  5. Replace the paddle attachment with the dough hook attachment. Continue to mix on medium speed until the dough becomes silky and tacky, but not sticky, about 8-10 minutes.
  6. Spray a large bowl with cooking spray. Cover the bowl with plastic wrap and let it rest in a warm area until the dough has doubled in size, approximately 1 hour.
  7. Use your clean hands to push down and deflate the dough. Roll out dough in a rough rectangle, ¼ in. thick. Spread 1/3 of apple bits onto half of the rolled out dough. (As pictured above)
  8. Fold dough in half and spread another 1/3 of apple bits on another half of the dough and fold once again in half to form a quarter of its original size. (As pictured above)
  9. Cut dough into 1 to 1 ½ inch pieces and roll the pieces into balls (apple pieces may stick out). Place the balls on the sheet pan.
  10. In a small bowl, stir together the sugar and cinnamon. Place the melted butter in a separate bowl.
  11. Dip one dough ball in the melted butter. Let the excess butter drip back into the bowl, roll the ball in the brown sugar mixture, and place it in the Bundt pan.
  12. Continue this process with each ball, until halfway where you will scatter the rest of the apple pieces.
  13. Wrap the Bundt pan tightly in plastic wrap and let rise in a warm area until the dough balls have doubled in size.
  14. Preheat the oven to 350 degrees F.
  15. Bake until the top layer is deep brown and the caramel coating begins to bubble around the edges, about 30 minutes.
  16. Cool the bread for 5 minutes, then turn it out directly onto a platter and serve warm. If you have any leftovers, reheat them in a 300 degree oven until warm to the touch.

Recipe adapted from Baked Explorations by Matt Lewis and Renato Poliafito.

Toasted Marshmallow Caramel Banana Cake with Cheesecake Frosting

Toasted Marshmallow Caramel Banana Cake with Cheesecake Frosting 2Wordy, I know.  This journey of mine started when I was trying to figure out what to post next for the blog.  I have this great caramelized banana bread recipe that I use and was going to blog about that.  But right when I was about to start baking, I realized that banana bread recipes are a dime a dozen on the internet.
Toasted Marshmallow Caramel Banana Cake with Cheesecake Frosting 4Why would I bore you with something that has been done for the umpteenth time?  No, I needed to do something different, maybe even drastic.  That’s when I spotted a bag of caramel bits that I picked up at Target a few months ago and the cogs in my brain started turning.

Toasted Marshmallow Caramel Banana Cake with Cheesecake Frosting 6It starts with a soft caramelized banana cake.  What makes it “caramelized” banana cake?  Because you caramelize bananas with sugar and melted butter until it starts to smell like banana heaven in your kitchen.  Then you mix your caramel bits into the batter to increase the caramel factor.
Toasted Marshmallow Caramel Banana Cake with Cheesecake Frosting 5Next, the cake layers are sandwiched with cheesecake frosting which is essentially my version of a cream cheese frosting only it is extra thick and tastes very much like cheesecake.  Then the entire cake is surrounded by marshmallow frosting which you toast with your kitchen torch (or in your oven if you don’t have one) and as if you really needed more, you finish it off with a caramel drizzle.
Toasted Marshmallow Caramel Banana Cake with Cheesecake Frosting 1Sweet, gooey, soft, toasty, and slightly chewy (from the caramel bits) this cake is definitely worth making for a celebration… or for no reason because it’s your kitchen and you can bake if you want to. 😉
Toasted Marshmallow Caramel Banana Cake with Cheesecake Frosting 3Toasted Marshmallow Caramel Banana Cake with Cheesecake Frosting

Makes one 6 inch 4-layer cake

Caramelized Banana Cake

Ingredients:
2 oz. unsalted butter
¾ c. brown sugar
3 medium brown bananas
½ c. buttermilk
2 tbsp. vegetable oil
2 large eggs
1 c. all-purpose flour
1 c. cake flour
¾ tsp. baking soda
½ tsp. ground cinnamon
½ tsp. kosher salt
8 oz. caramel bits

Instructions:

  1. Preheat oven to 350˚F and prepare four 6 inch cake pans by spraying them with non-stick spray and lining the bottom with parchment paper.
  2. In a small pot, melt the butter. Once the butter melts, add the brown sugar and bananas and cook for 4 minutes.  Cool mixture for 10 minutes before transferring mixture into a bowl of a stand mixer fitted with a paddle attachment.  Beat for 2-3 minutes until mixture is cool and combined.
  3. In a small bowl, whisk buttermilk, vegetable oil and eggs until homogeneous.
  4. In another bowl, mix both kinds of flour with baking soda, cinnamon and salt.
  5. With the mixer on low, add half the buttermilk mixture followed by half the flour mixture.
  6. Finish the batter by alternating the buttermilk mixture and flour mixture again.
  7. Fold in the caramel bits into the batter.
  8. Divide the batter evenly between 4 pans and bake about 12-15 minutes until a toothpick comes out clean.
  9. Let cool for 10 minutes in the pan and then remove from pan and let cool completely on a wire rack.

Cheesecake Frosting

Ingredients:
10 oz. cream cheese
4 oz. unsalted butter, softened
1 ½ c. powdered sugar
8 oz. mascarpone cheese
2 tsp. vanilla extract
1 pinch of kosher salt

Instructions:

  1. In a standing mixer fitted with a paddle attachment, beat cream cheese and butter until combined.
  2. Add the powdered sugar slowly, followed by the mascarpone cheese, vanilla extract and kosher salt.  Do not overbeat the mascarpone cheese it will separate if you do.

Marshmallow Frosting

Ingredients:
4 large egg whites
¾ c. sugar
¼ tsp. cream of tartar
1 tsp. vanilla extract

Instructions:

  1. In a metal bowl of a standing mixer, whisk egg whites, sugar and cream of tartar over a small saucepan with simmering water.
  2. Whisk until sugar is dissolved and whites are slightly foamy and warm to the touch, about 2-3 minutes.
  3. Transfer bowl to the standing mixer fitted with the whisk attachment and beat starting from low speed and gradually moving to high speed until stiff and glossy.
  4. Mix in the vanilla extract to finish the frosting.

Caramel Drizzle

Ingredients:
3 oz. caramel bits
¼ c. heavy cream

Instructions:

  1. In a small saucepan, melt caramel bits with heavy cream until a thick sauce forms. If the sauce is too thick, feel free to add more heavy cream.

Assembly:

  1. Frost each layer of banana cake with cream cheese frosting, ending with a layer of banana cake. Make sure you smooth the sides as well as you can. (As shown above.)
  2. Generously frost the top and sides with marshmallow frosting using your spatula to make swirl patterns along the cake. This will make a more impressive cake when you toast the frosting.
  3. Toast the frosting with a torch (kitchen, butane, or propane your choice) until golden brown.
  4. Drizzle caramel frosting.
  5. Stand back and enjoy your work of art.

Caramelized banana cake adapted from espresso and cream.
Marshmallow frosting adapted from Martha Stewart.

Salted Dark Chocolate Caramel Cookies

Salted Dark Chocolate Caramel Cookies 6I hope you all had a great Memorial Day weekend!  If you follow me on Instagram, you probably saw I had some good eats during my weekend.  I know many of you are on diet mode for the upcoming swimsuit season and I’m sorry to do this to you, but you must make these cookies, especially if you love salty/sweet desserts.
Salted Dark Chocolate Caramel Cookies 2What makes this cookie so great is the sum of its parts.  First, you have the moist chocolate cookie base.  The secret to having it so deliciously soft is by under baking it.  10 minutes! No more!  Second, you have the cocoa nibs that cut the sweetness and have a satisfying crunch.  Think of it as a more cocoa-y nut alternative.  Third, you have the perfectly melted caramel center.  Personally, I love caramel and you can use regular caramels instead of Rolos.  However Rolos have the chocolate coating that enhances it.
Salted Dark Chocolate Caramel Cookies 4
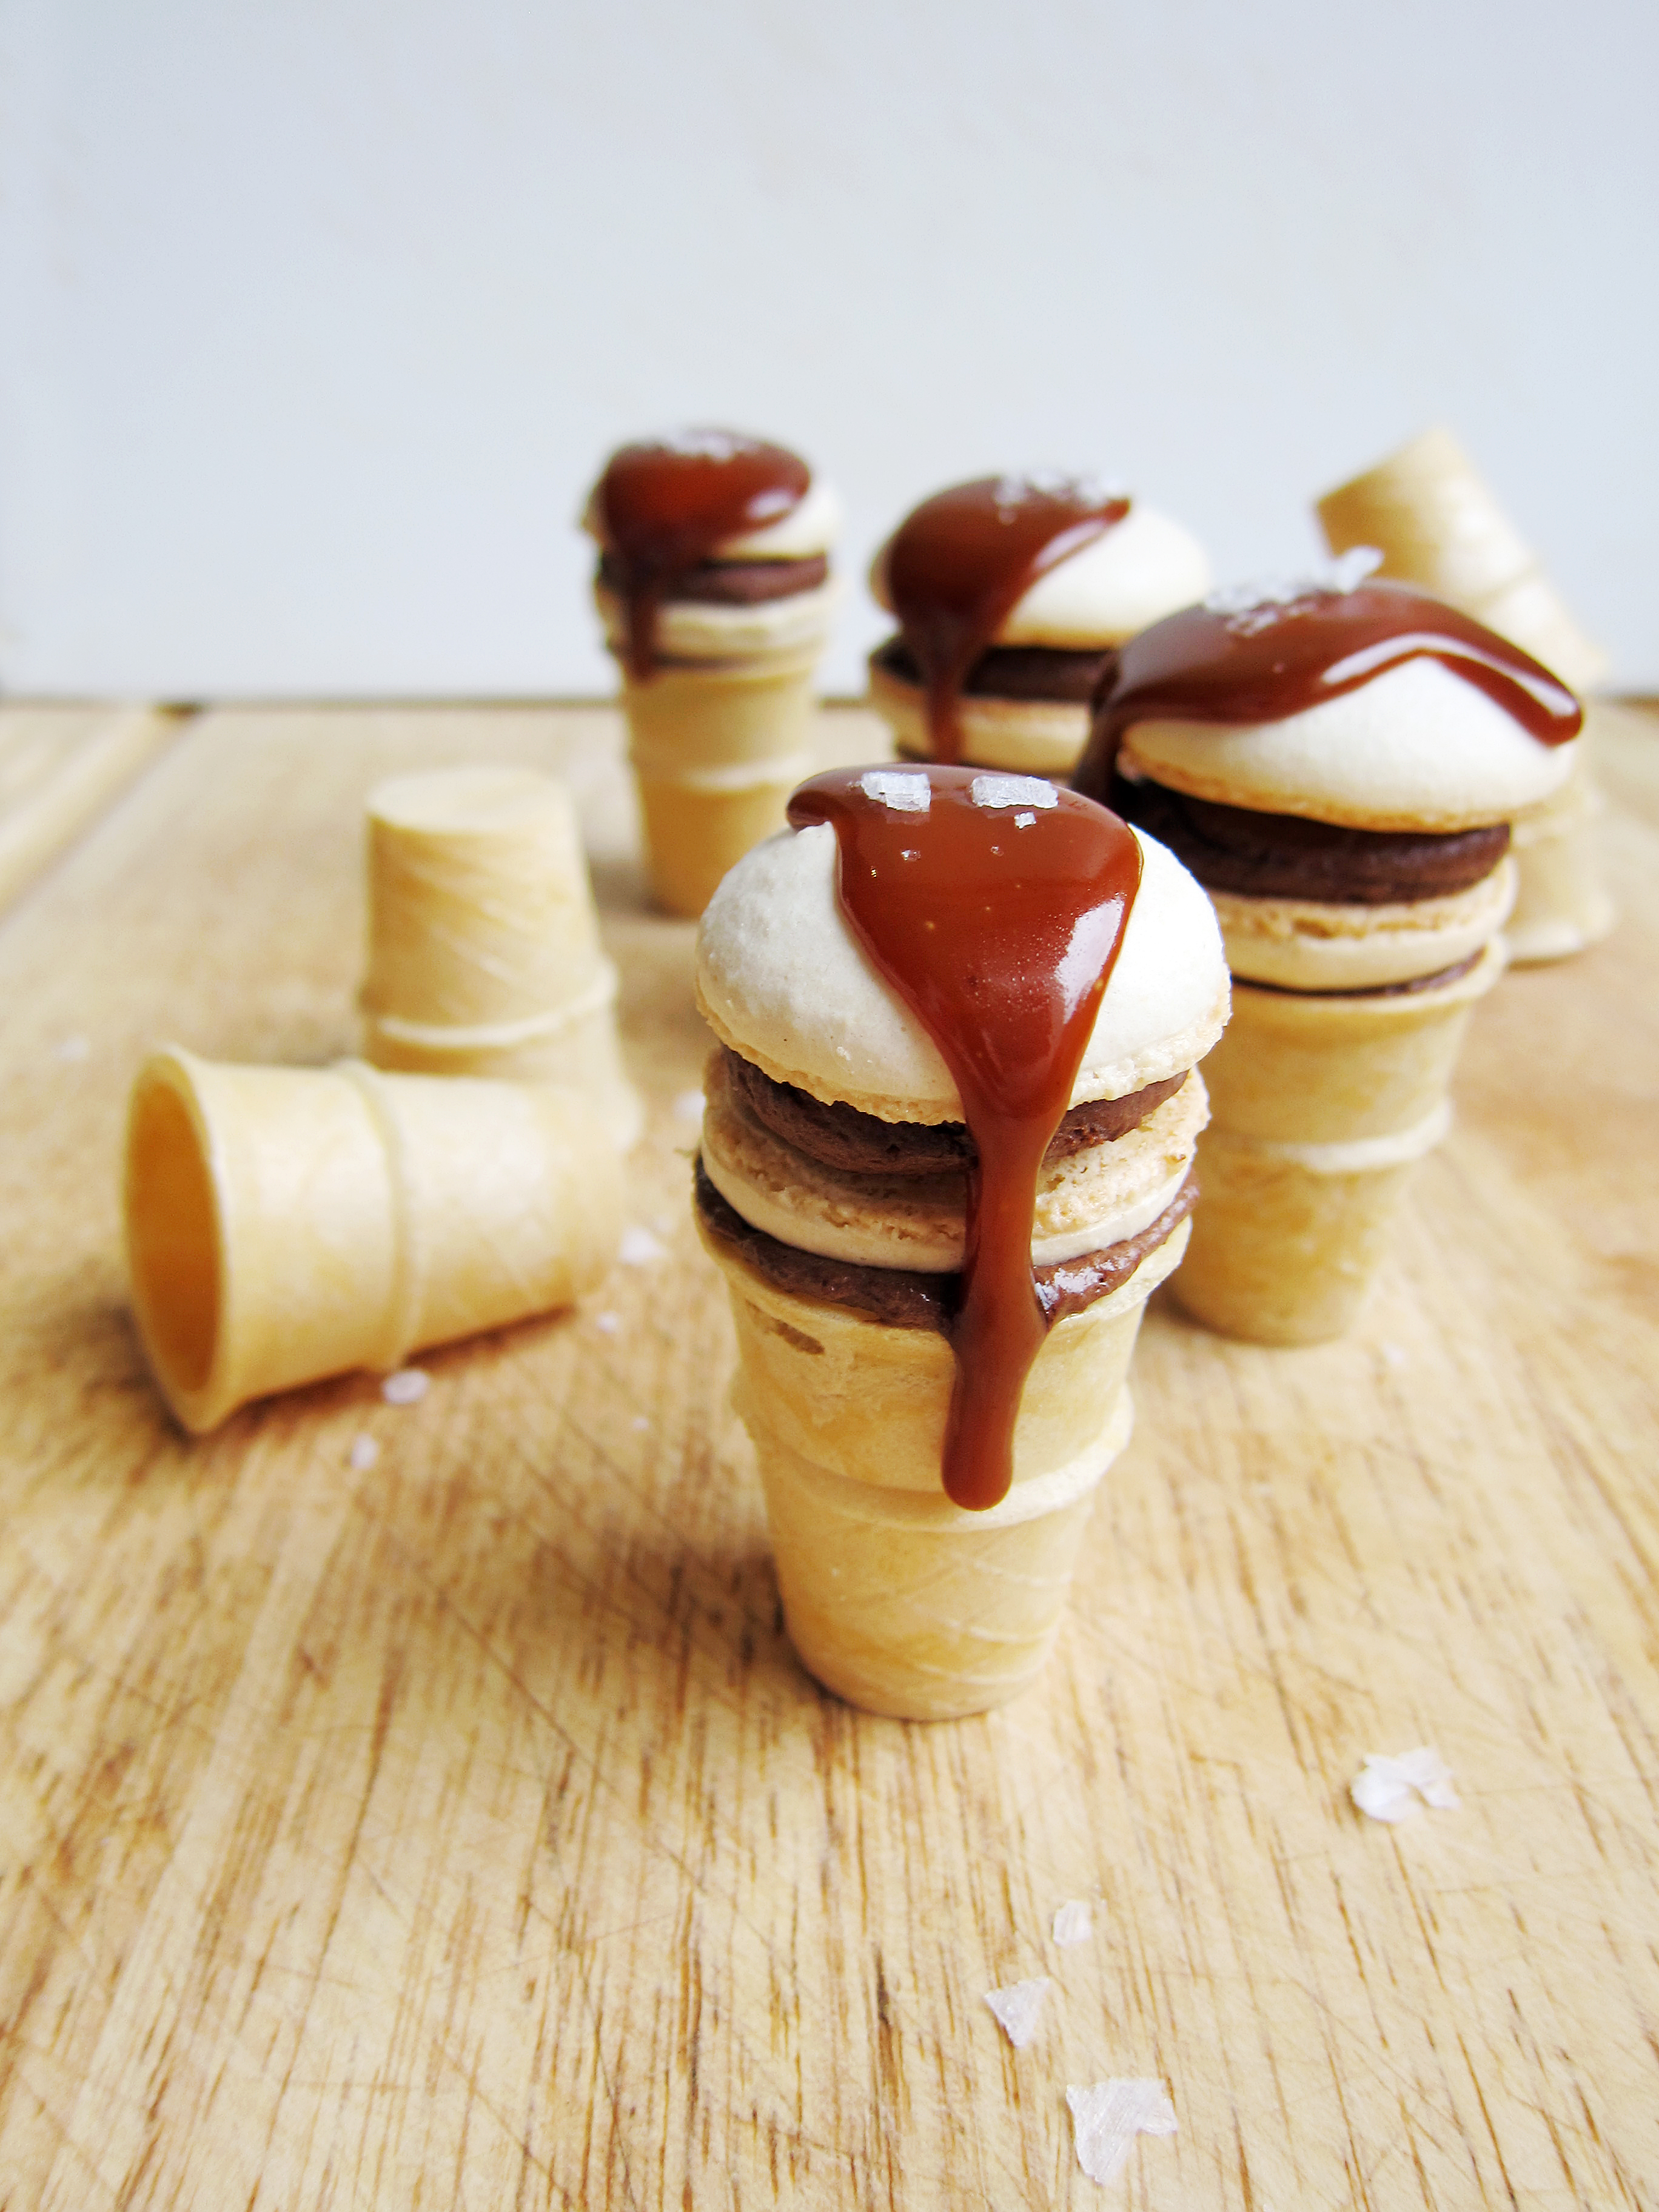
Finally, the sprinkling of Maldon salt finishes the balance of the cookie.  Some of the delicate flakes melt into the cookie fusing their salty goodness while the larger chunks withstand the heat and sparkle when you take them out.
Salted Dark Chocolate Caramel Cookies 3The recipe makes 12 large cookies.   You can easily double it, but I kept my body conscious readers in mind as I baked this.  It’s definitely not healthy food, but as the saying goes, “a balanced diet is a cookie in each hand”.
Salted Dark Chocolate Caramel Cookies 5Salted Dark Chocolate Caramel Cookies
Makes 12 large cookies

Ingredients:
4 oz. butter, room temperature
½ c. sugar
½ c. brown sugar
1 egg, room temperature
1 tsp. vanilla extract
⅓ c. Dutch-processed cocoa powder
1 c. all purpose flour
½ tsp. baking soda
½ tsp. kosher salt
¾ c. cocoa nibs
12 Rolos, unwrapped
Maldon sea salt

Instructions:

  1. In the bowl of a stand mixer fitted with the paddle attachment, beat butter, sugar and brown sugar until lighter in color and fluffy.
  2. Add egg and vanilla on medium speed and mix until glossy.
  3. Add cocoa and mix until homogeneous.
  4. Change the speed to low and add the flour, baking soda, and salt.  Mix until just combined.
  5. Fold in cocoa nibs.
  6. Chill dough in refrigerator for 1 hour.  This step will make it easier for you to roll the cookies.
  7. Preheat oven to 350˚F and line large cookie sheet with parchment paper.
  8. Form two, 1 tablespoon balls of cookie dough.
  9. Sandwich a Rolo in between the two balls of cookie dough and completely encase the Rolo by rolling it around in your hand.
  10. Repeat steps 8 and 9 until all of the dough and Rolos are used.
  11. Sprinkle Maldon salt over the tops of cookie dough balls.
  12. Bake for 10 minutes, rotating the pan 180˚ halfway.
  13. Let cool and enjoy.

Karamel Sutra Macarons (Chocolate Caramel Macarons)

Ice Cream MacaronsI love ice cream.  In high school, I used to eat an entire pint of ice cream in one sitting without blinking an eye.  It was a habit that quickly stopped once I started counting calories in college.  Yes the number of calories scared me, but I didn’t love it any less.
Ice Cream MacaronOne of my favorite ice cream is Karamel Sutra from Ben and Jerry’s.  Featuring “a core of soft caramel encircled by chocolate & caramel ice creams & fudge chips”, it is a sinfully indulgent treat.  I’ve been haunted by the idea of putting macarons on mini ice cream cones for the longest time. So, I decided to take the plunge with one of my all-time favorites.
Ice Cream MacaronsIce Cream MacaronsSitting on top of a caramel filled cone and chocolate frosting, this macaron has a chewy caramel center that is encased by chocolate frosting.  It is delightfully charming and insanely delicious.  So delicious in fact, the entire batch disappeared within one night! (FYI This is pretty rare.)
Ice Cream Macarons

Karamel Sutra Macarons
(Chocolate Caramel Mini Ice Cream Macarons)

You will need:
Mini Ice Cream Cones
Macarons
Chocolate Frosting
Salted Caramel Filling
Whipped Cream (Optional)
Sprinkles (Optional)
Maldon Salt (Optional)

Basic French Macarons
Adapted from Bouchon Bakery by Thomas Keller, Sebastien Rouxel

Ingredients:
212 g. almond meal
212 g. powdered sugar
172 g. egg whites, divided to 82 g. and 90 g (aged, if possible)
236 g. sugar
158 g. water

Instructions:

  1. Line two baking sheets with parchment paper or silicone mats.
  2. In the bowl of a food processor, add the almond meal and powdered sugar and pulse until thoroughly combined.
  3. Sift the mixture over a large mixing bowl, throwing out the lumps as they appear.  Add 82 g. of the egg whites and stir until you get a thick mixture.
  4. In a small pot attached with a candy thermometer, combine the sugar and water over medium heat and boil until the syrup reaches 200˚F.
  5. Once the syrup reaches 200˚F, start whipping the remaining 90 g. in the bowl of your stand mixer with the whisk attachment on medium speed until soft peaks are reached.
  6. Once the syrup reaches 248 degrees, remove the pot off the burner and slowly pour the syrup down the side of the mixing bowl with the egg whites on medium speed.
  7. Once the egg whites are fully incorporated, increase the speed to medium high until egg whites form glossy, stiff peaks.  Add two drops of the pink gel food color and mix until batter turns a light shade of pink.
  8. Mix a ⅓ of the egg white mix to the almond mixture and stir together until the batter is slightly lighter and less pasty.  From then on, fold in ⅓ of the egg white mixture at a time until the mixture “flows like magma”.  The mixture should be smooth and run thick ribbons off the spatula.
  9. With a pastry bag fitted with a ½ in. plain tip, pipe 1¼ – 1½ in. rounds.
  10. The piped batter may have peaks but should smooth away in a minute or two.  Let the batter stand until the tops of the macaron batter are dry to the touch, about 30 mins to 1 hour.
  11. Preheat the oven to 275-325˚F.  If your oven tends to run hot go for 275˚, if not then 325˚.
  12. Bake 10-13 minutes, until the feet are formed and the tops are smooth.  The batter is done when you slightly wiggle it and it starts to come off of the parchment paper / silicone mat.
  13. Let cool and fill.

Salted Caramel Filling

Ingredients:
1 c. sugar
3 tbsp. light corn syrup
3 tbsp. water
¾ c. heavy cream
3 tbsp. unsalted butter, room temp
½ tsp. kosher salt
¼ tsp. vanilla extract

Instructions:

  1. In a small pot, mix and boil sugar, corn syrup and water until a golden amber color forms.
  2. While the sugar mixture is boiling, mix the heavy cream, unsalted butter, kosher salt, and vanilla in a separate bowl.
  3. When the sugar mixture turns amber, add the cream mixture.  Be careful!  It will bubble up and create a lot of steam.
  4. Attach a candy thermometer and cook sugar mixture until the mixture reaches 235 degrees.
  5. Promptly remove to a large glass spout cup and cool.
  6. Once cooled, transfer into a squeeze bottle.

Chocolate Frosting

Ingredients:
⅔ c. all-purpose flour
⅓ c. cocoa powder
1 c. milk
⅛ tsp. salt
8 oz. butter
⅔ c. sugar
8 oz. chocolate, melted and cooled
½ tsp. vanilla extract

Instructions:

  1. In a saucier pan, put milk, salt, cocoa powder and flour and whisk until combined on medium heat.
  2. Continuously whisk mixture until thickened to a pudding like consistency.
  3. Once thickened, strain through a mesh strainer into a bowl with a spatula to remove lumps.
  4. Place a piece of plastic wrap on top of the flour mixture and put into the refrigerator until fully cool.
  5. In a mixer bowl fitted with the whisk attachment, mix the sugar and butter on high speed until fluffy and pale about, 5-10 minutes.
  6. Add the chilled flour mixture and continue to whip on high speed until the sugar is completely dissolved and the mixture is no longer gritty, about 5-10 minutes.
  7. Add the vanilla extract and melted chocolate and mix until combined.
  8. Fill frosting in a piping bag fitted with a ¼ or ½ in. plain piping tip.

Assembly:

If the filling has cooled too much at any point of the assembly, rewarm in the microwave for 15-20 seconds until fluid once more.

  1. On one cooled macaron shell, frost a round dam around the edge of the cookie.
  2. Put into freezer to set frosting for 5 minutes.
  3. Fill the inside of the macaron with caramel filling. Top with another macaron shell.
  4. In a mini ice cream cone, fill about 1/3 of the way with caramel filling.  Pipe a round of chocolate frosting onto the lip of the ice cream cone.  It should look somewhat like a doughnut. (As shown in the above photo.)
  5. Put an assembled macaron on top of the chocolate frosting on the ice cream cone and set in the freezer for about 5 minutes.
  6. From here you can enjoy as is or go further with your decorations:
    1. Top your macaron with another macaron for a double scoop effect. (As shown in the above photo.)
    2. Top your macaron with reserved caramel filling and sprinkle with maldon sea salt (or any other flaky sea salt you have on hand). (As shown in the above photo.)
    3. Top your macaron with reserved caramel filling and top with whipped cream and sprinkes. (As shown in the above photo.)