{Simple Sundays} Everything but the Bagel Chicken

How’s quarantined life? We’ve been trying to eat somewhat healthy with the wedding coming up in October, but we gave in and had Five Guys to go yesterday. As blessed as I feel that I was able to eat a burger when I wanted, I felt as if I was missing something. After some thought, I figured it out. It was the experience of eating at a dining establishment. It is strange how being in an environment with other people changes the experience of eating food, isn’t it?


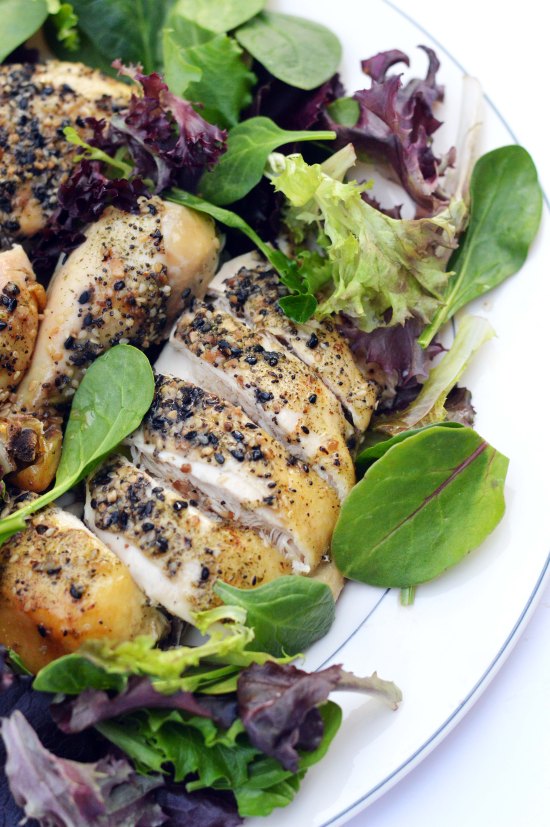
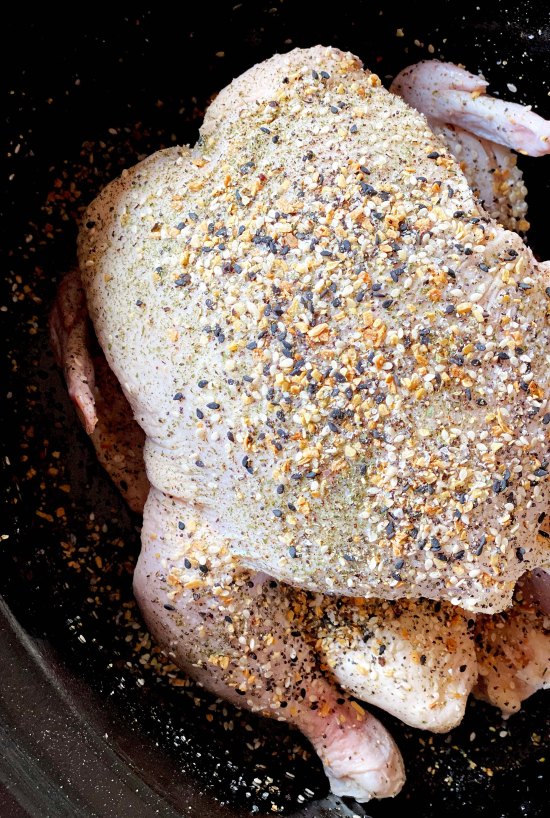
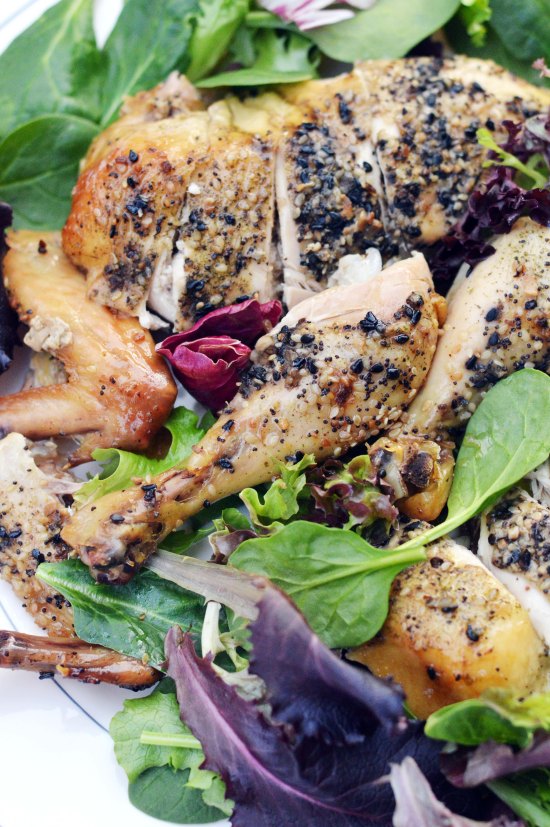
I haven’t done a Simple Sundays post in a while. It’s a series where I post a ridiculously simple recipe that seems kind of odd to write down and share. This chicken recipe can be done with two ingredients. It’s more the technique than anything. Lining your slow cooker with balls of aluminum foil to keep the chicken from braising in its juices gives you a roasted chicken. The best part is the delicious smell of chicken that slowly wafts through your house as it cooks.


No Everything but the Bagel seasoning? Try it with smoked paprika, salt, pepper and butter or Mexican or Cajun seasoning. Really anything goes.

Everything but the Bagel Chicken

Ingredients:

1 whole chicken (3-5 lbs), innards removed, patted dry
Everything but the Bagel seasoning
salt and pepper (optional)

Instructions

  1. In a large slow cooker, place 4 medium sized aluminum balls in the bottom of the slow cooker pot.
  2. Season the chicken liberally inside and out with the EBTB seasoning. You can add salt and pepper to the chicken if desired. Go easy on the salt because the EBTB seasoning has salt in it.
  3. Set the slow cooker to high and cook for 4-5 hours.
  4. Remove chicken from slow cooker and season again if desired. The initial seasoning will be softened from the chicken juices. If you want the crunch of the seasoning, season once more.
  5. Slice and serve.|

{Simple Sundays} Everything Bagel Sweet Potatoes AKA Aimee Song’s Sweet Potatoes

If you’ve been reading my blog for a while now, you would know how much I love sweet potatoes. (As evidenced here, here and here.) I love the soft texture it takes on when it is roasted well and the flavor, to me, is as comforting as chicken noodle soup. So when one of my favorite bloggers posted a video about “perfect sweet potatoes”, I had to give it a try.
Well, it was quite delicious and nearly perfect! I just tweaked it a little by adding salt and omitting the freshly chopped garlic. (If you love garlic, or are in a garlicky mood, mince a few cloves of garlic and add it to the seasoning stage.)
Aimee’s way of roasting the sweet potatoes gives it a crisp exterior and a smooth and buttery interior, and the addition of the “everything but the bagel” seasoning gives a savory edge to the sweetness of the sweet potato. We’ve been making these a lot in our house lately because it is Whole 30 friendly. My sister has been on the whole 30 diet and turns out no sugar, alcohol, grains, legumes, soy, and dairy really cuts down the things that you are allowed to eat. But this has been the sweet-savory snack that has been helping her stay on track.
You can watch the video of Aimee making it here.

Everything Bagel Sweet Potatoes

Ingredients:

3-4 medium sized sweet potatoes (use organic potatoes if you are eating the skin)
avocado oil (or any high smoke point oil)
everything but the bagel seasoning (I got mine at trader joe’s but you can technically make your own)
kosher salt
3-4 cloves of garlic, minced (optional)

Instructions:

  1. Preheat oven to 400˚F and line a baking sheet with aluminum foil (shiny side down).
  2. Thoroughly wash your sweet potatoes. Trim both ends and cut lengthwise.
  3. Coat the sweet potatoes with avocado oil, and place on baking sheet cut-side down.
  4. Roast sweet potatoes 15-20 minutes or until golden brown.
  5. Remove sweet potatoes from oven; flip sweet potatoes so they are cut-side up.
  6. Sprinkle with kosher salt, bagel seasoning, and garlic (if using).
  7. Move baking sheet back into the oven and roast 10-15 minutes more.
  8. Turn off oven and let sweet potatoes sit in oven for an additional 10-15 minutes.
  9. Enjoy!

Recipe adapted from Song of Style.

{Simple Sundays} Giant Popovers

Giant PopoversIt’s been a while since I’ve done a Simple Sundays post. I’ve been too busy trying to be creative and unique that I’ve put the effortless recipes on the back burner. But I’m back with this super simple popover recipe.
giant popoversgiant popoversIf you’ve never had a popover, I would say that it kind of reminds me of a dutch baby but in a muffin form. Light and crisp on the outside and moist and eggy on the inside, it’s the perfect breakfast food served with jam and butter. Actually, you can pretty much use them for dinner rolls too.
how to make a popoverIf you loved my blueberry cruffins, but feel like it’s too much work to do, I highly recommend this recipe instead. It’s lighter and you can use any kind of filling that you like. Plus, that vertical lift is insane! I mean just look at them. They’re literally popping out of the pans. You don’t even need a blender, mixer or a food processor. All you need is a whisk and a bowl. Oh! And a popover pan of course. 🙂
giant popovers
Giant Popovers
makes 6 very large popovers

Ingredients:

1 c. all-purpose flour
1 tsp. kosher salt
¾ c. whole milk, room temperature
4 large eggs, room temperature
3 tbsp. unsalted butter, melted

Instructions:

  1. Use a pastry brush to brush your popover pan with melted butter.
  2. Turn on the oven to 425˚F, and place your popover pan in the oven while the oven preheats. (As shown in picture #1)
  3. In a large bowl (preferably one with a spout), whisk salt and flour together. (As shown in picture #2)
  4. In a large liquid measuring cup, whisk together milk and eggs. (As shown in picture #3)
  5. Slowly add the egg mixture into the flour mixture while continuously whisking to make a smooth, liquidy batter. (As shown in picture #4)
  6. Whisk in the rest of the melted butter to the batter. (As shown in picture #5)
  7. Remove the pan from the oven and pour the batter into each cavity about halfway full. (As shown in picture #6)
  8. Bake the popovers for about 20-25 minutes until they are golden brown and very tall. DO NOT OPEN the oven door during this time.
  9. Remove the popovers from the pan and puncture each popover to let the steam out. (As shown in picture #7)
  10. Serve warm.

Recipe barely adapted from Food 52.


{Simple Sundays} Salted Milk Jam aka Dulce de Leche

salted dulce de lecheThe weather is finally turning warm! Flowers are blooming, the sun is shining and pollen is flying… I’m lucky enough to not have seasonal allergies, but I am sure many of you are suffering from it. It might be best to just stay in and make this milk jam. Making this milk jam (or dulce de leche) is so ridiculously easy, I don’t know if I should even write a recipe for it. It uses two ingredients: sweetened condensed milk and fleur de sel.  I’m almost embarrassed to admit that my devotion to sweetened condensed milk borders on idolatry. I believe that anything with sweetened condensed milk is delicious and so many tasty things are born from it. Banana pudding, Thai iced tea, flan, tres leches cake, even my favorite recipe for pumpkin pie has sweetened condensed milk in it. If you’ve never had it, you must try it. It is life changing.
dulce de leche recipeI can’t say dulce de leche is very close to a caramel because it has a distinctively different taste from it. I would say that it is more complex instead of the bold one note sweetness you get from caramel. The traditional way would be to boil down a lot of milk and sugar for many hours and constantly stir it until you get your desired shade of brown. The method I used is a shortcut. You take a can of sweetened condensed milk, put it in a pot of water and keep it at a gentle simmer for 2-3 hours. Cool. Open. Enjoy. Top liberally with fleur de sel if desired. (You know, if you’re into that sweet-salty thing. Let’s face it though, who isn’t?)
salted milk jamThe layer of the light colored dulce de leche is a mistake that I made. When I say gentle simmer, I mean simmer. I was scared about simmering too strongly so I kept it at a bare simmer for two hours. When I opened the jar, it was too pale to be called dulce de leche yet too dark to still be considered sweetened condensed milk. Don’t be like me. Put the pedal to the metal.how to make dulce de leche You can use dulce de leche on so many things. You can top ice cream, or pound cake or toast or crackers. You can also use it to fill a cake, sandwich in between cookies (alfajores!!) or macarons, or my favorite, eat it straight out of the jar, with a spoon. Seriously, the possibilities are endless! Or if you are feeling especially kind, you can also put them in little mason jars and gift them.

Salted Milk Jam

Ingredients:
1 can sweetened condensed milk
fleur de sel (optional, but recommended)
water (for submerging can in water)

Instructions:

  1. Remove the label off of the can of sweetened condensed milk.
  2. Place can in a large pot and fill pot with water, making sure the can is completely submerged. (At least 2 inches above the can.)
  3. Heat pot until water is simmers. Simmer can for 1½ hours, making sure that the water level does not fall below 1 inch above the can.
  4. Turn can upside down, simmer for another 1 – 1½ hours. Continue to monitor the water level, making sure the can is completely submereged.
  5. Remove can from water and let cool.
  6. Open can, top liberally with fleur de sel. Add salt to taste, pending on how much of a salty –sweet contrast you like.

{Simple Sundays} Corn Muffins

Corn Muffins 1One of the best things about baking is that there are so many ways to make the same things: cookies can be crunchy or chewy, muffins can be dense or light, and brownies can be cakey or fudgy. The thing is everyone is usually in one camp or the other. For me, cookies must be chewy and brownies must be fudgy, but when it comes to muffins, I love both kinds as long as they’re not tough.
Corn Muffins 3A few days ago, I was really craving corn muffins. (Not corn bread, which I think is a different breed.) The last time I had corn muffins was on my trip to Atlanta. We stopped by a Cracker Barrel as a rest stop and had a satisfying meal… satisfying except for the corn muffins. (I call it corn muffin because it was not square but baked in a muffin pan.) Ick! What is that stuff? As I bit into the corn muffin, disappointment filled my mouth in the form of salty, bland and coarse morsels. I need my corn muffins to be sweet and corny. I set out to make my own recipe. When freshly baked, it has a crisp exterior and a light and sweet interior. I wish I had some corn kernels to add to it, but I did not at the moment. I would encourage it if you have some on hand.
Corn Muffins 2Corn Muffins

Ingredients:

1 ½ c. flour
1 ⅓ c. cornmeal (stone ground if possible)
1 c. sugar
1 tbsp. baking powder
¾ tsp. kosher salt
¾ c. milk
4 oz. unsalted butter, melted
2 tbsp. vegetable oil
1 egg

Instructions

  1. Preheat oven to 350 ˚F and line a muffin pan with paper liners.
  2. In a mixing bowl, mix flour, cornmeal, sugar, baking powder, and salt.
  3. In a separate bowl, mix milk, butter, oil and egg.
  4. Mix milk mixture into the flour mixture and fold batter until just combined.
  5. Scoop batter evenly into the paper lined muffin pan and bake about 13-18 minutes or until tester comes out clean.

Cool and enjoy.

Red Velvet Oreo Truffles

Red Velvet Oreo Truffles 2Valentine’s Day is tomorrow and because it is on a Saturday, I can only imagine how busy restaurants and love themed places will be. I got a box of red velvet Oreos from H earlier this week and I’ve been trying to incorporate it into something Valentine’s Day themed. If you’ve never made Oreo truffles before, you’re about to be mind blown at how easy this recipe is. You technically need only three ingredients: Oreos, cream cheese and some sort of chocolate, almond bark, or candy melts. I modified this recipe a tiny bit by adding a dash of salt (because the overwhelming sweetness of the red velvet Oreos need them) and a splash of vanilla extract (to round out the flavor). You would think that something as simple as this wouldn’t be very tasty, but I had 6 truffles sitting on the counter and they were gone within 10 minutes… all eaten by the same person… sneakily… like a robber in the night. As simple as this recipe is, what really takes time is decorating each truffle, which can be as simple or as complicated as you like. If you’re trying to think of something last minute to do for your special someone, this is the perfect recipe for you. 😉
Red Velvet Oreo Truffles 1Note: I originally wanted this to be a {Simple Sunday} post, but I just didn’t have time to do it this weekend. 

Red Velvet Oreo Truffles

You will need:
1 package red velvet Oreos
3 oz. cream cheese
⅛-¼ tsp. kosher salt (optional, but recommended)
dash of vanilla extract (optional, but recommended)
chocolate/ almond bark/ candy coating (your preference)
sprinkles, sparkling sugar, sugar pearls… basically anything you want to decorate it with

Instructions:

  1. In a bowl of a food processor, crush Oreos until crumbs form.
  2. Add cream cheese, ⅛ kosher salt, and vanilla extract and process until a smooth lump forms.
  3. Taste and add the extra ⅛ kosher salt in needed.
  4. On a sheet pan lined with parchment paper, wax paper or silicone mat, dish out ½ tbsp. portion of truffle dough.
  5. Place sheet pan in freezer for 5 minutes to set.
  6. Roll each truffle dough ball in hand until a smooth ball forms.
  7. Place sheet pan in freezer for 5 minutes to set.
  8. Meanwhile, melt your desired candy melt in the microwave.
  9. Remove truffles and dip into candy melts.

Decorate as desired.

Easy Galbi Tacos {Simple Sundays}

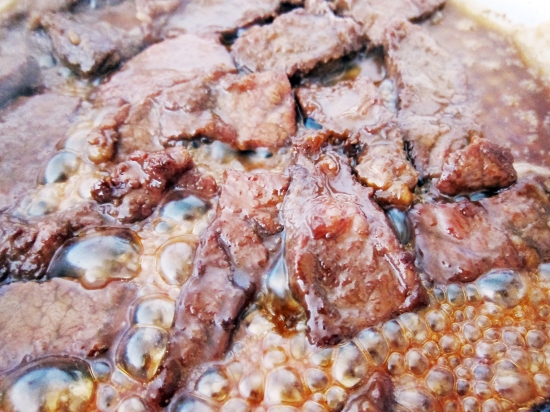
Kalbi Tacos 7I wasn’t sure if I should really put the word “Galbi” (aka Kalbi / 갈비) since this recipe isn’t a traditional Galbi recipe. Galbi is a Korean grilled dish made by marinating meat in a soy sauce based sauce. It usually requires grated onions and Asian pears, and to be honest some days I don’t even have the time to do that. So this is my extremely simple version of Galbi sauce. You literally put everything in a glass bowl, whisk, put meat in and you are done. The only utensils you need are measuring cups and spoons, and no cutting boards, or knives are required. Is it going to taste traditional? No.  But it’s darn tasty, I can guarantee that.
Kalbi Tacos 6On the weeks I know I will be short on time, I cut up whatever meat I have on hand (usually short ribs or chicken breasts) make this marinade and toss it in. Over the next few days, I’ll cook it up little by little incorporating it to whatever dish I decide for the day.
Kalbi Tacos 9Kalbi Tacos 2Whenever I decide to make tacos, I usually buy more corn tortillas than I need and freeze the leftovers for another day. If you toast it over a (clean) gas burner, it reheats well and becomes soft and pliable in the middle and toasty crisp on the edges. I happened to have some frozen corn tortillas in the freezer and decided to make quick tacos.
Kalbi Tacos 8Kalbi Tacos 1You can really top this with whatever you’d like. On this particular day, I ran out of cheese, sour cream, parsley, avocados… pretty much every traditional taco ingredient and put my meat on a bed of mixed greens, topped it with Sriracha and sesame seeds. It still turned out delicious.
Kalbi Tacos 4Easy Galbi Tacos

For the marinated meat:
½ c. brown sugar, packed
½ c. soy sauce
¼ c. water
2 tbsp. mirin (rice wine)
2 tbsp. balsamic vinegar
2 tsp. granulated garlic
1 tbsp. sesame oil
½ tsp. freshly ground black pepper
2 lbs. of meat, cut into strips (I usually use chicken breasts or short ribs)

Instructions:

  1. In a large glass bowl, whisk all the ingredients (minus the meat) until combined.
  2. Place meat into bowl, turning to coat.
  3. Cover bowl with plastic wrap and put into the fridge to marinate.

For the tacos:
½ lb. mixed greens
12 corn tortillas, toasted
¾ lb. cooked, marinated meat
Sriracha sauce
toasted sesame seeds

Instructions:

  1. Cook the meat to desired doneness.
  2. Top toasted tortillas with mixed greens.
  3. Top with meat, Sriracha and sesame seeds.
  4. Consume.

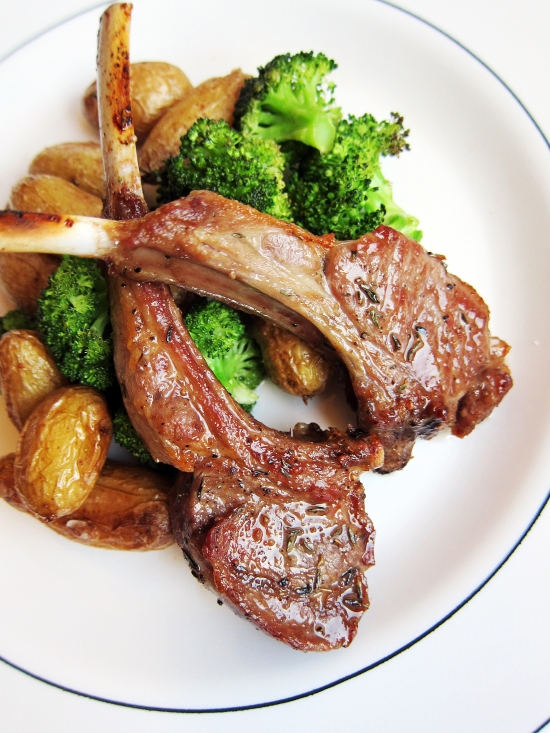
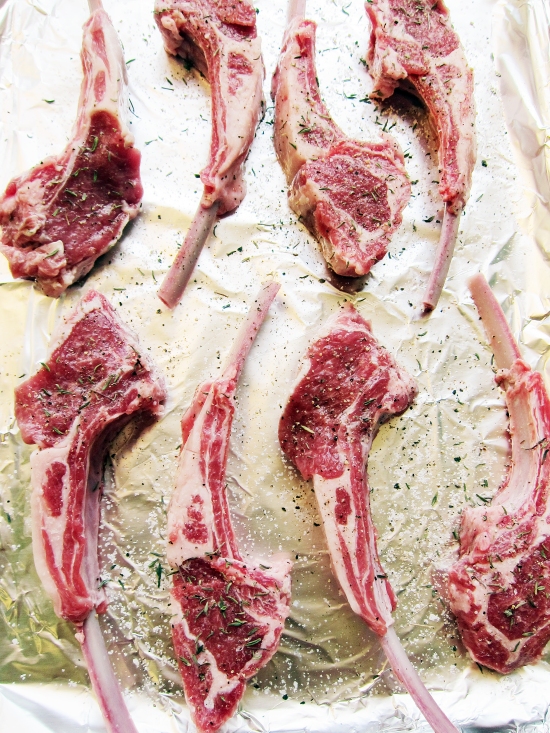
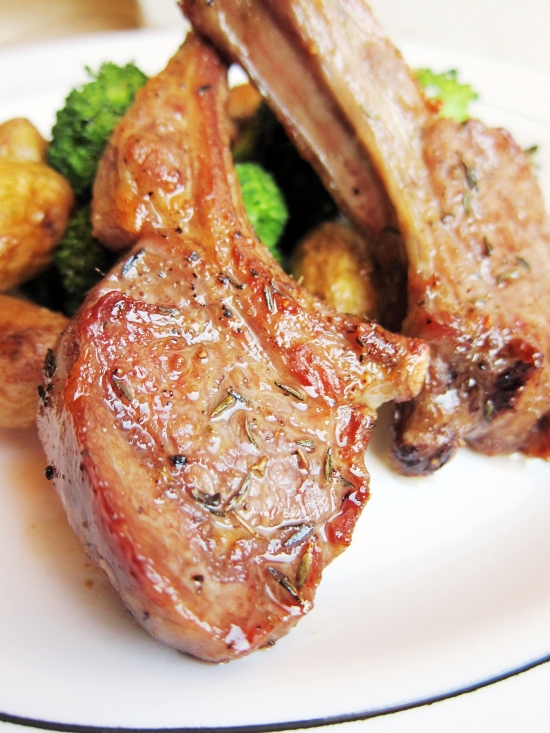
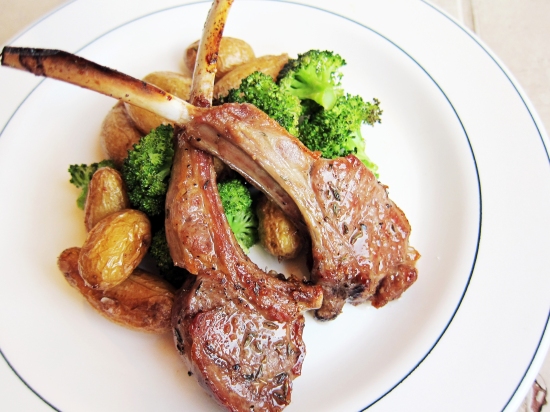
Broiled Lamb Chops with Roasted Potatoes and Broccoli {Simple Sundays}

Broiled Lamb Chops with Roasted Potatoes and Broccoli  4I understand that sometimes my recipes are a little tricky, have too many steps, slightly overabundant in ingredients or a bit complicated. So on Simple Sundays, every recipe will be exactly as stated. Simple. There will be many recipes almost too basic to even write a recipe for, but still delicious in its simplicity. It will include every day dinners that can be done around 30 minutes or cookies that can be whipped up on a whim. After all, we can’t make gourmet meals every night. 🙂
Broiled Lamb Chops with Roasted Potatoes and Broccoli  1I have to be honest; I’m not a huge fan of lamb. It is usually too gamy for my palate. But, there is something about lamb chops that is so tender and delicious, I can’t resist them. Plus, they aren’t as gamy as other cuts of lamb.
Broiled Lamb Chops with Roasted Potatoes and Broccoli  2This is one of those dinners that are effortless but sounds fancy and plates beautifully. The only downside is that your oven has to be on. However, it’s been so chilly here in Jersey that the prospect of a warmer kitchen isn’t terribly off putting.
Broiled Lamb Chops with Roasted Potatoes and Broccoli  3Broiled Lamb with Roasted Potatoes and Broccoli

Ingredients
1 rack of lamb, frenched
1 lb. baby potatoes*
4 cups of broccoli florets
1 tsp. granulated garlic (or 4 garlic cloves, minced)
dried or fresh thyme
olive oil
kosher salt
freshly ground black pepper

Instructions

  1. Preheat the oven to 400˚F and on a sheet pan lined with aluminum foil, drizzle the potatoes with olive oil and season with salt, pepper and 1/2 tsp. granulated garlic. Put into oven to start roasting.
  2. Divide the rack of lamb into individual lamb chops. Arrange your lamb chops on a sheet pan lined with aluminum foil and season with salt, pepper and thyme on both sides.
  3. When the potatoes have roasted for about 15 minutes, turn the oven on to broil and remove the pan of potatoes.**
  4. Add the broccoli to the pan and season the broccoli with the remaining ½ tsp of granulated garlic, salt and pepper. Place the pan back in to the oven.
  5. Broil the lamb chops 5 minutes per side, 10 minutes in total. Let the meat rest for about 10 minutes.
  6. The potatoes and broccoli should be done at the same time as the lamb chops. If not, continue baking while the lamb is resting and check every 2 minutes. You want a knife to slide easily into the potato and the broccoli to be crisp tender.
  7. Arrange them on a plate and you’re done!

* Buy them as small as you can get them for faster cooking.  I get teeny tiny potatoes from Trader Joe’s and it’s the best thing for quick meals.
** I should note that I have a gas oven that has a separate broiling rack under the oven.