Toffee Mocha Cake

I used to avoid toffee. It was just too crunchy and the bits of sugar would get stuck in my teeth and I’d have to try and fish it out with my tongue while trying to look like I wasn’t. No? Just me? I could never bring myself to fish it out with my fingers in public, although I’ve seen many people do it without batting an eye. Ick. I’ve always been partial to caramels and their chew until I made my own toffee. Unlike brittle or a not-so-great toffee, good toffee not only breaks into delightful shards in your mouth (as opposed to the jagged, sharp chips) but disintegrates into a caramel liquid that is pleasant on the tongue and doesn’t stick to your teeth.
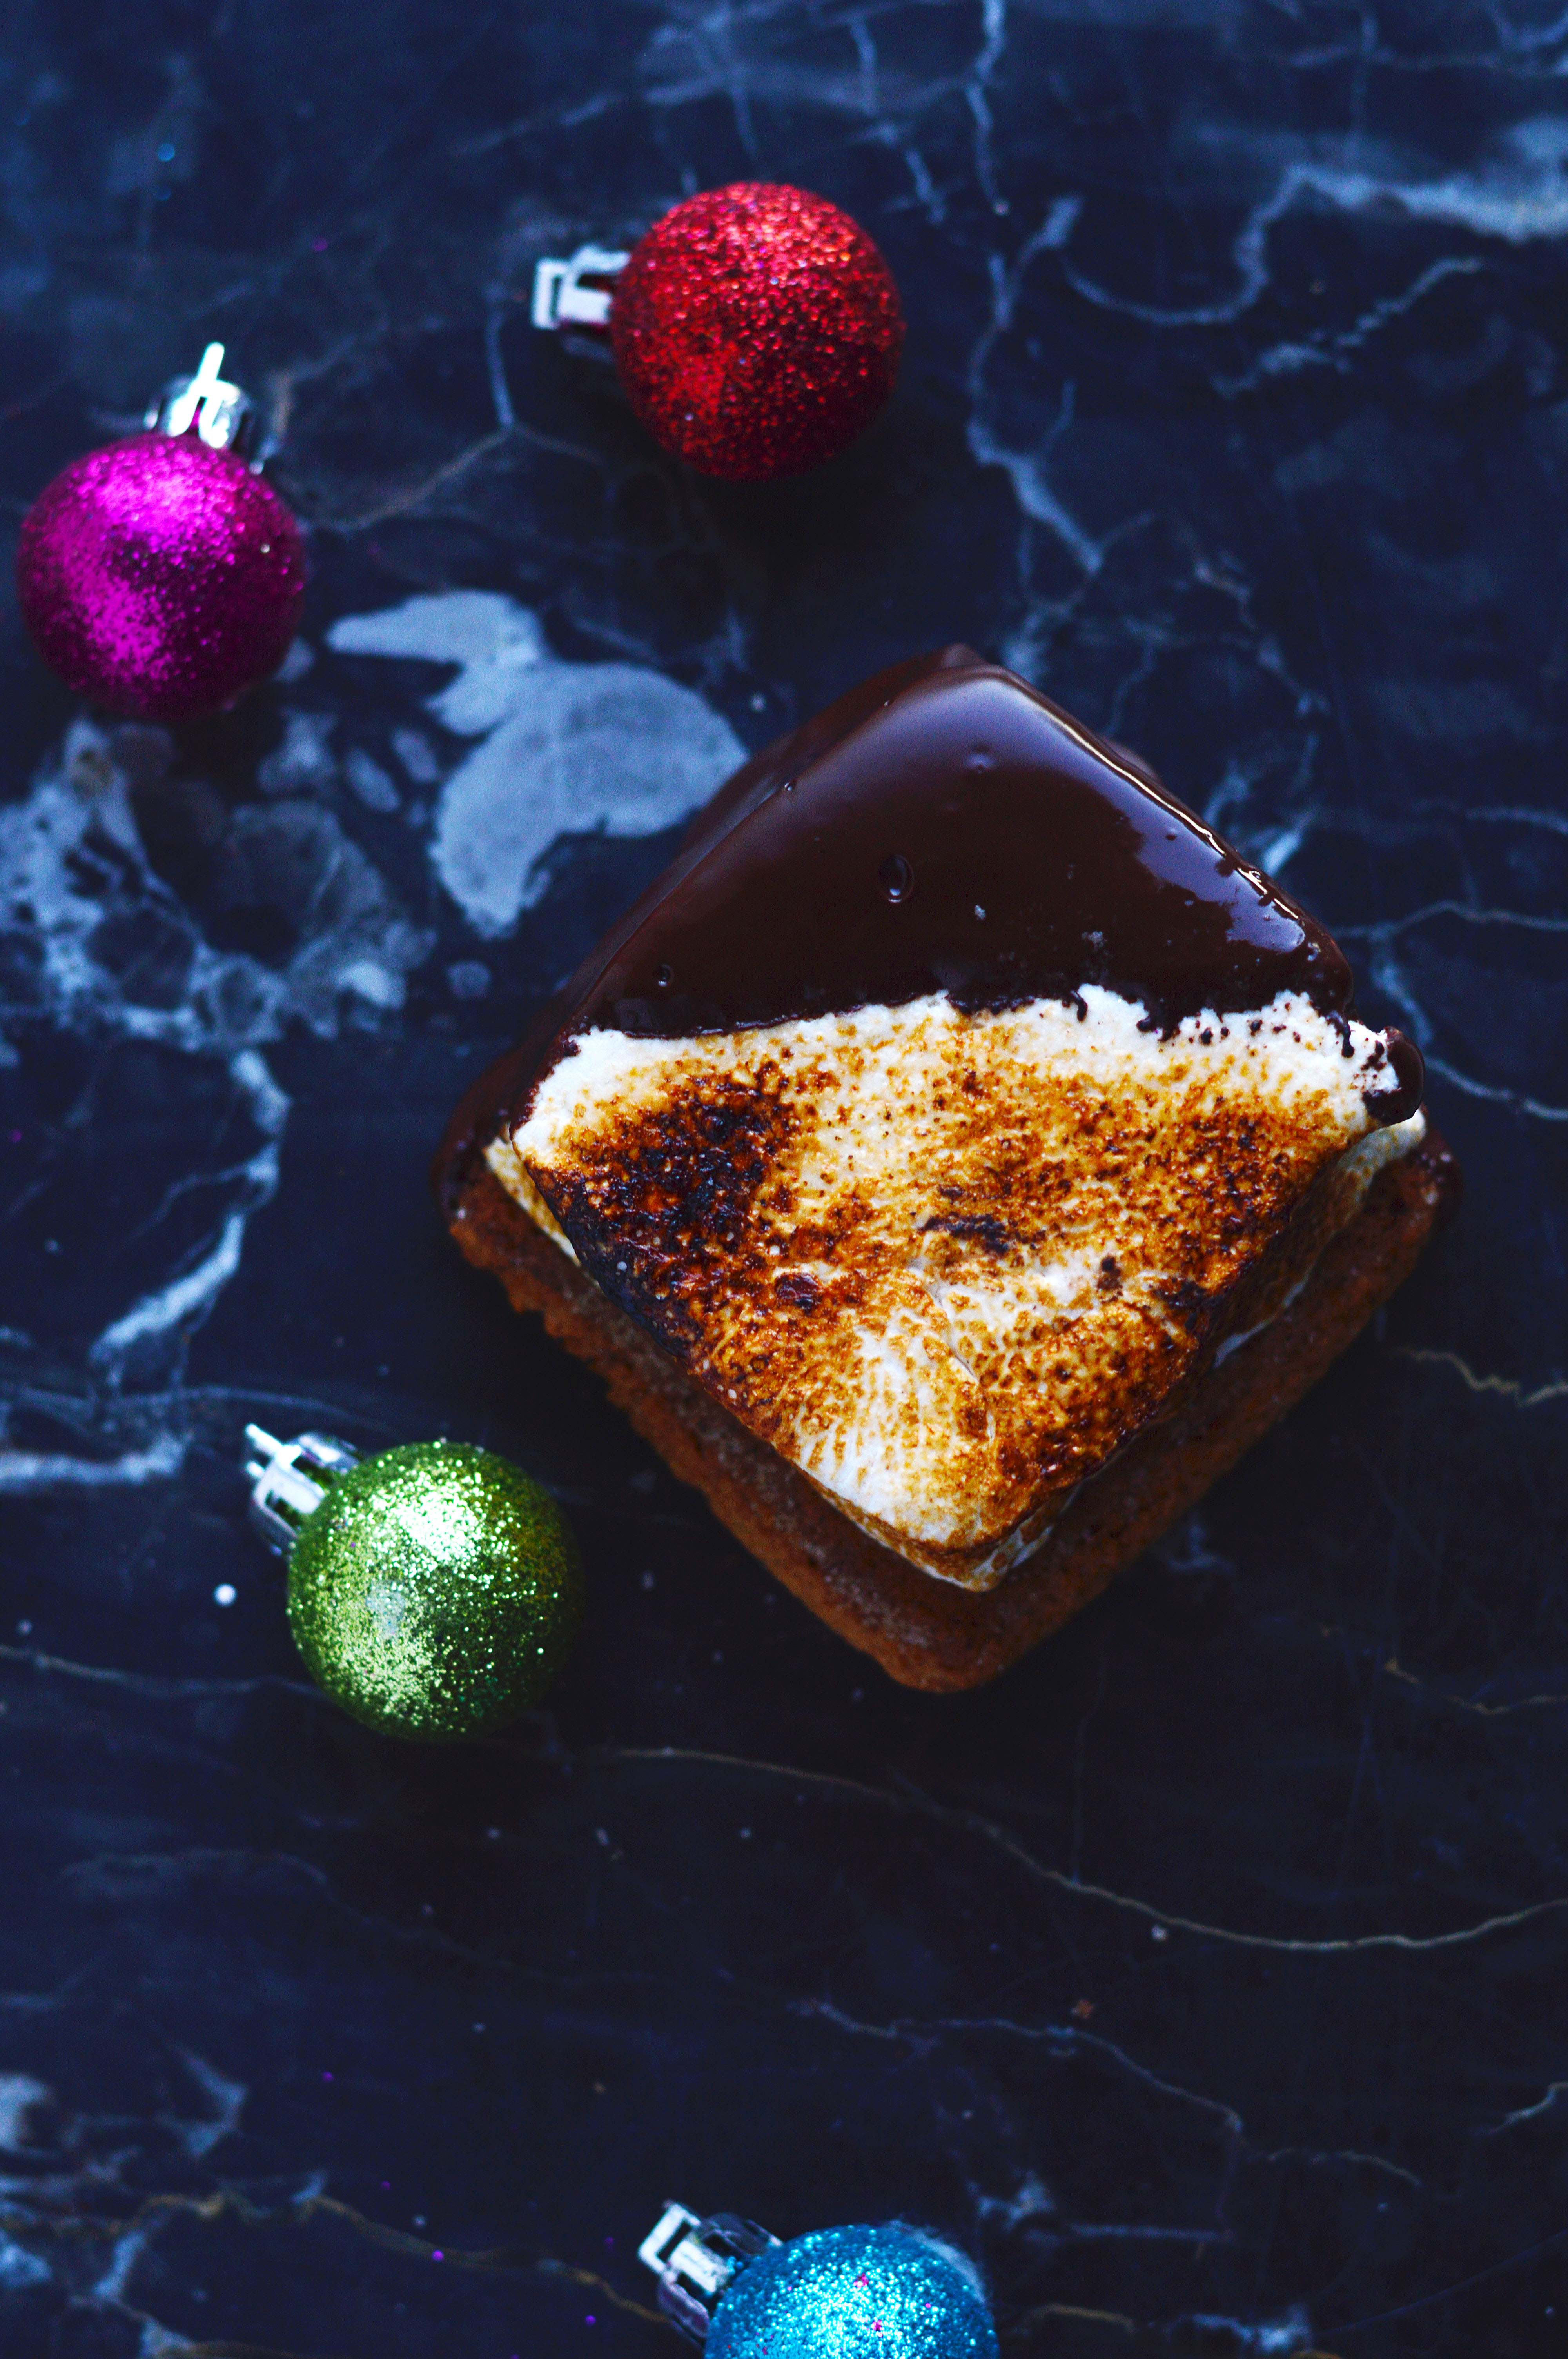
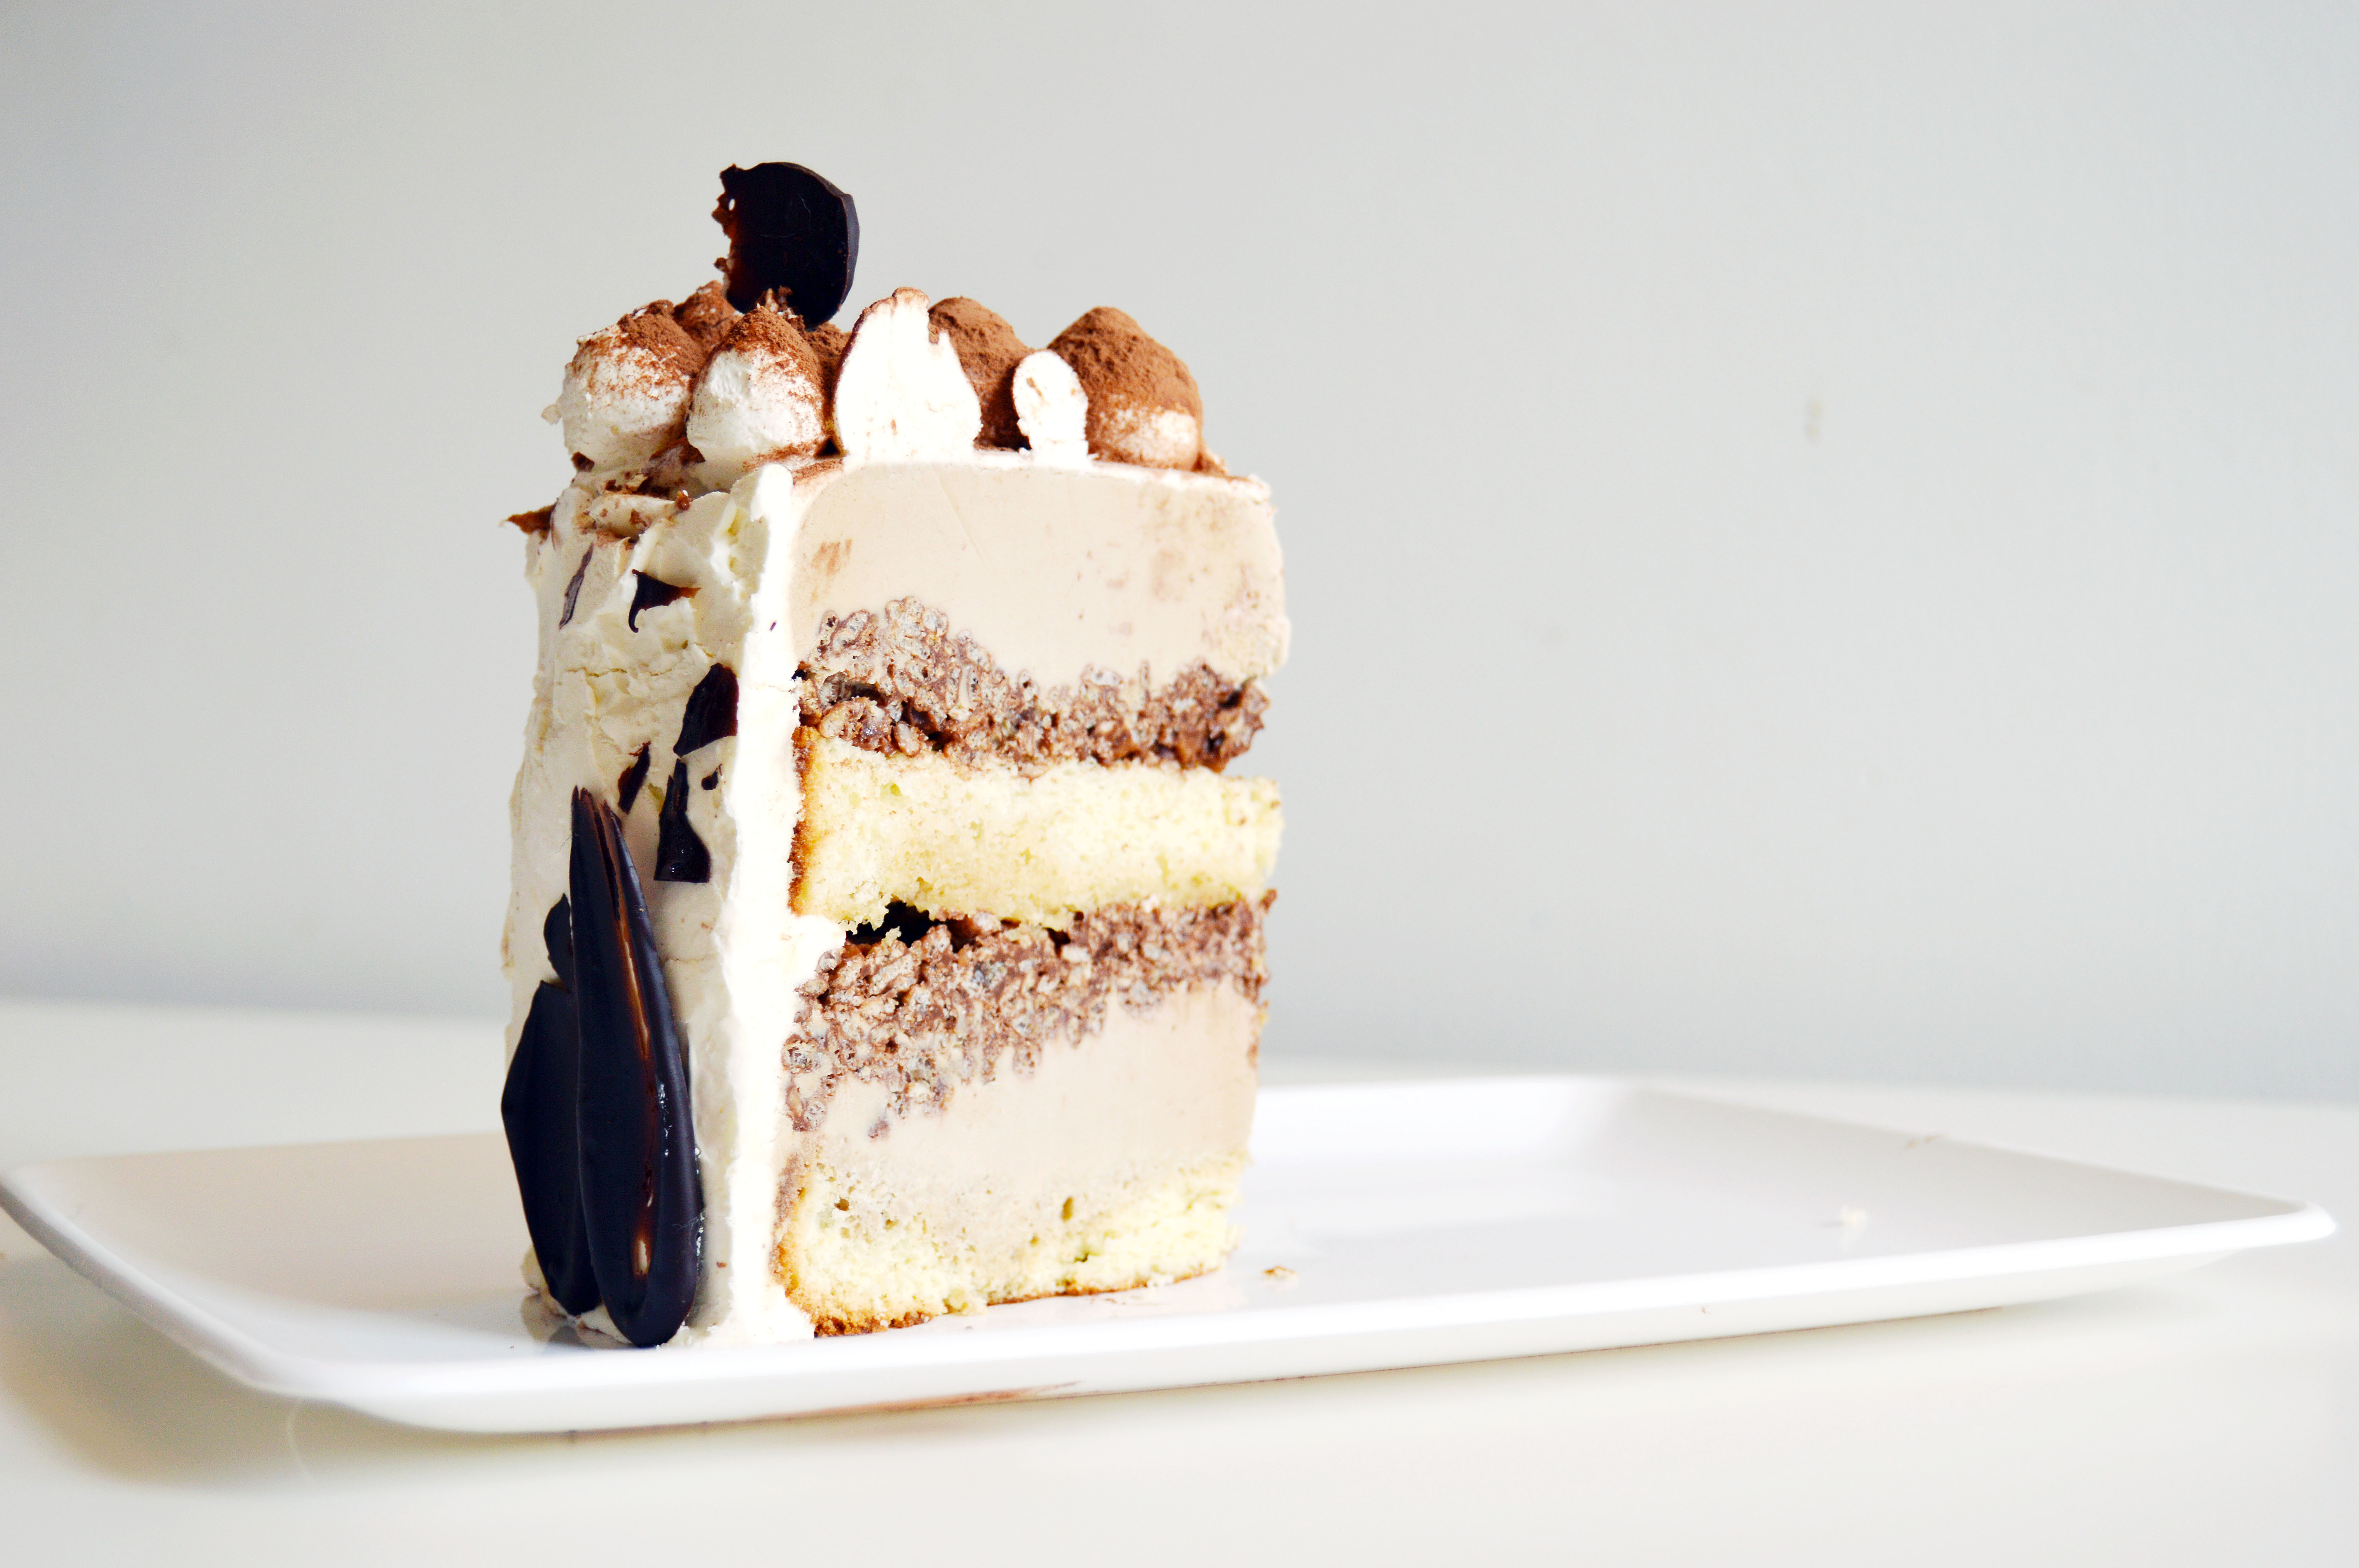
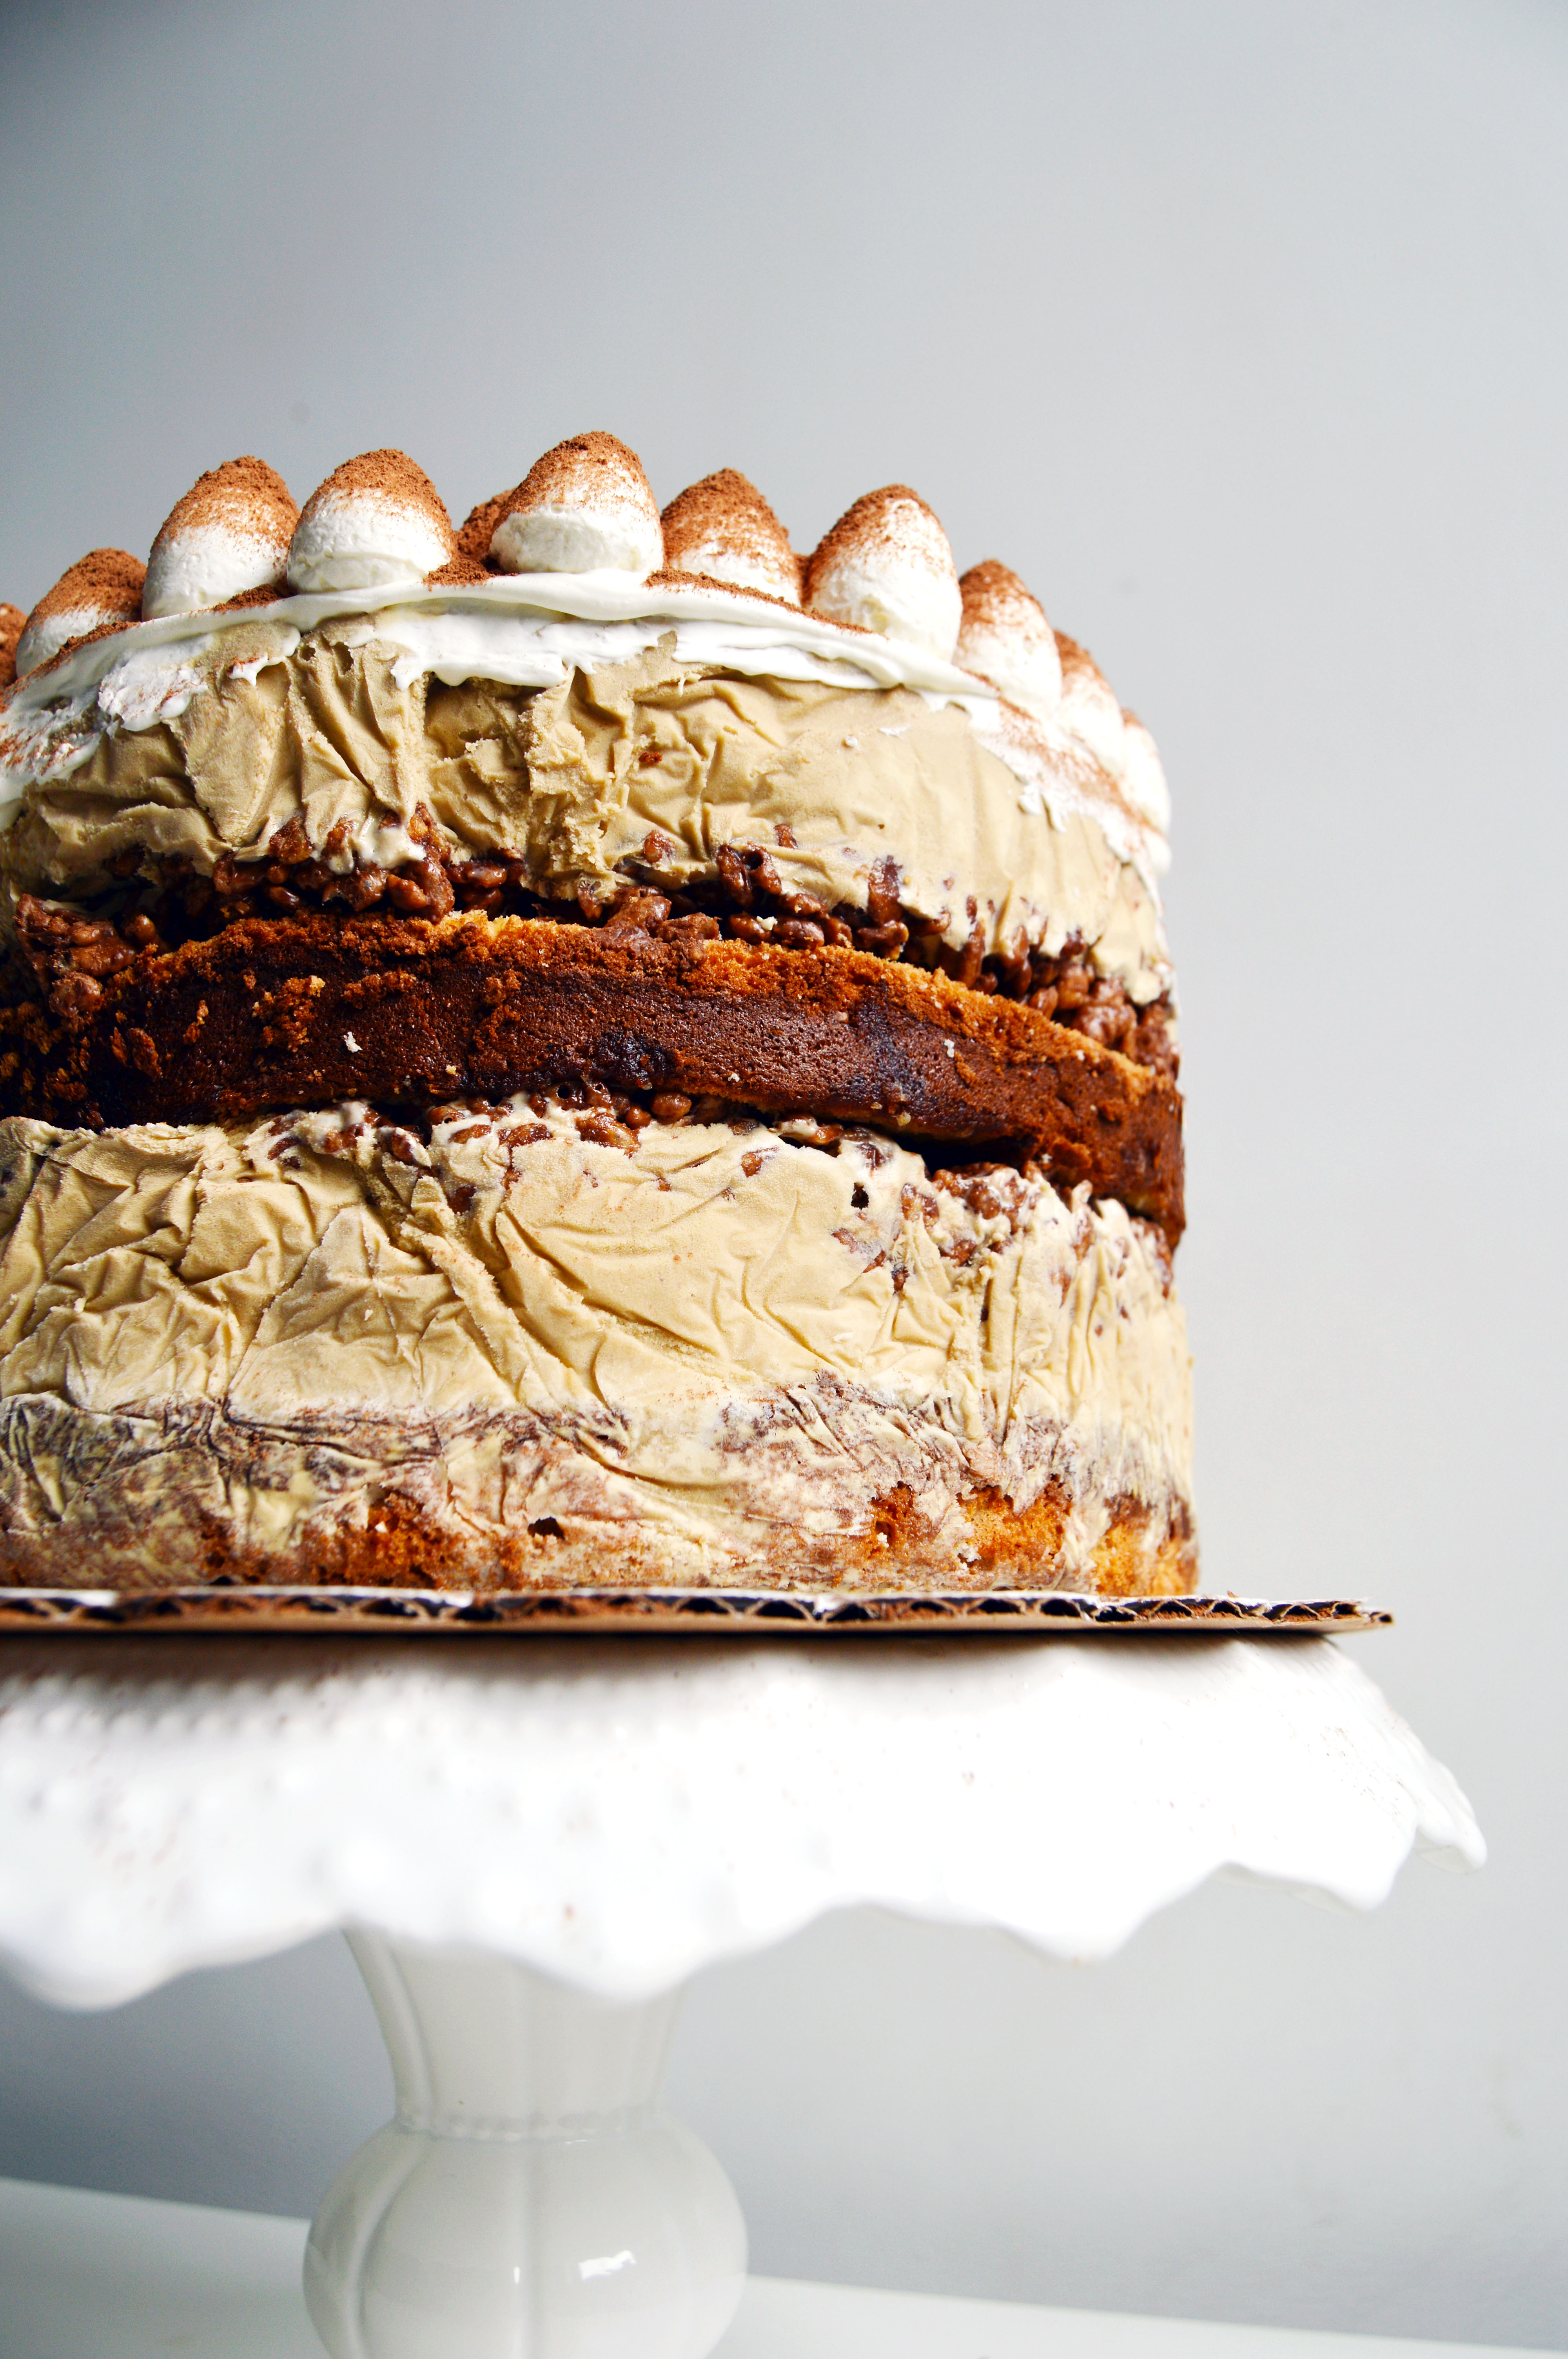
This cake is an ode to toffee and coffee. I call it a mocha cake because there are layers of chocolate cake in the center and chocolate + coffee = mocha. If I had it my way though, it would really be a toffee coffee chocolate cake. What a mouthful.
The cake itself is well balanced with a salty sweet coffee toffee and its chocolate cake. But if you really don’t want to go through with this over-the-top cake, I’m pleading with you to at least try the toffee. That is one worth taking your time making.

Toffee Mocha Cake
(For a step-by-step video of how I put it together, check out my stories on Instagram (@thebusyspatula)!)

You will need:


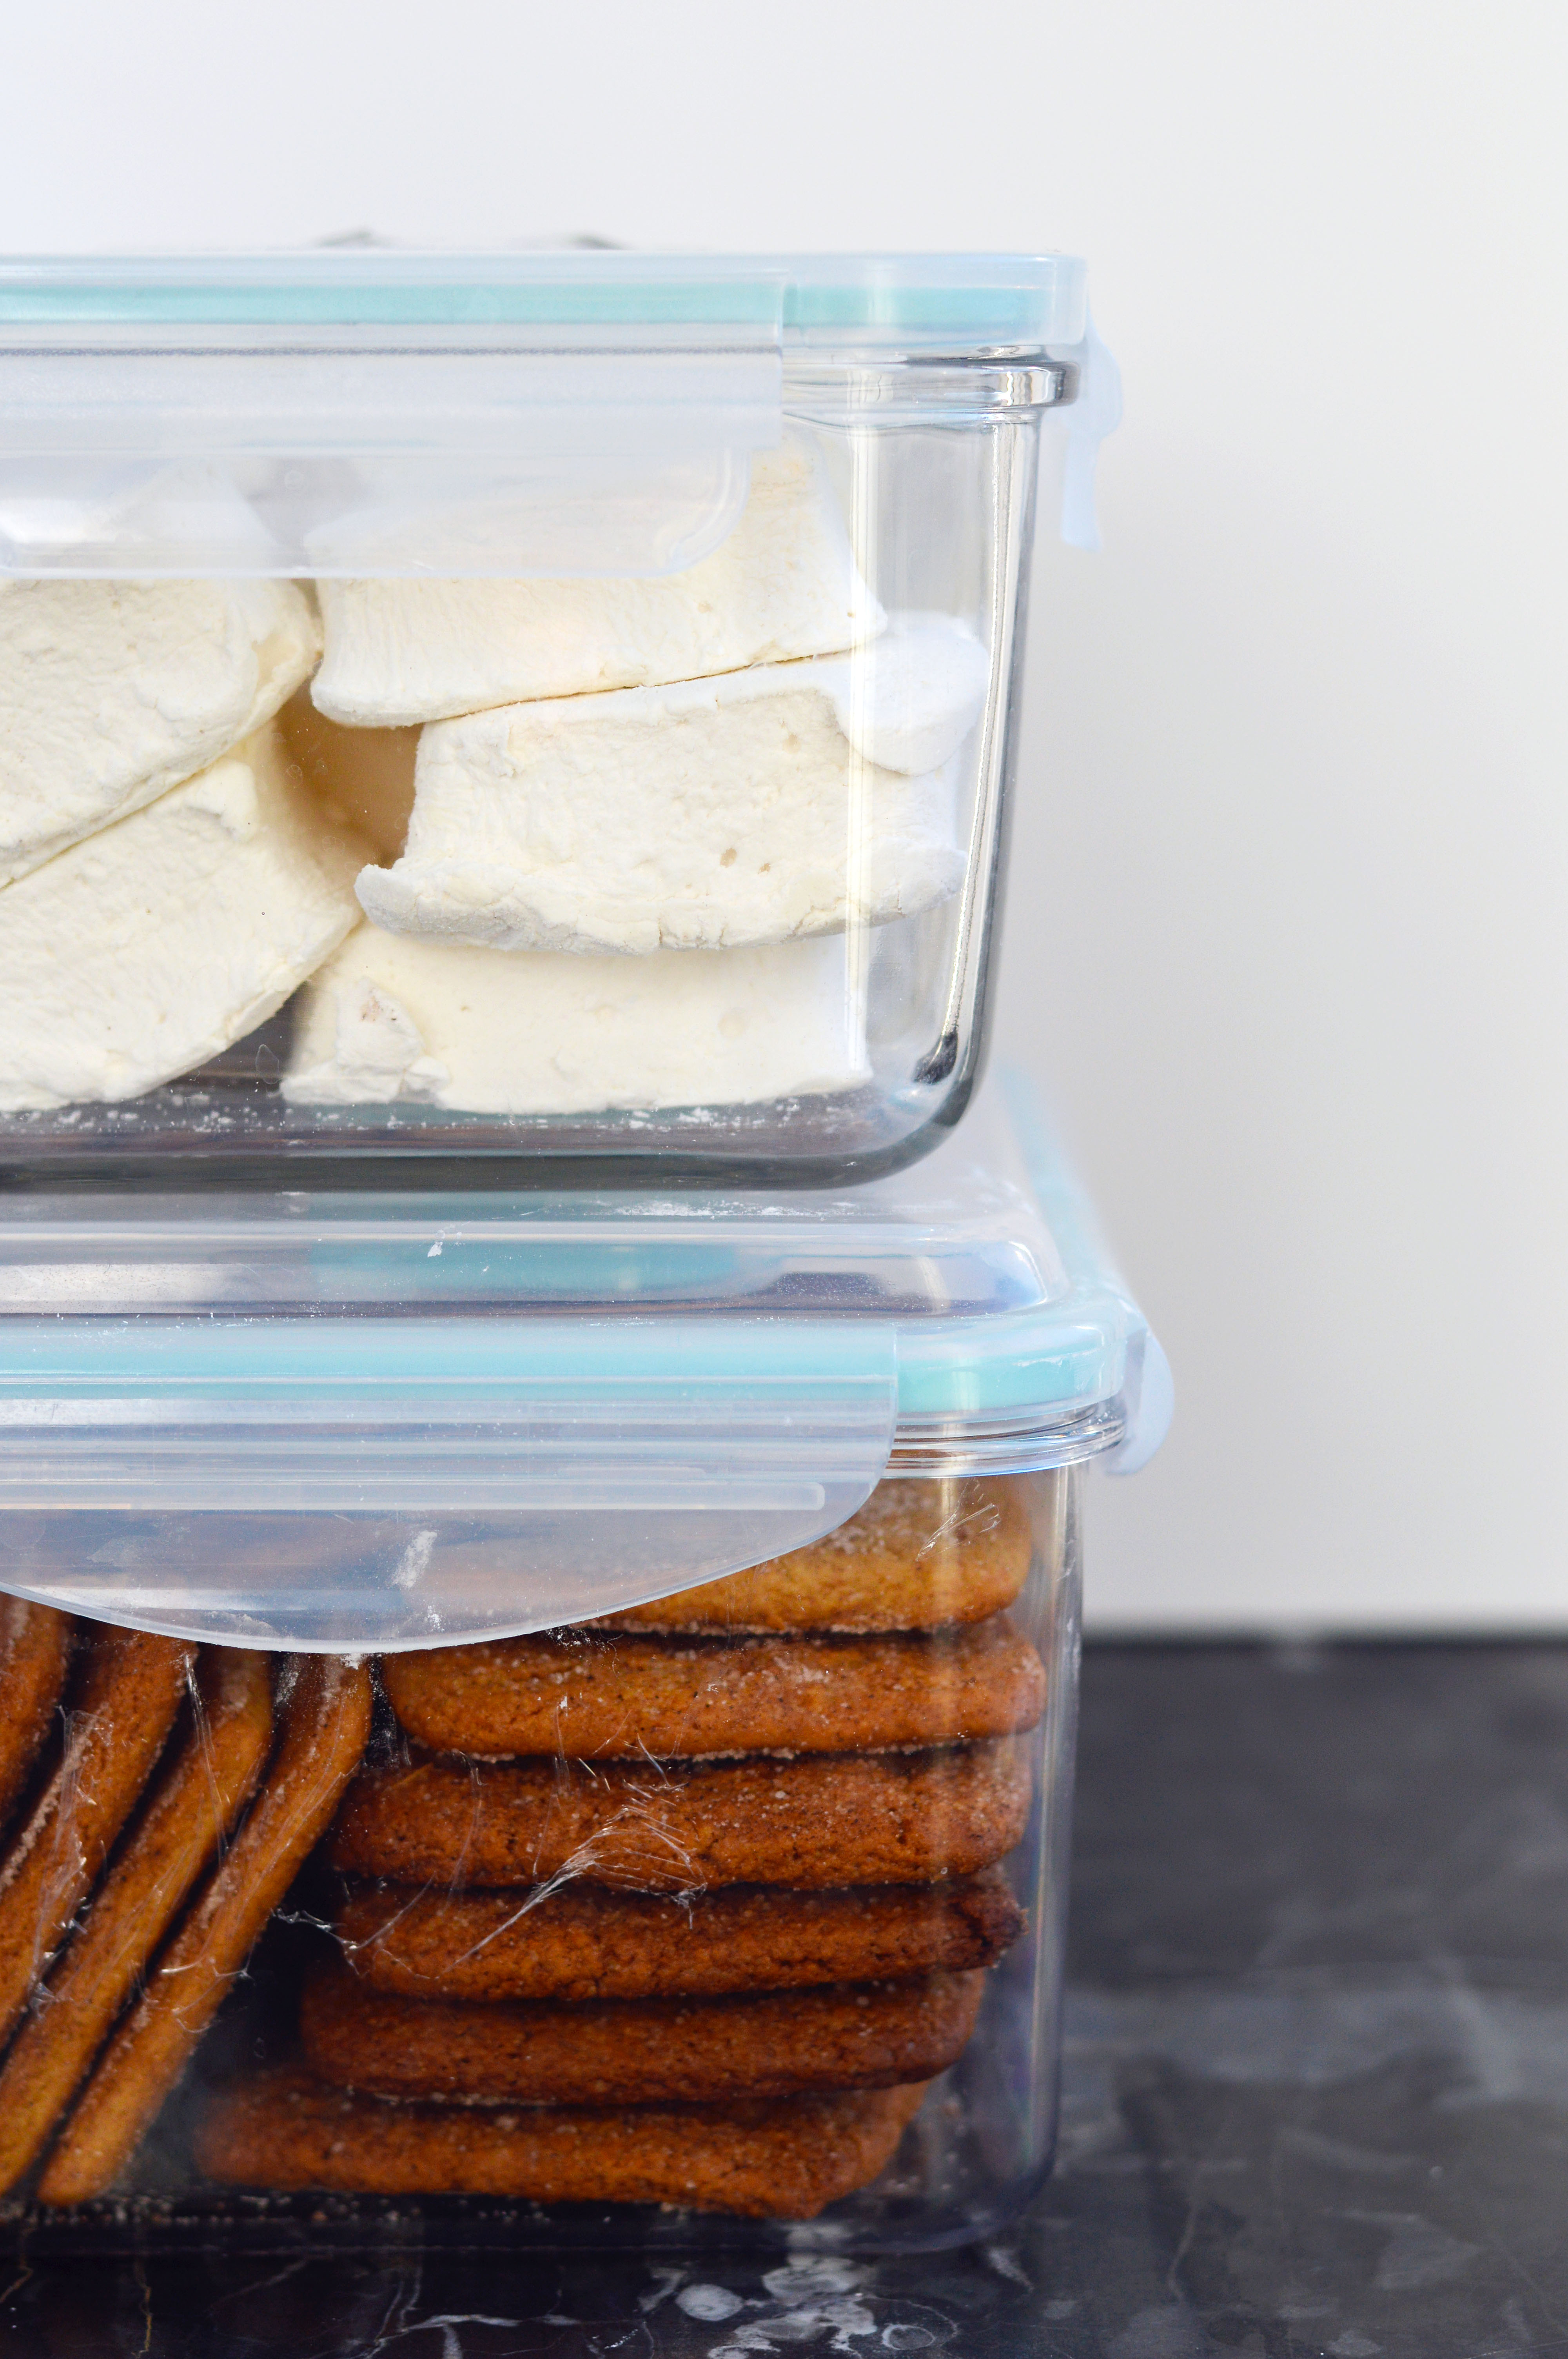
Chocolate Cake (recipe below)
Salted Nut Coffee Toffee (recipe below)
Coffee Ganache (recipe below)
Coffee Swiss Meringue Buttercream (recipe below)
Espresso Beans (optional)

Instructions:

  1. On a cake board, place one layer of your chocolate cake.
  2. Spread a thin, but even layer of the coffee buttercream.
  3. Spread a layer of the coffee ganache.
  4. Top with the coffee toffee.
  5. Repeat two more times.
  6. Crumb coat the cake with leftover buttercream and set in freezer for about 10-15 minutes or until the buttercream is firm.
  7. Remove cake from freezer and frost entire cake smoothly.
  8. Garnish the bottom of the cake with crushed coffee toffee.
  9. Place cake in freezer until firm, about 20-30 minutes.
  10. While cake is in the freezer, put the leftover ganache in a squeeze bottle and warm up ganache in a cup of hot water. You want the ganache to be runny enough that it will drip down the sides but not so hot that it will melt the buttercream.
  11. Remove cake from the freezer and do a ganache drip down the side of the cake. Fill the top smoothly with coffee ganache.
  12. Place cake in freezer to set.
  13. In a pastry bag fitted with a star pastry tip (I used Wilton’s 1M), swirl buttercream all around the edge of the cake.
  14. Dust the tops of the buttercream with crushed leftover toffee, and garnish each swirl with one espresso bean.

Chocolate Cake:

Ingredients:

1 ¾ c. flour
2 c. sugar
¾ c. cocoa powder
2 tsp. baking soda
1 tsp. baking powder
1 tsp. kosher salt
1 c. buttermilk, shaken
½ c. vegetable oil
2 eggs, at room temperature
1 tsp. pure vanilla extract
1 c. hot coffee

Instructions:

  1. Preheat oven to 350˚ and grease and line the bottom of four 6” cake pans with parchment paper.
  2. In a stand mixer fitted with the paddle attachment, mix flour, sugar, both cocoa powders, baking soda, baking powder and salt until fully combined.
  3. In a separate bowl, whisk vegetable oil, eggs, and vanilla extract until combined.
  4. With the mixer speed on low, add the egg mixture to the flour mixture until combined.
  5. Turn off the mixer. With a spatula, scrape the sides of the bowl to fully incorporate the two mixtures.
  6. Turn the mixer on low and slowly add the hot coffee to the batter. Once added, raise the speed to medium until completely homogenous.
  7. Divide batter evenly amongst the four cake pans and bake for 18-20 minutes, rotating the cake pans halfway.
  8. Let cake cool in pan for 10 minutes, then turn out of cake pan and move onto wire cooling rack to cool completely.

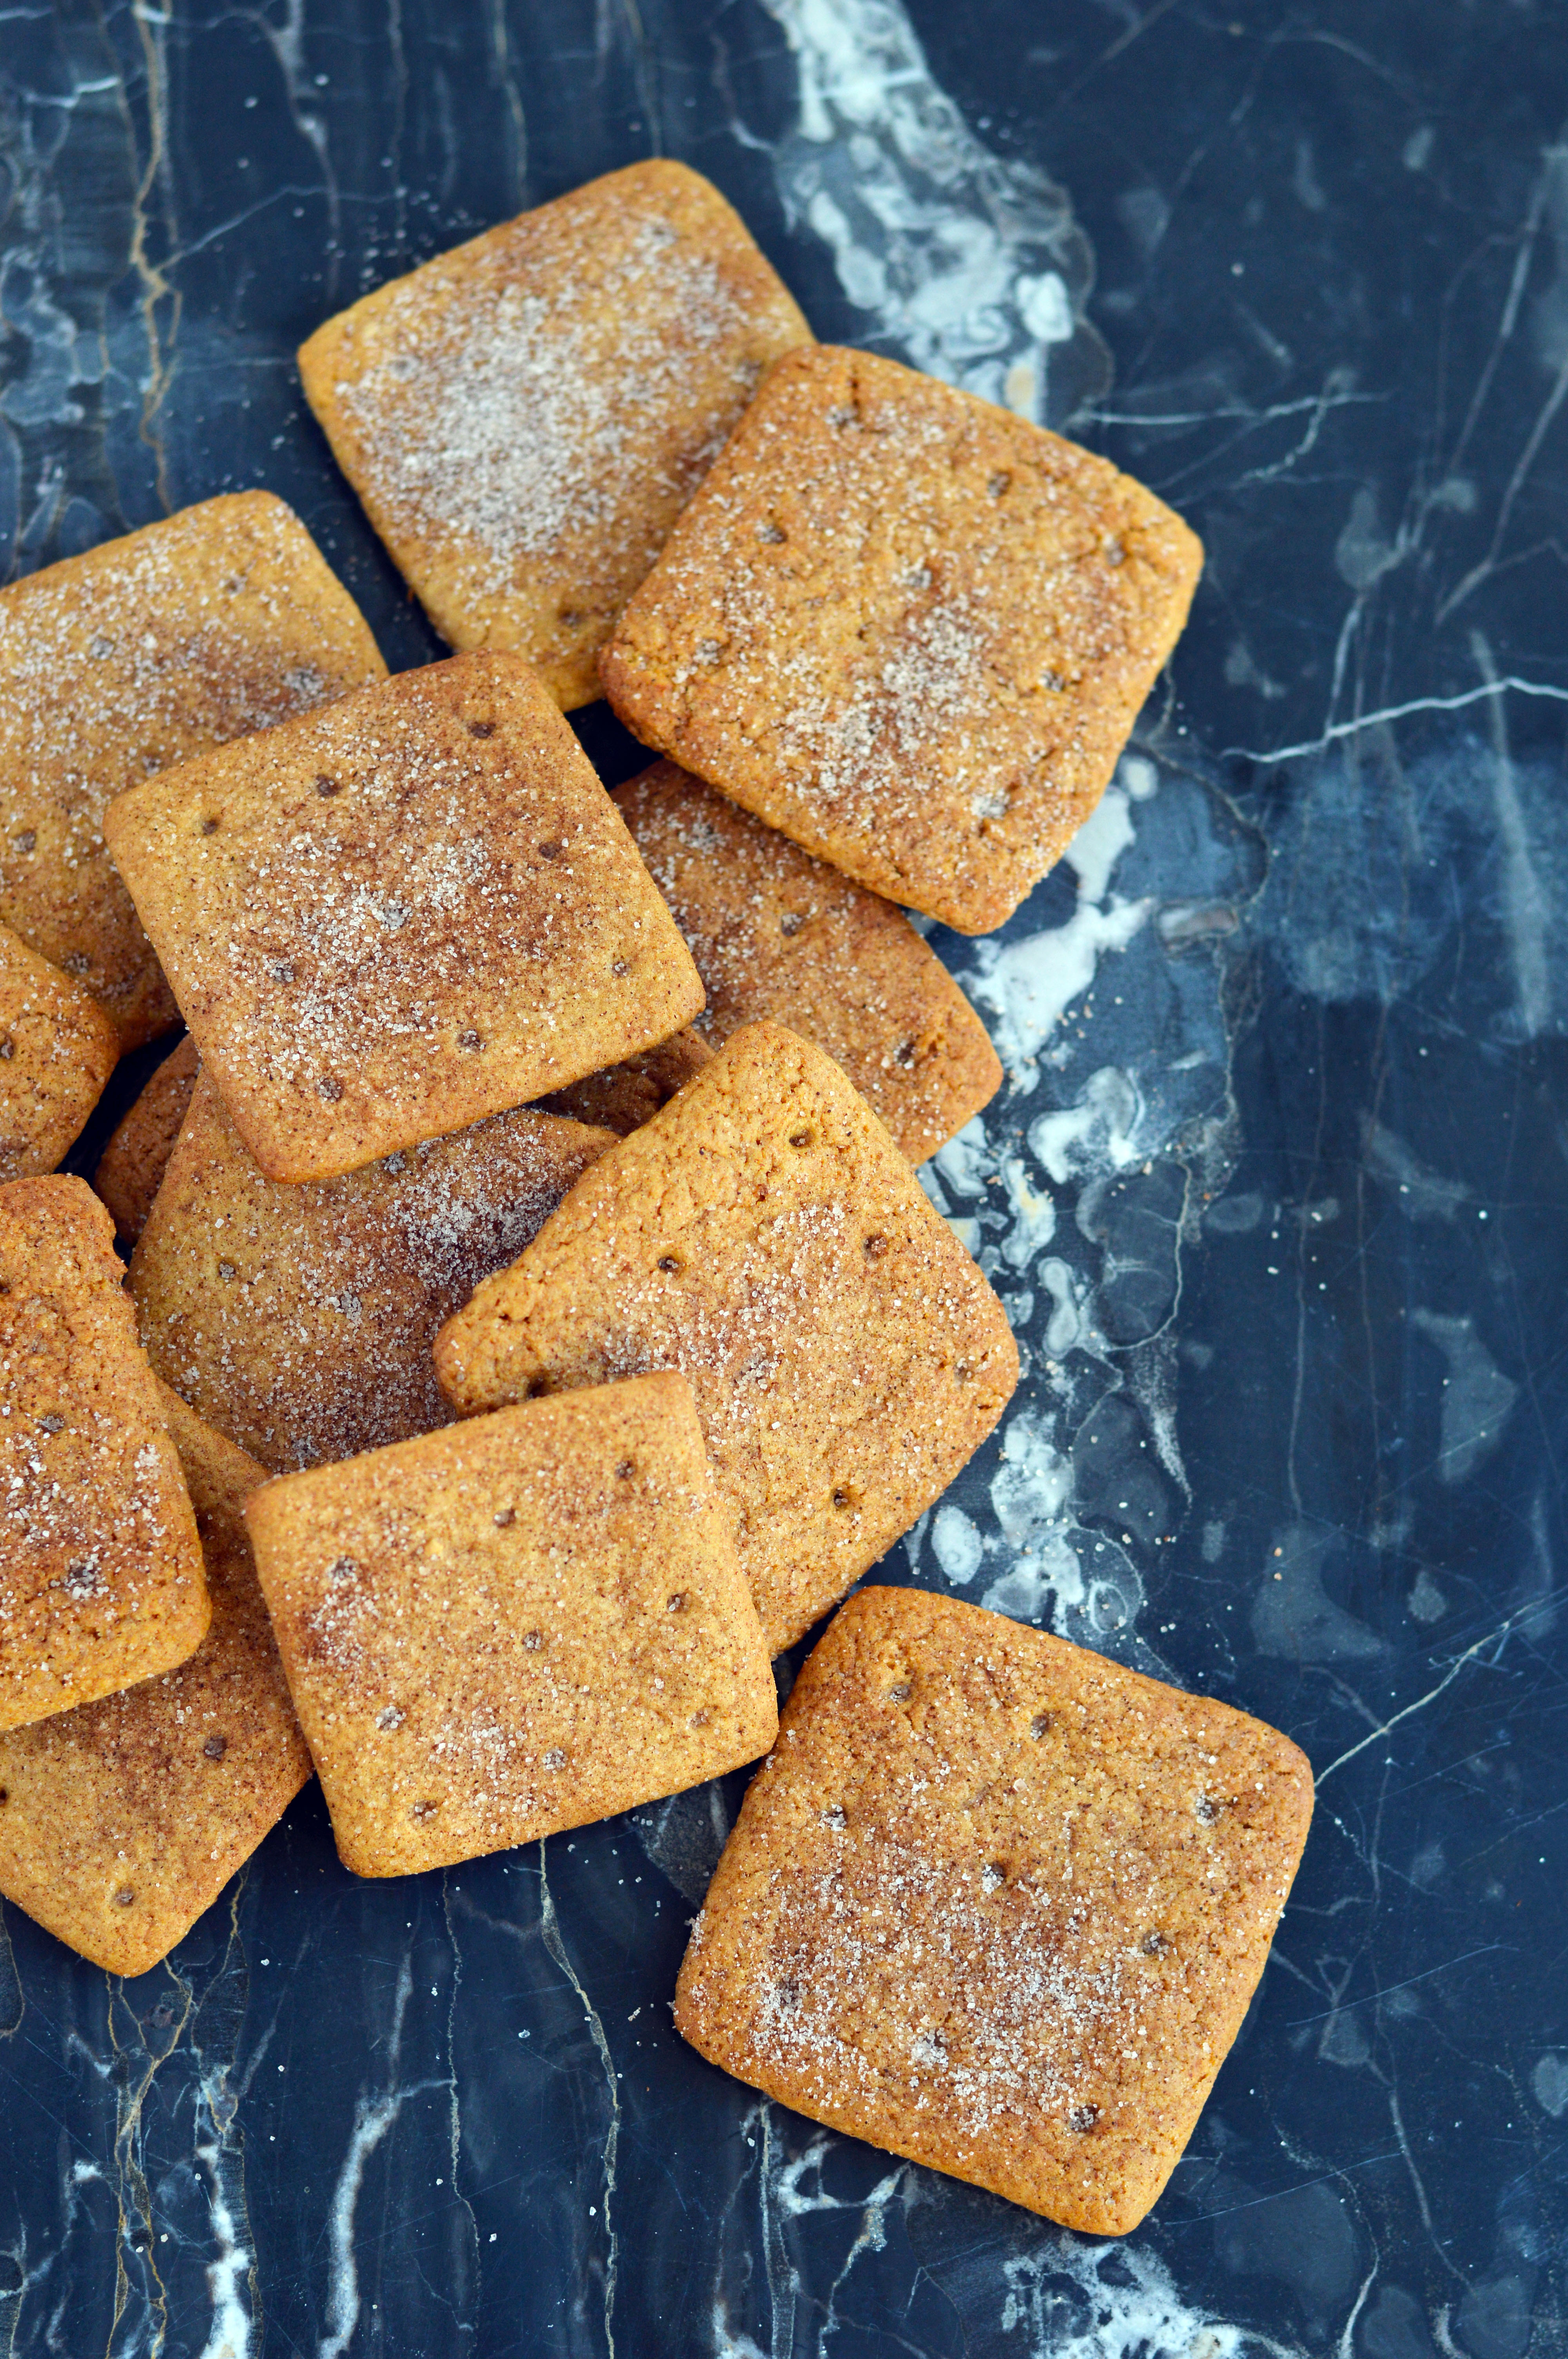
Salted Nut Coffee Toffee:

Ingredients:

1 c. butter
1 c. sugar
1 ½ tsp. espresso powder
1 ½ tsp. molasses
¼ tsp. kosher salt
nuts (I used walnuts and sunflower seeds)
flaky salt (I used maldon sea salt)

Instructions:

  1. Prepare a sheet pan lined with either parchment paper or a silicone baking mat.
  2. On medium-low heat in a small to medium HEAVY saucepan with a candy thermometer attached, mix butter, sugar, espresso powder, molasses and kosher salt together. (I’m emphasizing heavy because I’ve tried with a lighter pan and I ruined my first batch.)
  3. Whisk mixture constantly until temperature reaches 285˚F.
  4. Pour mixture onto the sheet pan and sprinkle your nuts and then the flaky salt.
  5. Let cool and break into shards.

For the Coffee Ganache:

Ingredients:

120 ml. heavy cream
180 g. white chocolate
2 tsp. espresso powder
1 tsp. coffee emulsion

Instructions:

  1. In a microwave safe bowl, heat heavy cream and white chocolate for one minute. Whisk mixture together until it becomes homogenous. If the white chocolate did not fully melt, microwave at intervals of 30 seconds until melted.
  2. Add in espresso powder and coffee emulsion and whisk.
  3. Pour onto the mocha cake layer and put cake in fridge to set the ganache. About 30 minutes to an hour.

Coffee Swiss Meringue Buttercream

Ingredients:

1 ¾ c. sugar
1 tbsp. espresso powder
7 large egg whites
a pinch of kosher salt
5 ½ sticks unsalted butter
2 tsp. vanilla extract
2 tsp. coffee emulsion

Instructions:

  1. Simmer an inch of water in a medium pot.
  2. In the bowl of a standing mixer, whisk egg whites, espresso powder, sugar and salt together.
  3. Place the bowl over the pot of simmering water and whisk the egg white and sugar mixture continuously until the mixture becomes lighter and no longer grainy.
  4. Remove the bowl from the pot and transfer the bowl into the mixer fitted with a whisk attachment.
  5. Mix on high until mixture becomes white and fluffy, and cool (check for this by seeing if the outside of the bowl is cool to the touch).
  6. Add in vanilla extract and butter one stick at a time until a silky smooth frosting forms.
  7. Add 2 tsp. of the coffee emulsion and whip until light brown and homogenous.

Salted nut coffee toffee recipe adapted from The Smitten Kitchen and All Recipes.
Chocolate cake recipe adapted from Food Network.

S’mores Cookies

Why is s’mores a “summer” thing? Toasted marshmallows and melty chocolate seem more suited for winter, no? Because I like it so much, I decided to go homemade on all the components of it. I’m not knocking on my ol’ standby of Honey Maid graham crackers, Jet-Puffed marshmallows and Hershey’s chocolate, but sometimes a girl’s gotta do some from-scratch projects.
I guess (for most people) the deciding factor boils down to: is it worth it? I won’t lie that the store-bought s’mores are almost as good and are way quicker to make, but do you see the char on that homemade marshmallow? You just can’t get the same toast on a ready-made version. If there was one component of the cookie that is worth making, it would be the marshmallows. The texture and flavor is unbeatable when compared to its commercial counterpart.A couple of notes about making marshmallows: 1) It is very sticky. Do not wrestle with it or try to get every bit out of the mixer. 2) Gelatin smells. When you whip up the gelatin and hot sugar mixture, it will smell awful. It’s hard to explain…but to me, it kind of smells like a farm? (I once took a class in college that required me to take care of a cow. It takes me back to that experience every time.) Either way, it is not a pleasant smell, but it will dissipate when the mixture cools. 3) You NEED a thermometer. There is no way around it. My thermapen might be the most used kitchen gadget and is worth every penny. Please, do not try and buy the $10 thermometers on Amazon. I promise you, you will not regret it.Homemade graham crackers are more flavorful and you can cut them into any shape and thickness that you want. Plus, you know every single ingredient that goes in it. And as for the chocolate coating, you can use way better quality chocolate. Oh! I tried using the sous vide cooker to temper chocolate and I’m not kidding, the best way to do it, EVER. We were having lunch as a group the other day and I was talking smack about my sous vide cooker… how it takes forever, how it’s only good for making steaks. But after this experience, I take it all back. I’m sorry I talked smack about you, I love you forever.
S’mores is one of my favorite cookies because it combines everything I like: crisp cookie, a soft-chewy marshmallow and rich chocolate. So I decided to share it with you guys along with a bunch of other cookies from my very talented blogger friends! Seriously, the list is outrageously delicious. If a recipe stands out to you, please visit and show them some love!

What Should I Make For… – Ugly Sweater Gingerbread Cookies
The Sweet Nerd – Gingerbread Cookies – All Spruced Up
Girl Heart Food – Orange Poppy Seed Shortbread Cookies
The Beach House Kitchen- Hot Chocolate Marshmallow Cookies
Beyond Mere Sustenance – Brandy-Spiked Mexican Hot Chocolate
Seasons & Suppers – Lemon Pistachio Shortbread Cookies
Ciao Chow Bambina – Lemon Drop Italian Cookies
Contemplating Sweets – Hedgehog Cookies
Salt & Lavender – Vegan Gingerbread Cookie Bars
Meg Is Well – Bradshaw Cookies: A Sour Cream Cookie with Cream Cheese Frosting


S’mores Cookies

You will need:

Homemade graham crackers (recipe below)
Homemade marshmallows (recipe below)
8 oz. chocolate, tempered (I used the sous vide method here)
Toppings, optional

Instructions:

  1. Put all the chocolate in a tall container for easier dipping. I used a 2-cup pyrex measuring cup.
  2. Have a sheet pan lined with a parchment paper ready.
  3. Place one square of marshmallow on top of the graham cracker and lower both on an angle so you get a crisp line. Work quickly so your chocolate doesn’t fall out of temper.
  4. Sprinkle the chocolate covered side with any toppings you want. Above, I used nonpareils, freeze dried strawberries, royal icing poinsettias, and flaky salt. The flaky salt looked the least impressive, but tasted the best.
  5. Let set. Toast marshmallow with a kitchen torch before eating for best taste. The chocolate melts a little when you toast the marshmallow, giving you the s’mores effect.

Homemade Graham Crackers

Ingredients:

2 ½ c. plus 2 tbsp. all purpose-flour
1 c. dark brown sugar, lightly packed
1 tsp. baking soda
¾ tsp. kosher salt
7 tbsp unsalted butter, cut into 1-inch cubes and frozen
1/3 c. honey
5 tbsp. whole milk
2 tbsp. vanilla extract

Cinnamon-Sugar Topping:
3 tbsp. sugar
1 tsp. ground cinnamon

Instructions:

  1. In a food processor fitted with the steel blade, pulse together the flour, brown sugar, baking soda and salt.
  2. Add in the chunks of frozen butter and pulse until the mixture looks very crumbly, or a coarse meal.
  3. In a small bowl, mix the honey, milk and vanilla extract and add it to the flour mixture.
  4. Pulse the mixture until the dough barely comes together. Do not over process, the cookies will become tough.
  5. Wrap the dough in a large piece of plastic wrap. The dough will be sticky, so try to avoid using your hands and use the sides of the plastic wrap to form the dough into a large rectangle. Refrigerate the dough for two hours, or overnight.
  6. Take the dough out and divide it in half, refrigerate the half that you are not using.
  7. Roll out the dough (remember, the dough is sticky, so use flour as needed) about ⅛ inch thick, and use a square 2 ½ inch cutter to cut out squares.
  8. Place them on a baking sheet lined with parchment paper.
  9. Take the thicker end of a skewer and poke nine holes in each square, like a cracker.
  10. In a small bowl, mix the sugar and ground cinnamon for the topping.
  11. Sprinkle the tops of the cookies with the topping and refrigerate for about 30-45 minutes until firm. Repeat with the remaining dough. Once you cut out all the squares, put the scraps together and re-roll and cut out more squares.
  12. Preheat the oven to 350˚F and bake the cookies about 10-15 minutes, or until the cookies are golden brown.

Homemade Marshmallows

Ingredients:

3 envelopes of unflavored gelatin
1 c. ice cold water, divided
1 ½ c. sugar
1 c. light corn syrup
¼ tsp. kosher salt
1 tsp, vanilla extract
¼ c. powdered sugar
¼ c. cornstarch

Instructions:

  1. Place the gelatin into a bowl of a standing mixer fitted with the whisk attachment. Add ½ c. ice water and let bloom.
  2. In a small pot either fitted with a candy thermometer (or not, if you’re using an instant-read thermometer), combine ½ c. water, sugar, corn syrup and salt.
  3. Heat mixture over medium high heat and cook until the mixture hits 240˚F, which should take about 6-8 minutes depending on the type of pot you used and the heat of the stove.
  4. Once the mixture hits 240˚F, take it off the heat and start your mixer on low speed.
  5. Add the hot sugar to the gelatin mixture slowly, avoid hitting the whisk.
  6. Once all of the sugar is mixed in gradually raise the speed of the mixer to high.
  7. Mix for about 12-15 minutes, or until the side of the bowl is luke warm and the mixture becomes very thick. Add in the vanilla in the last minute of mixing, taking care to lower the speed while you add it in, so you don’t fling extract everywhere (like I did. Ha!).
  8. Prepare an 8×8 pan, with high sides (at least 2 inches), by spraying the inside with nonstick spray and lining the inside with parchment paper.
  9. Spread the sugar mixture into the 8×8 pan using a silicone spatula also sprayed with nonstick spray. Try to smooth it down the best you can.
  10. In a small bowl, mix the powdered sugar and cornstarch together. Use a mesh strainer to dust the top of the marshmallow mixture and wrap with plastic wrap overnight to cool and set. Save the rest of the powdered sugar mixture for the next day.
  11. When the marshmallow is set, overturn it on a cutting board dusted with the powdered sugar mixture.
  12. Use a 2 ½ in. square cutter to cut out squares of marshmallows. Dust the cutter with the powdered sugar to avoid sticking.
  13. Store in an airtight container.

Graham cracker recipe adapted from the smitten kitchen.
Marshmallow recipe adapted from the food network.

Chocolate Unicorn Easter Eggs

I know it’s been a while! If you follow my Instagram feed, you would know that I’ve been making some cakes during my weekends off and that took time away from blogging. But I hurried my butt to share this project with you this week, because I could not wait another year for an Easter post.
These unicorn eggs are made of hollow candy melt shells, with swirls of pastel buttercream and adorned with a golden fondant horn and pearls and stars. I originally wanted the eggs to be filled with a rainbow mousse that would have beautiful layers when you cut into the candy melt. But I had the toughest time molding the eggs.
The eggs are made with an egg shaped Jell-O mold that I used for my tiramisu eggs a while back. As much as I appreciate the mold, I have a deep love/hate relationship with it. It fails to close properly unless you use excessive force (this might be because my mold is old), and it’s hard to fill because of the small opening on top. But it does make the perfect egg shape when it is molded properly. The tiramisu had a cracked shell look to it, so I didn’t need a perfect shape. Unfortunately, this project required a whole egg shape and it made it more difficult.
If I’m being honest, I almost gave up after failing to mold the eggs on my first attempt. I wasted a whole afternoon of prepping everything, and gathering all the supplies and decorations. But I just had to make it, even if the mousse was a long lost dream. After trying it a second time, I was somewhat successful and 3 out of 6 eggs were usable, and I was a little worried but the end result was so cute that it made the journey worth it.

Chocolate Unicorn Easter Eggs

You will need:

jello egg mold*
1 c. white chocolate candy melts
½ batch vanilla buttercream
a small amount of white fondant
purple gel food color
blue gel food color
pink gel food color
gold luster dust
vodka
edible silver stars
tiny confetti sprinkles
colored edible pearls
metallic edible pearls
black edible ink marker
white pearl dust

Assembly:

  1. Roll out a small amount of fondant with your palms to create a thin white rod. Twist two rods together to create a horn shape. Taper the end of the rod to create a unicorn horn.
  2. Mix a few drops of vodka with a small amount of gold luster dust and paint the unicorn horn. Set aside to set.
  3. Place white chocolate in a microwave safe bowl/cup with a spout.
  4. Melt the white chocolate melts in the microwave in 15 second intervals until completely melted.
  5. Thoroughly spray the inside of your egg mold with a non-stick cooking spray.
  6. Use the spout of your bowl/cup to pour white chocolate into the egg about ¼ of the way.
  7. Start rotating your egg mold (left, right, and upside down) until it starts to set. (When flipping the egg mold upside down, do so above your melted chocolate so the excess can drip back into the bowl.)
  8. Once set, repeat steps 4 and 5 two more times to ensure through covering and place in freezer to completely set. (4-5 minutes)
  9. While the eggs are setting, fit three disposable piping bags with small star tips (I used wilton tip #16, 15, and 17), color your buttercream and fill your piping bags with each color.
  10. Take the eggs out of the freezer and carefully unmold the chocolate. It may stick a little. Just wiggle it around gently, and it should come out in one piece.
  11. Use the frosting to swirl different colors to give your unicorn a mane. Leaving a small gap at the tip of the egg for the unicorn horn. Tip: Use the largest star tip to give the mane a general shape and use the smaller tip to make the mane fuller. Use the smallest tip to fill in the tiny gaps in between the large and small swirls.
  12. Use a tweezer (kitchen use only tweezers) to place pearls, stars, and confetti sprinkles to give the eggs a little more dimension. You can pretty much use any sprinkle you desire. Just make sure it is small so that you don’t lose the swirls of the unicorn mane.
  13. Place the eggs in the freezer for the buttercream to harden, about 3-5 minutes.
  14. Remove eggs from the freezer and with the edible marker, draw on the eyes.
  15. Use a food-safe brush to brush on pearl powder around the egg to give it some sheen.
  16. Squeeze a little swirl of buttercream right where you want the unicorn horn and place the unicorn horn in the center of the swirl.
  17. Display eggs in an egg carton to really sell the “egg” look.

*After doing extensive research, the egg mold I used has been discontinued. I did find some eBay listings for them. Look up the term “jello egg mold” and it should give you purchasing options.

Okinawan Sweet Potato Macarons

Okinawan Sweet Potato MacaronsThere isn’t much that I remember about living in Seoul, South Korea as a little girl. But one memory that lingers after all these years is how the streets were perfumed with the scent of roasted sweet potatoes in the winter. I don’t know how it is now, but back then the streets were filled with carts that sold perfectly roasted sweet potatoes. Roasted Korean sweet potatoes are very different from their American counterpart. They are insanely sweet and the flavor is chestnut-like. And unlike American sweet potatoes, they don’t get watery. Instead, they are more fibrous and hold their shape when peeled. For many years, I’ve tried to recapture that memory by roasting Korean sweet potatoes in my oven. The smell was spot on, but I couldn’t get that same roasted taste that I remembered.
Okinawan Sweet Potato MacaronsThere is a Korean market that I stop by for snacks when I’m at my local Laundromat. If you stop by in the colder months, there is a small machine that churns out roasted sweet potatoes and the whole store smells has that warm roasty toasty smell. Anyways, after having one that was properly roasted, I became obsessed with trying to recreate it at home and scoured the internet on how to do it. I finally came upon a blog that featured this pot and after finding it in a Korean supermarket (It’s so much cheaper. I got it for less than $20 because it was on sale), I gave it a try and I finally reached sweet potato nirvana. Tip: The instructions say to roast on medium heat for 20-30 minutes but I found that roasting for about an hour on low heat produces the best results.
Okinawan Sweet Potato MacaronsArmed with my new roasting pot, I wanted to feature sweet potatoes differently and made these macarons. Purple sweet potatoes are just as sweet but not as flavorful as their yellow cousins. However, I couldn’t resist their beautiful purple flesh. I suppose I could’ve made the frosting a vibrant purple by adding a little food dye, but I wanted you to be able to see what it would look like without it. The best part about the frosting is that it takes just one stick of butter and about ¾ cup of powdered sugar (which just might be perfect for filling cakes for babies since you are using minimal sugar).
Okinawan Sweet Potato MacaronsCan you tell that I originally made these for Valentine’s Day? The purple ombre effect is easy to achieve by using an edible food color spray can. They’re easy enough to find on amazon. You want to be careful to be light handed or you will end up spraying the entire macaron purple. This is especially true if your spray can is new. There are so many options out there, I feel like you have a rainbow at your fingertips and it’s an easy way to spruce up a plain macaron.
Okinawan Sweet Potato MacaronsEven if you don’t decorate it, they’re definitely worth giving a try and best eaten within two days. Since the frosting has low butter/sugar content, it will turn your macarons soggy as the days go by.

Okinawan Sweet Potato Macarons

For the macaron shells:

Ingredients:
212 g. almond meal
212 g. powdered sugar
172 g. egg whites, divided to 82 g. and 90 g
236 g. sugar
158 g. water
purple edible spray paint
heart sprinkles
white pearl sprinkles

Instructions:

  1. Line two baking sheets with parchment paper or silicone mats.
  2. In the bowl of a food processor, add the almond meal and powdered sugar and pulse until thoroughly combined.
  3. Sift the mixture over a large mixing bowl, throwing out the lumps as they appear.  Add 82 g. of the egg whites and stir until you get a thick mixture.
  4. In a small pot attached with a candy thermometer, combine the sugar and water over medium heat and boil until the syrup reaches 200˚F.
  5. Once the syrup reaches 200˚F, start whipping the remaining 90 g. in the bowl of your stand mixer with the whisk attachment on medium speed until soft peaks are reached.
  6. Once the syrup reaches 248 degrees, remove the pot off the burner and slowly pour the syrup down the side of the mixing bowl with the egg whites on medium speed.
  7. Once the egg whites are fully incorporated, increase the speed to medium high until egg whites form glossy, stiff peaks
  8. Mix ⅓ of the egg white mix to the almond mixture and stir together until the batter is slightly lighter and less pasty.  From then on, fold in ⅓ of the egg white mixture twice until the mixture “flows like magma”.  The mixture should be smooth and run thick ribbons off the spatula.
  9. Fill batter in a pastry bag fitted with a ½ in. plain tip.
  10. The piped batter may have peaks but should smooth away in a minute or two. Sprinkle the top of the macaron batter with the pearl and heart sprinkles. Let the batter stand until the tops of the macaron batter are dry to the touch, about 30 mins to 1 hour.
  11. Preheat the oven to 350˚F.
  12. Once you place the macarons in the oven, reduce the heat to 300˚F. Bake 10-13 minutes, until the feet are formed and the tops are smooth.  The macarons are done when you slightly wiggle them and they start to come off of the parchment paper / silicone mat.
  13. Once you remove the macarons, reheat the oven to 350˚F for ten minutes before baking another pan of macarons at 300˚F.
  14. Once the shells are cool, spray one side of the macarons lightly about 7 inches away from the surface. Fill with frosting.

Okinawan Sweet Potato Frosting

Ingredients:
1 ½ lb Okinawan sweet potatoes, roasted (about 3 medium potatoes)
4 oz. (one stick) unsalted butter
¾ – 1 c. powdered sugar

Instructions:

  1. Peel the outer skin of the sweet potatoes and put them the food processor.
  2. Puree the sweet potatoes until very smooth and silky. Set aside.
  3. In a bowl of a standing mixer fitted with the whisk attachment, whip the butter until light and fluffy.
  4. Add in ¾ c. of the powdered sugar and the sweet potato puree and whip until a smooth frosting forms. If not sweet enough, add the remaining ¼ c. powdered sugar and whip until smooth. Fill the macarons.

Lucky Charms Cake

lucky charms cakeI’m pretty sure everyone is already saying this, but how is it already March? I’m definitely not complaining since I absolutely adore warm weather and I’m dying to be able to wear dresses without tights. As spring quickly approaches, the next holiday around the corner would be St. Patrick’s Day. Even closer is National Cereal Day, which is on March 7th. So I figured that I might as well tie up both and make this cake.
DSC_0584I’ve been thinking of something similar to this when I bought a bag full of “Lucky Charms” marshmallows. I say it in quotes because while it tastes very similar to the marshmallows in the cereal, the shapes of these marshmallows are less detailed and smaller. (I’m thinking it’s a copyright issue.) Either way, I wasn’t about to pick out each marshmallow from a box of Lucky Charms cereal, so I used this to decorate the outside of the cake. What is really funny is, that over time, the marshmallows will rehydrate from the frosting giving it a similar flavor and texture to a dehydrated marshmallow that was sitting in a pool of milk. They become darker in color and squishy and so this cake is best eaten the day it is baked.
DSC_0504The inside of the cake is frosted with cereal milk frosting, (like the one I posted in my cereal macaron post) but instead of Frosted Flakes, I used Lucky Charms cereal. The cereal milk turns a pale green and I think it’s perfect for the theme. The cake itself is funfetti since I was going along with the rainbow color scheme.
DSC_0526My absolute favorite part of the cake is the Lucky Charms bark I made from the marshmallows, different colors of candy melts and chock full of every kind of decorative sprinkle. You start off with a melted slab of white candy melt and swirl different colors of melted candy melts using a toothpick and then swipe along the top with an offset spatula. It blends beautifully and makes a watercolored candy bark. Then you pretty much go ham with however you want to top it. I think it’s important to restrain yourself when you do this so that you can still see the colors of the bark.
DSC_0578I had some confetti macaron shells leftover from a baking order, so I stuck some marshmallow pieces on top of it and decorated the cake, but really, I don’t think it’s worth baking a whole batch of macarons for this. If you have it, great and if it not, it still looks beautiful without it. I should warn you that this is a very sweet cake. I suppose it shouldn’t come as a surprise given the funfetti inside and the marshmallows and candy outside. But it’s so stunning, I think it’s worth the sugar overload.

Lucky Charms Cake

Funfetti Buttermilk Cake (recipe below)
Lucky Charms Cereal Milk Frosting (recipe below)
Vanilla Swiss Meringue Buttercream (recipe below)
Lucky Charms Marshmallows
Lucky Charms Bark (recipe below)
Funfetti Macarons (optional, recipe in this post)

Instructions:

  1. Evenly fill and stack each layer of funfetti cake with cereal milk frosting.
  2. Crumb coat the cake with a thin layer of the remaining cereal milk frosting
  3. Place cake in freezer for 5 minutes until the frosting on the outside sets firmly.
  4. Once crumb coat is set, frost the entire cake with swiss meringue buttercream.
  5. Take a handful of marshmallows and slowly cup the outside of the cake, patting it to ensure full coverage.
  6. Let the outside set in freezer for 5 minutes.
  7. Take cake out and top the cake with shards of Lucky Charms bark and macarons if desired.

Funfetti Buttermilk Cake

Ingredients:

2 c. cake flour
1⅓ c. sugar
¾ tbsp. baking powder
¼ tsp. salt
¾ c. buttermilk, divided
6 oz. unsalted butter, room temperature
3 eggs, room temperature
1 ½ egg yolks
1 ½ tsp. vanilla extract
¾ c. rainbow sprinkles

Instructions:

  1. Preheat the oven to 350˚F and line four 6-inch cake pans with parchment paper.
  2. In a bowl of a standing mixer with the paddle attachment, add flour, sugar, baking powder, and salt. Mix until combined.
  3. On low speed, add ½ c. buttermilk and butter and mix until combined.
  4. In a separate bowl, whisk eggs, egg yolks, ¼ c. buttermilk, and vanilla extract until homogeneous.
  5. On low speed, slowly add the egg mixture to the flour mixture.
  6. Increase speed to medium, and mix until combined.
  7. Fold in sprinkles into the batter.
  8. Evenly divide cake batter into the four cake pans.
  9. Bake about 20-25 minutes until cake is done or until a toothpick inserted into the center comes out clean.
  10. Let cool in pan for 10 minutes, and then move onto a cooling rack until completely cool.

Lucky Charms Cereal Milk Frosting (for the filling)

Ingredients:

1½ c. cereal milk (recipe below)
1/4 c. flour
½ tsp. kosher salt
8 oz. (2 sticks) unsalted butter, room temperature
¾ c. sugar
½ tsp. vanilla extract

Instructions:

  1. In a small pot over medium heat, whisk milk, salt and flour until combined.
  2. Continuously whisk mixture until thickened to a pudding like consistency.
  3. Once thickened, strain through a mesh strainer into a bowl with a spatula to remove lumps.
  4. Place a piece of plastic wrap on top of the flour mixture (to prevent skin from forming) and put bowl into the fridge until fully cool.
  5. In a mixer bowl fitted with the whisk attachment, mix the sugar and butter on high speed until fluffy and pale about, 5-10 minutes.
  6. Add the chilled flour mixture and continue to whip on high speed until the sugar is completely dissolved and the mixture is no longer gritty, about 5-10 minutes.
  7. Add the vanilla extract and mix until combined.

Cereal Milk

Ingredients:

3 ½ c. Lucky Charms cereal
4 c. whole milk, cold

Instructions:

  1. In a large bowl, mix cereal and milk and steep for 30 minutes, until cereal is soggy.
  2. Strain mixture through a fine mesh strainer. (Do not force mixture through mesh strainer. The resulting milk will be starchy and thicker than what you started with.)

Vanilla Meringue Buttercream (for the outside)

Ingredients:

1 c. sugar
4 large egg whites
3 sticks unsalted butter
1 tsp. vanilla extract

Instructions:

  1. Simmer an inch of water in a medium pot.
  2. In the bowl of a standing mixer, whisk egg whites and sugar together.
  3. Place the bowl over the pot of simmering water and whisk the egg white and sugar mixture continuously until the mixture becomes lighter and no longer grainy.
  4. Remove the bowl from the pot and transfer the bowl into the mixer fitted with a whisk attachment.
  5. Mix on high until mixture becomes white and fluffy, and cool (check for this by seeing if the outside of the bowl is cool to the touch).
  6. Add in vanilla extract and butter one stick at a time until a silky smooth frosting forms.

Lucky Charms Bark

Ingredients:

white candy melts
yellow candy melts
orange candy melts
sky blue candy melts
pink candy melts
purple candy melts
Lucky Charms cereal marshmallows
any type of sprinkles you would like to use

Instructions:

*Note: You want to move fast before the candy melts set. Try to have all of the sprinkles, marshmallows, and candy melts out and on hand before you start this recipe.

  1. Line a sheet pan with wax paper.
  2. Melt white candy melts in a bowl and spread thinly in a rectangular shape onto the wax paper.
  3. On a separate plate, melt about 3-4 disks of each color of the candy melt separately,
  4. Using a toothpick, make swirls of different colors all over the slab of white candy melt.
  5. Using an offset spatula, smooth the top of the bark in one fluid horizontal stroke.
  6. Place the marshmallows and sprinkles before the candy bark sets.
  7. Before the candy bark sets completely, (when it is similar to very soft chocolate) take a sharp knife and score shards of candy bark by making triangular shapes into the candy melt.
  8. When the candy bark sets, break along the lines you made with your knife.

Red Velvet Rose Pavlova

Red Velvet Rose PavlovaAs much as I love flowers, I’ve learned over the years that I have a black thumb. No matter how hard I try or how “low-maintenance” the plant is, I manage to kill it. I’ve even killed a cactus. Don’t ask me how I did it. But one day it started to shrivel up and before I knew it, it was dead.  These days, I run away from plants like the plague. The cute DIY terrariums that everyone talks about? Nope. Growing my own herbs? No way. So instead of growing my own plants, I prefer already cut plants because (not to sound morbid) they’re already dying. It gives me a little less stress.
Red Velvet Rose Pavlova 2In the food world, I think Valentine’s Day can be renamed as Red Velvet Everything Day. Is it just me or when February rolls around, everything is red velvet flavored? They come in forms of cake, brownies, whoopie pies, cupcakes and cookies. It is not their fault. There aren’t that many red cakes out there and that deep red hue is kind of perfect for the season.
Red Velvet Rose PavlovaRed Velvet Rose Pavlova Instead of doing the usual red velvet cake, I decided to make a red velvet pavlova. I dyed the layers of pavolva red (or as red as I could get them) and flavored them with a hint of cocoa. Then I made a cream cheese whipped cream (because how would you have anything red velvet without cream cheese) and flavored it with some rose water for a floral note. I finally decorated it with some tiny rose meringues and actual tiny roses. If you are using fresh flowers, make sure they’re pesticide-free and if you want to eat them, make sure they’re edible.
Red Velvet Rose Pavlova
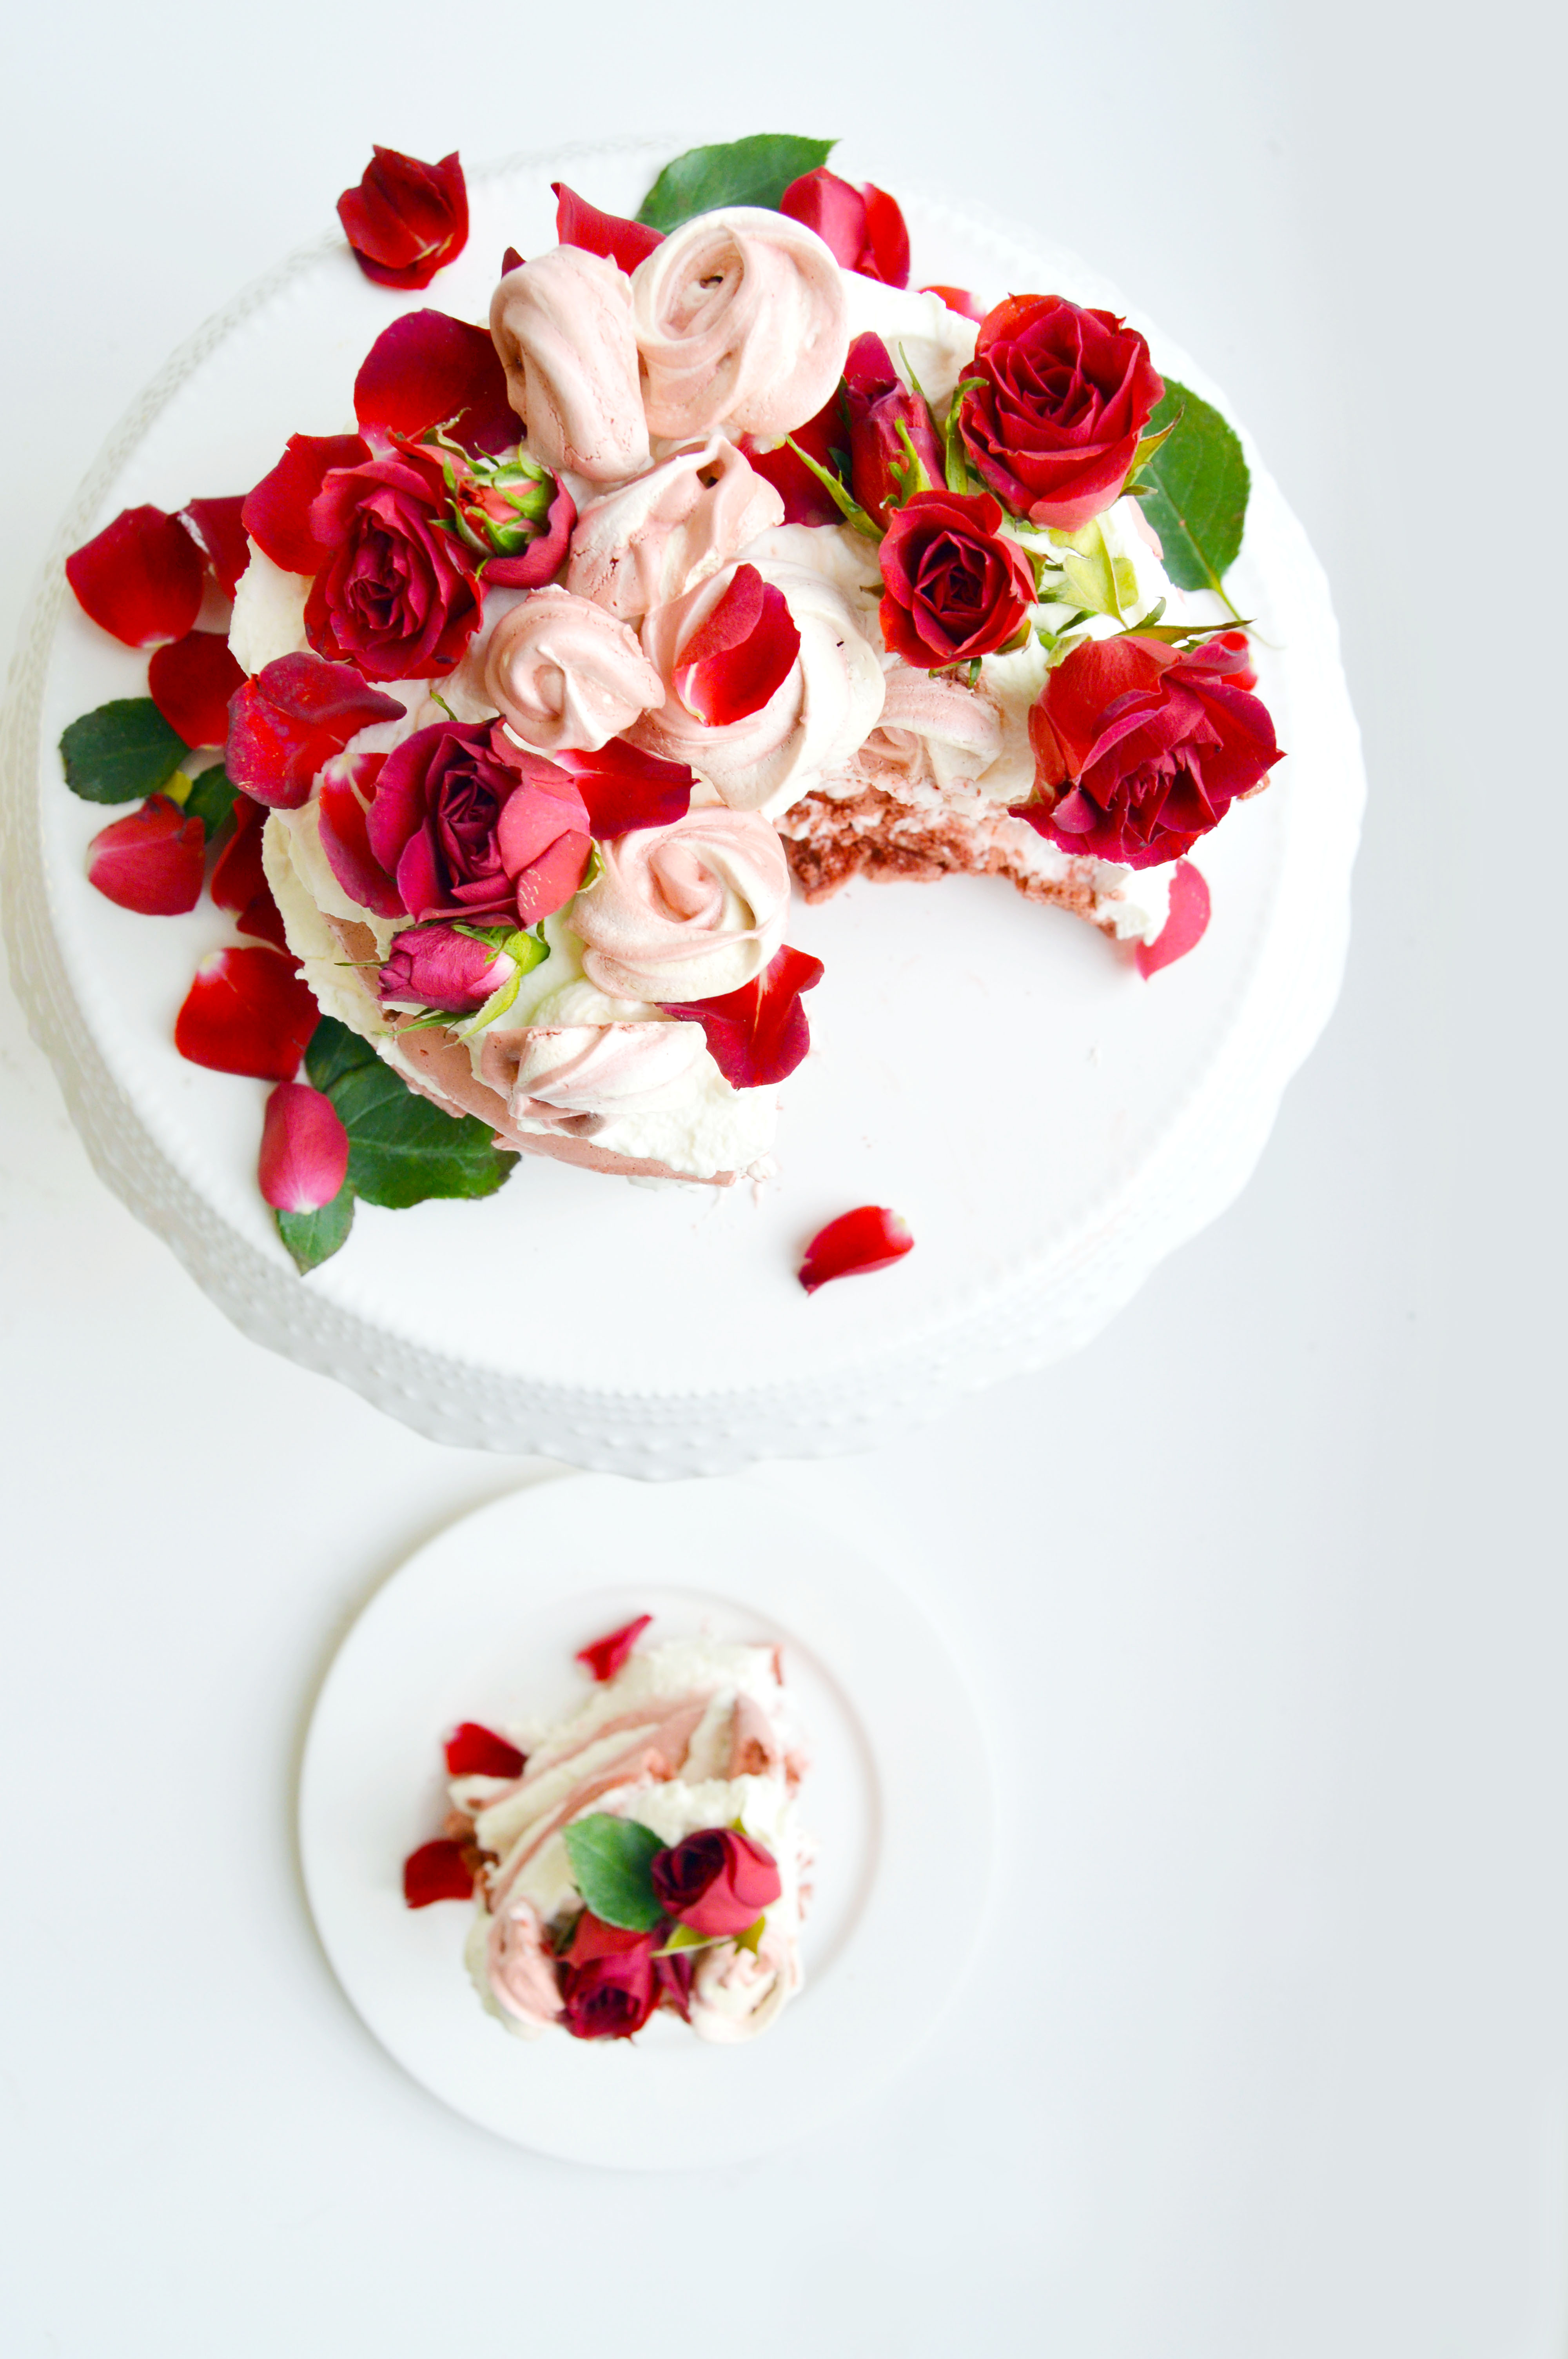
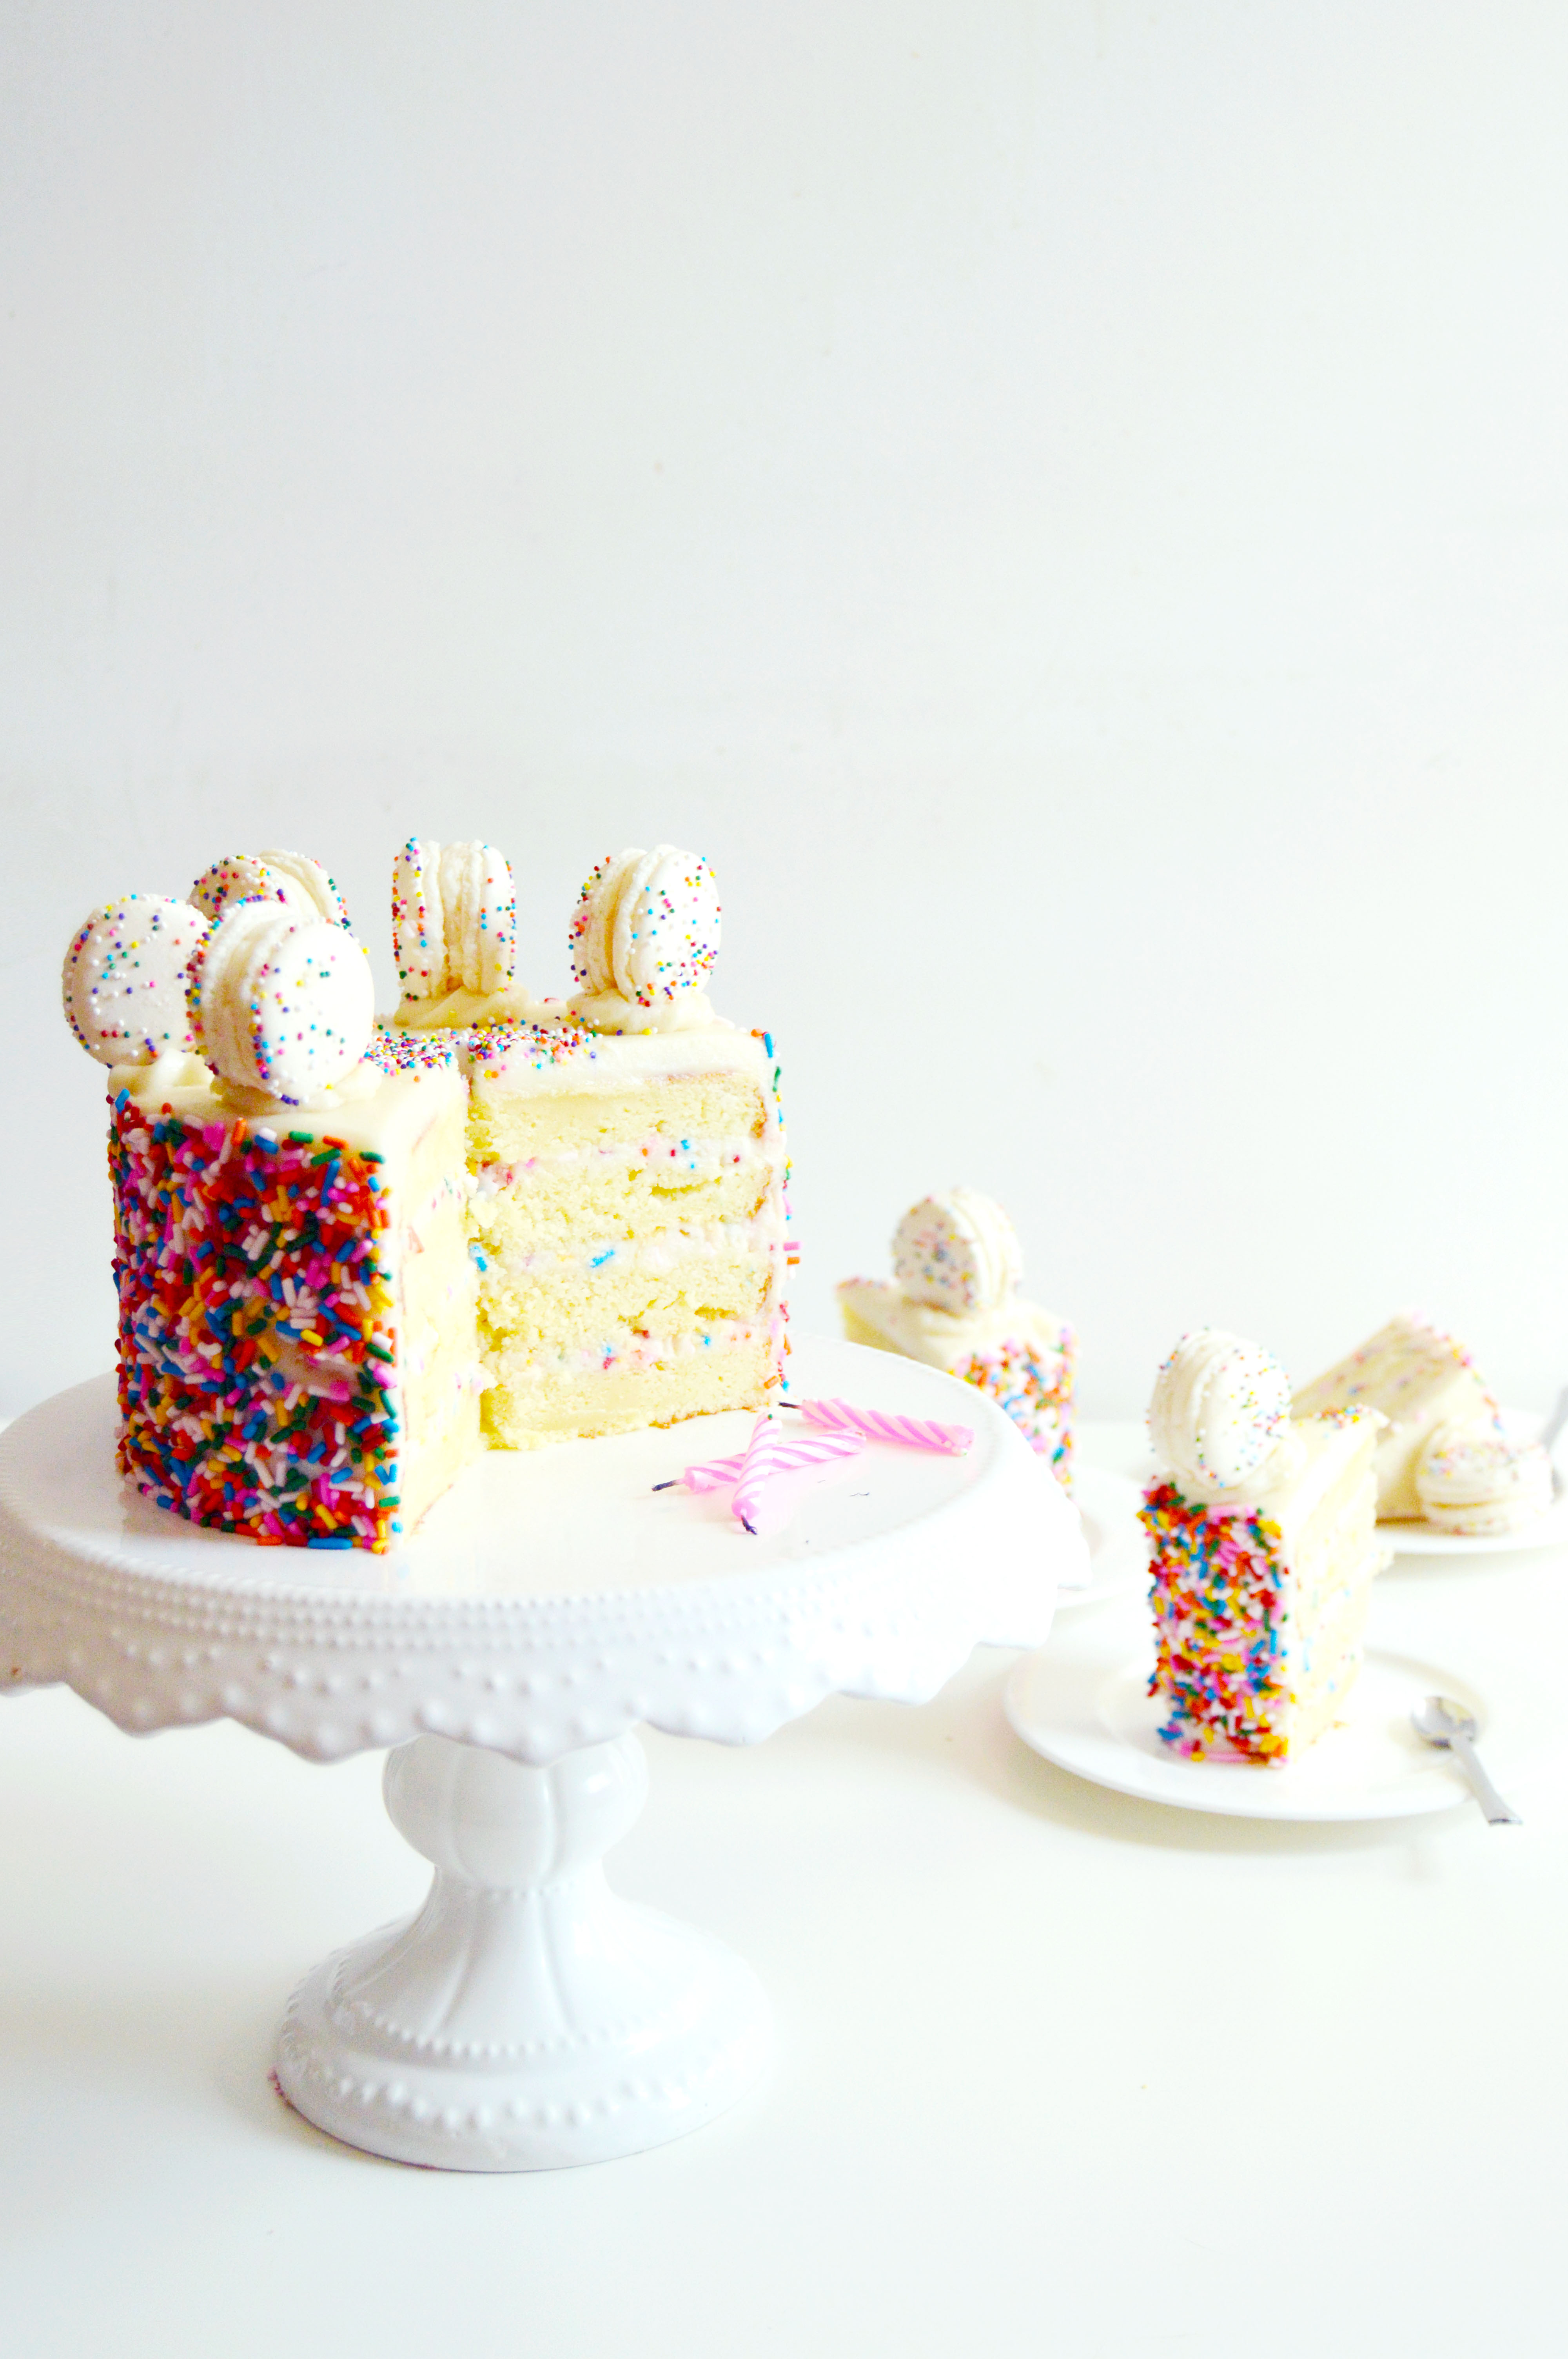
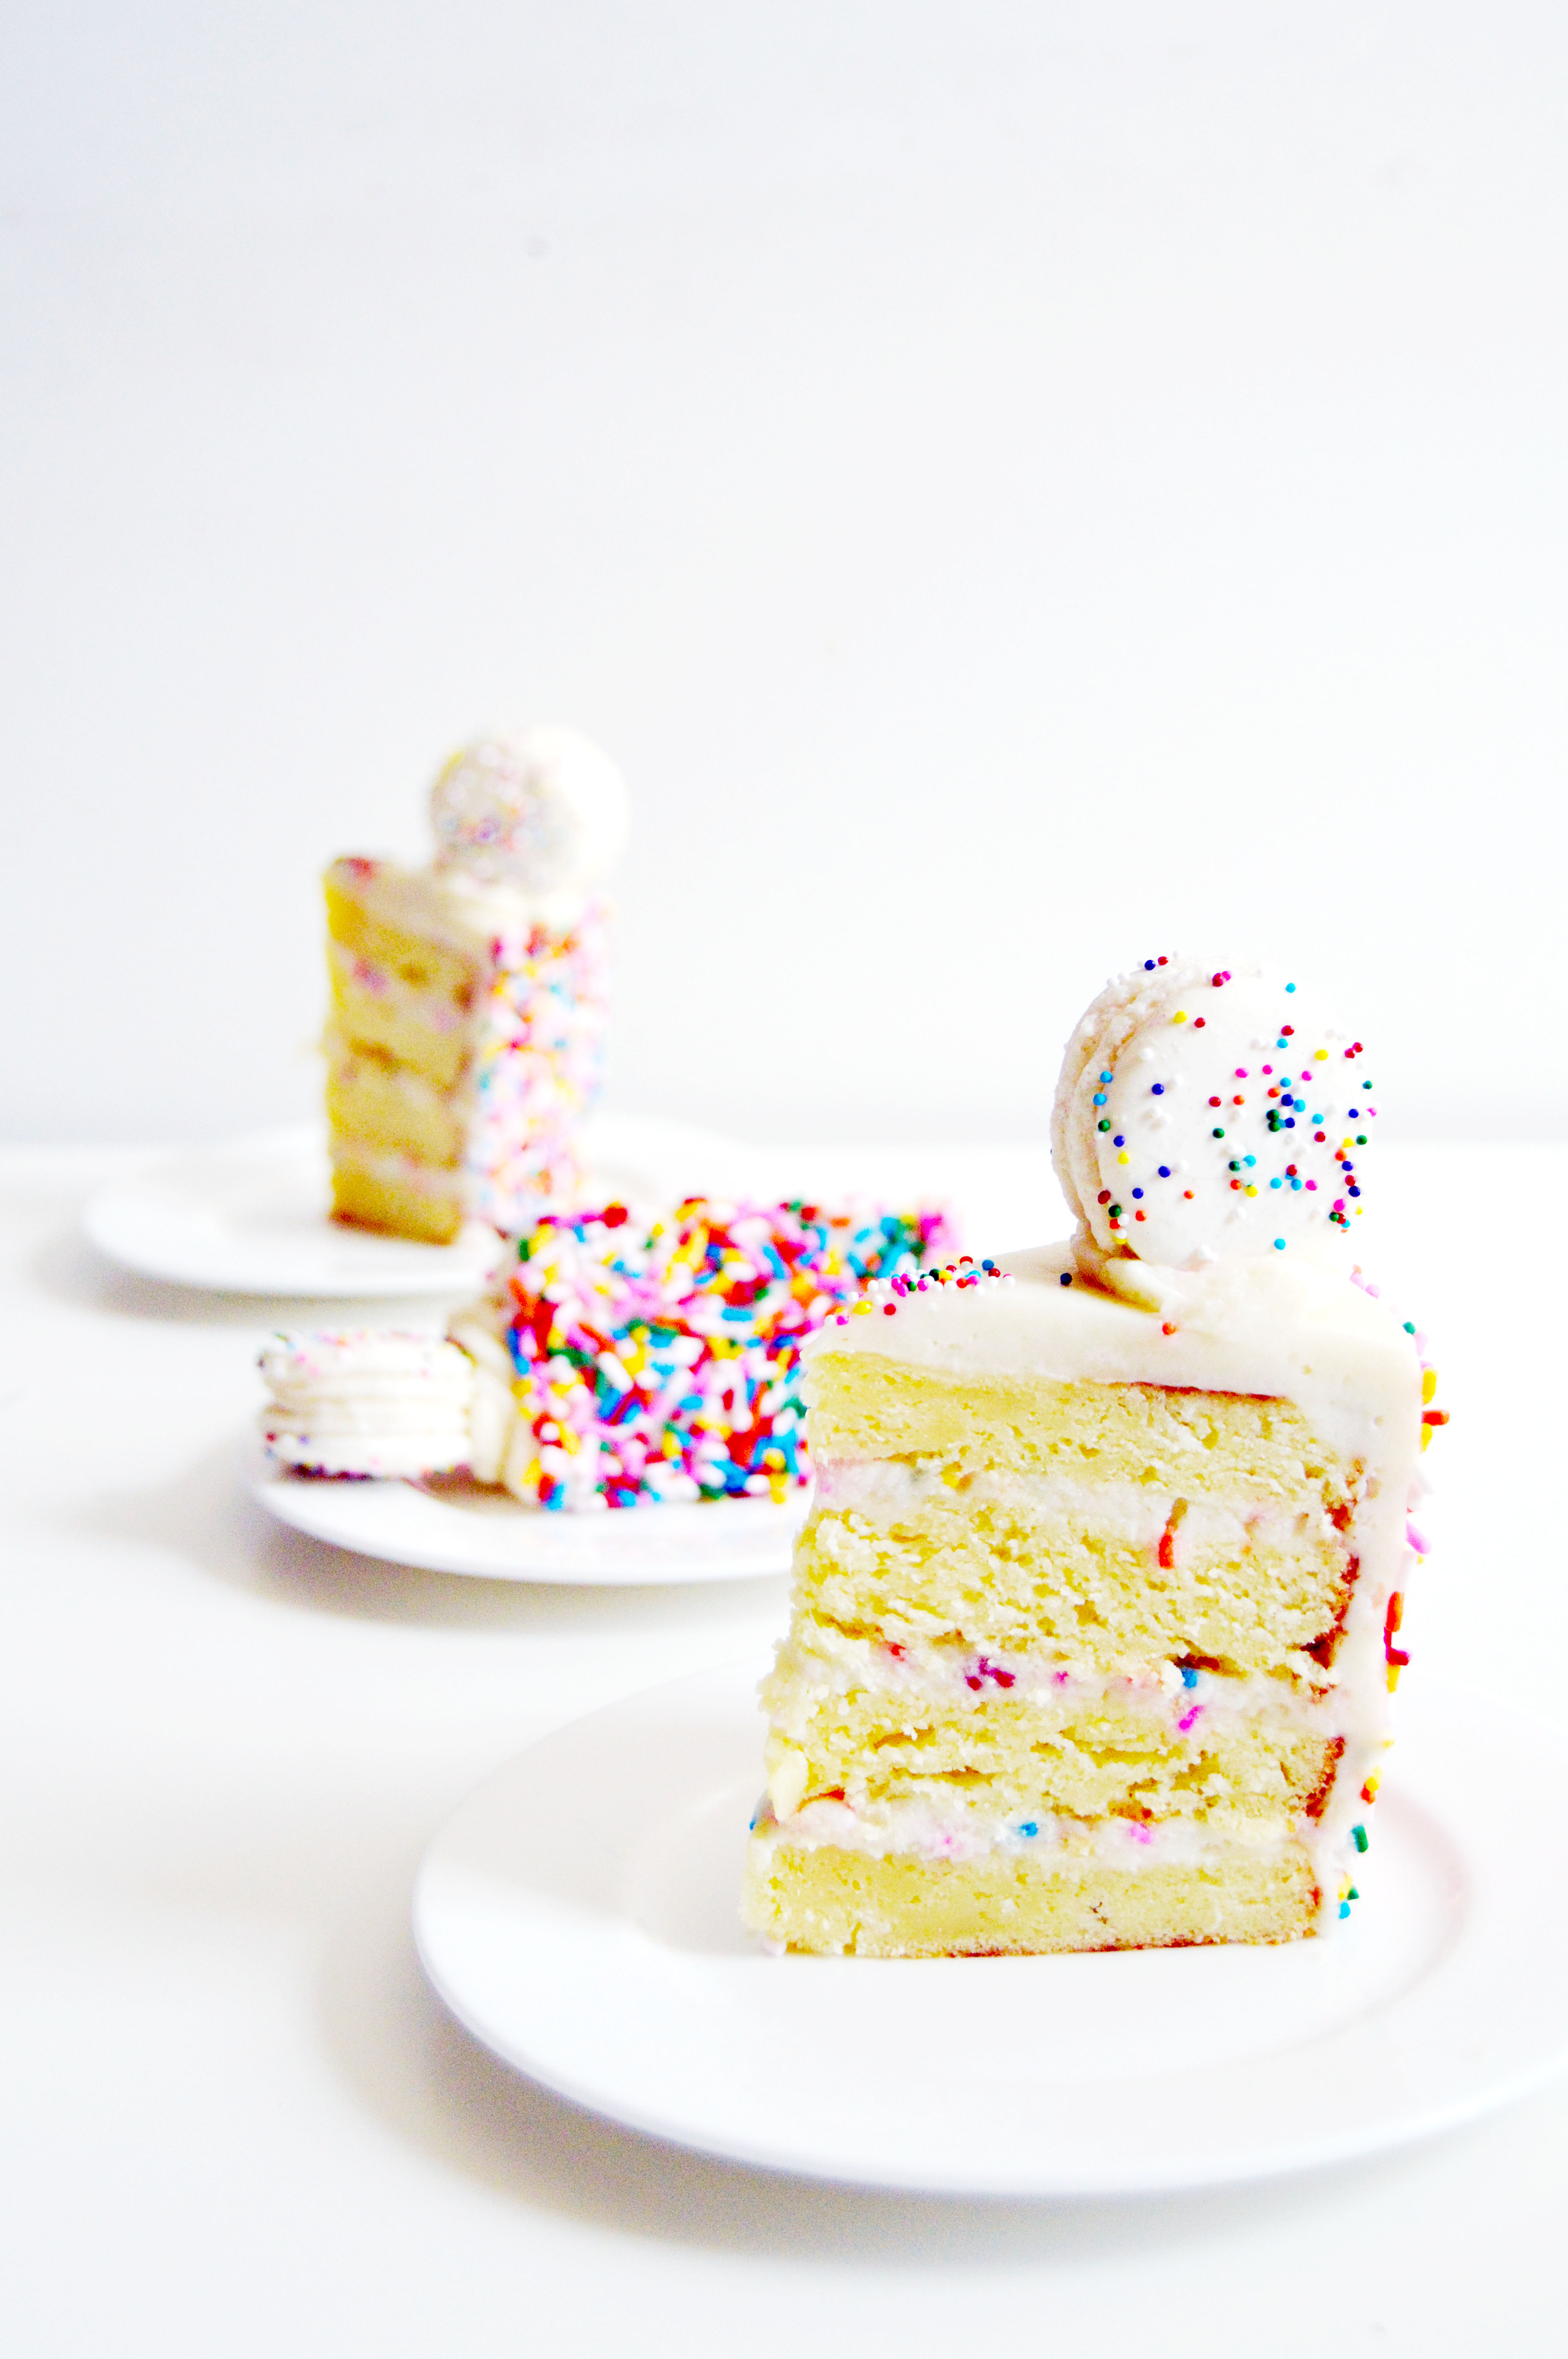
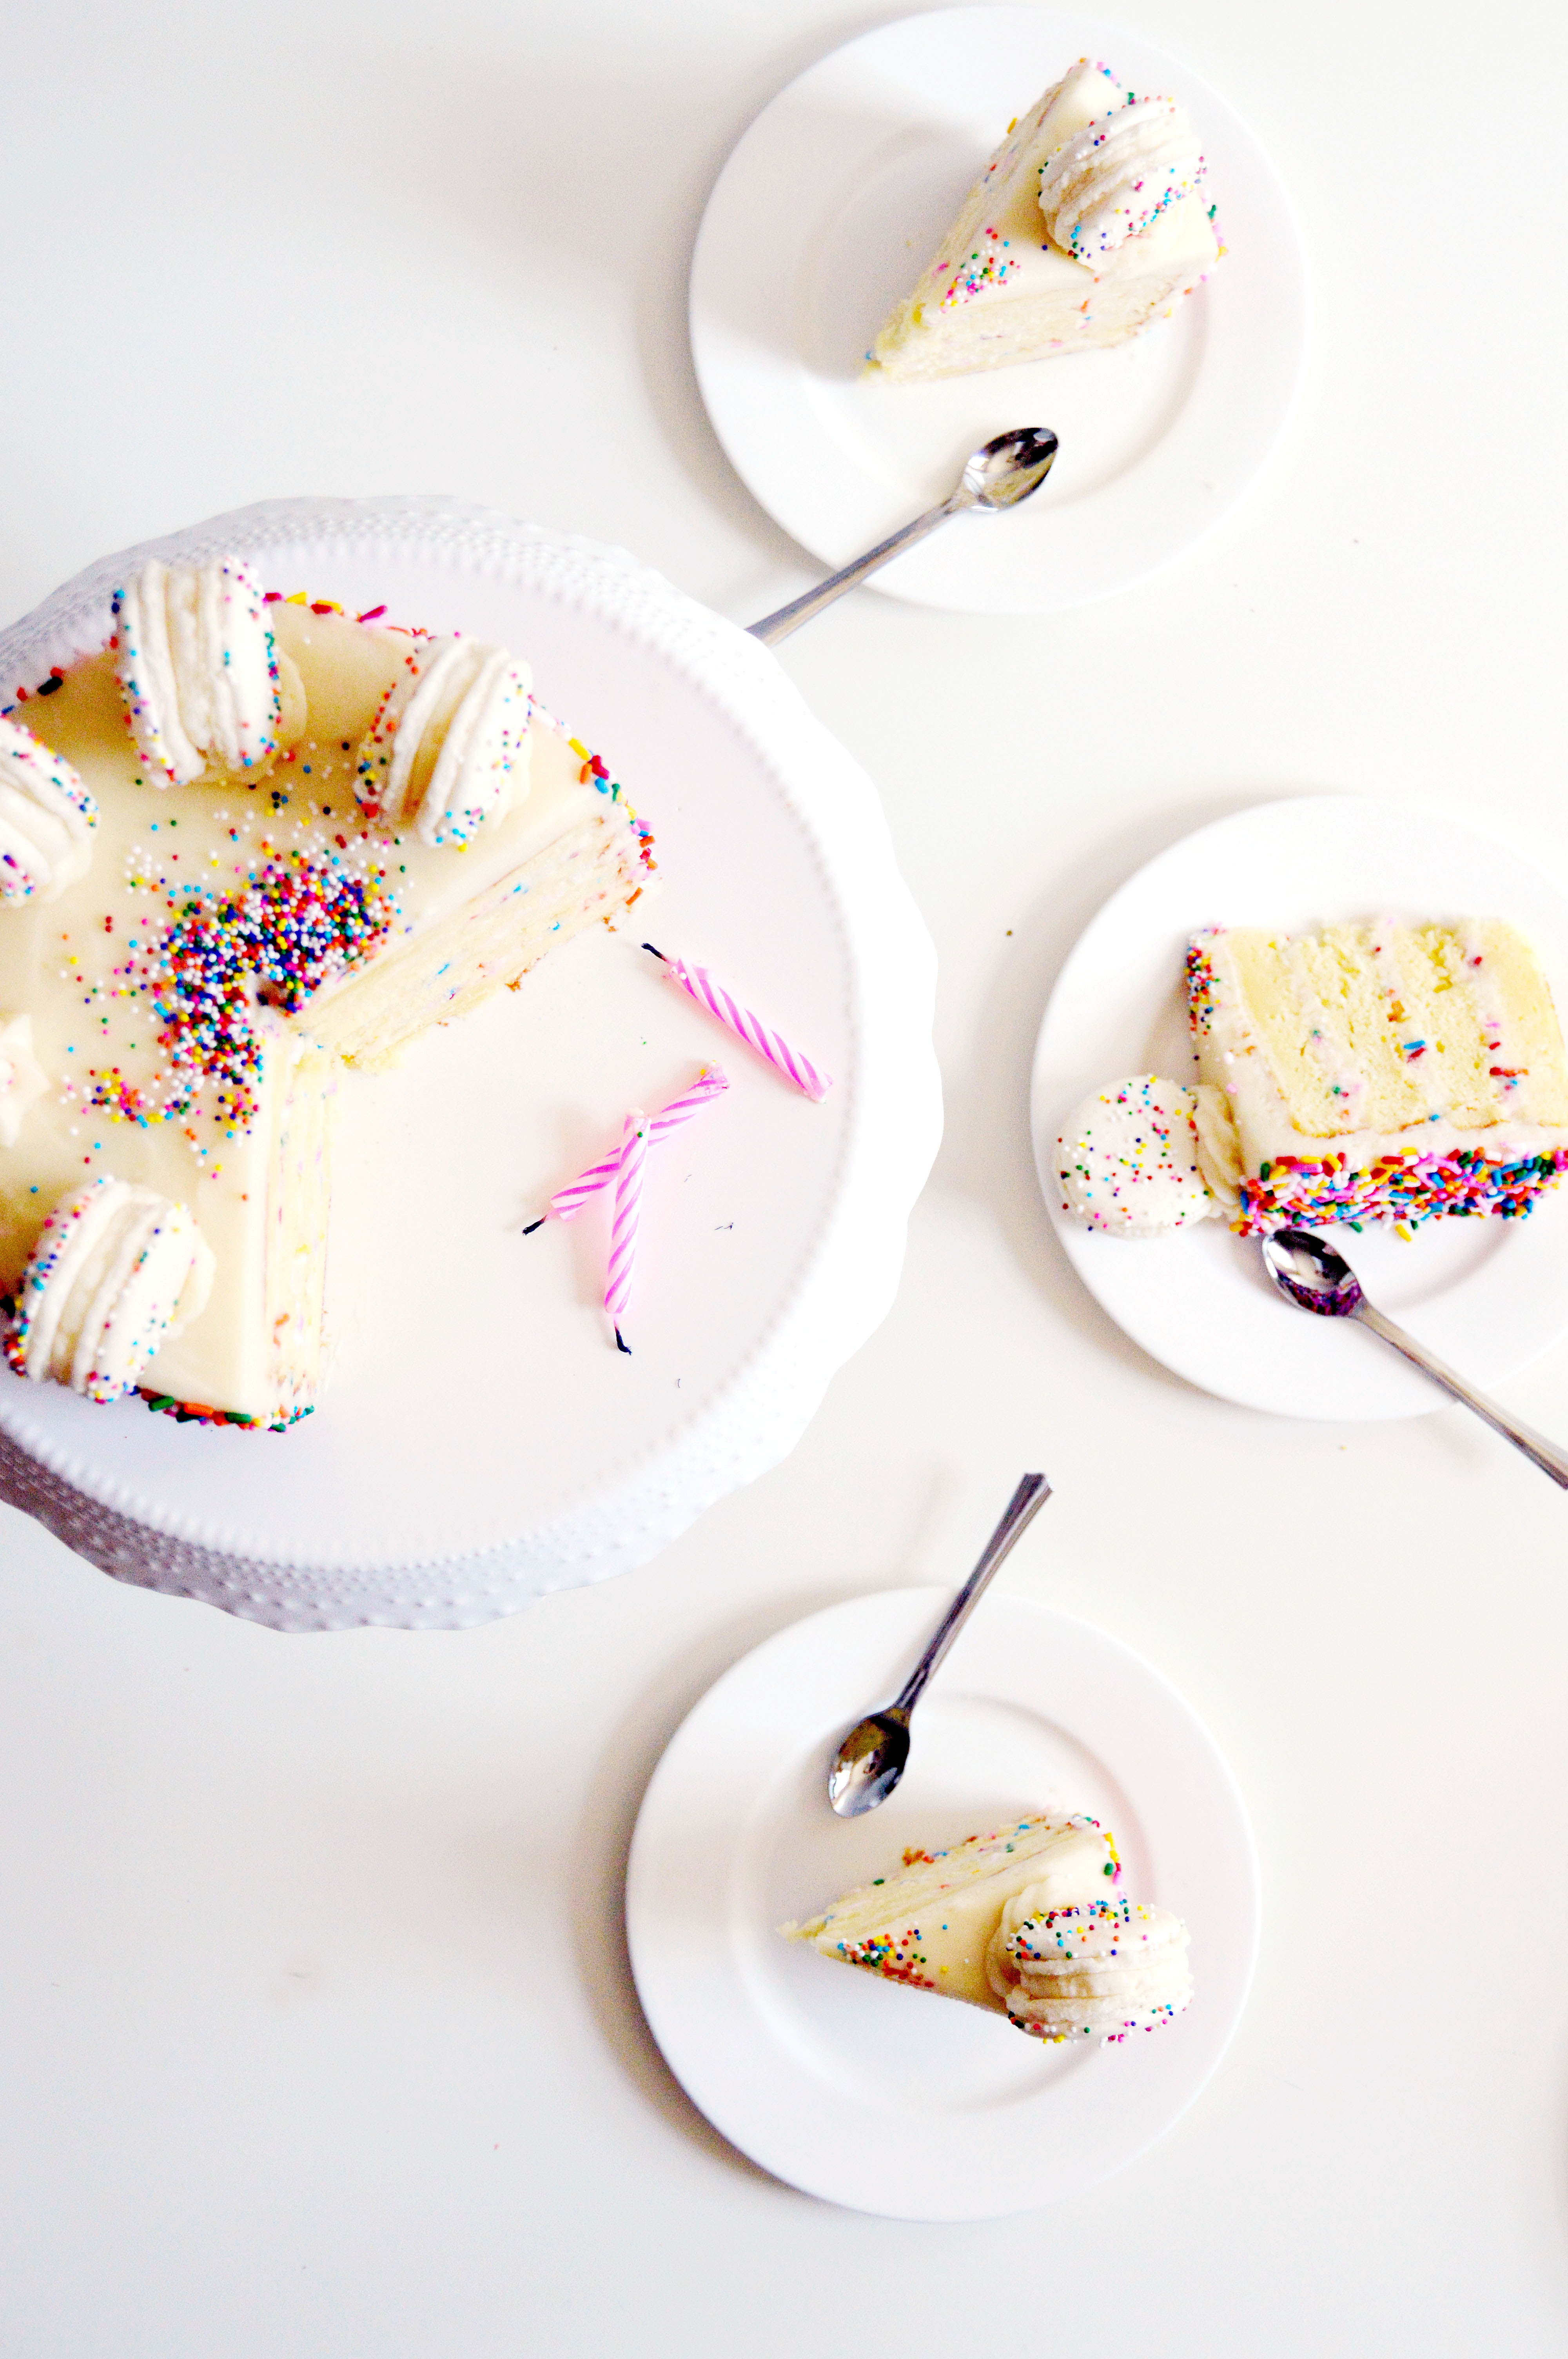
This may be the most romantic cake I’ve made. (Followed closely by this one.)

Red Velvet Rose Pavlova
Makes one 4-layered mini cake

Ingredients
300 g. superfine sugar
150 g. egg whites, room temperature
1 pinch cream of tartar
2 tbsp. cocoa powder
red gel food color
1 batch of cream cheese rose whipped cream (recipe below)
mini red roses, organic pesticide-free (for decoration)

Instructions:

  1. Preheat oven to 400˚F and line a rimmed baking sheet with parchment paper.
  2. Spread sugar in an even layer over parchment.
  3. In the bowl of a standing mixer fitted with the whisk attachment, add the egg whites and the cream of tartar.
  4. Place sugar into the oven and bake until the edges of the sugar begins to melt but not brown, about 5 minutes.
  5. Once the sugar begins to melt, turn the mixer onto high.
  6. Remove baking sheet from the oven and the eggs whites should be foamy.
  7. Turn the mixer to medium high and slowly pour the hot sugar from the parchment paper into egg whites.
  8. Once all the sugar is added, turn the mixer onto high and mix until stiff, shiny peaks form.
  9. Reserve ¼ c. of white meringue batter in a different bowl.
  10. Add cocoa powder and red gel food color to the rest of the batter and mix until desired color is reached.
  11. Reserve ¼ c. of red meringue batter in a separate bowl.
  12. Reduce oven to lowest setting 140˚F.
  13. Line two baking sheets with parchment paper.
  14. On one baking sheet, spoon 4 five-inch circles of the red meringue.
  15. Fit a medium closed star piping tip into a piping bag and add ¼ c. each of reserved white and red meringue batter.
  16. On the second baking sheet, form small roses by making small circles with the piping tip.
  17. Bake the baking sheet with the five-inch circles for 1- 2 hours until they are crisp and hollow.
  18. Bake the baking sheet with the mini roses for 30 minutes to 1 hour until they are crisp and hollow.
  19. Turn off oven and let it dry out for about 30 minutes to an hour.
  20. When meringues are completely cool and dry, alternate a layer of the meringue with the layer of the whipped cream.
  21. Decorate the top with the mini meringue roses and mini roses.

Cream Cheese Rose Whipped Cream

Ingredients:

1 ½ c. heavy whipping cream, cold
4 oz. cream cheese, room temperature
½ c. powdered sugar
½ – 1 tsp. rose water (be careful with the rose water, too much of it will make the frosting taste like soap)

Instructions:

  1. In a bowl of a standing mixer fitted with the whisk attachment, whip the heavy cream until stiff peaks form.
  2. Set aside the whipped cream mixture into a different bowl.
  3. In the same bowl, add the cream cheese and powdered sugar and mix until light, fluffy and fully incorporated.
  4. Fold the whipped cream into the cream cheese mixture.
  5. Add ½ tsp. rose water and taste. If you feel like it needs more, add ¼ tsp. at a time until desired flavor is reached.

Coffee Macarons

coffee macaronsWhere in the world did the time go?? It’s a week before Thanksgiving! I always feel a little overwhelmed right before the week of Thanksgiving. Not so much the day of, because by then I have already planned and prepped for the big day. But the week before, I’m trying to figure out grocery lists, what dishes to remake from last year and try for this year, and the number of people coming while doing every day things like work, house chores and errands. This is the first time I ever felt like leaving Thanksgiving dinner to someone else (that says volumes since I’ve been doing Thanksgiving dinner since I was a junior in high school).
coffee macaron shellAs children of Korean immigrants, we didn’t celebrate American holidays like my non-Asian friends. Thanksgiving was just another day off of school (which we were more than grateful for) and we would maybe have a chicken for dinner. In hindsight, we didn’t even have chicken every year. I didn’t even care about having a Thanksgiving meal with turkey until my one friend said to me, “What?? You don’t eat turkey on Thanksgiving?? No mashed potatoes? No gravy or stuffing? What about sweet potatoes with marshmallows, you must have that at least.” Mind you this was over AIM (omg remember those days?? Being on AIM was the lifeline to having a social life) and it may have sounded harsher than he intended in my mind. Either way, that night (the night before Thanksgiving) I searched high and low for a turkey recipe and in the morning, I insisted that my dad buy us a turkey. (Now that I think about it, it was a miracle in itself to have found a fresh turkey the day of Thanksgiving.) So with a fresh 12-lb. turkey with no other fixings, we made our first Thanksgiving meal. It was just salted, peppered and basted with butter and it was the most delicious turkey I’ve ever had.
coffee macaronMy meals since then have evolved and developed. We have had a variation of every side dish you can think of (mashed and roasted potatoes and vegetables, stuffing, salads, cranberry sauce, gravy, sweet potatoes, mac and cheese…). I’ve tried about every method there is to making a turkey (brined, dry-brined, roasted upside down halfway and turned over, spatchcocked, blanketed with a weave of bacon strips…) with the exception of deep frying. But nothing ever tastes as good as that first turkey I made.

keurig macaronsEither way, yes, for once in my life I feel overwhelmed with Thanksgiving. Last year, when my brother asked, “Are we having a Thanksgiving dinner with everyone?” I replied, “As long as I’m living and breathing, there is always Thanksgiving dinner.” I think I forget what we started with and it’s so easy to see the tough part of the task that it’s even easier to dismiss the highlights of the fruit of the labor. So this year, I’m so incredibly thankful for every opportunity and task that I’ve been given. Not because I’m so gung ho about the work, but because I’ve been blessed with the ability and the environment to accomplish it and that is more than enough to be thankful for.
DSC_0484*
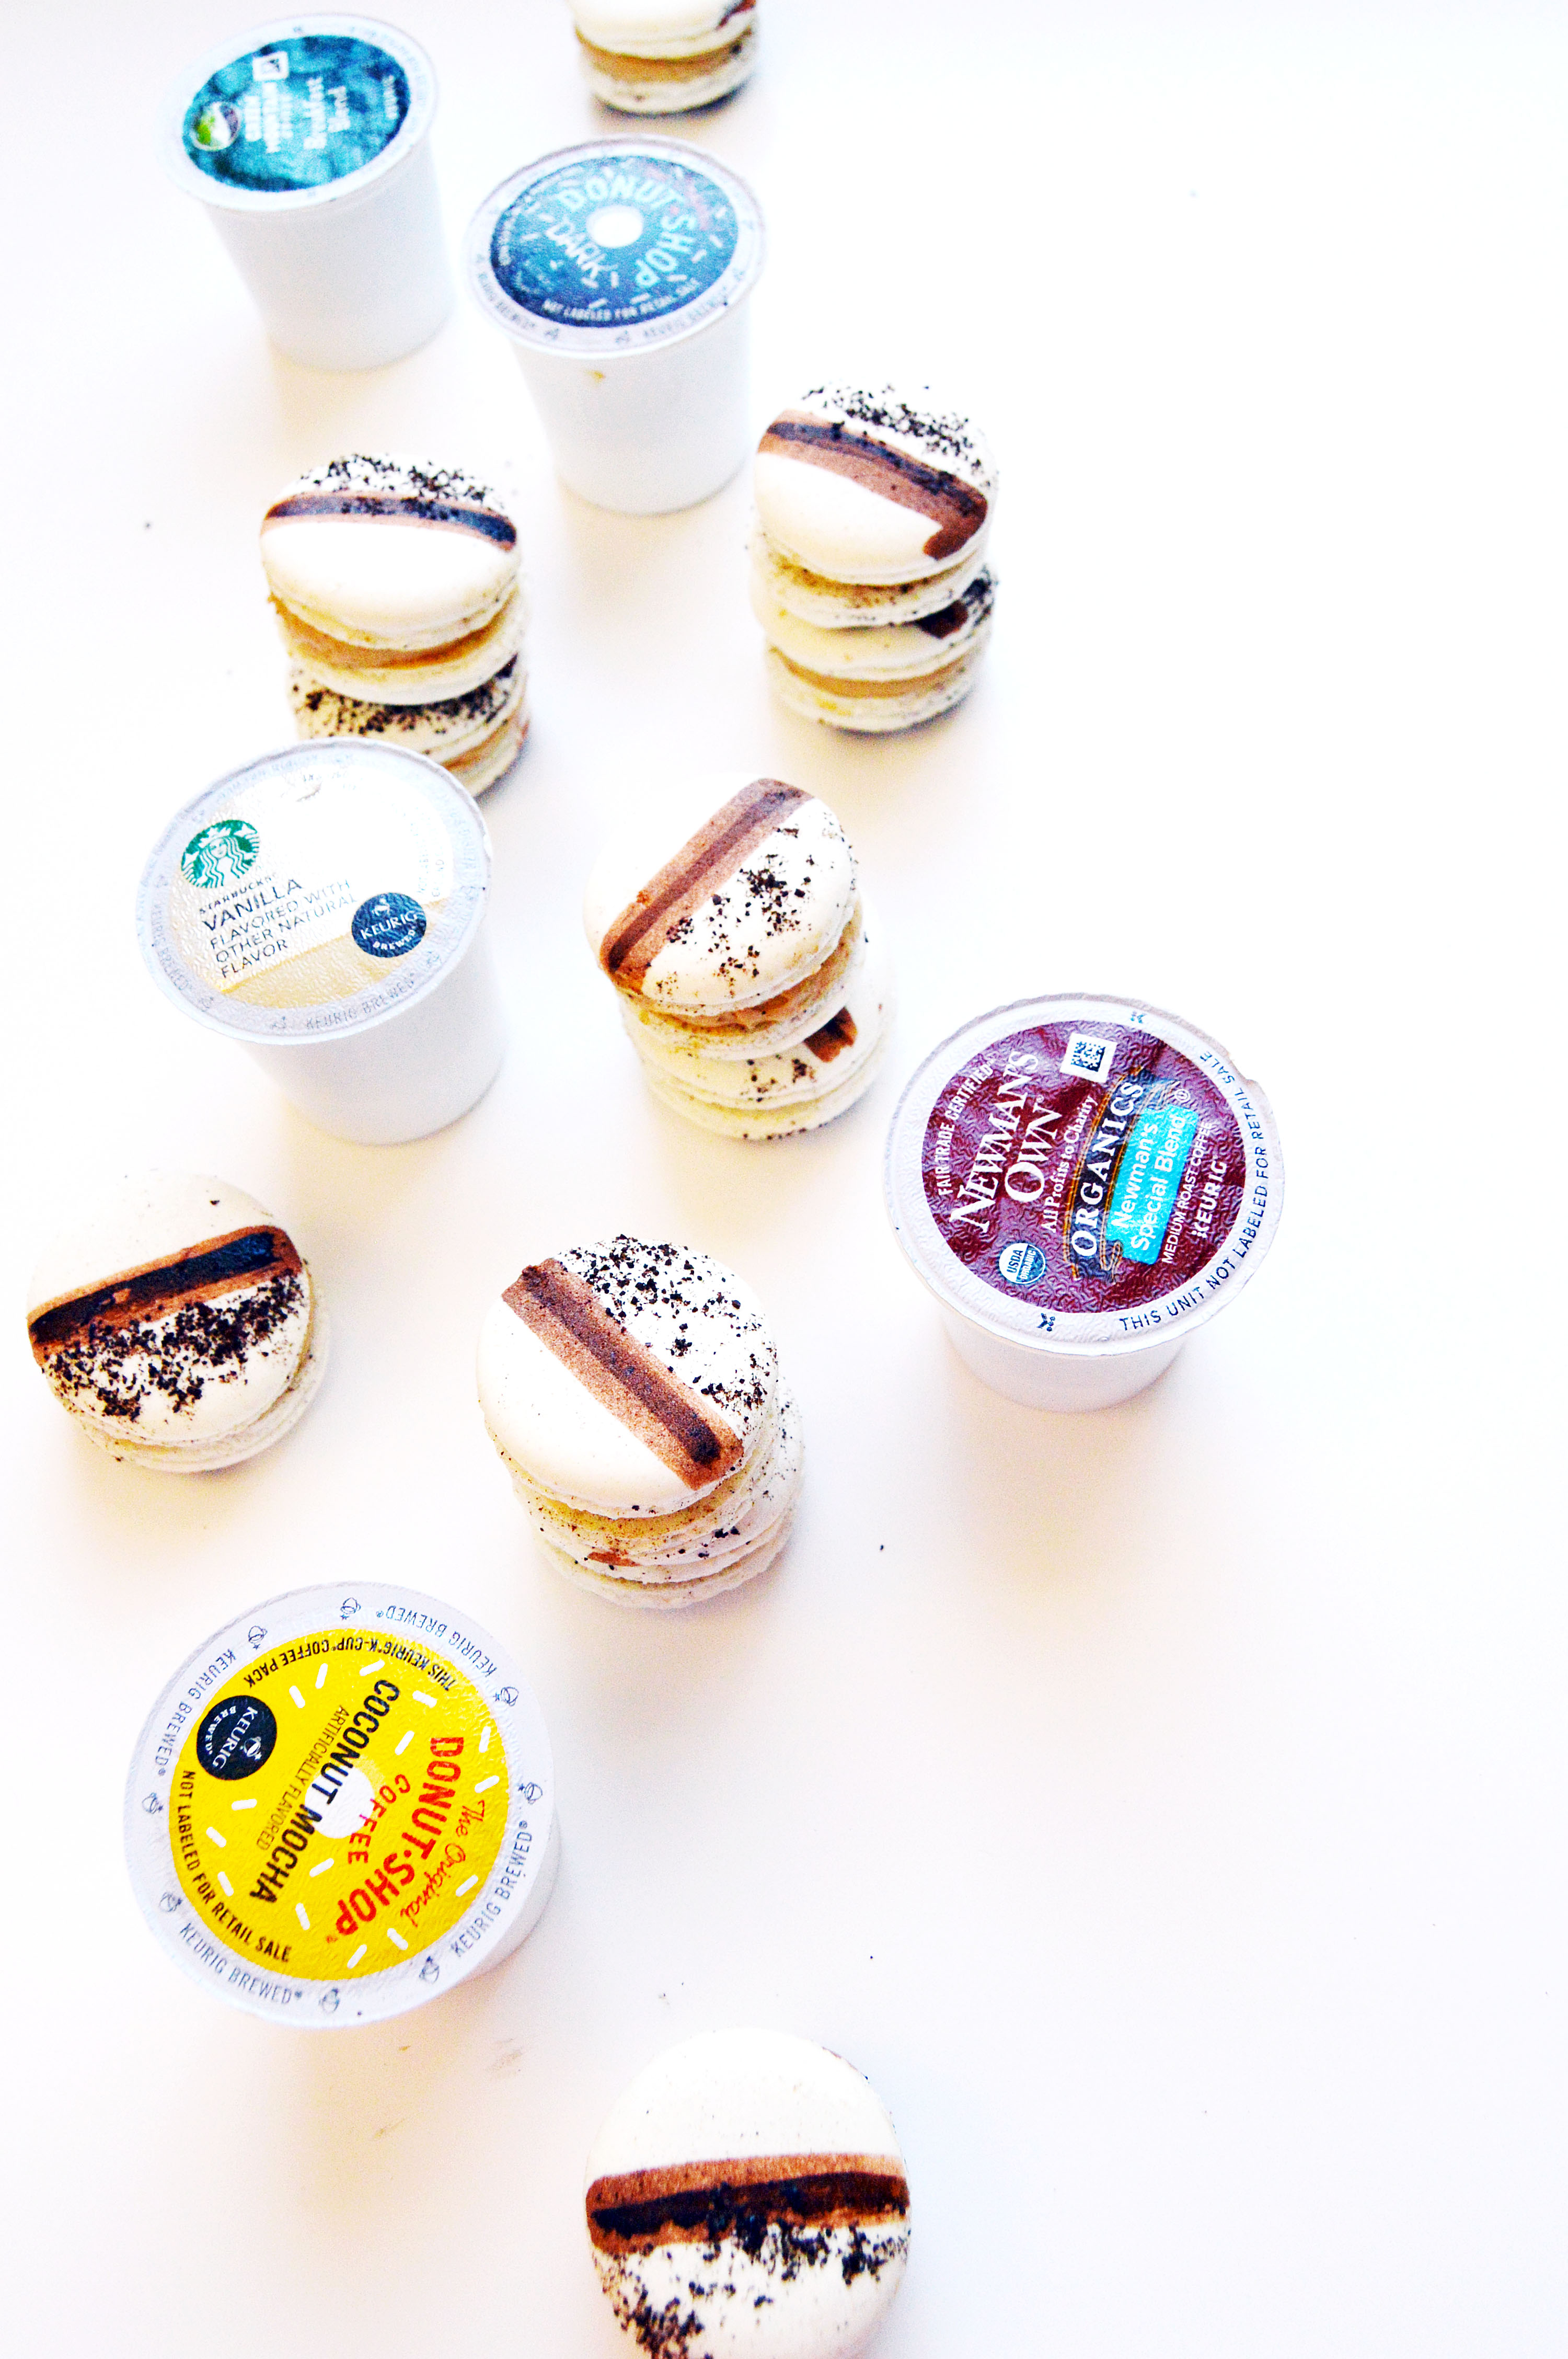
Somehow I ended up with this soliloquy about Thanksgiving. But this macaron would be the perfect ending to a meal. Thanks to the coffee emulsion (which is more potent than an extract) and a sprinkling of coffee grounds (I just opened up a fresh Keurig pod), it is bursting with coffee flavor. Also, I’m kinda macaron-ed out. Hahaha So it may be a while before you see another macaron post. But I’m looking forward to bringing different things for the blog. 🙂

Coffee Macarons

For the macaron shell:

Ingredients:
212 g. almond meal
212 g. powdered sugar
172 g. egg whites, divided to 82 g. and 90 g (aged, if possible)
236 g. sugar
158 g. water
fresh ground coffee (for garnish)
brown gel food coloring (for decorating the macaron)
vodka (for diluting the food coloring)

Instructions:

  1. Line two baking sheets with parchment paper or silicone mats.
  2. In the bowl of a food processor, add the almond meal and powdered sugar and pulse until thoroughly combined.
  3. Sift the mixture over a large mixing bowl, throwing out the lumps as they appear.  Add 82 g. of the egg whites and stir until you get a thick mixture.
  4. In a small pot attached with a candy thermometer, combine the sugar and water over medium heat and boil until the syrup reaches 200˚F.
  5. Once the syrup reaches 200˚F, start whipping the remaining 90 g. in the bowl of your stand mixer with the whisk attachment on medium speed until soft peaks are reached.
  6. Once the syrup reaches 248 ˚F, remove the pot off the burner and slowly pour the syrup down the side of the mixing bowl with the egg whites on medium speed.
  7. Once the egg whites are fully incorporated, increase the speed to medium high until egg whites form glossy, stiff peaks.
  8. Mix a ⅓ of the egg white mix to the almond mixture and stir together until the batter is slightly lighter and less pasty.  From then on, fold in ⅓ of the egg white mixture at a time until the mixture “flows like magma”.  The mixture should be smooth and run thick ribbons off the spatula.
  9. With a pastry bag fitted with a ½ in. plain tip, pipe 1¼ – 1½ in. rounds.
  10. The piped batter may have peaks but should smooth away in a minute or two.
  11. Sprinkle coffee grounds on only 1/3 of the macaron shell.
  12. Let the batter stand until the tops of the macarons are dry to the touch, about 30 minutes to 1 hour.
  13. Preheat the oven to 325-350˚F.  If your oven tends to run hot go for 325˚F, if not then 350˚F.
  14. Lower the heat to from 350˚F to 300˚F. (If starting from 325˚F, lower to 275˚F.)
  15. Bake 10-12 minutes, until the feet are formed and the tops are smooth.  The macaron shell is done when you slightly wiggle it and it starts to come off of the parchment paper / silicone mat.
  16. Remove pan from oven and reheat oven to higher temperature for 10 minutes before baking the next tray, lowering the temperature when you start baking it.
  17. Continue until you bake all of the macaron shells.
  18. Once the macarons have cooled, dilute brown food coloring in some vodka to make it paint-like.
  19. With a flat brush (food-only use), draw a thick line down the middle of the macaron.
  20. Once all the macarons have been drawn, dilute food coloring with a drop or two of vodka for a stronger color and turning the flat brush to the side, draw a thin stripe down the thick light brown stripe.
  21. Let dry and fill with coffee frosting.

For the coffee frosting:

Ingredients:
1 c. whole milk
¼ c. flour
⅛ tsp. salt
8 oz. (2 sticks) unsalted butter, room temperature
½ c. sugar
1 – 1½ tbsp. coffee emulsion  

Instructions:

  1. In a small pot over medium heat, whisk milk, salt and flour until combined.
  2. Continuously whisk mixture until thickened to a pudding like consistency.
  3. Once thickened, strain through a mesh strainer into a bowl with a spatula to remove lumps.
  4. Place a piece of plastic wrap on top of the flour mixture (to prevent skin from forming) and put bowl into the fridge until fully cool.
  5. In a mixer bowl fitted with the whisk attachment, mix the sugar and butter on high speed until fluffy and pale about, 5-10 minutes.
  6. Add the chilled flour mixture and continue to whip on high speed until the sugar is completely dissolved and the mixture is no longer gritty, about 5-10 minutes.
  7. Add 1 tbsp. coffee emulsion and mix until combined.
  8. Taste and if you want a stronger flavor, add another ½ tbsp. coffee emulsion.

Avocado Bacon Spiralized Hotdogs

bacon avocado hotdogsIt’s rare that I find a technique that is life-changing. I love trying out new ways to do things. Mostly because they are novel and I’m always looking for ways to grow and learn in general. I’ll usually try something once or twice, but that’s about it. It’s on to the next obsession, the next trend, the next new way to do something.
spiralized bacon avocado hotdogBut this, oh man… It is such a simple technique but it makes the average hot dog 10000% tastier than what it was before. You simply stick a skewer into the sausage, take a knife and create a swirl pattern along the meat, which will result in a Slinky looking piece of meat. It does not look like much but once you cook it, the increased surface to volume ratio creates extra crisp, juicy, meaty goodness.
bacon avocado hotdogThe first time I made this on a grill, the neighboring party came over and asked what kind of meat I was cooking. Once they saw that it was just a hot dog cut up into a fancy shape, they amused at its novelty and went about their merry way. Little did I know that I was a monkey about to touch the monolith.
bacon avocado hot dogsI’ve eaten my fair share of hot dogs and this one is right at the top. Neck and neck with the deep fried hot dogs they sell at a local hot dog joint in my town. Yes, true to the busy spatula fashion, I had to jazz it up by adding bacon, avocado, Sriracha and Kewpie mayo. (Which by the way, if you can do it, you must. It is a serious flavor bomb.) But honestly, this post is really about the technique. Simply cutting it up in a spiral shape will be life changing. I promise.
bacon avocado hot dogs
Avocado Bacon Spiralized Hotdogs

Ingredients:
Hot dog sausage
Avocado, peeled and cut into thin slices
Bacon
Sriracha
Kewpie Mayo (yes, there is a difference between this and regular mayonnaise)
Potato hot dog buns
Skewers (I understand that this is not an ingredient but SO NECESSARY)

Instructions:

  1. Stick a skewer through the middle of a hot dog sausage. If it does not go straight and pokes out the side, pull it back and continue until you get it to the other end of the sausage.
  2. With a sharp knife, make a continuous spiral cut along the sausage, using the skewer as a guide to know how deep to cut the sausage.
  3. Spread a thin layer of mayo over potato hot dog buns and toast it in a heated frying pan.
  4. Remove toasted buns and cook sausage over medium heat until well browned and crispy.
  5. Remove sausages, turn heat to low and cook bacon until desired level of crispness.
  6. Top toasted hot dog bun with sausage, avocado slices, bacon, Kewpie mayo and Sriracha.
  7. Enjoy immensely.

Tiramisu Crunch Ice Cream Cake

Tiramisu Crunch Ice Cream Cake 1I made this cake for my sister’s birthday last week. As far as sisters go, my sister and I are as different as night and day. We don’t look alike, with the exception that we both share freckles. Growing up, I would be pale from staying in and reading books while she would be as tan as can be from playing outside. She loves the color black while I love white. She is loud and I am quiet. She prefers vegetables, while I prefer steak. She likes things simple and casual while I cannot get enough frills and bows. She favors pants in comparison to my preference to dresses. She is also not partial to desserts whereas I cannot live without them (as evidenced by this blog). I always tell people that whatever she is good at, I lack it and whatever I am good at, she lacks it.
Tiramisu Ice Cream Cake 3I love creating cakes and I look forward to baking one for all of my family members on their special day. But my sister does not like cake. HOW?! As someone whose life (or a good part of their life) revolves around frosting, and sugar and flour, it is hard to understand someone who does not like cake. So every year on her birthday, I resort to an ice cream cake. Because let’s face it, who doesn’t like ice cream?
Tiramisu Crunch Ice Cream Cake 2Tiramisu was one of my least favorite desserts because I used to rarely drink coffee. If anything, I loved it for the mascarpone cream. (Ah, mascarpone cream… everything you touch becomes a magical milky confection.) But ever since I gave up diet coke, I’ve been leaning towards coffee for my caffeine fix and I’ve managed to fall in love with the bitter brew. My sister’s preferred choice of drink has always been coffee, so tiramisu was a no-brainer when it came to a flavor choice.
layoutI have to say, this cake ranks as one of the best cakes to come out of my kitchen. It features layers of coffee ice cream sandwiched between coffee syrup soaked sponge cake, chocolate almond crispies (!!!), and is covered by a blanket of mascarpone whipped cream and adorned with dark chocolate accents and cocoa powder. I know. It sounds like it is too much work and it is true that there are many components to the cake. However, each part is simple to make!
mascarpone cream I always use high quality ice cream when it comes to ice cream cakes. It is important to have the lower air content so that the ice cream stays firmer, longer. I used Haagen-Dazs in mine. The sponge cake is a standard sponge cake that is divided in half. The coffee syrup is nothing more than a mix of sugar and dark brewed coffee. The chocolate almond crispies provide a crunch and a textural contrast to the smooth ice cream and cake. To make it, you simply stir chocolate almond spread with Rice Krispies cereal until it is evenly coated. The mascarpone whipped cream is a mix of vanilla extract, powdered sugar, mascarpone, and cool whip. I am not a fan of cool whip, but when it comes to ice cream cakes, I think it is superior in terms of spreadability and stability. To make the chocolate accents, simply melt some chocolate and using a small offset spatula, drag a dollop of chocolate over parchment paper and repeat until you have as many pieces as you need. They will not all look uniform, but I think that’s what makes it look slightly “rustic”.
Tiramisu Ice Cream Cake 4I understand if you are a little overwhelmed by it. But trust me, it is worth every minute you spend making it. 😉

Tiramisu Crunch Ice Cream Cake

Ingredients:

56 oz. premium coffee ice cream, softened
sponge cake, halved horizontally (recipe below)
coffee simple syrup (recipe below)
chocolate almond crispies (recipe below)
whipped mascarpone cream (recipe below)
dark chocolate, melted (for garnish)
cocoa powder (for garnish)

Instructions:

  1. Line two 8-inch cake pans that are 3 inches deep with a double layer of plastic wrap that overhangs over the cake pan.
  2. In one of the cake pans, place one half of the sponge cake and brush liberally with coffee syrup. (You do not want to soak the cake, but put enough of it that it is moist.)
  3. Layer 28 oz. of coffee ice cream over the cake base, smooth so that the coffee base is as smooth as you can get it.
  4. Place pan in freezer for about 10 minutes.
  5. Meanwhile, make the chocolate almond crispies.
  6. Get half of the chocolate almond crispies and layer it over the ice cream, flattening it with an offset spatula to make it as flat, even and smooth as possible.
  7. Wrap the overhanging plastic wrap over the cake pan and place in freezer until completely frozen, preferably overnight.
  8. In the second lined cake pan, smooth 28 oz. of coffee ice cream with offset spatula evenly.
  9. Chill in freezer for 10 minutes.
  10. Layer the remaining chocolate almond crispies over the coffee ice cream.
  11. Place the second half of the sponge cake and brush liberally with coffee simple syrup.
  12. Wrap the overhanging plastic wrap over the cake pan and place in freezer until completely frozen, preferably overnight.
  13. On a cake board you are planning to serve, carefully unmold the first cake pan you put together by lifting the plastic wrap off of the pan and unwrapping it completely.
  14. Take the second cake pan and unmold it, and place on top of the first cake pan layer with the sponge cake layer facing downwards. Apply pressure to fuse the two layers together.
  15. Place in freezer to harden for about 20-30 minutes.
  16. Meanwhile, make the whipped mascarpone cream.
  17. Remove frozen cake from freezer and frost the outside of the cake with ¾ of the whipped mascarpone cream.
  18. Place cake back in the freezer and put the remaining whipped mascarpone cream in a piping bag with a plain large round tip.
  19. Remove cake from freezer and use the piping bag to place decorative dollops of cream over the top of the cake by making even vertical rows of cream.
  20. Using a mesh strainer, liberally dust the top of the cake with cocoa powder. The cocoa powder will dust the surface of the cake board too, carefully use a wet paper towel to clean the cake board off.
  21. Place cake back in the freezer.
  22. While cake is freezing, make decorative chocolate pieces.
  23. Line two baking sheets with parchment paper.
  24. Using a small offset spatula, drag dollops of dark chocolate to create a streak. Use larger dollops for the bottom and smaller dollops for the top. Place in refrigerator to set for 5-10 minutes.
  25. When set, remove the cake from the freezer and decorate the bottom of the cake with the longer chocolate pieces and the top of the cake with the smaller chocolate pieces.
  26. Refrigerate until ready to serve.

Vanilla Sponge Cake

Ingredients:

½ c. all-purpose flour
½ c. cornstarch
4 large eggs, separated
1 tsp. vanilla extract
¾ c. sugar, divided
pinch of salt

Instructions:

  1. Preheat oven to 350˚F and grease the inside of an 8 inch baking pan with nonstick spray.
  2. In a small bowl, sift together flour and cornstarch.
  3. In the bowl of a standing mixer fitted with the whisk attachment, beat the egg yolks, vanilla extract, and ½ c. sugar on high until thick and pale.
  4. Transfer mixture into a large bowl.
  5. Thoroughly wash and dry mixing bowl and whisk attachment.
  6. In a clean bowl of a standing mixer fitted with the whisk attachment, beat egg whites and salt until soft peaks form.
  7. Slowly incorporate the remaining ¼ c. of sugar into the egg whites and mix until whites are stiff and glossy.
  8. Fold egg whites into the egg yolk mixture in three additions.
  9. Fold in flour mixture
  10. Transfer batter into the prepared cake pan.
  11. Bake 30-40 minutes or until a cake tester inserted into the center of the cake comes out clean.
  12. Cool cake on a wire rack until ready for use.

Coffee Simple Syrup

Ingredients:

½ c. strong, dark coffee
¼ c. sugar

Instructions:

  1. Heat coffee and sugar together until sugar is completely dissolved.
  2. Cool until ready for use.

Chocolate Almond Crispies

Ingredients:

3 c. Rice Krispies Cereal
1 c. chocolate almond spread (I used this one from Trader Joe’s)

Instructions:

  1. Heat chocolate almond spread until easily pourable.
  2. In a large bowl, mix chocolate almond spread and cereal until cereal is evenly coated.
  3. Cool mixture until ready for use.

Whipped Mascarpone Cream

Ingredients:

12 oz. Cool Whip (thawed)
1 lb. mascarpone cheese
3 tbsp. powdered sugar
1 tsp. vanilla extract

Instructions:

  1. In a large bowl, whip Cool Whip and half of mascarpone cheese until smooth with an electric hand mixer.
  2. Add the remaining half of the Cool Whip and mix until incorporated. Do not over whip.
  3. Add powdered sugar and vanilla extract and whip until homogeneous.

* Vanilla Sponge Cake recipe from Martha Stewart.

A (Belated) Blogiversary, A Funfetti Cake Batter Cake & A Giveaway

Funfetti Cake Batter Cake and Macarons 3It’s my first Blogiversary! One year ago, I started blogging on this little website with a lot of encouragement from friends and family. I cannot believe that it has already been a year. Each time I am able to share recipes, tutorials or whatever this brain of mine thinks of, I am so grateful to be able to send off a little piece of my creativity into the webosphere.  I’m even more grateful to the all of you who take the time out of your day to read the little bits of me that I post on my wee space on the internet.
funfetti macarons Funfetti Cake Batter Cake and Macarons 2Because anything celebratory requires sprinkles (or glitter) in my brain, I made a little cake chock-full with sprinkles for this post. It has sprinkles in the frosting, around the outside, and on the macarons. (I originally wanted to do a funfetti cake, but being me I totally forgot to add the sprinkles to the cake batter so instead it went into the frosting.) And because I love all things macarons, I added some funfetti macarons. The cake and the macarons are filled with cake batter frosting. My secret ingredient to making it taste like cake batter? Boxed cake mix. *GASP*I know. I never ever ever ever ever use boxed cake mix but this is the one time exception. And because it uses boxed cake mix, it is definitely on the sweeter side of the dessert spectrum. It also has that nostalgic bake sale cupcake taste that I loved in my youth.
Funfetti Cake Batter Cake and Macarons 5 Funfetti Cake Batter Cake and Macarons 6To celebrate my ridiculously belated blogiversary, I’m hosting a giveaway! If you know me at all, Target is one of my favorite places to shop. I’m telling you, I cannot walk out of that store without something in my hand! It literally has everything you need so I’m giving away a $25 gift card so that you too can enjoy a small shopping trip to Target.*  Entering the giveaway is so simple! Simply follow me on Instagram and like my giveaway photo and for an extra entry, like and leave a comment on this post about what kind of cake you like. The giveaway ends on Friday, May 8th and if the winner does not respond within 3 days, I will be selecting another one. Funfetti Cake Batter Cake and Macarons 4Funfetti Cake Batter Cake and Macarons

Vanilla Buttermilk Cake (recipe below)
Funfetti Cake Batter Frosting (recipe below)
Funfetti Macarons (recipe below)
1-2 c. Sprinkles

Instructions:

  1. Evenly fill and stack each layer of vanilla cake with funfetti cake batter frosting.
  2. Crumb coat the cake with a thin layer of cake batter frosting (funfetti cake batter frosting without the sprinkles.)
  3. Place cake in freezer for 5 minutes until the frosting on the outside sets firmly.
  4. Once crumb coat is set, frost the entire cake with cake batter frosting.
  5. Take a handful of sprinkles and slowly cup the outside of the cake, patting it to ensure full coverage. (This part will create a mess. Sprinkles will bounce and fall everywhere.)
  6. Let frosting set in freezer for 5 minutes.
  7. Take cake out and frost little mounds of frosting around the top of the cake and attach a funfetti macaron for decoration.

Vanilla Buttermilk Cake

Ingredients:
1.5 c. cake flour
1  c. sugar
½ tbsp. baking powder
⅛ tsp. salt
¾ c. buttermilk, divided
4 oz. unsalted butter, room temperature
2 eggs, room temperature
1 egg yolk
1 tsp. vanilla extract

Instructions:

  1. Preheat the oven to 350˚F and line four 6-inch cake pans with parchment paper.
  2. In a bowl of a standing mixer with the paddle attachment, add flour, sugar, baking powder, and salt. Mix until combined.
  3. On low speed, add ½ c. buttermilk and butter and mix until combined.
  4. In a separate bowl, whisk eggs, egg yolk, ¼ c. buttermilk, and vanilla extract until homogenous.
  5. On low speed, slowly add the egg mixture to the flour mixture.
  6. Increase speed to medium, and mix until combined.
  7. Evenly divide cake batter into the three cake pans.
  8. Bake about 20-25 minutes until cake is done or until a toothpick inserted into the center comes out clean.
  9. Let cool in pan for 10 minutes, and then move onto a cooling rack until completely cool.

Funfetti Cake Batter Frosting

Ingredients:
3 c. whole milk
¾ c. flour
¼ tsp. salt
1½ 1b. (6 sticks) unsalted butter, room temperature
3 c. sugar
¼ c. cake mix
1 tbsp. vanilla extract
½ c. sprinkles

Instructions:

  1. In a saucier pan, put milk, salt and flour and whisk until combined on medium heat.
  2. Continuously whisk mixture until thickened to a pudding like consistency.
  3. Once thickened, strain through a mesh strainer into a bowl with a spatula to remove lumps.
  4. Place a piece of plastic wrap on top of the flour mixture and put into the fridge until fully cool.
  5. In a mixer bowl fitted with the whisk attachment, mix the sugar and butter on high speed until fluffy and pale about, 5-10 minutes.
  6. Add the chilled flour mixture and continue to whip on high speed until the sugar is completely dissolved and the mixture is no longer gritty, about 5-10 minutes.
  7. Add the vanilla extract and cake mix and mix until combined.
  8. Reserve ⅔ of the mixture for filling the macarons and frosting the outside of the cake.
  9. Mix ½ c. sprinkles into the remaining frosting for filling the cake.

Funfetti Macarons

Ingredients:
212 g. almond meal
212 g. powdered sugar
172 g. egg whites, divided to 82 g. and 90 g (aged, if possible)
236 g. sugar
158 g. water
nonpareils for decorating
cake batter frosting (recipe above)

Instructions:

  1. Line two baking sheets with parchment paper or silicone mats.
  2. In the bowl of a food processor, add the almond meal and powdered sugar and pulse until thoroughly combined.
  3. Sift the mixture over a large mixing bowl, throwing out the lumps as they appear.  Add the crystalized lemon and 82 g. of the egg whites and stir until you get a thick mixture.
  4. In a small pot attached with a candy thermometer, combine the sugar and water over medium heat and boil until the syrup reaches 200˚F.
  5. Once the syrup reaches 200˚F, start whipping the remaining 90 g. in the bowl of your stand mixer with the whisk attachment on medium speed until soft peaks are reached.
  6. Once the syrup reaches 248 ˚F, remove the pot off the burner and slowly pour the syrup down the side of the mixing bowl with the egg whites on medium speed.
  7. Once the egg whites are fully incorporated, increase the speed to medium high until egg whites form glossy, stiff peaks.
  8. Mix a ⅓ of the egg white mix to the almond mixture and stir together until the batter is slightly lighter and less pasty.  From then on, fold in ⅓ of the egg white mixture at a time until the mixture “flows like magma”.  The mixture should be smooth and run thick ribbons off the spatula.
  9. With a pastry bag fitted with a ½ in. plain tip, pipe 1¼ – 1½ in. rounds.
  10. The piped batter may have peaks but should smooth away in a minute or two.
  11. Sprinkle nonpareils evenly over macaron shells.
  12. Let the batter stand until the tops of the macarons are dry to the touch, about 30 minutes to 1 hour.
  13. Preheat the oven to 275-325˚F.  If your oven tends to run hot go for 275˚F, if not then 325˚F.
  14. Bake 10-13 minutes, until the feet are formed and the tops are smooth.  The batter is done when you slightly wiggle it and it starts to come off of the parchment paper / silicone mat.
  15. Once cool, frost the inside of the macaron shell with cake batter frosting and sandwich with another macaron shell.

* Open to U.S. Residents only. Winner will be contacted via email.