Easy Peanut Butter Eggs


peanut butter eggs 4One of the best things about holidays is all the holiday themed candy that comes out on display. Packaged in brightly colored bags and interesting designs, they are already hard to pass by, but what makes me really want to buy them are the words, “limited edition”. What do they mean by limited edition? Am I going to see the same product next year or is this a once-in-a-lifetime opportunity? What if it is something absolutely delicious and I can never have it again? All of the sudden I HAVE to have whatever is in inside the shiny wrapper. I would say 9 out of 10 times I end up buying it to try it out. Am I the only person who is like this? … Possibly.peanut butter eggs 3My #1 favorite Easter candy is the Reese’s peanut butter eggs. I think the ratio of the peanut filling to chocolate is just right and it is perfectly smooth without the thick ridges that the peanut butter cups have. The lazy side of me secretly likes the fact that I don’t have to unwrap each egg I consume (except for the initial packaging of course).
peanut butter eggs 5
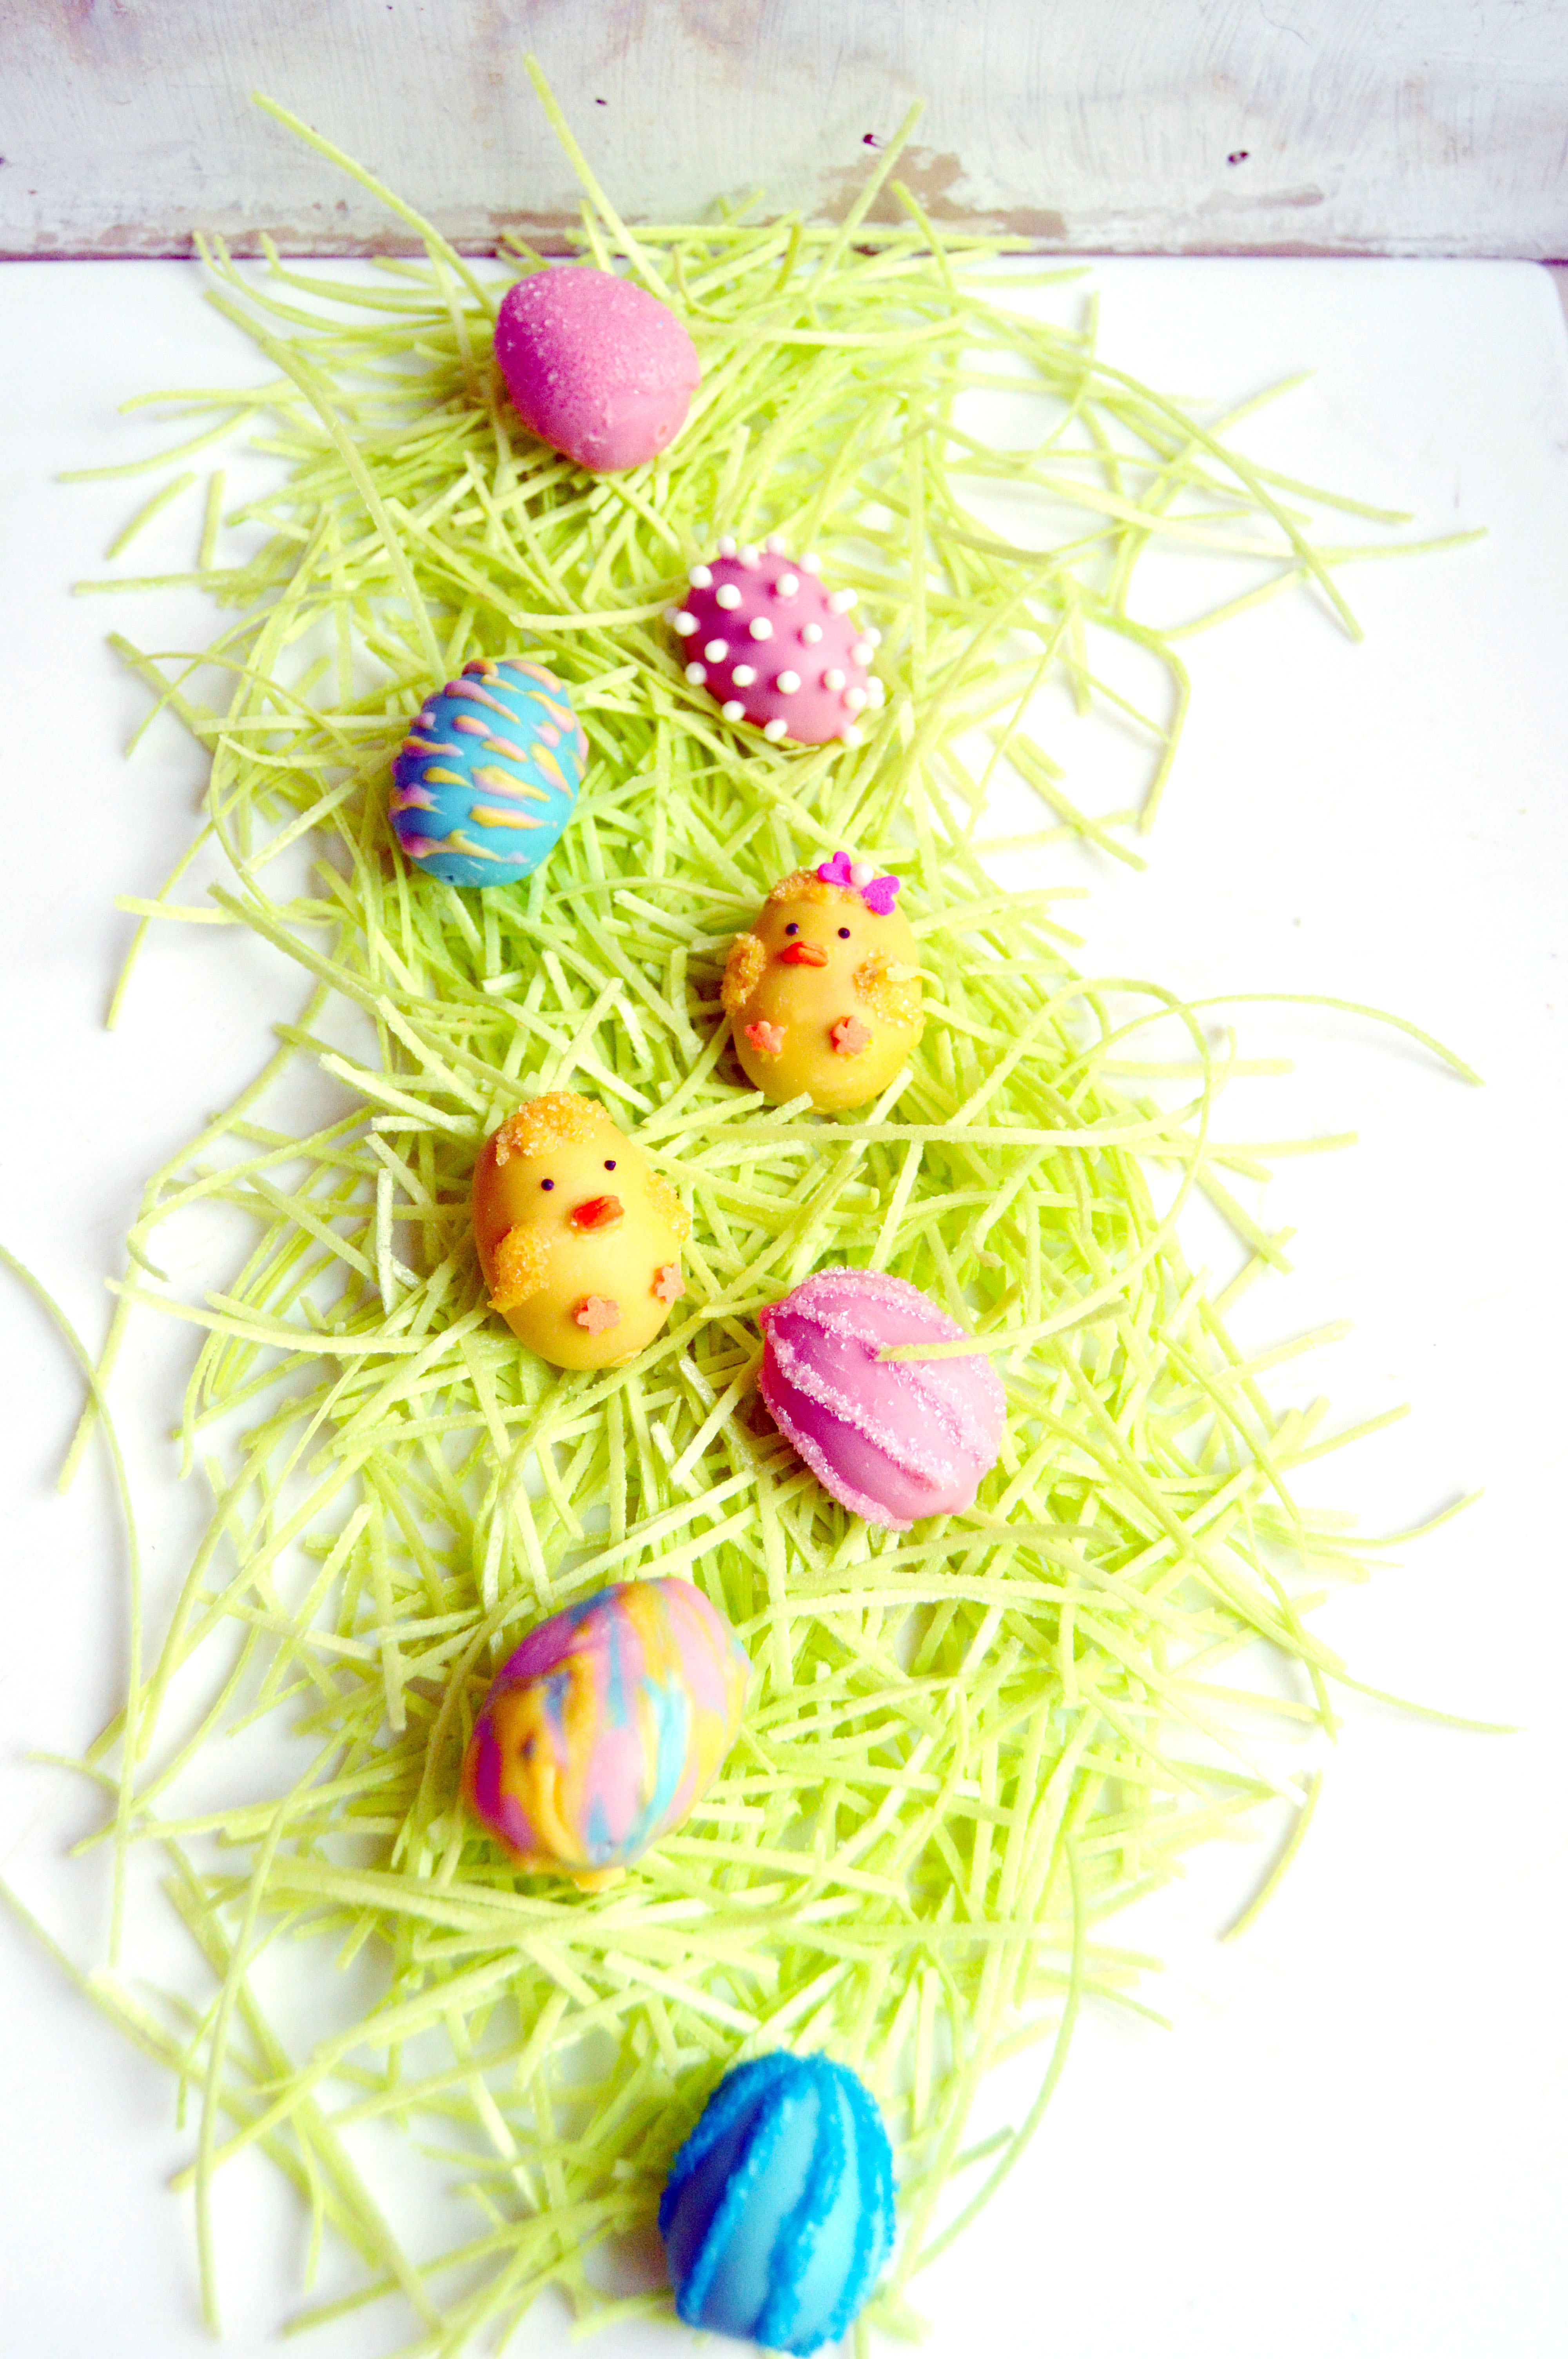
These peanut butter eggs are super smooth and deliciously peanut-y. It’s also really simple to make! No fancy equipment needed and it is all done in one bowl.  I made mine small, because honestly to me, smaller = cuter. I went a little overboard with the way I decorated mine (which took a lot longer than I’d like to admit). I think it’s the perfect project to do with kids and they can go as sprinkle crazy as they want or not. (But most likely they will because more sprinkles = more fun.)
peanut butter eggs 2For more Easter projects, here are my previous Easter themed posts:
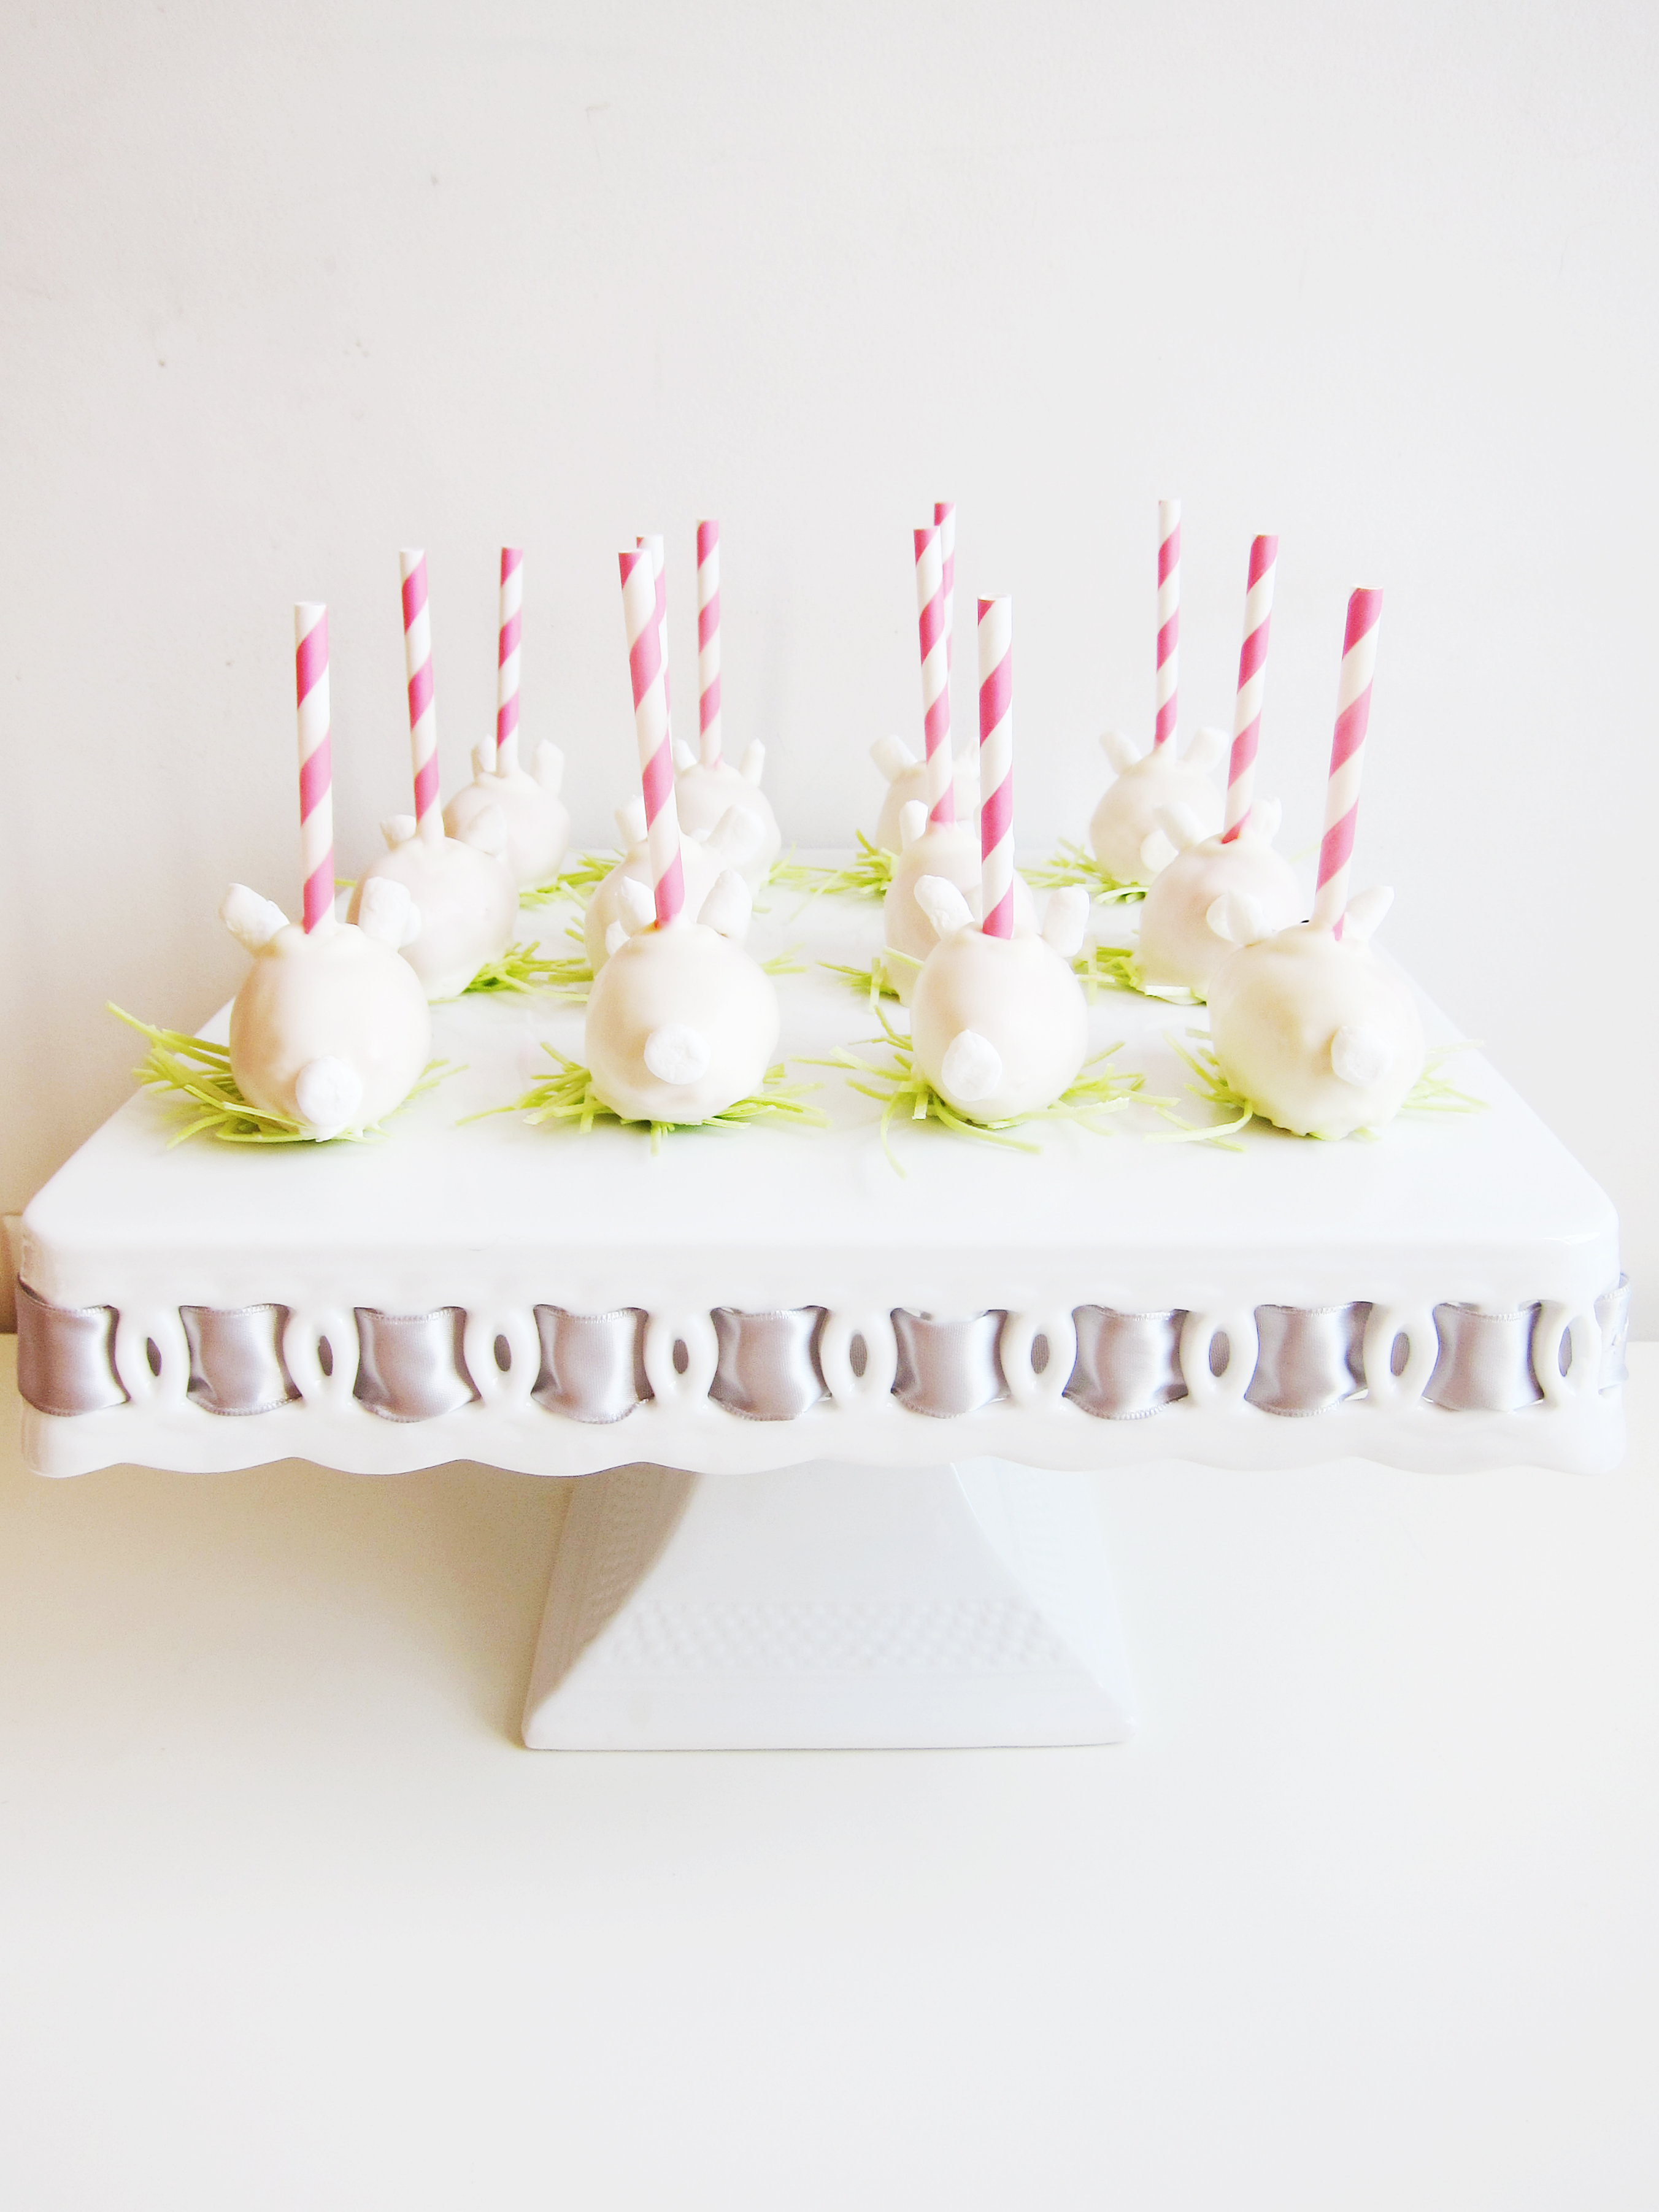
Bunny Cake Pops
White Chocolate Tiramisu Eggs
Easter Bunny Surprise Cake

Easy Peanut Butter Eggs

Ingredients:
½ c. creamy peanut butter
1 c. powdered sugar
2 tbsp. butter, melted
⅛-¼ tsp. kosher salt
½ tsp. vanilla extract
chocolate or candy melts (whichever you prefer)
optional: sprinkles and sanding sugar (for decorating)

Instructions:

  1. In a bowl, mix peanut butter and sugar until combined.
  2. Add butter, vanilla extract and ⅛ tsp salt, mix and taste. If needed, add an additional ⅛ tsp. salt.
  3. Chill mixture until firm, about 1 hour in the fridge.
  4. On a baking sheet lined with wax or parchment paper, dose out ½ tbsp. portions of dough and use your palms to roll and form into egg shapes.
  5. Place egg shaped dough into freezer to chill and set 15-20 minutes.
  6. Melt chocolate or candy melts and dip chilled peanut butter eggs and shake off excess chocolate.
  7. Decorate as desired.

Recipe adapted from Serious Eats.

Red Velvet Oreo Truffles

Red Velvet Oreo Truffles 2Valentine’s Day is tomorrow and because it is on a Saturday, I can only imagine how busy restaurants and love themed places will be. I got a box of red velvet Oreos from H earlier this week and I’ve been trying to incorporate it into something Valentine’s Day themed. If you’ve never made Oreo truffles before, you’re about to be mind blown at how easy this recipe is. You technically need only three ingredients: Oreos, cream cheese and some sort of chocolate, almond bark, or candy melts. I modified this recipe a tiny bit by adding a dash of salt (because the overwhelming sweetness of the red velvet Oreos need them) and a splash of vanilla extract (to round out the flavor). You would think that something as simple as this wouldn’t be very tasty, but I had 6 truffles sitting on the counter and they were gone within 10 minutes… all eaten by the same person… sneakily… like a robber in the night. As simple as this recipe is, what really takes time is decorating each truffle, which can be as simple or as complicated as you like. If you’re trying to think of something last minute to do for your special someone, this is the perfect recipe for you. 😉
Red Velvet Oreo Truffles 1Note: I originally wanted this to be a {Simple Sunday} post, but I just didn’t have time to do it this weekend. 

Red Velvet Oreo Truffles

You will need:
1 package red velvet Oreos
3 oz. cream cheese
⅛-¼ tsp. kosher salt (optional, but recommended)
dash of vanilla extract (optional, but recommended)
chocolate/ almond bark/ candy coating (your preference)
sprinkles, sparkling sugar, sugar pearls… basically anything you want to decorate it with

Instructions:

  1. In a bowl of a food processor, crush Oreos until crumbs form.
  2. Add cream cheese, ⅛ kosher salt, and vanilla extract and process until a smooth lump forms.
  3. Taste and add the extra ⅛ kosher salt in needed.
  4. On a sheet pan lined with parchment paper, wax paper or silicone mat, dish out ½ tbsp. portion of truffle dough.
  5. Place sheet pan in freezer for 5 minutes to set.
  6. Roll each truffle dough ball in hand until a smooth ball forms.
  7. Place sheet pan in freezer for 5 minutes to set.
  8. Meanwhile, melt your desired candy melt in the microwave.
  9. Remove truffles and dip into candy melts.

Decorate as desired.

Chocolate Covered Strawberry Cake

Chocolate Covered Strawberry Cake  3Is it the middle of February already?? I feel like February just started and here it is already nearing its end. As Valentine’s Day approaches, I can’t help but feel a little more love and happiness in the air. Maybe it’s all the hearts plastered every way I turn or people posting all things related to love on social media, but I’m digging the atmosphere. Yes, I know that you should show your love and affection to your significant other/ loved ones every day of the year but what’s the harm of celebrating that love?
Chocolate Covered Strawberry Cake  2I once had an ex-boyfriend who frequently bought me chocolate covered strawberries from Godiva. Not knowing how much they cost ($7 a piece!!), I used to eat them in one seating without much thought. I only found out how much they cost recently and boy, do I feel bad about not savoring them. But that was my first encounter with chocolate covered strawberries and it’s been one of my favorite flavor parings since.
Chocolate Covered Strawberry Cake  4This cake is my spin on a chocolate covered strawberry. A rich dark chocolate cake is filled and frosted with fresh strawberry frosting and covered in a chocolate ganache and adorned with chocolate dipped strawberries. Because fresh strawberries in February are not the tastiest, I suggest buying frozen strawberries for the frosting to ensure full strawberry flavor. I happened to have this cake pan that I bought on clearance a year or two ago, and I thought it fit the theme perfectly. If you do not have the cake pan, you can always make the same cake sans the strawberry frosting heart in the middle. Talking about clearance, am I the only person that scours the holiday section at Target after every major holiday? I cannot resist the themed sprinkles and sparkling sugar at a deep discount. Sometimes, I’ll land on a real gem… like this cake pan at 75% off. It’s a guilty pleasure and I look forward to going to Target post February 14th. 😉
Chocolate Covered Strawberry Cake  1Chocolate Covered Strawberry Cake

Chocolate Cake

Ingredients:
1 ¾ c. all-purpose flour
2 c. sugar
¼ c. natural unsweetened cocoa powder
½ c. Dutch-process unsweetened cocoa powder
2 tsp. baking soda
1 tsp. baking powder
1. tsp. kosher salt
½ c. vegetable oil
2 extra-large eggs, room temperature
1 tsp. vanilla extract
1 c. strong, hot coffee

Instructions:

  1. Preheat oven to 350 degrees and grease and line 2 cake pans with parchment paper.
  2. In a stand mixer fitted with the paddle attachment, mix flour, sugar, both cocoa powders, baking soda, baking powder and salt until fully combined.
  3. In a separate bowl, whisk vegetable oil, eggs, and vanilla extract until combined.
  4. With the mixer speed on low, add the egg mixture to the flour mixture until combined.
  5. Turn off the mixer. With a spatula, scrape the sides of the bowl to fully incorporate the two mixtures.
  6. Turn the mixer on low and slowly add the hot coffee to the batter. Once added, raise the speed to medium until completely homogenous.
  7. Divide batter equally among the two cake pans and bake about 25-30 minutes. Checking at 20 minutes for doneness with a toothpick test.*
  8. Let stand for 5-10 minutes when done, then put onto a cooling rack to fully cool.

Strawberry Puree

Ingredients:
2 lbs of strawberries, smashed
1 tbsp. lemon juice

Instructions:

  1. In a small pot, cook strawberries and lemon juice on medium heat until mixture thickens and reduces 1/3-1/2 of the original volume, about 20-30 minutes.
  2. Once thickened, put in a bowl to cool and refrigerate.

Basic Vanilla Frosting

Ingredients:
2 c. whole milk
½ c. flour
¼ tsp. salt
1 1b. (4 sticks) unsalted butter, room temperature
2 c. sugar
1 tbsp. vanilla extract

Instructions:

  1. In a saucier pan, put milk, salt and flour and whisk until combined on medium heat.
  2. Continuously whisk mixture until thickened to a pudding like consistency.
  3. Once thickened, strain through a mesh strainer into a bowl with a spatula to remove lumps.
  4. Place a piece of plastic wrap on top of the flour mixture and put into the fridge until fully cool.
  5. In a mixer bowl fitted with the whisk attachment, mix the sugar and butter on high speed until fluffy and pale about, 5-10 minutes.
  6. Add the chilled flour mixture and continue to whip on high speed until the sugar is completely dissolved and the mixture is no longer gritty, about 5-10 minutes.
  7. Add the vanilla extract and mix until combined.

Strawberry Frosting

Ingredients:
1 batch of strawberry puree
1 batch of vanilla frosting

Instructions:

  1. Mix vanilla frosting with strawberry puree until the mixture turns strawberry pink and fluffy.

Chocolate Ganache

Ingredients:
8 oz. dark chocolate, chopped
¾ c. heavy whipping cream

Instructions:

  1. In a heatproof bowl, pour heavy cream on top of chocolate and microwave for one minute.
  2. Let stand 3 minutes and stir until combined.

Assembly

1 batch chocolate cake
1 batch strawberry frosting
1 batch chocolate ganache
6-8 strawberries, rinsed and dried

Instructions:

  1. Fill and frost chocolate cake with strawberry frosting.
  2. Chill in freezer for 15-20 minutes.
  3. Pour ¾ of chocolate ganache and use offset spatula to push ganache over the edge.
  4. Before the ganache sets completely, dip the strawberries in the remaining ganache and garnish the cake.

* Chocolate cake recipe adapted from Ina Garten.

Christmas Wreath Macarons

Christmas Wreath Macarons 1Am I the only person that thinks that Christmas snuck upon us this year? I feel like I was waiting forever for Thanksgiving and then BAM! Christmas is right around the corner. (Did anyone else think of this Friends’ scene when they read BAM?) I’ve been dreaming of these macarons since December started and I finally had a chance to bake them earlier this week.
Christmas Wreath Macarons 2Is it cold where you live? It’s been freezing in NJ and I am not used to working in a cooler kitchen. The weather must’ve been super dry because my macaron shells set before I was able to place my sprinkles, hence the little cracks in the shell where I tried to force each sprinkle in with a pair of tweezers (kitchen-use-only-tweezers). I have to admit I was getting quite frustrated with making them and then this happened:
Christmas Wreath Macarons 4Here are my attempts at his mug shots.
Christmas Wreath Macarons 5The thing is, Bear, my cat loves to watch me bake and prep food on the kitchen table. He demands to sit on his own chair and Petey (my other cat) was occupying Bear’s usual space. Fed up with watching from the floor, he decided to get up close and onto the table where the trays of macarons were drying. If you don’t know already, macaron batter is sticky and it took forever to get the green goo out of his tiny paws. Not to mention the trail of green batter on the floor he left when he ran away from me.
Christmas Wreath Macarons 3Despite my frustrations making this particular recipe, I think the macarons would make a cute addition to any cookie platter and add a bit of holiday flair. You can also change up the look of the macaron with different sprinkles. Just make sure you put them on before the shells dry out. If you don’t, they’ll just bounce off like hail on cement pavement.

Christmas Wreath Macarons

Ingredients:

212 g. almond meal
212 g. powdered sugar
172 g. egg whites, divided to 82 g. and 90 g (aged, if possible)
236 g. sugar
158 g. water
green gel food color
various sprinkles

Instructions:

  1. Line two baking sheets with parchment paper or silicone mats.
  2. In the bowl of a food processor, add the almond meal and powdered sugar and pulse until thoroughly combined.
  3. Sift the mixture over a large mixing bowl, throwing out the lumps as they appear. Add 82 g. of the egg whites and stir until you get a thick mixture.
  4. In a small pot attached with a candy thermometer, combine the sugar and water over medium heat and boil until the syrup reaches 200˚F.
  5. Once the syrup reaches 200˚F, start whipping the remaining 90 g. in the bowl of your stand mixer with the whisk attachment on medium speed until soft peaks are reached.
  6. Once the syrup reaches 248 degrees, remove the pot off the burner and slowly pour the syrup down the side of the mixing bowl with the egg whites on medium speed.
  7. Once the egg whites are fully incorporated, increase the speed to medium high until egg whites form glossy, stiff peaks. Add two drops of the green gel food color and mix until batter turns a bright shade of green.
  8. Mix a ⅓ of the egg white mix to the almond mixture and stir together until the batter is slightly lighter and less pasty. From then on, fold in ⅓ of the egg white mixture at a time until the mixture “flows like magma”.  The mixture should be smooth and run thick ribbons off the spatula.
  9. With a pastry bag fitted with a ¼ in. plain tip, pipe a ring of macaron batter leaving the hole in the center as wide as possible. (If you do not, it will close up when the macaron bakes.)
  10. Before the batter dries, place your sprinkles in the desired area.
  11. The piped batter may have peaks but should smooth away in a minute or two. Let the batter stand until the tops of the macaron batter are dry to the touch, about 30 mins to 1 hour.
  12. Preheat the oven to 275-325˚F. If your oven tends to run hot go for 275˚, if not then 325˚.
  13. Bake 10-13 minutes, until the feet are formed and the tops are smooth. The batter is done when you slightly wiggle it and it starts to come off of the parchment paper / silicone mat.
  14. Let cool and fill.

Basic Vanilla Frosting

Ingredients:
2 c. whole milk
½ c. flour
¼ tsp. salt
1 1b. (4 sticks) unsalted butter, room temperature
2 c. sugar
1 tbsp. vanilla extract

Instructions:

  1. In a saucier pan, put milk, salt and flour and whisk until combined on medium heat.
  2. Continuously whisk mixture until thickened to a pudding like consistency.
  3. Once thickened, strain through a mesh strainer into a bowl with a spatula to remove lumps.
  4. Place a piece of plastic wrap on top of the flour mixture and put into the fridge until fully cool.
  5. In a mixer bowl fitted with the whisk attachment, mix the sugar and butter on high speed until fluffy and pale about, 5-10 minutes.
  6. Add the chilled flour mixture and continue to whip on high speed until the sugar is completely dissolved and the mixture is no longer gritty, about 5-10 minutes.
  7. Add the vanilla extract and mix until combined.

*Basic macarons adapted from Bouchon Bakery by Thomas Keller, Sebastien Rouxel.

Cute Halloween Bat Cupcakes

Cute Halloween Bat CupcakesI know I said I would post about my Rebels Party next, but today is Halloween. And if I don’t share this with you now, I would have to wait a whole year to post this! I have a little cousin, J (wait, can I call her “Little J” from now on? A la Gossip girl??), who asks me to make cupcakes for her classroom parties every year. Last year I made these cauldron cupcakes, but it wasn’t an original idea of mine. This year I was bent on doing something unique, and of course every time I thought something was new, Google told me I was wrong. After a solid week of thinking about spiders, cats, ghosts, graveyards, pumpkins, candy corn, witches and other Halloween themed items, I came up with these really cute bat cupcakes.
Cute Halloween Bat Cupcakes 3Start by tinting vanilla frosting to a blue that is similar to the night sky and add some edible gold stars. The bats are made with Oreo truffles which are one of the easiest desserts you can make. You basically mix Oreos and cream cheese and you get these tasty nuggets of goodness. Plus, I used cookie dough Oreos which made them that much more awesome. Stick on some candy eyes, chocolate wings and chocolate covered candy pearls and you’ve got a bat. The moon in the background is made with yellow candy melts sprinkled with sanding sugar to make it glitter. By the way, I hurried my butt to get a few shots of these before the sun went down and that’s the reason I’m lacking more photo content. I love me some fall, but I do not love the short days… no siree.

Halloween Bat Cupcakes

Chocolate Cupcakes

Ingredients:

1 ¾ c. all-purpose flour
2 c. sugar
¼ c. natural unsweetened cocoa powder
½ c. Dutch-process unsweetened cocoa powder
2 tsp. baking soda
1 tsp. baking powder
1. tsp. kosher salt
½ c. vegetable oil
2 extra-large eggs, room temperature
1 tsp. vanilla extract
1 c. strong, hot coffee

Instructions:

  1. Preheat oven to 350 degrees and line 2 muffin pans with cupcake liners (24 cups in total).
  2. In a stand mixer fitted with the paddle attachment, mix flour, sugar, both cocoa powders, baking soda, baking powder and salt until fully combined.
  3. In a separate bowl, whisk vegetable oil, eggs, and vanilla extract until combined.
  4. With the mixer speed on low, add the egg mixture to the flour mixture until combined.
  5. Turn off the mixer. With a spatula, scrape the sides of the bowl to fully incorporate the two mixtures.
  6. Turn the mixer on low and slowly add the hot coffee to the batter. Once added, raise the speed to medium until completely homogenous.
  7. Fill cupcake liners with 2/3 full with batter and bake about 15-20 minutes. Checking at 13 minutes for doneness with a toothpick.
  8. Let stand for 5-10 minutes when done, then put onto a cooling rack to fully cool.

Night Sky Frosting

Ingredients:

2 c. whole milk
½ c. flour
¼ tsp. salt
1 1b. (4 sticks) unsalted butter, room temperature
2 c. sugar
1 tbsp. vanilla extract
royal blue gel food color
violet gel food color

Instructions:

  1. In a saucier pan, put milk, salt and flour and whisk until combined on medium heat.
  2. Continuously whisk mixture until thickened to a pudding like consistency.
  3. Once thickened, strain through a mesh strainer into a bowl with a spatula to remove lumps.
  4. Place a piece of plastic wrap on top of the flour mixture and put into the fridge until fully cool.
  5. In a mixer bowl fitted with the whisk attachment, mix the sugar and butter on high speed until fluffy and pale about, 5-10 minutes.
  6. Add the chilled flour mixture and continue to whip on high speed until the sugar is completely dissolved and the mixture is no longer gritty, about 5-10 minutes.
  7. Add the vanilla extract and mix until combined.
  8. Add blue and violet gel colors until desired color is reached.

Yellow Moons

Ingredients:

yellow candy melts
yellow sanding sugar

Instructions:

  1. Melt yellow candy melts and pour into a squeeze bottle.
  2. On a sheet pan lined with wax paper, draw and fill in 1 inch wide circles with the squeeze bottle.
  3. Sprinkle yellow sanding sugar while candy melt is still melted.
  4. Let set until use.

Oreo Truffle Bats

Ingredients:

36 Oreos
8 oz. package of cream cheese, softened
1 tsp. vanilla extract
black candy melts
black candy pearls
small candy eyeballs

Instructions:

  1. Put Oreos in a food processor and pulse until fine crumbs form.
  2. Add softened cream cheese and vanilla extract, and pulse until blended.
  3. Shape into 40 small balls onto a wax paper lined sheet pan and chill until firm.*
  4. Melt the black chocolate candy melt in a tall and narrow bowl or cup and dip chilled truffles using a fork. Let excess drip back into the bowl/cup.
  5. Let the chocolate on the truffle set until firm.
  6. Pour melted chocolate candy melt into a squeeze bottle.
  7. On a separate sheet pan lined with wax paper, draw wings with squeeze bottle. Set aside.
  8. While the wings set, use the black candy melt to adhere candy eyeballs onto the chocolate truffle.
  9. Take a black candy pearl, dip it into melted black candy melt and adhere onto top of the bat’s head. Let set.

Assembly

You will need:

chocolate cupcakes, baked and cooled
night sky frosting
yellow moons
truffle bats
edible gold star glitter
large open star decorating tip

Instructions:

  1. In a pastry bag fitted with a large open star decorating tip, fill with night sky frosting and frost a tall swirl on a chocolate cupcake.
  2. Sprinkle edible gold star glitter all around the sides.
  3. Add a yellow moon towards the back of the cupcake and place a truffle bat (without its wings) onto the center of the cupcake.
  4. Take two wings and position it next to the truffle bat.
  5. Enjoy!

*If mixture is too soft to shape into balls, spoon 40 small separate mounds on a wax paper lined sheet pan and chill.  Once chilled, you should be able to form them into balls.

Chocolate cake recipe adapted from Ina Garten.
Oreo truffle recipe adapted from Kraft.

Sofia the First Doll Cake

sofia the first doll cake 1There are many things that make birthdays special: friends, family, presents, food… the list goes on.  My favorite part of a birthday is the cake.  I’m not sure what the exact reason is.  It may be because it’s the centerpiece of a celebration or because it foreshadows the inevitable sweet ending of a party or simply because I love cake.
sofia the first doll cake 3I did not have many birthday parties when I was little, but I do remember seeing many beautiful cakes at American bakeries wishing I would have one for my birthday.  I always ended up getting a Korean cake.  By Korean cake, I mean a simple sponge cake filled with whipped cream and fruit and a simple decoration on top.  (I have to say, Korean bakeries have stepped up their decorating game since I was a little kid.) Many a day did I wish for the sugary sweet American buttercream counterpart but it just didn’t happen.  So that’s why when it’s someone’s birthday I try to make it special the only way I know how, with cake.
sofia the first doll cake 4Andy’s niece LOVES Sofia the First, along with Minnie Mouse and Max & Ruby.  I’ve always wanted to try my hand at doll cakes so the present was twofold: the cake and the doll in one.

steps 2If you’ve never made doll cakes before, I’ll tell you that it’s definitely more time consuming than a layer cake but the reaction you get makes it worth the trouble.  When we walked in the door, the first thing she screamed was “Sofia!!” and asked to hold it thinking it was a real doll.  We were successful keeping her hands off until the end when the urge was too great and she made a grab for it. 🙂
sofia the first doll cake 5

Sophia the First Doll Cake

You will need:
Purple Fondant
White Fondant
White Buttercream
White Sugar Pearls
4 layers of 6” round cake
Purple Food Marker
Isomalt (optional)
Small Gem Mold (optional)

Instructions:

  1. Cut out holes in the cake layers so that it would fit your doll.  I used this doll.
  2. Prep your doll by tying its hair up, taking off the dress, and wrapping the doll with plastic wrap.
  3. Roll out a piece of purple fondant and drape around the doll adhering it with either a very thin layer of buttercream or water. (As shown above.)
  4. Frost and layer the cake layers and place your doll inside.
  5. Mold the cake into a dress shape by cutting it along the top in a rounded shape.
  6. Frost the cake smoothly up to below the waist of the doll.  (As shown above.)
  7. Roll out a piece of white fondant and cut out a 2-3 in. strip.  Drape it around the bottom of the dress to form the underskirt of the dress. (As shown above.)
  8. Roll out a piece of purple fondant and cut out a ¼ in. strip.  Adhere the purple strip over the white fondant with either buttercream or water to form the stripe around the underskirt. (As shown above.)
  9. Roll out a large piece of purple fondant (about 10 in. in height) and cut out scalloped shapes along the bottom.  Drape right below the waist of the doll connecting the two ends together in the back. (As shown above.)
  10. Roll out two more pieces of fondant in a semi-circle shape and drape around each side of the doll to create the top layer of her dress. (As shown above.)
  11.  Roll and cut a thin ribbon of fondant and wrap around the waist to meld the top and bottom together.
  12. With the purple marker, draw two lines and a loop design on the front of her dress. (As shown above.)
  13. Adhere pearls along the neckline and the purple stripes. (As shown above.)
  14. Adhere pearls along the top layer of the dress. (As shown above.)
  15. Optional: If you have time, you can continue the pearl all across the back of the dress.  I did not so I opted to continue it with a white ribbon made of white fondant.
  16. Adhere pearls all along the top and bottom skirt of the dress
  17. For the circular pattern along the bottom of the dress you can either:
    1. Cut out the pattern with the fondant and adhere it.
    2. Make white teardrop jewels with a small gem mold with either sugar or isomalt. This gives it an interesting 3D effect to the dress.  You can cut out the triangular shapes with fondant and adhere it.
  18. If you have time, you can fancy the dress up in the back with more pearls and sugar jewels. (As shown above.)
  19. Optional: You can also paint the crown with silver paint and bling it out with little purple gems like I did above.  It makes the cake look a little more expensive and detailed. (As shown above.)

Bunny Cake Pops

IMG_2651

When I came across a package of edible grass at Target, a passage from “Charlie and the Chocolate Factory” by Roald Dahl was the first thing that came into my mind:

“The grass you’re standing on, my dear little ones, is made of a new kind of soft, minty sugar that I’ve just invented! I call it swudge! Try a blade! Please do! It’s delectable!

Automatically, everybody bent down and picked one blade of grass – everybody, that is, except Augustus Gloop, who took a big handful.”

Filled with nostalgia from my childhood obsession with the wonderful world of Willy Wonka, I immediately grabbed two bags and tossed it into my basket.  From there, it promptly sat on my counter waiting to be used for something scrumdiddlyumptious.

IMG_2644

This is what I have for you. It’s perfect for Easter*, spring and bunny themed parties. I hope you give it a try and wait for the squeals of “It’s so cute!” to follow you for the rest of the day.

IMG_2666

Bunny Cake Pops

You will need:

1 Batch of Cake (whatever flavor you prefer, you may use 1 box cake mix if pressed for time)
1 Batch of Frosting (whatever flavor you prefer, you can use 1 can frosting if pressed for time)
1 Bag of White Candy Melts
Mini Marshmallows
Edible Grass
Heart Shaped Sprinkles
Black Edible Sugar Pearls
Light Pink Sanding Sugar
Lollipop sticks or Striped Party Paper Straws

Instructions:

1.  Crumble up cooled cake until you have very fine cake crumbs.

2.   Add half of the frosting to the cake and mix until it is evenly distributed.  If you can mold the cake into a firm stable ball at this point, stop.  If not, add the rest of the frosting ¼ at a time until you are able to shape it.

3.  Scoop tablespoon sized balls of the cake mixture and shape into an oval (approximately the size and shape of a piece of sushi rice ball).

4.  Chill cake balls in the freezer until firm (this could take anywhere from 15-30 minutes)**

5.  While the cake is chilling:

a. Cut the mini marshmallows vertically, and dip into sanding sugar for the ears.

b. Cut more mini marshmallows horizontally for the tails.

c. Cut edible grass into desired size.

d. Melt the chocolate wafers in the microwave until completely smooth.

6.  Remove the cake balls from the freezer and dip your stick (or straw) into a little chocolate and insert it into the top middle of the cake ball. Place back into the freezer for 5-10 mins until the chocolate has set.

7.  Line a sheet with parchment paper and place tufts of edible grass where your coated cake ball will land.

8.  Once the chocolate has set, take the stick and submerge the cake ball into the melted chocolate and gently tap the excess chocolate off.  Place on the edible grass.

9. Quickly, before the chocolate sets, place the tail on one end and the ears on the opposite end.  Place two black pearls for the eyes and a heart shaped sprinkle for the nose.  You can use a (clean) tweezer to facilitate the placement of the eyes and nose.

10. Let the chocolate set at room temp, or if you’re in a hurry you can place it in the freezer to set it.


*I am aware that bunnies have nothing to do with the meaning of Easter.
**Be careful when chilling the cake balls.  If the cake balls are too cold, it will crack your chocolate when it comes to room temperature.