Meyer Lemon Creme Brûlée Cheesecake

What are you doing this Valentine’s Day? I think Mr. Spatula and I are going to stay in and cook up something tasty. It’s a little different from our usual tradition which consists of going out to a good restaurant and eating delicious food while people-watching other couples. I’d like to think that while many restaurants are no-gos for many of us, that we are all enjoying a delicious meal with our loved ones. Because breaking bread together is always one of the best ways to share love. 

This cheesecake bar really is a marriage of a lemon bar with the hint of lemon and the shortbread crust and a creme brûlée cheesecake. The sugar torched topping is not an option. It really gives it the perfect crisp shell for a dessert that is fitting for Valentine’s day. I used Meyer lemons because they’re in season and they’re less intense than lemons. But if you can’t get your hands on Meyer lemons, please feel free to use regular lemons. Just expect a more lemon-y punch. 🙂

Left: Before Torching | Right: After Torching

Meyer Lemon Creme Brûlée Cheesecake
Makes about 12 servings, pending on how you large you make your squares

Ingredients:

For the crust:
8 tbsp. (1 stick) unsalted butter, room temp.
½ c. (100 g.)  sugar
1 tbsp. Meyer lemon zest (be careful to not grate the pith of the lemon – the white part)
½ tsp. vanilla extract
1 c. (120 g.) all purpose-flour
¼ tsp. kosher salt

For the filling:
8 oz. (1 box) cream cheese, softened
14 oz. sweetened condensed milk
1 egg, large, room temp.
1 tbsp. Meyer lemon zest (be careful to not grate the pith of the lemon – the white part)
⅓ c. Meyer lemon juice
a pinch of kosher salt

For the burnt sugar crust:
Granulated sugar, as needed (if you have caster sugar, this is the time to use it)

Instructions:

  1. Preheat the oven to 350°F. Grease and line an 8×8 inch baking pan with parchment paper. (This will make it much easier to remove the cheesecake.)
  2. In the bowl of a standing mixer fitted with the paddle attachment, mix the butter, sugar, lemon zest and vanilla on medium speed until well combined.
  3. Switch the mixer speed to low and in the flour and salt, mixing until just combined. 
  4. Press the dough into the prepared baking pan, trying to get it as even of a layer as possible. 
  5. Refrigerate the baking pan with the dough while you prepare the cheesecake layer.
  6. In the bowl of a standing mixer fitted with the paddle attachment (or in another bowl using a handheld mixer), mix the cream cheese on medium speed until smooth. Scrape down the sides. 
  7. Add the sweetened condensed milk, mix on medium speed and scrape down the sides again.
  8. Add the egg, lemon zest and juice and mix on medium-low speed, scrape down the sides and mix again until homogenous. 
  9. Remove the pan from the fridge, pour in the cheesecake filling and bake in the oven for about 20-25 minutes, or until the filling does not jiggle when you lightly shimmy the pan. 
  10. Remove cheesecake from the oven, and let cool completely.
  11. Refrigerate cheesecake until firm. 
  12. Cut the cheesecake into the number of slices that you want. 
  13. Sprinkle sugar over the cheesecake evenly, and use your kitchen torch to heat the tops of the cheesecake until amber – a spotted dark brown. (If you don’t have a kitchen torch, you can apparently do this under a broiler. But I’ve never tried and would advise that you keep a close eye on the caramelizing sugar.) 

Recipe adapted from Lauren’s Latest

Red Velvet Strawberry Rose Cake

Happy Valentine’s Day! As someone who loves all things pink and feminine, Valentine’s Day décor is right up my alley. This cake was inspired by Ron Ben Israel’s rose cake which I’ve been obsessed with as soon as I laid my eyes on it. It was always on my “to-try” list but I never got the chance to take on the challenge. Recently, there was a blog post by NYC Cake Girl who used to work with Ron Ben Israel with a how-to on the very cake I loved. The amount of work and the detail work was perfection (as always), and I knew I simply didn’t have the time (and possibly even the skill) to recreate the cake. So I created this cake which looks similar and uses real rose petals.
As for the cake itself, I used half of my giant doughnut cake pan instead of baking a round cake and carving it into a dome like the tutorial. A similar effect could be produced with a shallow bundt cake, but I think the smooth exterior of the doughnut pan really makes things easier. The cake flavor is red velvet (because it is THE cake of Valentine ’s Day), and is layered on the inside with fresh strawberries and vanilla frosting. I know I know, I almost felt like it was sacrilege not to use cream cheese frosting, but I didn’t have cream cheese in the fridge so, vanilla it is. Please feel free to use cream cheese frosting if you prefer it.
I picked a bouquet of flowers that varied in shades of pink in hopes of making an ombre effect. However, once the petals were stripped from the flowers, they kind of ended up being the same color. I saved the lightest rose for the center though. Although in hindsight, I think I should’ve just picked the flower that had the least blemishes. You essentially layer the petals one by one in alternating layers around the cake to form a giant rose. It is a bit time consuming and is not completely symmetrical like the fondant petals from the original cake. But, I think it kind of gives it a homemade vibe that people can appreciate.I went a little heavy with the pictures because it was SO STUNNING. Like… the photos can’t do it justice. I loved even how the slices had petals on them fanning out the back, like a very fancy cape or headdress. I can almost guarantee that you will get “wows” and surprised looks when you bring this cake. It won’t disappoint.
I hope all of you got some sort of recognition of love this Valentine’s Day. If not, I baked this cake for you. 😉

Red Velvet Strawberry Rose Cake

You will need:

1 batch red velvet cake, baked in a dome shape (recipe below)
1 batch vanilla frosting (recipe below)
About ½ pint strawberries, sliced horizontally (enough to cover the area of the cake twice)
1 dozen roses (pesticide-free)

Instructions:

  1. Slice the red velvet cake in half (horizontally), and smooth a thin layer of vanilla frosting.
  2. Layer it with fresh strawberry slices and repeat layer with vanilla frosting and fresh strawberries using frosting to fill in any gaps. (shown in picture #2)
  3. Place the top half of the cake onto the frosting layer and crumb coat the entire cake with a thin layer of frosting. (shown in picture #3)
  4. Put cake in freezer for about 10-15 minutes until the frosting is set and then remove from fridge and give it a full coating. (shown in picture #4)
  5. Pick the flower you will be using as your center flower. Trim and place it in the center of the cake. (shown in picture #5)
  6. Get a few petals and fill in the gaps around the hole. (shown in picture #6)
  7. Now start layering the bottom part of the cake by pressing the petals into the frosting of the cake. Try to press the bottom edge of the petal only. (shown in picture #7)
  8. Try to use the largest petals you have for the bottom layer and go all around the cake. (shown in picture #8)
  9. Layer the next row of petals around the cake. (shown in picture #9)
  10. Try to alternate the position of the petals. As in, try to place the petal of the next layer between two petals of the bottom layer. (shown in picture #10)
  11. Repeat until you get to the center of the cake, try to use smaller petals as you get to the top of the cake. I had to replace some of the lighter petals because the lower petals turned out to be too pink to get a more seamless look. (shown in picture #11)
  12. Get ready to stun the room. 😉

Red Velvet Cake

Ingredients

1 ½ cups all-purpose flour
1 ½ cups cake flour
3 tablespoons unsweetened cocoa powder
¾ tsp. salt
3 large eggs, at room temperature
¾ (1 ½ sticks) cup butter, at room temperature
2 ¼ cups granulated white sugar
2 tsp. vanilla extract
1 ounce bottle of red food coloring (2 Tablespoons)
1 ¼ cups buttermilk
1 ½ teaspoons baking soda
1 ½ teaspoons vinegar

Directions:

  1. Preheat oven to 350°F, spray either your bundt pan or the top half of your giant doughnut cake pan with nonstick spray. (I highly suggest using either pam for baking or baker’s joy for extra insurance of “nonstickage”.)
  2. In a medium bowl, whisk together flour, cocoa powder and salt. Set aside.
  3. In the bowl of a standing mixer, beat butter on medium speed for 30 seconds.
  4. Add sugar and vanilla, and beat until combined.
  5. Add eggs one at a time on medium speed.
  6. Lower speed to low and add in food coloring.
  7. Add ⅓ of flour mixture to the egg mixture on low and add ½ of the buttermilk.
  8. Repeat with ⅓ flour mix and the rest of the buttermilk.
  9. Finish mixing with the rest of the flour mixture. Mix until just combined.
  10. Stir together baking soda and vinegar in a small bowl. Add to cake batter and beat just until combined.
  11. Fill cake pan until ⅔ full, bake 30-40 minutes or until a cake tester comes out clean.
  12. Cool pan on rack for about 15-20 minutes. Try to use a small spatula around the edges to ensure a clean removal. Remove cake from pan.
  13. Let cool completely.

Vanilla Frosting

Ingredients:

1 c. whole milk
¼ c. flour
¼ tsp. salt
8 oz. (2 sticks) unsalted butter, room temperature
1 c. sugar
2 tsp. vanilla extract

Instructions:

  1. In a saucier pan, put milk, salt and flour and whisk until combined on medium heat.
  2. Continuously whisk mixture until thickened to a pudding like consistency.
  3. Once thickened, strain through a mesh strainer into a bowl with a spatula to remove lumps.
  4. Place a piece of plastic wrap on top of the flour mixture and put into the fridge until fully cool.
  5. In a mixer bowl fitted with the whisk attachment, mix the sugar and butter on high speed until fluffy and pale about, 5-10 minutes.
  6. Add the chilled flour mixture and continue to whip on high speed until the sugar is completely dissolved and the mixture is no longer gritty, about 5-10 minutes.
  7. Add vanilla extract and mix until combined.


Weekday Update // Currently Loving

Valentine’s Day is coming and I’ve got hues of red and pink on the brain. Funnily enough, I don’t own many red colored clothing. I think maybe it’s because they tend to be statement pieces. But there are so many cute options this season and I kinda want everything.

  1. Self Portrait 3D Floral Azaelea Dress in Tomato Red – I’ve always loved self-portrait’s famous azaelea dress, but I prefer this version with the additional details.
  2. Sézane Jack Sneakers in Nude – Love the shape of the shoe with the clean lines and the blush color is just perfect.
  3. YSL Touche Éclat Pen in Dazzling Lights – I’ve tried all the “dupes” and nothing comes close to this miracle in a tube. It makes me look instantly awake and alert. I just wish it wasn’t so pricey. Sometimes I turn an extra click by accident and I feel like I’m wasting money. Hahaha J Worth every penny and I adore the festive packaging on this version.
  4. Waitress the Broadway Musical – Saw this the past week and I just about died fangirling over Jason Mraz on the inside. If you know me personally, you would know that I’ve been a big fan since high school. I met him after the show after waiting in the cold for an hour. But being the introvert that I am, just stood there quietly while he signed my Playbill. We made eye contact though, and Mr. H kept coaxing me to take a selfie with him, which we kinda did at the end but I have that oh-so-awkward smile that I always have when I’m not 100% comfortable so I’ll just keep it to myself. Unfortunately, Jason won’t be performing after the 11th of February, but it’s just as worth watching for Sara Bareilles. So talented!
  5. H&M Short Chiffon Dress – I’m a fan of the ruffled shoulder details and the ruffled skirt. The polka dots are also a chic detail.
  6. Sézane Line Blouse in Red Poppy – How beautiful is the lace pattern on this shirt? Plus, that flattering square neck in the back makes this just about the most romantic top.
  7. Candy Corpse’ Hot Hams Pin – Because Calcifer is one of my favorite Miyazaki characters and this pin is so stinking cute.


Okinawan Sweet Potato Macarons

Okinawan Sweet Potato MacaronsThere isn’t much that I remember about living in Seoul, South Korea as a little girl. But one memory that lingers after all these years is how the streets were perfumed with the scent of roasted sweet potatoes in the winter. I don’t know how it is now, but back then the streets were filled with carts that sold perfectly roasted sweet potatoes. Roasted Korean sweet potatoes are very different from their American counterpart. They are insanely sweet and the flavor is chestnut-like. And unlike American sweet potatoes, they don’t get watery. Instead, they are more fibrous and hold their shape when peeled. For many years, I’ve tried to recapture that memory by roasting Korean sweet potatoes in my oven. The smell was spot on, but I couldn’t get that same roasted taste that I remembered.
Okinawan Sweet Potato MacaronsThere is a Korean market that I stop by for snacks when I’m at my local Laundromat. If you stop by in the colder months, there is a small machine that churns out roasted sweet potatoes and the whole store smells has that warm roasty toasty smell. Anyways, after having one that was properly roasted, I became obsessed with trying to recreate it at home and scoured the internet on how to do it. I finally came upon a blog that featured this pot and after finding it in a Korean supermarket (It’s so much cheaper. I got it for less than $20 because it was on sale), I gave it a try and I finally reached sweet potato nirvana. Tip: The instructions say to roast on medium heat for 20-30 minutes but I found that roasting for about an hour on low heat produces the best results.
Okinawan Sweet Potato MacaronsArmed with my new roasting pot, I wanted to feature sweet potatoes differently and made these macarons. Purple sweet potatoes are just as sweet but not as flavorful as their yellow cousins. However, I couldn’t resist their beautiful purple flesh. I suppose I could’ve made the frosting a vibrant purple by adding a little food dye, but I wanted you to be able to see what it would look like without it. The best part about the frosting is that it takes just one stick of butter and about ¾ cup of powdered sugar (which just might be perfect for filling cakes for babies since you are using minimal sugar).
Okinawan Sweet Potato MacaronsCan you tell that I originally made these for Valentine’s Day? The purple ombre effect is easy to achieve by using an edible food color spray can. They’re easy enough to find on amazon. You want to be careful to be light handed or you will end up spraying the entire macaron purple. This is especially true if your spray can is new. There are so many options out there, I feel like you have a rainbow at your fingertips and it’s an easy way to spruce up a plain macaron.
Okinawan Sweet Potato MacaronsEven if you don’t decorate it, they’re definitely worth giving a try and best eaten within two days. Since the frosting has low butter/sugar content, it will turn your macarons soggy as the days go by.

Okinawan Sweet Potato Macarons

For the macaron shells:

Ingredients:
212 g. almond meal
212 g. powdered sugar
172 g. egg whites, divided to 82 g. and 90 g
236 g. sugar
158 g. water
purple edible spray paint
heart sprinkles
white pearl sprinkles

Instructions:

  1. Line two baking sheets with parchment paper or silicone mats.
  2. In the bowl of a food processor, add the almond meal and powdered sugar and pulse until thoroughly combined.
  3. Sift the mixture over a large mixing bowl, throwing out the lumps as they appear.  Add 82 g. of the egg whites and stir until you get a thick mixture.
  4. In a small pot attached with a candy thermometer, combine the sugar and water over medium heat and boil until the syrup reaches 200˚F.
  5. Once the syrup reaches 200˚F, start whipping the remaining 90 g. in the bowl of your stand mixer with the whisk attachment on medium speed until soft peaks are reached.
  6. Once the syrup reaches 248 degrees, remove the pot off the burner and slowly pour the syrup down the side of the mixing bowl with the egg whites on medium speed.
  7. Once the egg whites are fully incorporated, increase the speed to medium high until egg whites form glossy, stiff peaks
  8. Mix ⅓ of the egg white mix to the almond mixture and stir together until the batter is slightly lighter and less pasty.  From then on, fold in ⅓ of the egg white mixture twice until the mixture “flows like magma”.  The mixture should be smooth and run thick ribbons off the spatula.
  9. Fill batter in a pastry bag fitted with a ½ in. plain tip.
  10. The piped batter may have peaks but should smooth away in a minute or two. Sprinkle the top of the macaron batter with the pearl and heart sprinkles. Let the batter stand until the tops of the macaron batter are dry to the touch, about 30 mins to 1 hour.
  11. Preheat the oven to 350˚F.
  12. Once you place the macarons in the oven, reduce the heat to 300˚F. Bake 10-13 minutes, until the feet are formed and the tops are smooth.  The macarons are done when you slightly wiggle them and they start to come off of the parchment paper / silicone mat.
  13. Once you remove the macarons, reheat the oven to 350˚F for ten minutes before baking another pan of macarons at 300˚F.
  14. Once the shells are cool, spray one side of the macarons lightly about 7 inches away from the surface. Fill with frosting.

Okinawan Sweet Potato Frosting

Ingredients:
1 ½ lb Okinawan sweet potatoes, roasted (about 3 medium potatoes)
4 oz. (one stick) unsalted butter
¾ – 1 c. powdered sugar

Instructions:

  1. Peel the outer skin of the sweet potatoes and put them the food processor.
  2. Puree the sweet potatoes until very smooth and silky. Set aside.
  3. In a bowl of a standing mixer fitted with the whisk attachment, whip the butter until light and fluffy.
  4. Add in ¾ c. of the powdered sugar and the sweet potato puree and whip until a smooth frosting forms. If not sweet enough, add the remaining ¼ c. powdered sugar and whip until smooth. Fill the macarons.

Weekday Update

pink swirl cakeIt’s been a quiet few weeks on the busy spatula. Mostly, I’ve been busy filling cake orders and baking here and there. Not enough photos to write an actual blog about, but just enough for a glimpse of what’s been going on. (If you follow me on Instagram, you probably saw some of these already.)

Pink and Gold Swirl Cake – It’s such a whimsical cake, I couldn’t help taking close up photos of this one. Swirled with pastel pink and white frosting then filled to the brim with pearls, gold stars, and dragees. It was four layers of chocolate cake filled with toffee coffee frosting.

DSC_0487DSC_0428DSC_0475DSC_0477

Baymax Macarons – I wanted to post these for Valentine’s Day, but I never had the time. Place a few red heart sprinkles on each macaron and draw in two circles and connect with a line with a black edible color marker. I filled the inside with some leftover strawberry frosting. So simple and very cute.

baymax macarons baymax macarons

Pink Ombre Ranunculus Cake – The inside of this cake was layered with layers of pink ombre cake. Filled with fresh strawberry frosting and topped with fresh ranunclus, it was so pretty. I originally wanted peonies, but the florist didn’t have any that were in bloom. Did you know that you had to order peonies in advance? I never knew.

pink ombre flower cakeranunculus flowers on cake

Red Velvet Rose Pavlova

Red Velvet Rose PavlovaAs much as I love flowers, I’ve learned over the years that I have a black thumb. No matter how hard I try or how “low-maintenance” the plant is, I manage to kill it. I’ve even killed a cactus. Don’t ask me how I did it. But one day it started to shrivel up and before I knew it, it was dead.  These days, I run away from plants like the plague. The cute DIY terrariums that everyone talks about? Nope. Growing my own herbs? No way. So instead of growing my own plants, I prefer already cut plants because (not to sound morbid) they’re already dying. It gives me a little less stress.
Red Velvet Rose Pavlova 2In the food world, I think Valentine’s Day can be renamed as Red Velvet Everything Day. Is it just me or when February rolls around, everything is red velvet flavored? They come in forms of cake, brownies, whoopie pies, cupcakes and cookies. It is not their fault. There aren’t that many red cakes out there and that deep red hue is kind of perfect for the season.
Red Velvet Rose PavlovaRed Velvet Rose Pavlova Instead of doing the usual red velvet cake, I decided to make a red velvet pavlova. I dyed the layers of pavolva red (or as red as I could get them) and flavored them with a hint of cocoa. Then I made a cream cheese whipped cream (because how would you have anything red velvet without cream cheese) and flavored it with some rose water for a floral note. I finally decorated it with some tiny rose meringues and actual tiny roses. If you are using fresh flowers, make sure they’re pesticide-free and if you want to eat them, make sure they’re edible.
Red Velvet Rose Pavlova
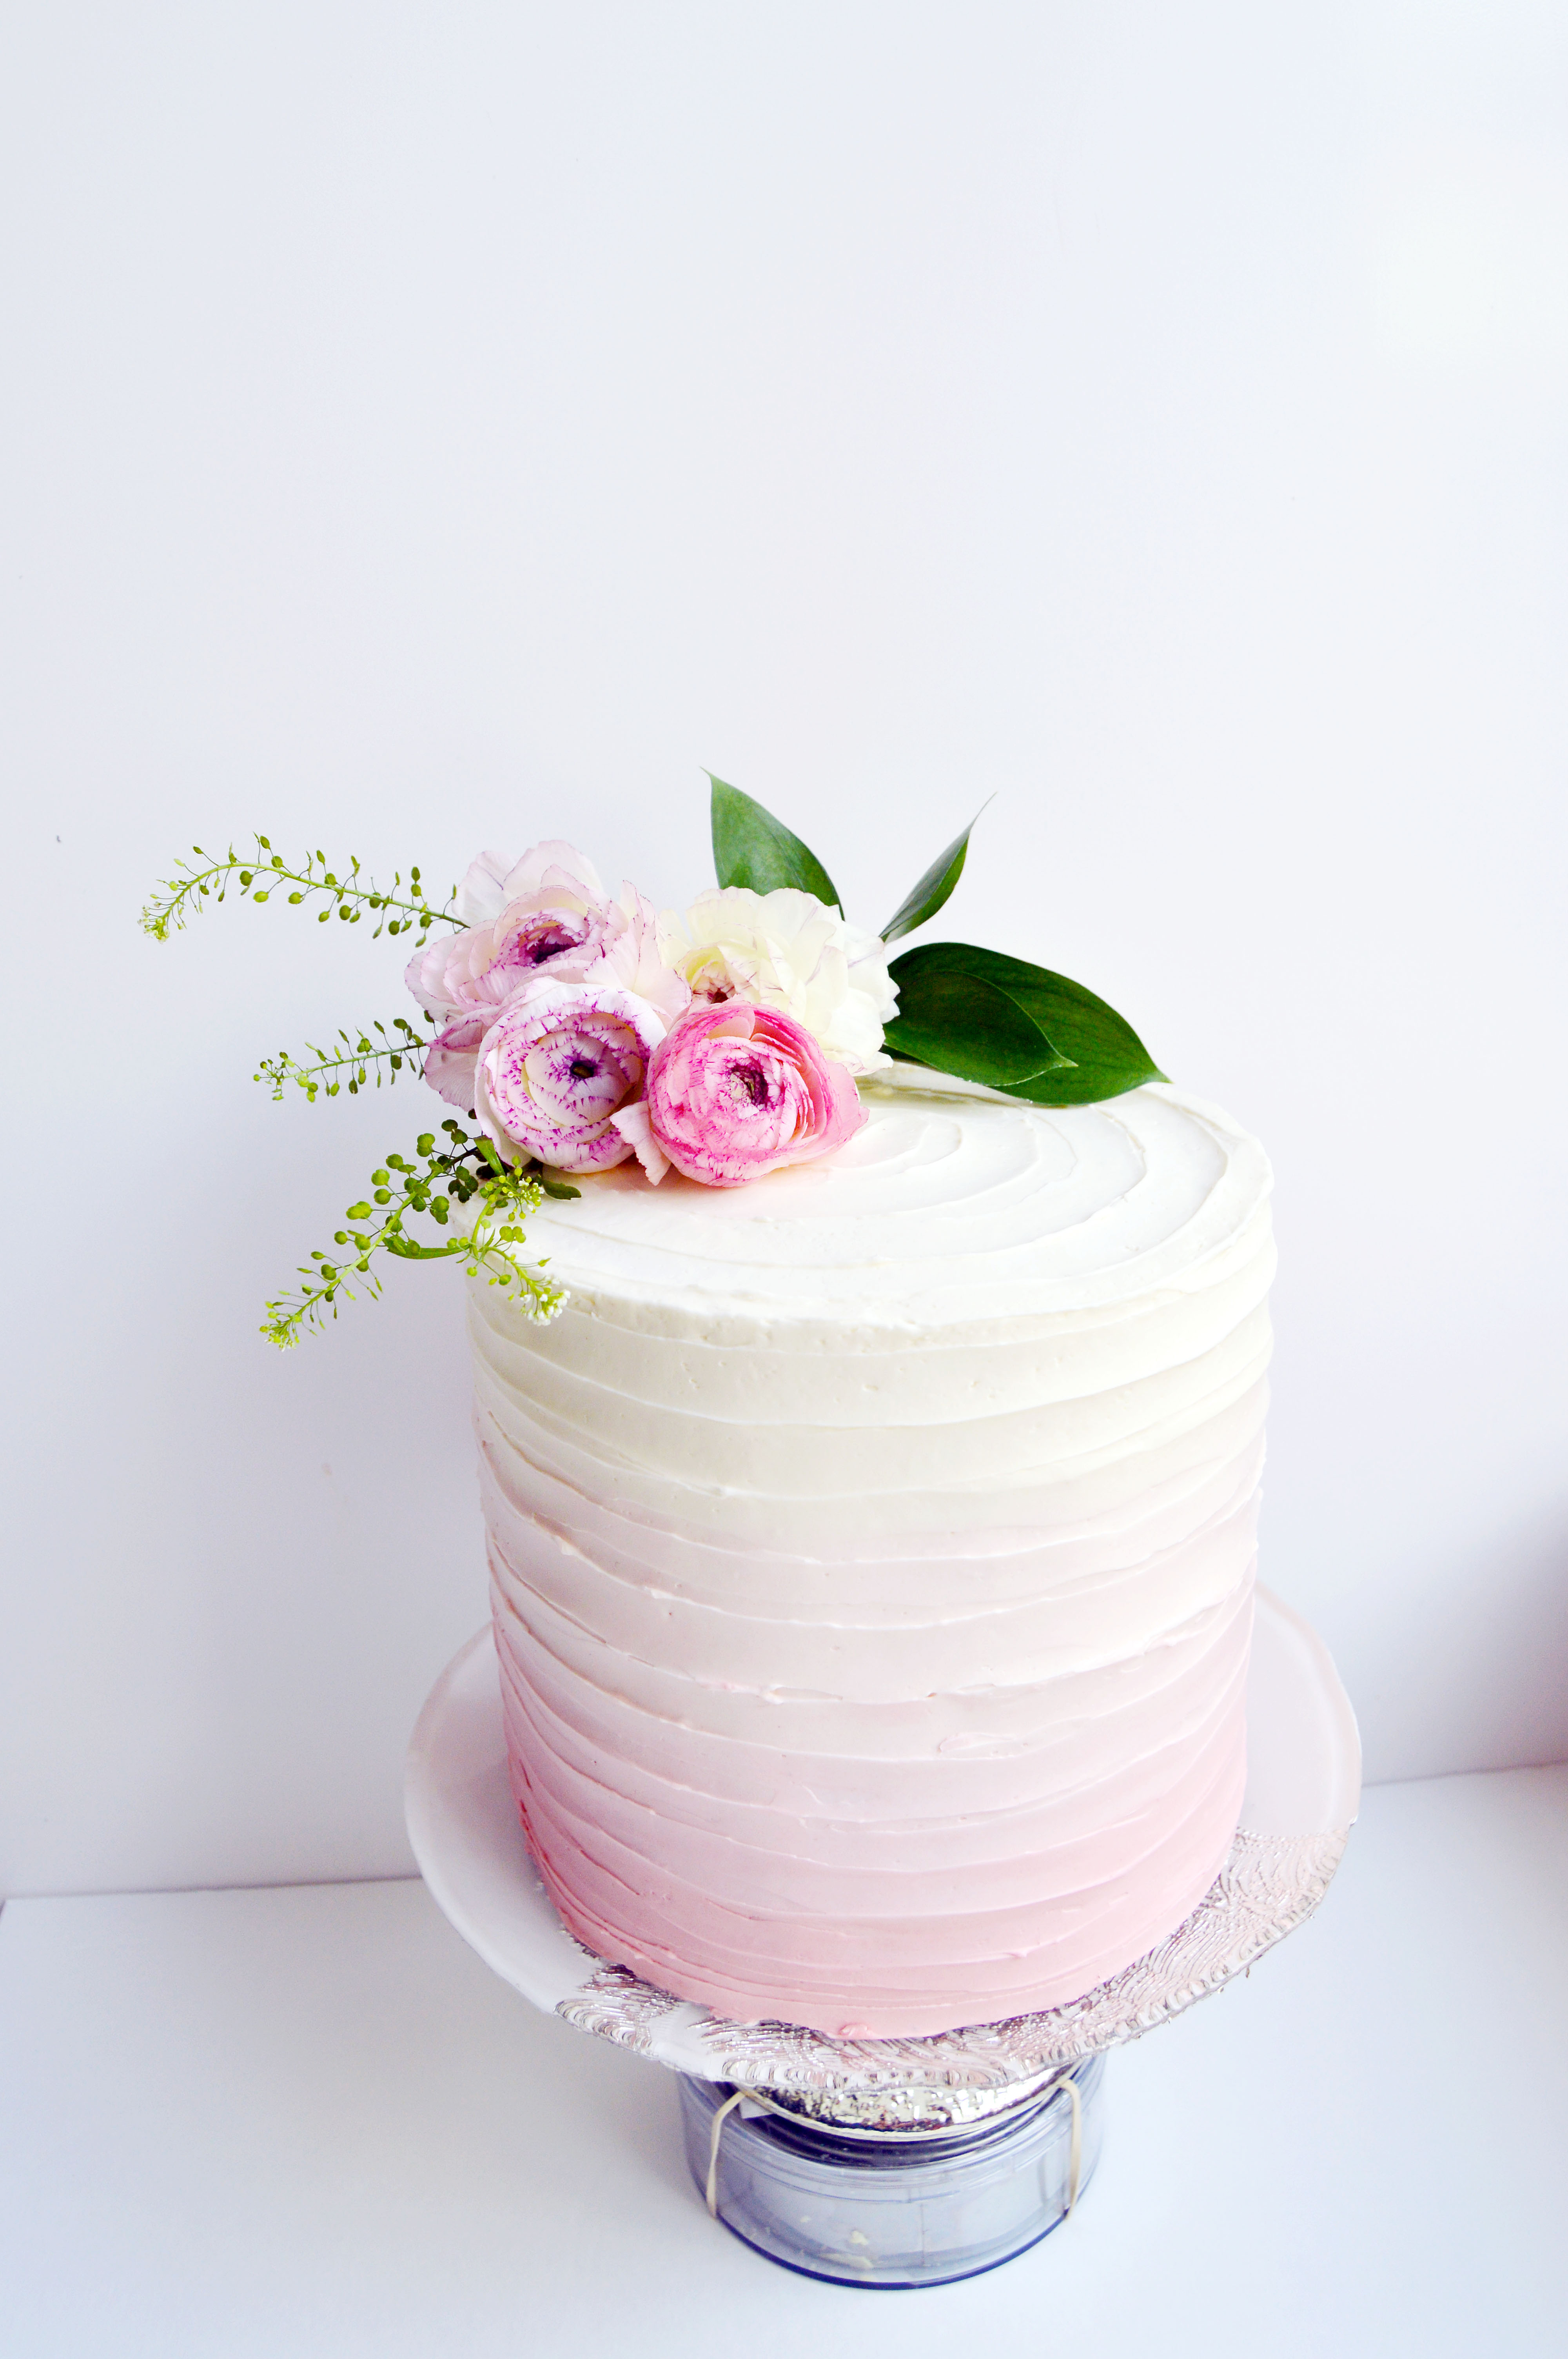
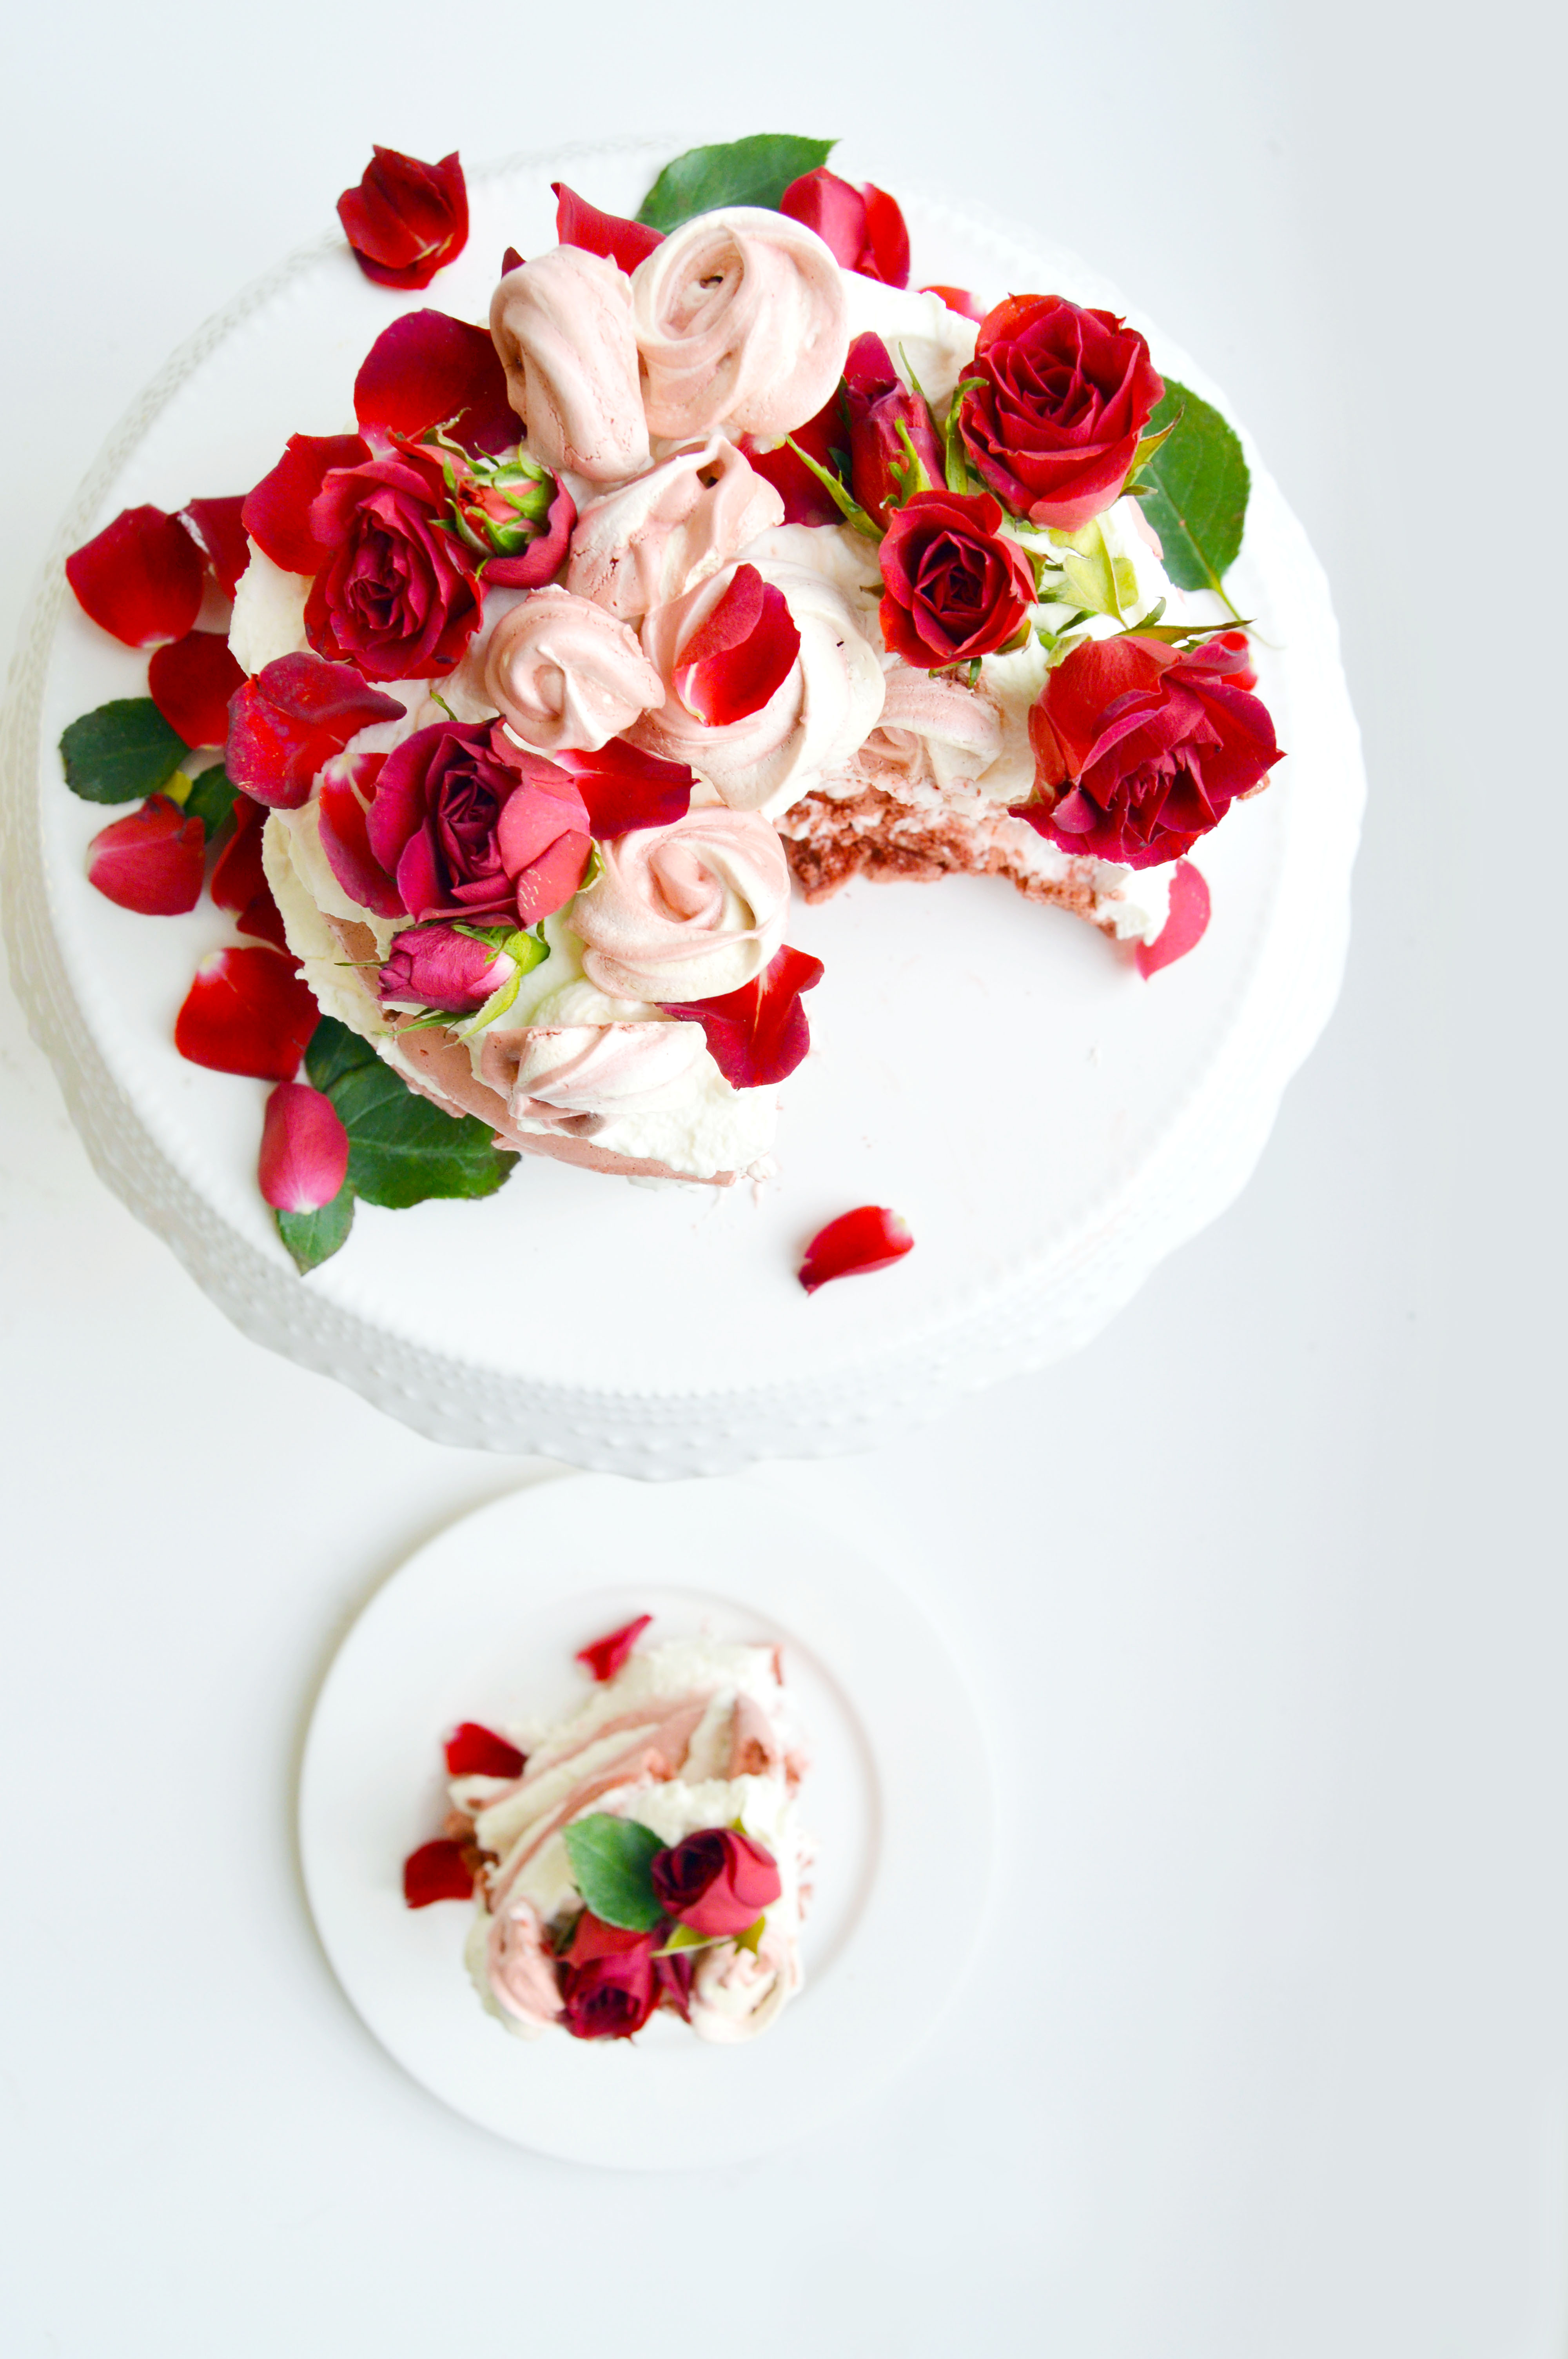
This may be the most romantic cake I’ve made. (Followed closely by this one.)

Red Velvet Rose Pavlova
Makes one 4-layered mini cake

Ingredients
300 g. superfine sugar
150 g. egg whites, room temperature
1 pinch cream of tartar
2 tbsp. cocoa powder
red gel food color
1 batch of cream cheese rose whipped cream (recipe below)
mini red roses, organic pesticide-free (for decoration)

Instructions:

  1. Preheat oven to 400˚F and line a rimmed baking sheet with parchment paper.
  2. Spread sugar in an even layer over parchment.
  3. In the bowl of a standing mixer fitted with the whisk attachment, add the egg whites and the cream of tartar.
  4. Place sugar into the oven and bake until the edges of the sugar begins to melt but not brown, about 5 minutes.
  5. Once the sugar begins to melt, turn the mixer onto high.
  6. Remove baking sheet from the oven and the eggs whites should be foamy.
  7. Turn the mixer to medium high and slowly pour the hot sugar from the parchment paper into egg whites.
  8. Once all the sugar is added, turn the mixer onto high and mix until stiff, shiny peaks form.
  9. Reserve ¼ c. of white meringue batter in a different bowl.
  10. Add cocoa powder and red gel food color to the rest of the batter and mix until desired color is reached.
  11. Reserve ¼ c. of red meringue batter in a separate bowl.
  12. Reduce oven to lowest setting 140˚F.
  13. Line two baking sheets with parchment paper.
  14. On one baking sheet, spoon 4 five-inch circles of the red meringue.
  15. Fit a medium closed star piping tip into a piping bag and add ¼ c. each of reserved white and red meringue batter.
  16. On the second baking sheet, form small roses by making small circles with the piping tip.
  17. Bake the baking sheet with the five-inch circles for 1- 2 hours until they are crisp and hollow.
  18. Bake the baking sheet with the mini roses for 30 minutes to 1 hour until they are crisp and hollow.
  19. Turn off oven and let it dry out for about 30 minutes to an hour.
  20. When meringues are completely cool and dry, alternate a layer of the meringue with the layer of the whipped cream.
  21. Decorate the top with the mini meringue roses and mini roses.

Cream Cheese Rose Whipped Cream

Ingredients:

1 ½ c. heavy whipping cream, cold
4 oz. cream cheese, room temperature
½ c. powdered sugar
½ – 1 tsp. rose water (be careful with the rose water, too much of it will make the frosting taste like soap)

Instructions:

  1. In a bowl of a standing mixer fitted with the whisk attachment, whip the heavy cream until stiff peaks form.
  2. Set aside the whipped cream mixture into a different bowl.
  3. In the same bowl, add the cream cheese and powdered sugar and mix until light, fluffy and fully incorporated.
  4. Fold the whipped cream into the cream cheese mixture.
  5. Add ½ tsp. rose water and taste. If you feel like it needs more, add ¼ tsp. at a time until desired flavor is reached.