Churro Cupcakes

churro cupcake 2Have you ever had a churro before?  It’s a giant stick of fried dough with tons of cinnamon sugar on it.  It’s different from zepoles and funnel cakes because it’s more dense and has a thicker outer crust.  I get my churro craving satisfied at Costco.  It’s just one dollar for about 1½ feet of sweet fried goodness.  Such a good bargain!  The trick is to get it before you start shopping so you have a little snack, and you don’t have to worry about a cinnamon sugar trail being left in the house.
churro cupcake 1
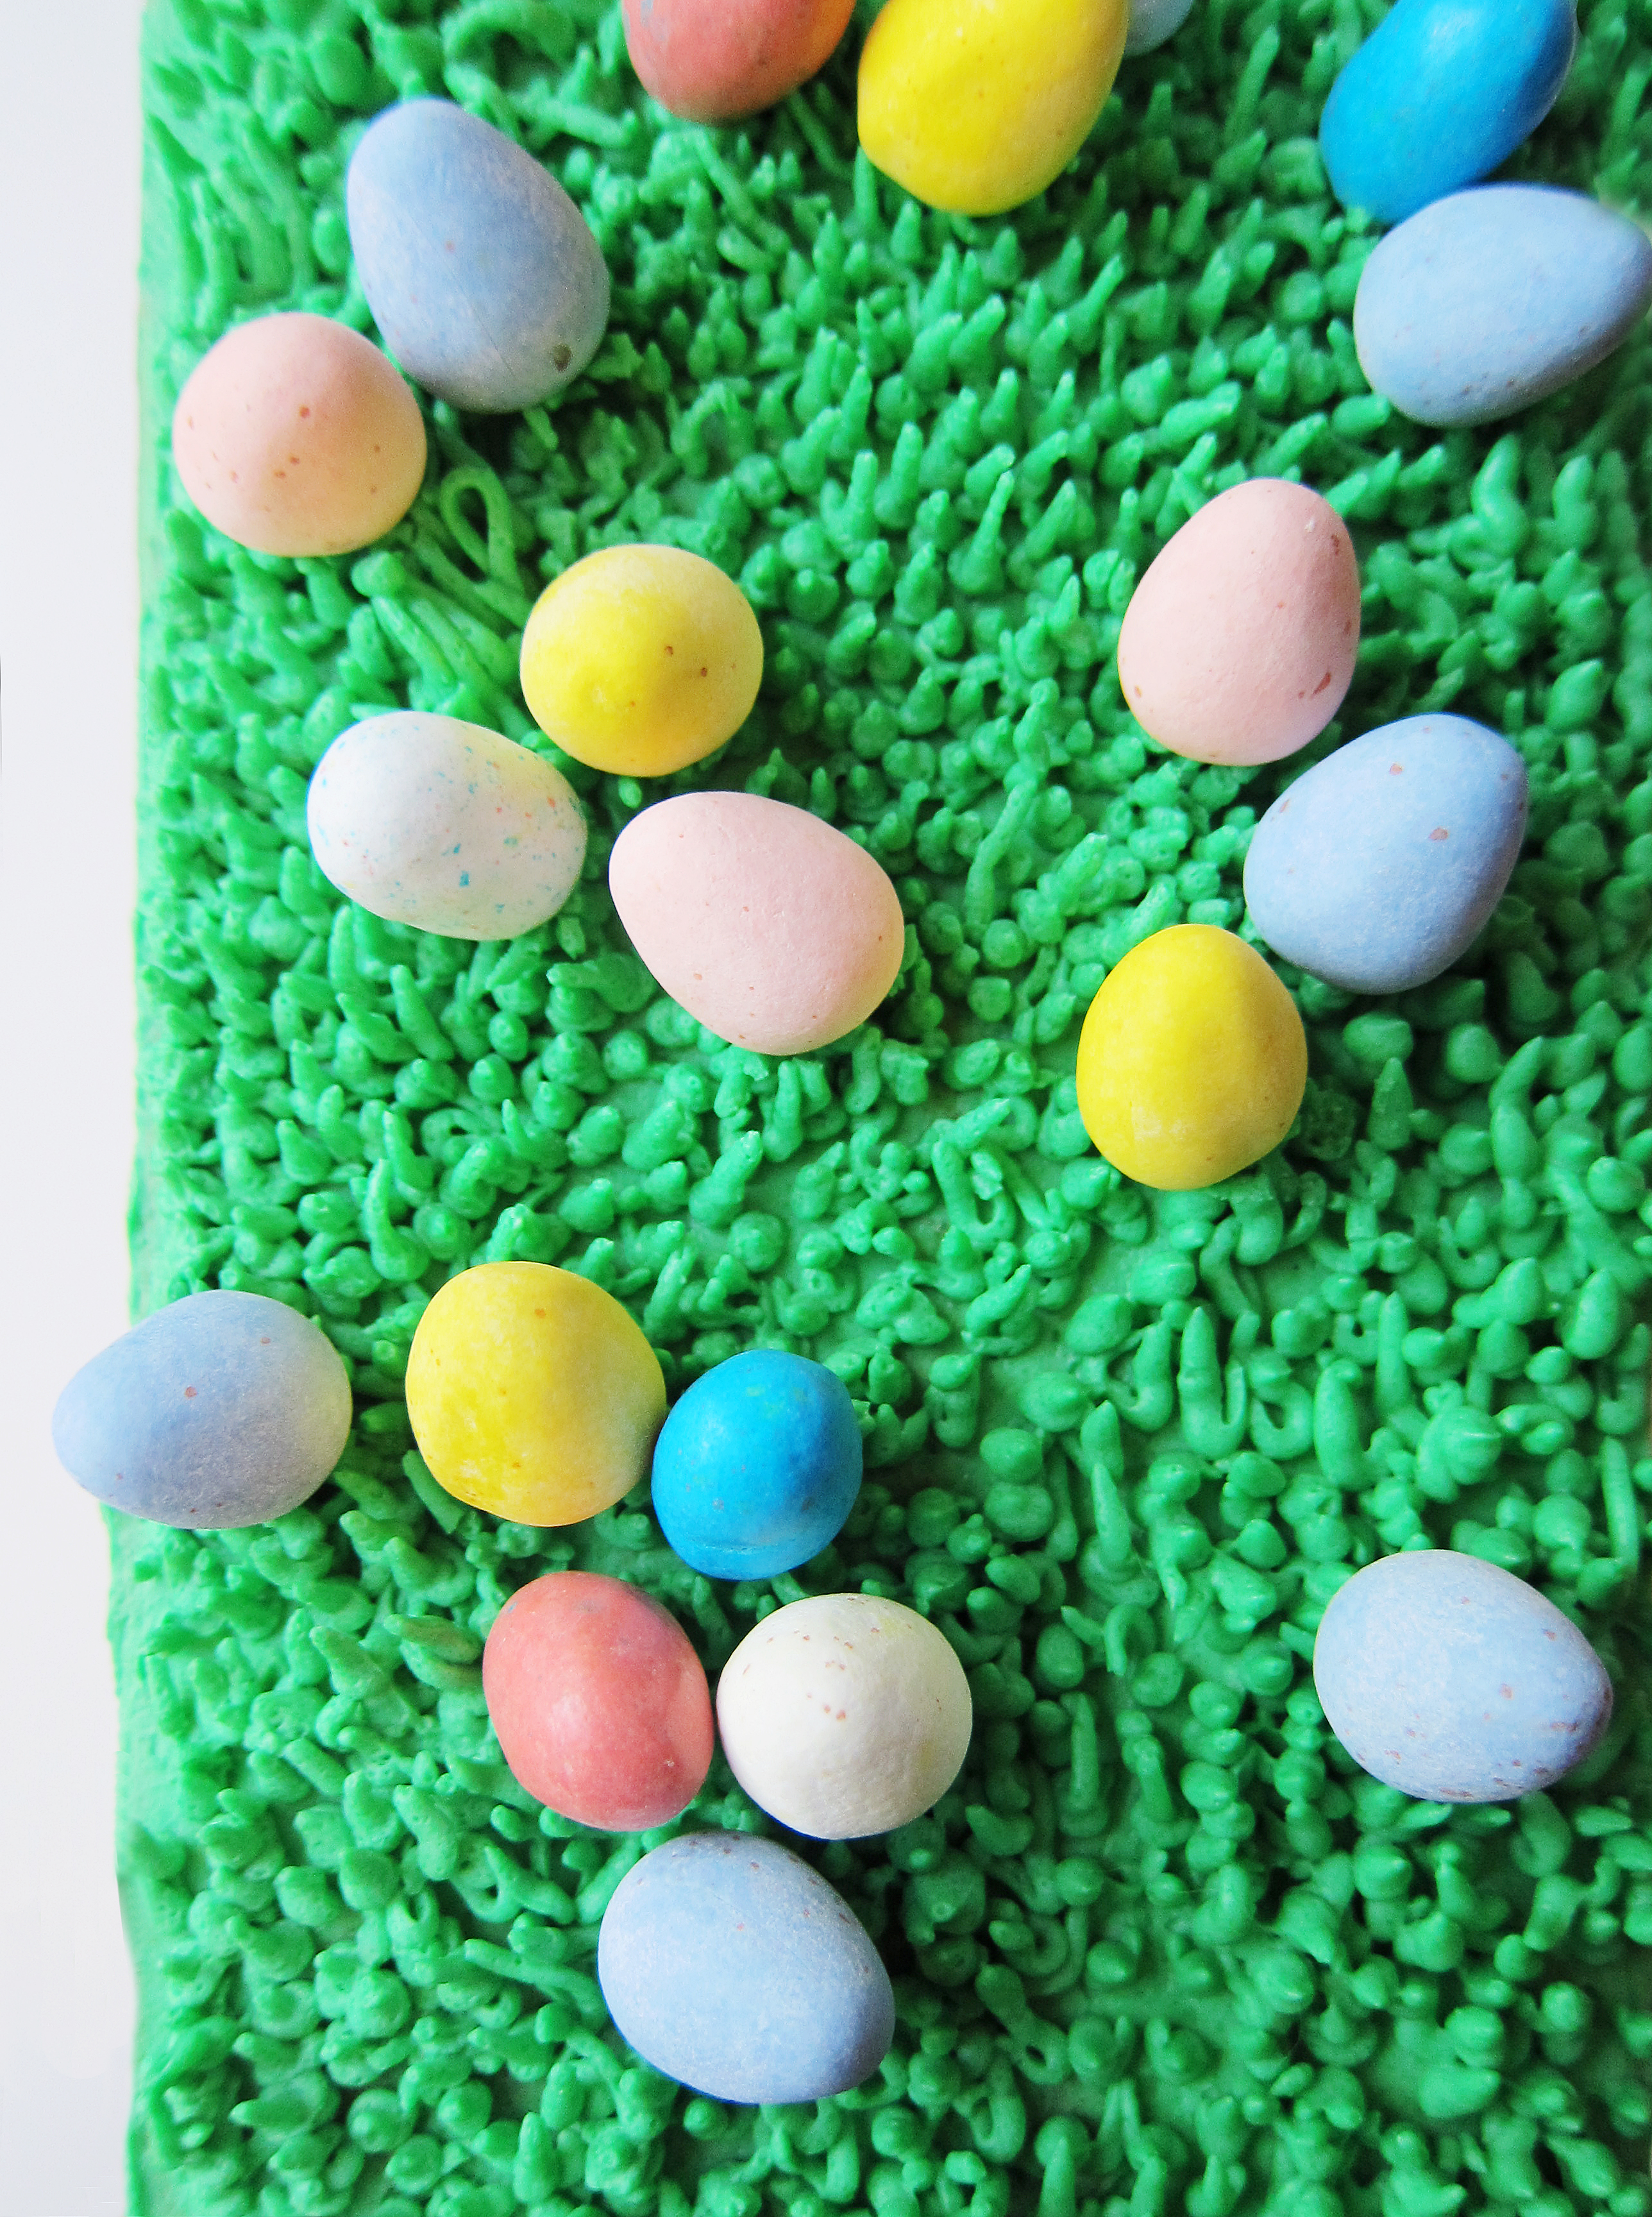
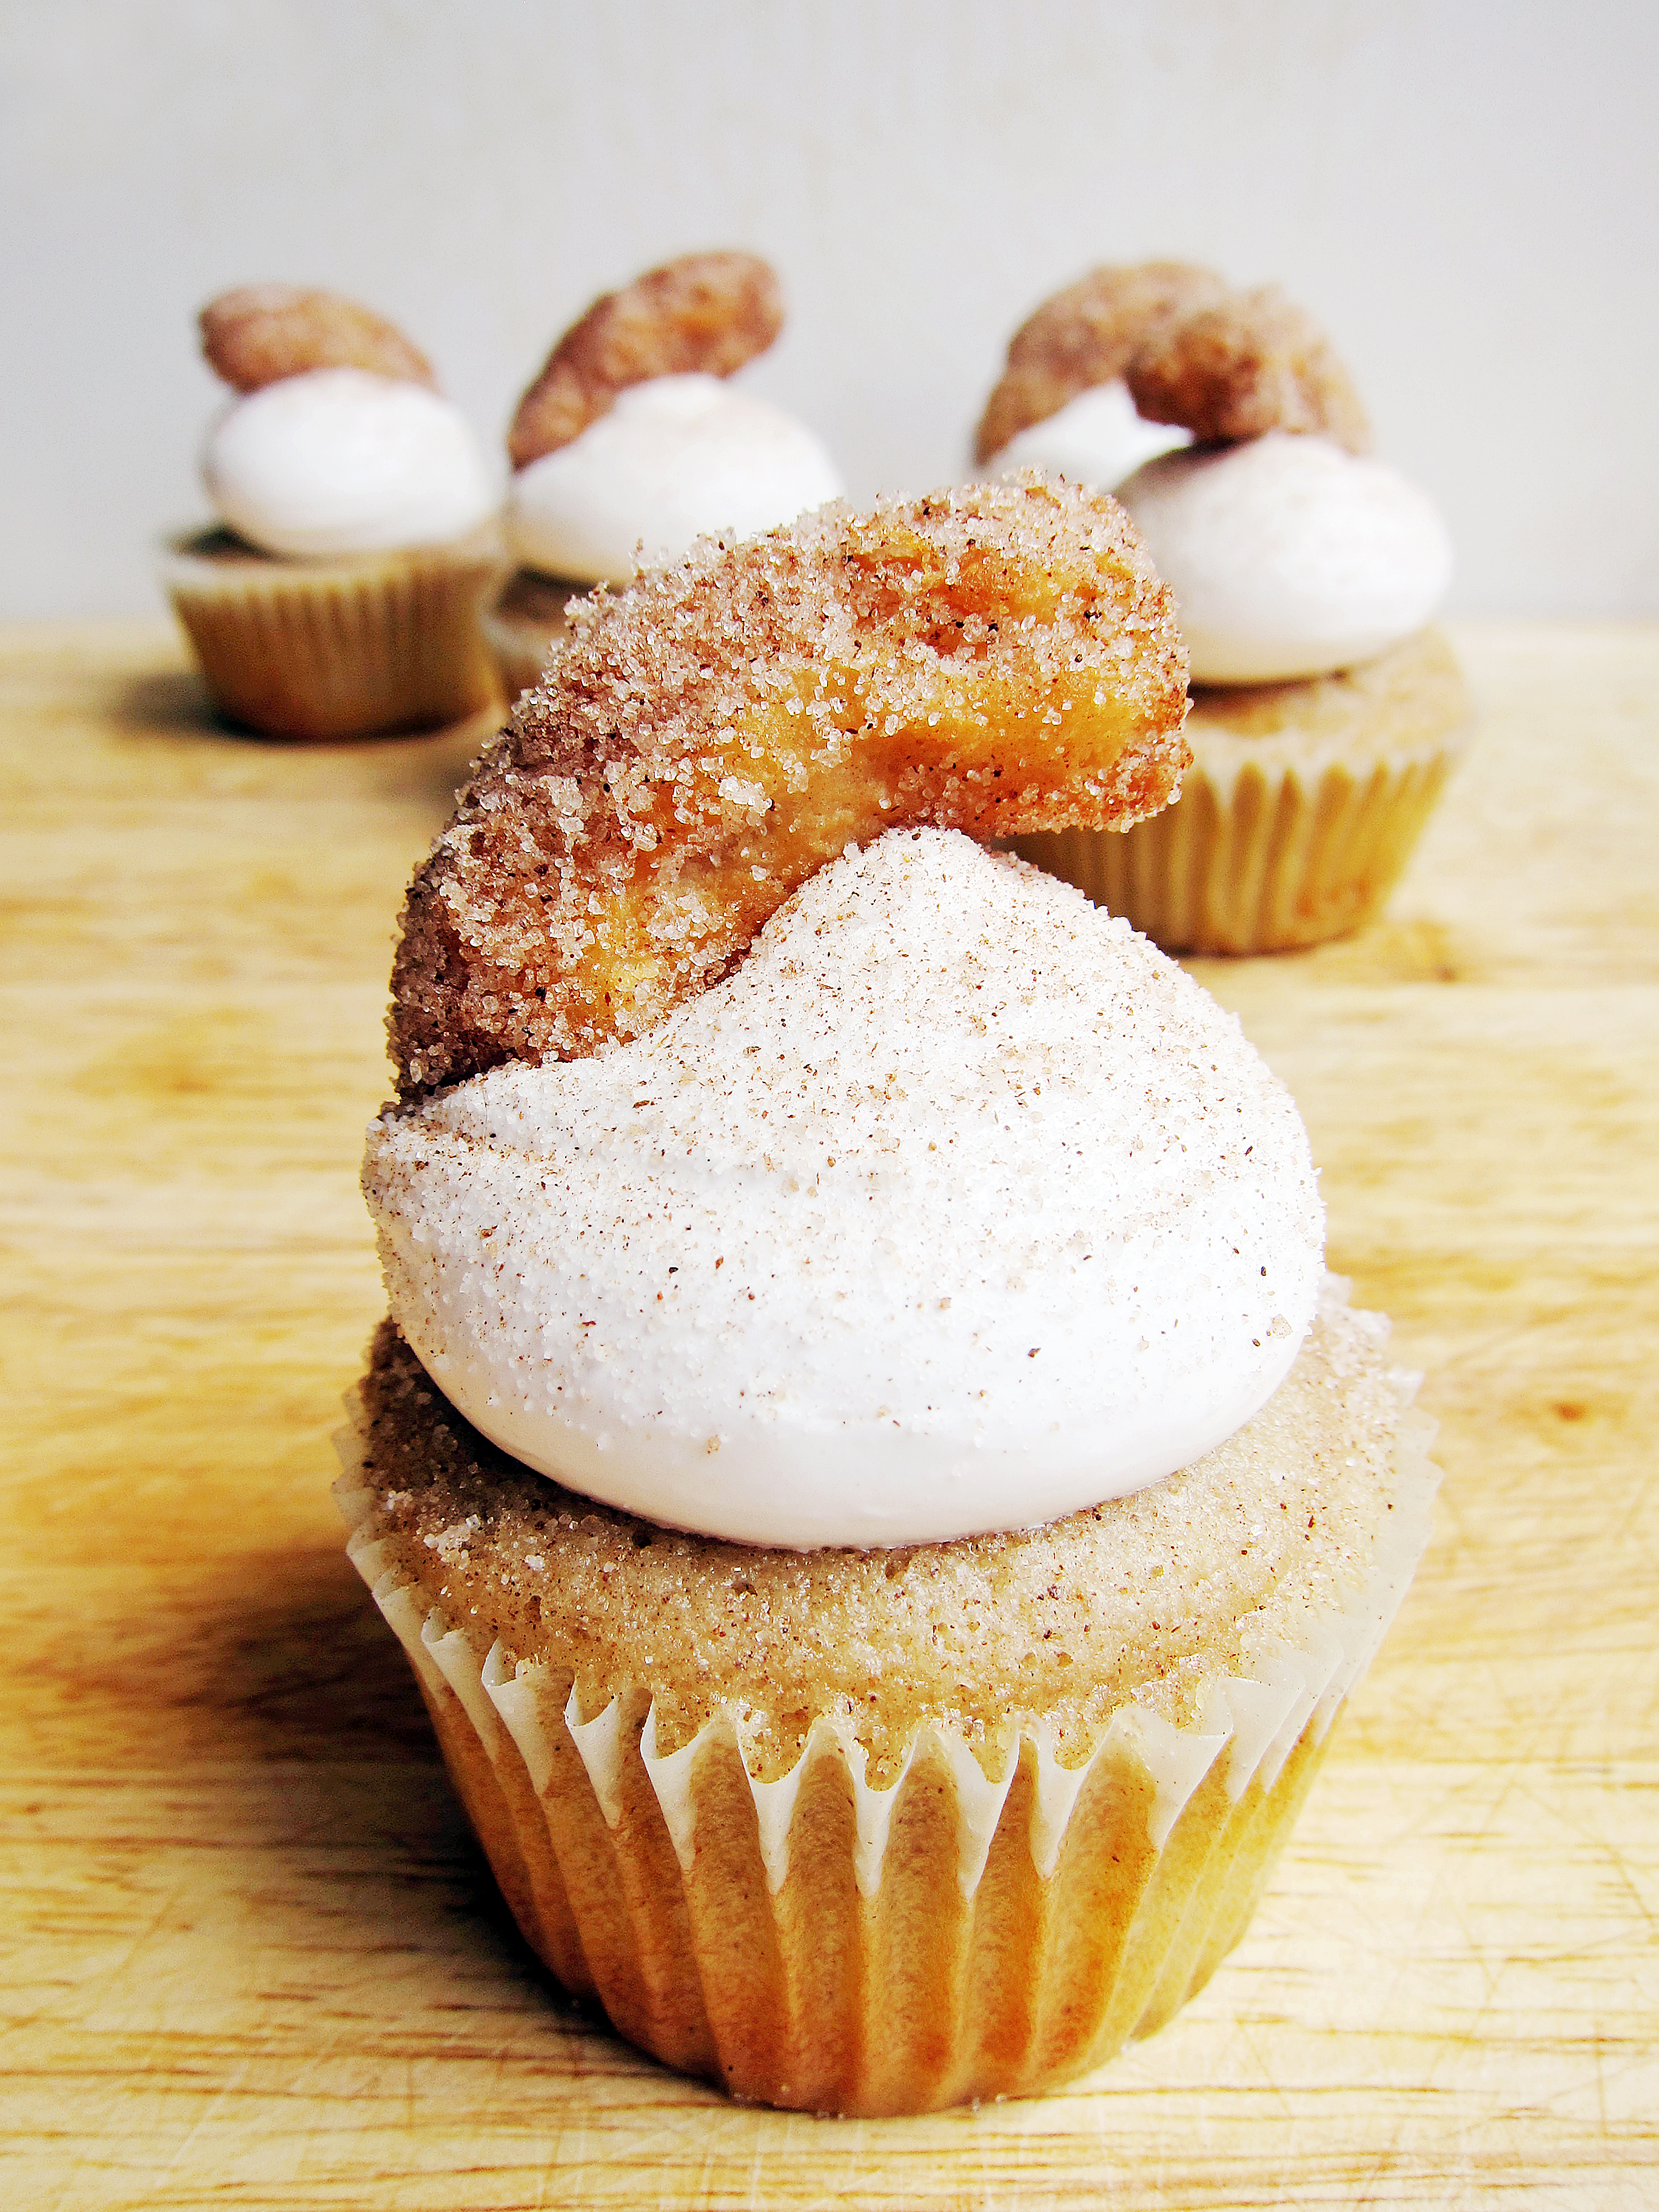
Here is my ode to a churro.  It is a cinnamon buttermilk cake with fluffy marshmallow frosting topped with cinnamon sugar and a bite-sized churro.  It takes a bit of work to make but it’s a lot of fun and a great idea for Cinco De Mayo. 🙂
churro cupcake 3Churro Cupcakes

Makes about 28 cupcakes

Cinnamon Buttermilk Cake

Ingredients:
3 c. cake flour
2  c. sugar
1½ tsp. ground cinnamon
1 tbsp. baking powder
¼ tsp. salt
1¼  c. buttermilk, divided
8 oz. unsalted butter, room temperature
4 eggs, room temperature
2 egg yolks
2 tsp. vanilla extract

Instructions:

  1. Preheat the oven to 350˚F and line muffin pans with cupcake liners.
  2. In a bowl of a standing mixer with the paddle attachment, add flour, sugar, ground cinnamon, baking powder, and salt. Mix until combined.
  3. On low speed, add 1 c. buttermilk and butter and mix until combined.
  4. In a separate bowl, whisk eggs, egg yolk, ¼ c. buttermilk, and vanilla extract until homogenous.
  5. On low speed, slowly add the egg mixture to the flour mixture.
  6. Increase speed to medium, and mix until combined.
  7. Fill 2/3 of cupcake liners.
  8. Bake about 13-16 minutes until cake is done or until a toothpick inserted into the center comes out clean.
  9. Let cool in pan for 10 minutes, and then move onto a cooling rack until completely cool.

Churros

For the cinnamon sugar
Ingredients:
½ c. sugar
1½ tsp. ground cinnamon

For the batter
Ingredients:
1½ tbsp. sugar
1 c. water
½ tsp. salt
2 tbsp. plus 2 quarts vegetable oil, divided
1 c. all-purpose flour

Instructions:

  1. In a medium shallow bowl, mix together ½ c. sugar and ground cinnamon.  Set aside.
  2. In a small saucepan combine sugar, water, sat and 2 tbsp. vegetable oil and bring to a boil.
  3. Take the pan off heat and stir in flour until a ball of dough forms.
  4. In a medium heavy bottomed pan, heat oil to 375˚F and line a sheet pan with paper towels for draining.
  5. Transfer dough to a piping bag fitted with a large star tip.
  6. Squeeze out 1-2 inches of dough and have it ready for frying.
  7. Once the oil is ready, use a slotted spoon or a spider to transfer the dough into the hot oil and fry until golden brown.
  8. Remove the fried dough onto the sheet pan with a slotted spoon or a spider and let drain for about a minute.
  9. Toss the warm churros into the cinnamon sugar mixture.  Reserve leftover cinnamon sugar mixture to dust on top of cupcakes.

Marshmallow Frosting

Ingredients:
6 egg whites (180 g.)
1½ c. sugar
¼ tsp. cream of tartar
1 pinch of salt
1½ tsp. vanilla extract

Instructions:

  1. In a small pot fill about 1 in. of water and let it come to a simmer.
  2. In the bowl of a stand mixer, whisk egg whites, sugar, cream of tartar and salt until homogenous.
  3. Once the water comes to a simmer, place the bowl on top of the pot and whisk the egg white mixture until the sugar is completely dissolved and no longer grainy.
  4. Move the bowl to your standing mixer fitted with a whisk attachment and beat on high speed until glossy and stiff.
  5. Add the vanilla extract and mix completely.
  6. Fill a piping bag fitted with the biggest plain piping tip you have.

Assembly:

  1. Pipe a large dollop onto the cupcake by holding the piping bag perpendicular to the cupcake and squeeze using an even pressure until your desired size forms.
  2. In a fine mesh sieve, dust reserved cinnamon sugar topping onto the frosted cupcake.
  3. Garnish with a piece of churro.

Cake recipe adapted from sky high.
Churro recipe adapted from just a taste.
Marshmallow frosting recipe adapted from Marth Stewart.

Easter Bunny Surprise Cake

Easter bunny cake 1Here comes Peter Cottontail, Hoppin’ down the bunny trail… was the song that was running through my head when I thought of this cake.  Can you imagine the look of surprise people will give you when you cut into this?  Unfortunately for me, my family saw every step of the assembly and expected it when I cut into this cake.  Learn from my mistake, and keep it secret when you give it a try.
Easter bunny cake 2The great thing about this technique is that it is adaptable to many holidays and special occasions.  Off the top of my head, you could do tulips for Mother’s Day, a bat for Halloween, and even alternating red, white, and blue stars for Independence Day.  I think I may be giving away future blog posts so I’ll just stop here.
Easter bunny cake 3My only caveat to you is: 1) measure to make sure your cutouts will fit into the loaf pan (both horizontally and vertically) and 2) to keep your cutout design simple because you will lose the finer details when the cake bakes.  Other than that, I hope you have fun trying this cake!  Don’t worry, at this point I’m so tired of bunnies and Easter eggs, you will probably not see any more posts of them until next spring. 😀

Easter bunny cake 4

Easter Bunny Surprise Cake

You will need:
1 Batch of Pink Sheet Cake
1 Batch of Yellow Cake
1 Batch of Green Frosting
1 Batch of Chocolate Frosting
Bunny Cookie Cutter
Mini Chocolate Eggs
Grass Frosting Tip (Optional)

Pink Sheet Cake

Ingredients:
1 ½ c. all purpose flour
1 c. sugar
½ tbsp. baking powder
⅛ tsp. salt
¾ buttermilk, divided
4 oz. unsalted butter, room temperature
2 eggs,  room temperature
1 egg yolk
¼ tsp. vanilla extract
Pink gel food coloring

Instructions:

  1. Preheat the oven to 350˚F and line a sheet pan with parchment paper or a silicone mat.
  2. In a bowl of a standing mixer with the paddle attachment, add flour, sugar, baking powder, and salt. Mix until combined.
  3. On low speed, add ½ c. buttermilk and butter and mix until combined.
  4. In a separate bowl, whisk eggs, egg yolk, ¼ c. buttermilk, and vanilla extract until homogenous.
  5. On low speed, slowly add the egg mixture to the flour mixture.
  6. Increase speed to medium, and mix until combined.
  7. On low speed, add pink food coloring until desired color is reached.
  8. Spread batter onto the sheet pan until fully covered.
  9. Bake 10-12 minutes until cake is set.
  10. Let cool.
  11. Cut out bunny shapes. (as shown above)
  12. Chill in freezer.

Yellow Cake

Ingredients:
1 c. cake flour
1 c. all-purpose flour
1 ⅓  c. sugar
¾ tbsp. baking powder
⅛ tsp. salt
1 c. buttermilk, divided
6 oz. unsalted butter, room temperature
3 eggs, room temperature
1 egg yolk
½ tsp. vanilla extract

Instructions:

  1. Preheat the oven to 350˚F and line a loaf pan with parchment paper.
  2. In a bowl of a standing mixer with the paddle attachment, add flour, sugar, baking powder, and salt. Mix until combined.
  3. On low speed, add ¾ c. buttermilk and butter and mix until combined.
  4. In a separate bowl, whisk eggs, egg yolk, ¼ c. buttermilk, and vanilla extract until homogenous.
  5. On low speed, slowly add the egg mixture to the flour mixture.
  6. Increase speed to medium, and mix until combined.
  7. Spread batter until ¼-½ in. up the loaf pan.
  8. Stack the chilled cake cutouts side by side, horizontally, without any spaces in between.
  9. Place the stacked cake cutouts into the center of the cake pan, carefully making sure no gaps form in between.
  10. Spread rest of the batter into cake pan.
  11. Bake 30-45 minutes until cake is done or until a toothpick inserted into the center comes out clean.
  12. Let cool in pan for 10 minutes, and then flip onto a cooling rack until completely cool.

Chocolate Frosting

Ingredients:
⅔ c. all-purpose flour
⅓ c. cocoa powder
1 c. milk
⅛ tsp. salt
8 oz. butter
⅔ c. sugar
8 oz. chocolate, melted and cooled
½ tsp. vanilla extract

Instructions:

  1. In a saucier pan, put milk, salt, cocoa powder and flour and whisk until combined on medium heat.
  2. Continuously whisk mixture until thickened to a pudding like consistency.
  3. Once thickened, strain through a mesh strainer into a bowl with a spatula to remove lumps.
  4. Place a piece of plastic wrap on top of the flour mixture and put into the refrigerator until fully cool.
  5. In a mixer bowl fitted with the whisk attachment, mix the sugar and butter on high speed until fluffy and pale about, 5-10 minutes.
  6. Add the chilled flour mixture and continue to whip on high speed until the sugar is completely dissolved and the mixture is no longer gritty, about 5-10 minutes.
  7. Add the vanilla extract and melted chocolate and mix until combined.
  8. Smooth chocolate frosting over the loaf cake, and place in the freezer

Green Frosting:

Ingredients:
½ c. whole milk
¼ c. flour
⅛ tsp. salt
2 oz. unsalted butter, room temperature
½ c. sugar
¼ tsp. vanilla extract
green gel food coloring

Instructions:

  1. In a saucier pan, put milk, salt and flour and whisk until combined on medium heat.
  2. Continuously whisk mixture until thickened to a pudding like consistency.
  3. Once thickened, strain through a mesh strainer into a bowl with a spatula to remove lumps.
  4. Place a piece of plastic wrap on top of the flour mixture and put into the fridge until fully cool.
  5. In a mixer bowl fitted with the whisk attachment, mix the sugar and butter on high speed until fluffy and pale about, 5-10 minutes.
  6. Add the chilled flour mixture and continue to whip on high speed until the sugar is completely dissolved and the mixture is no longer gritty, about 5-10 minutes.
  7. Add the vanilla extract and mix until combined.
  8. Add green frosting until desire colored is reached.
  9. Add a thin layer of green frosting to top of cake.
  10. Chill cake in freezer for 3-5 minutes.
  11. Optional: Put the green frosting into a piping bag fitted with the grass frosting tip and pipe grass all over top of chilled cake.
  12.  Garnish top of cake with mini chocolate eggs.

White Chocolate Tiramisu Eggs

Two years ago, I bought a Jello egg mold with grand hopes that it will mold and form beautiful rainbow-striped Jello eggs.   After mixing endless bowls of different flavored Jello, the project flopped terribly.  The eggs didn’t set properly and I ended up with shattered Jello eggs that wouldn’t hold their shape.  I called it a lost cause and put the mold away thinking I would never use it again.

Chocolate Tiramisu Egg 3

Fast forward two years and I unearthed the egg mold while digging through my cake pans.  Since Easter is around the corner, I called it fate and contemplated a way to use it.  It didn’t come easy, but in the end I finally thought of an original idea.  An idea that was original until this moment when I googled it and saw that 7 hours ago someone beat me to the punch!!  NOOOO!  Le sigh.

Chocolate Tiramisu Egg 2

Well original or not, these eggs look so much like the real thing at first glance it’s a little weird to eat them.  But you need to, because encased in the chocolate egg is the most heavenly bite of tiramisu.  It’s adorable and let’s be honest, it’s a little fun freaking out people.

Chocolate Tiramisu Egg 4

White Chocolate Tiramisu Eggs

You will need:

1 Batch of Lady Fingers (Recipe Below)
1 Batch of Mascarpone Cream (Recipe Below)
1 Cup of Strong Coffee
1/2 Package of White Chocolate Melts
1 Jello Egg Mold*
Approximately 10 Pieces of Yellow Chocolate Melts
Cocoa Powder (Optional)

Assembly:

  1. Place white chocolate in a microwave safe bowl/cup with a spout.
  2. Melt the white chocolate melts in the microwave in 15 second intervals until completely melted.
  3. Thoroughly spray the inside of your egg mold with a non-stick cooking spray.
  4. Use the spout of your bowl/cup to pour white chocolate into the egg about ¼ of the way.
  5. Start rotating your egg mold (left, right, and upside down) until it starts to set.** (When flipping the egg mold upside down, do so above your melted chocolate so the excess can drip back into the bowl.)
  6. Once set, repeat steps 4 and 5 two more times to ensure through covering and place in freezer to completely set. (4-5 minutes)
  7. While the eggs are setting,
    1. Punch out ½ -⅔ in circles of the prepared lady fingers.
    2. Place Mascarpone cream into a piping bag fitted with a ¼ in. plain piping tip.
  8. Take the eggs out of the freezer and carefully unmold the chocolate. It may stick a little. Just wiggle it around and it should come out in one piece.
  9. Run a serrated knife in hot tap water and wipe off excess water. While the knife is hot, cut the top ¼ -⅙ of the egg. (After every egg, make sure to reheat your knife for easier cutting.)
  10. Place the eggs back into the bottom half of the egg mold, and put about a teaspoon of the mascarpone cream inside.
  11. Layer one piece of the lady finger and with a small pastry brush, brush coffee onto the lady finger to soak it. Place a second piece of lady finger on top and brush coffee again.
  12. Layer another teaspoon of mascarpone cream, and repeat step 11.
  13. Layer the final teaspoon of mascarpone cream and let set in freezer.
  14. Melt the yellow chocolate melts and put into a squeeze bottle for easy use.***
  15. Take the chocolate out of the freezer and squeeze a dollop of yellow chocolate melts to imitate the yolk.
  16. Optional: Pinch a little cocoa powder between your fingers and (over the sink) flick specks of cocoa onto the white chocolate. Rotate the egg and repeat until completely speckled.  (This resembles the cocoa that is usually dusted on top of traditional tiramisu.)

Lady Fingers

Ingredients:
2 eggs, separated
6 tbsp. sugar, divided
⅓ c. flour, sifted
½ tsp. vanilla extract
pinch of salt

Instructions:

  1. Preheat oven to 350 degrees Fahrenheit and prepare a sheet pan lined with parchment paper or a silicone mat.
  2. In a stand mixer bowl fitted with the whisk attachment, whip egg whites until foamy.
  3. Slowly add in 2 tablespoons of sugar and continue whisking until stiff, glossy peaks form.
  4. Empty the egg whites in a separate bowl.
  5. Place 2 egg yolks and 4 tablespoons sugar into the mixer bowl and mix until pale and very thick.
  6. Add the vanilla extract and fold in sifted flour. (It will be very thick.)
  7. Mix in 1/3 of the reserved whipped egg whites to the flour mixture
  8. Fold in the remaining whipped egg whites 1/3 at a time.
  9. Spread the batter onto prepared sheet pan to about ¼ inch thick.
  10. Bake about 8 minutes, rotating the pan halfway until golden brown
  11. Let cool.

Mascarpone Cream

Ingredients:
1 c. heavy cream
¼ c. powdered sugar
4 oz. mascarpone cheese

Instructions:

  1. In a cold stand mixer bowl fitted with the whisk attachment, whip the heavy cream until soft peaks form.
  2. Sift in the powdered sugar and mix until just incorporated.
  3. Add the mascarpone cheese and mix until stiff peaks form.

* If you do not own a Jello egg mold, you can always take a shortcut and order pre-made hollow chocolate eggs from Amazon. If you do this, start from step 7.
** This process is messy. Don’t let that get you down!
*** If you do not have a squeeze bottle, you can always just spoon on the chocolate.

Bunny Cake Pops

IMG_2651

When I came across a package of edible grass at Target, a passage from “Charlie and the Chocolate Factory” by Roald Dahl was the first thing that came into my mind:

“The grass you’re standing on, my dear little ones, is made of a new kind of soft, minty sugar that I’ve just invented! I call it swudge! Try a blade! Please do! It’s delectable!

Automatically, everybody bent down and picked one blade of grass – everybody, that is, except Augustus Gloop, who took a big handful.”

Filled with nostalgia from my childhood obsession with the wonderful world of Willy Wonka, I immediately grabbed two bags and tossed it into my basket.  From there, it promptly sat on my counter waiting to be used for something scrumdiddlyumptious.

IMG_2644

This is what I have for you. It’s perfect for Easter*, spring and bunny themed parties. I hope you give it a try and wait for the squeals of “It’s so cute!” to follow you for the rest of the day.

IMG_2666

Bunny Cake Pops

You will need:

1 Batch of Cake (whatever flavor you prefer, you may use 1 box cake mix if pressed for time)
1 Batch of Frosting (whatever flavor you prefer, you can use 1 can frosting if pressed for time)
1 Bag of White Candy Melts
Mini Marshmallows
Edible Grass
Heart Shaped Sprinkles
Black Edible Sugar Pearls
Light Pink Sanding Sugar
Lollipop sticks or Striped Party Paper Straws

Instructions:

1.  Crumble up cooled cake until you have very fine cake crumbs.

2.   Add half of the frosting to the cake and mix until it is evenly distributed.  If you can mold the cake into a firm stable ball at this point, stop.  If not, add the rest of the frosting ¼ at a time until you are able to shape it.

3.  Scoop tablespoon sized balls of the cake mixture and shape into an oval (approximately the size and shape of a piece of sushi rice ball).

4.  Chill cake balls in the freezer until firm (this could take anywhere from 15-30 minutes)**

5.  While the cake is chilling:

a. Cut the mini marshmallows vertically, and dip into sanding sugar for the ears.

b. Cut more mini marshmallows horizontally for the tails.

c. Cut edible grass into desired size.

d. Melt the chocolate wafers in the microwave until completely smooth.

6.  Remove the cake balls from the freezer and dip your stick (or straw) into a little chocolate and insert it into the top middle of the cake ball. Place back into the freezer for 5-10 mins until the chocolate has set.

7.  Line a sheet with parchment paper and place tufts of edible grass where your coated cake ball will land.

8.  Once the chocolate has set, take the stick and submerge the cake ball into the melted chocolate and gently tap the excess chocolate off.  Place on the edible grass.

9. Quickly, before the chocolate sets, place the tail on one end and the ears on the opposite end.  Place two black pearls for the eyes and a heart shaped sprinkle for the nose.  You can use a (clean) tweezer to facilitate the placement of the eyes and nose.

10. Let the chocolate set at room temp, or if you’re in a hurry you can place it in the freezer to set it.


*I am aware that bunnies have nothing to do with the meaning of Easter.
**Be careful when chilling the cake balls.  If the cake balls are too cold, it will crack your chocolate when it comes to room temperature.