Where in the world did the time go?? It’s a week before Thanksgiving! I always feel a little overwhelmed right before the week of Thanksgiving. Not so much the day of, because by then I have already planned and prepped for the big day. But the week before, I’m trying to figure out grocery lists, what dishes to remake from last year and try for this year, and the number of people coming while doing every day things like work, house chores and errands. This is the first time I ever felt like leaving Thanksgiving dinner to someone else (that says volumes since I’ve been doing Thanksgiving dinner since I was a junior in high school).
 As children of Korean immigrants, we didn’t celebrate American holidays like my non-Asian friends. Thanksgiving was just another day off of school (which we were more than grateful for) and we would maybe have a chicken for dinner. In hindsight, we didn’t even have chicken every year. I didn’t even care about having a Thanksgiving meal with turkey until my one friend said to me, “What?? You don’t eat turkey on Thanksgiving?? No mashed potatoes? No gravy or stuffing? What about sweet potatoes with marshmallows, you must have that at least.” Mind you this was over AIM (omg remember those days?? Being on AIM was the lifeline to having a social life) and it may have sounded harsher than he intended in my mind. Either way, that night (the night before Thanksgiving) I searched high and low for a turkey recipe and in the morning, I insisted that my dad buy us a turkey. (Now that I think about it, it was a miracle in itself to have found a fresh turkey the day of Thanksgiving.) So with a fresh 12-lb. turkey with no other fixings, we made our first Thanksgiving meal. It was just salted, peppered and basted with butter and it was the most delicious turkey I’ve ever had.
 My meals since then have evolved and developed. We have had a variation of every side dish you can think of (mashed and roasted potatoes and vegetables, stuffing, salads, cranberry sauce, gravy, sweet potatoes, mac and cheese…). I’ve tried about every method there is to making a turkey (brined, dry-brined, roasted upside down halfway and turned over, spatchcocked, blanketed with a weave of bacon strips…) with the exception of deep frying. But nothing ever tastes as good as that first turkey I made.
 Either way, yes, for once in my life I feel overwhelmed with Thanksgiving. Last year, when my brother asked, “Are we having a Thanksgiving dinner with everyone?” I replied, “As long as I’m living and breathing, there is always Thanksgiving dinner.” I think I forget what we started with and it’s so easy to see the tough part of the task that it’s even easier to dismiss the highlights of the fruit of the labor. So this year, I’m so incredibly thankful for every opportunity and task that I’ve been given. Not because I’m so gung ho about the work, but because I’ve been blessed with the ability and the environment to accomplish it and that is more than enough to be thankful for.
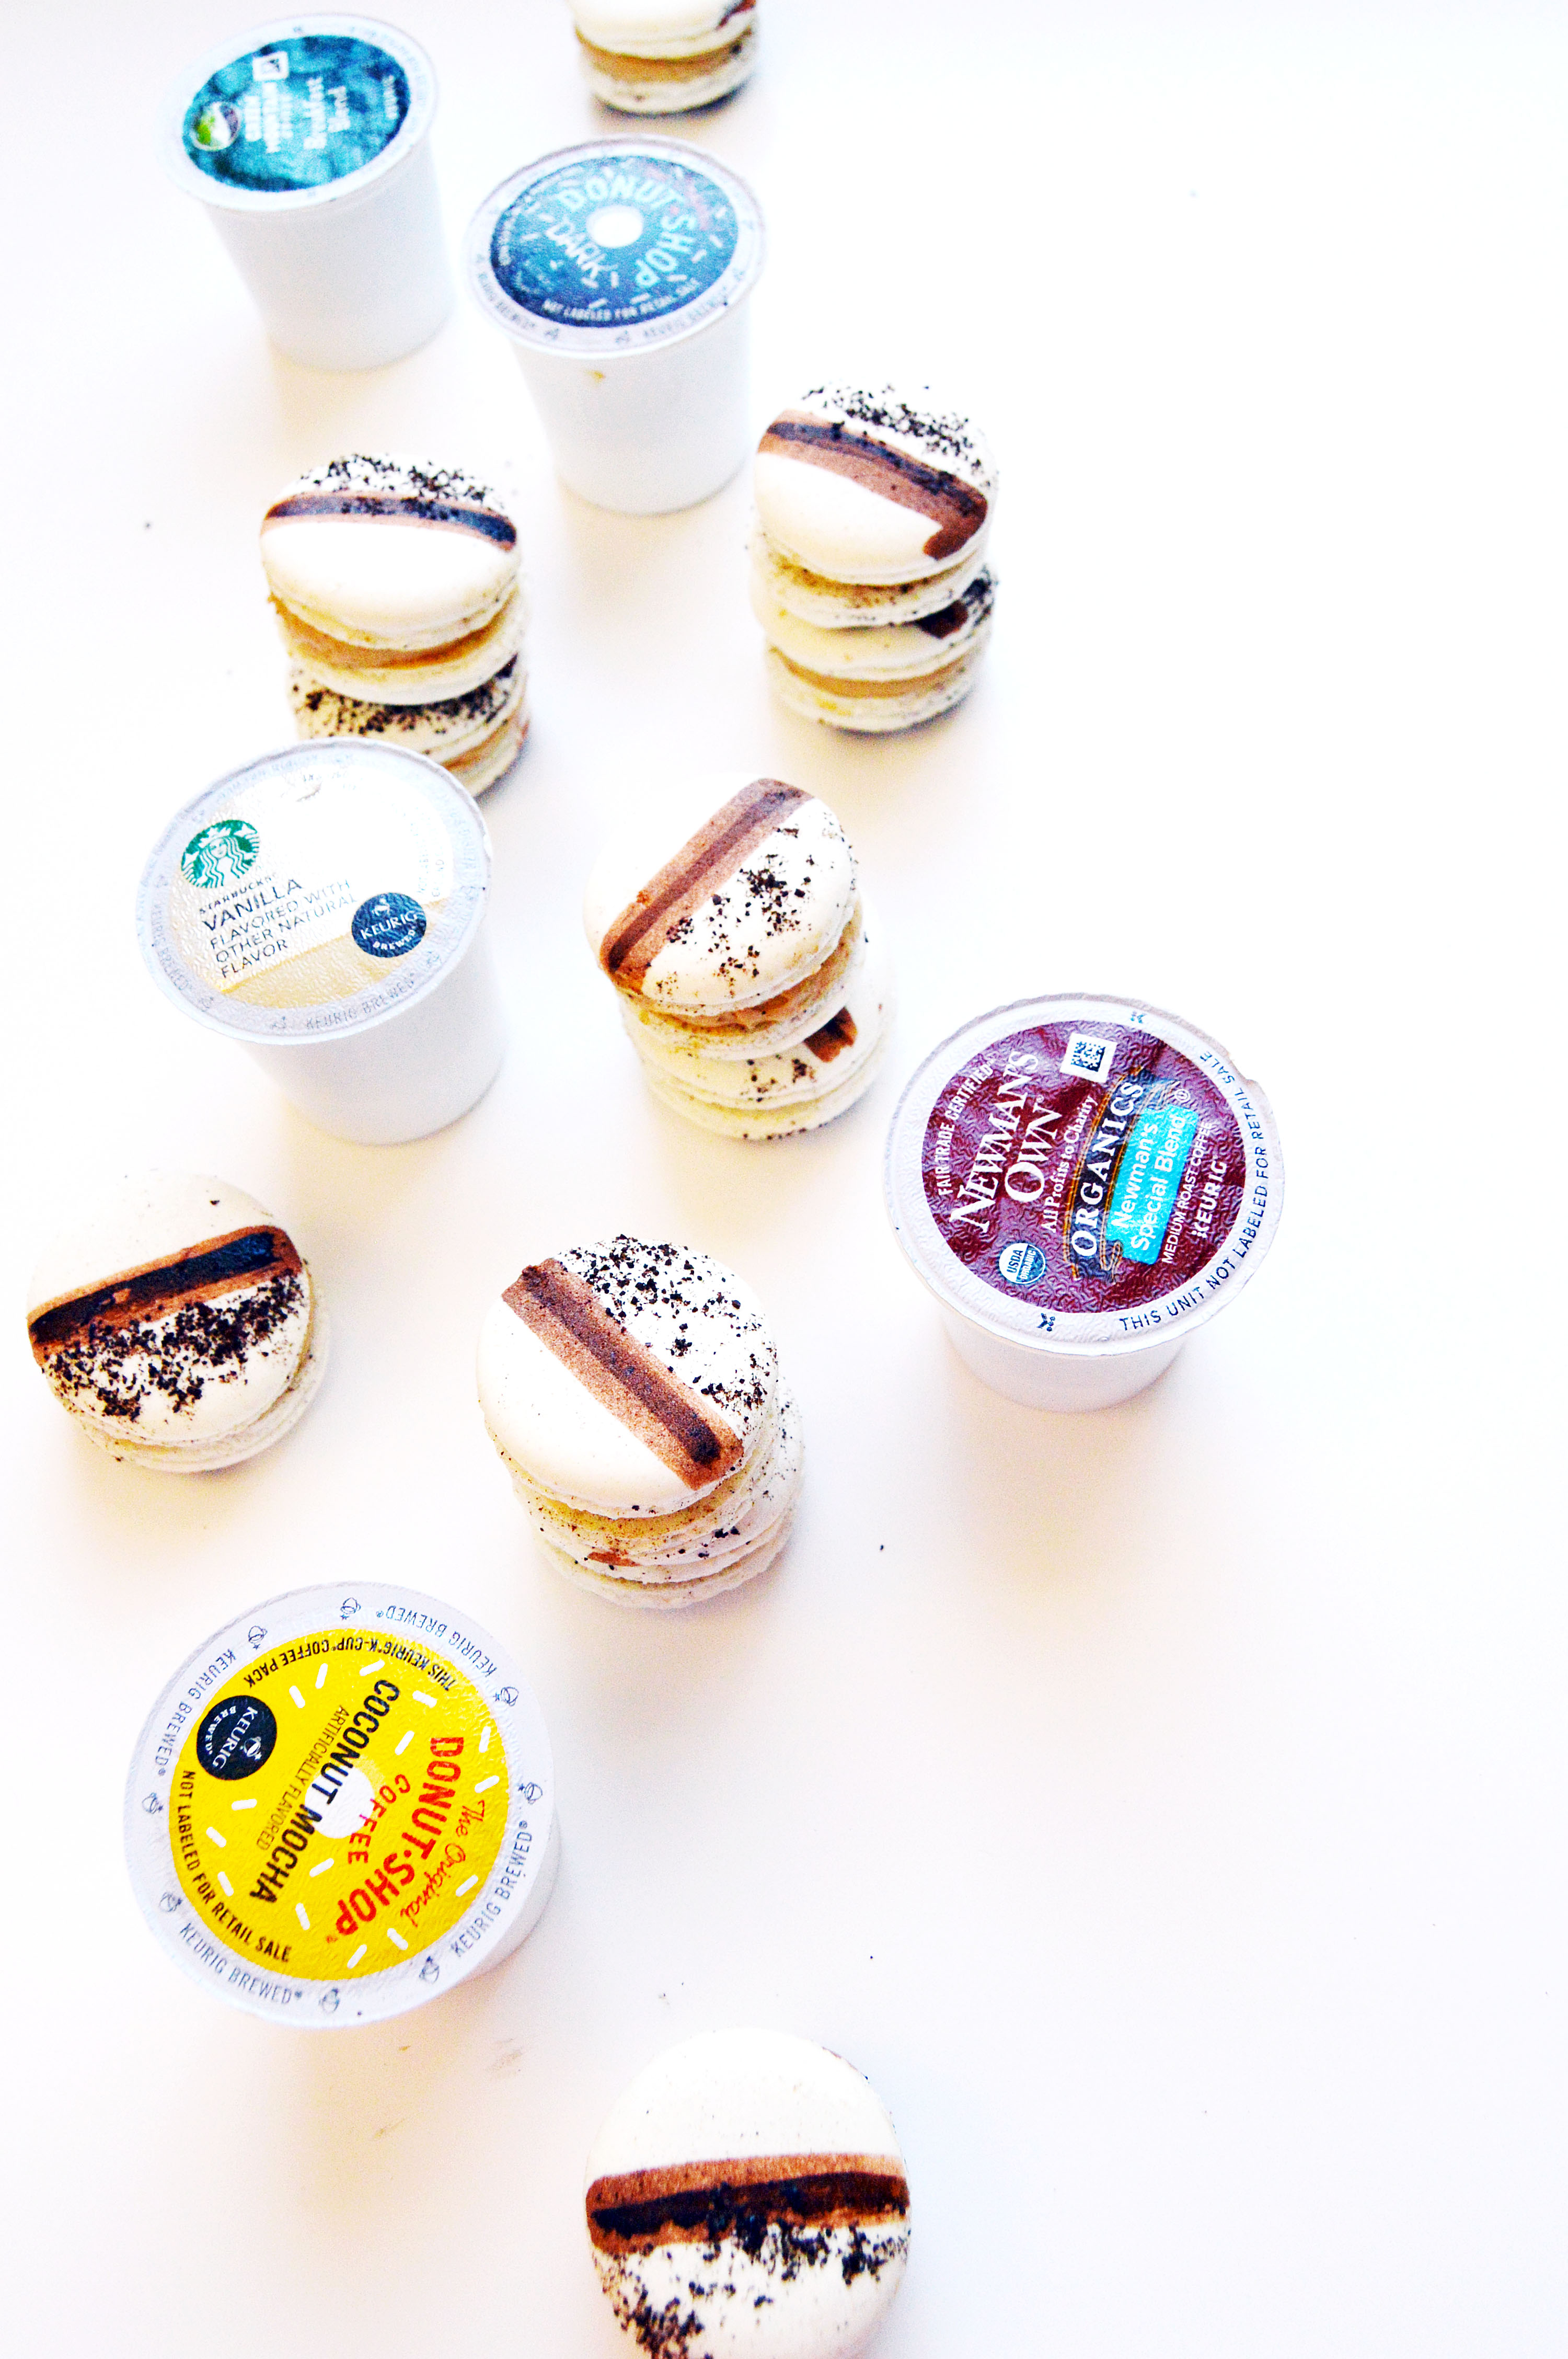
 *Somehow I ended up with this soliloquy about Thanksgiving. But this macaron would be the perfect ending to a meal. Thanks to the coffee emulsion (which is more potent than an extract) and a sprinkling of coffee grounds (I just opened up a fresh Keurig pod), it is bursting with coffee flavor. Also, I’m kinda macaron-ed out. Hahaha So it may be a while before you see another macaron post. But I’m looking forward to bringing different things for the blog. 🙂
Coffee Macarons
For the macaron shell:
Ingredients:
212 g. almond meal
212 g. powdered sugar
172 g. egg whites, divided to 82 g. and 90 g (aged, if possible)
236 g. sugar
158 g. water
fresh ground coffee (for garnish)
brown gel food coloring (for decorating the macaron)
vodka (for diluting the food coloring)
Instructions:
- Line two baking sheets with parchment paper or silicone mats.
- In the bowl of a food processor, add the almond meal and powdered sugar and pulse until thoroughly combined.
- Sift the mixture over a large mixing bowl, throwing out the lumps as they appear. Add 82 g. of the egg whites and stir until you get a thick mixture.
- In a small pot attached with a candy thermometer, combine the sugar and water over medium heat and boil until the syrup reaches 200˚F.
- Once the syrup reaches 200˚F, start whipping the remaining 90 g. in the bowl of your stand mixer with the whisk attachment on medium speed until soft peaks are reached.
- Once the syrup reaches 248 ˚F, remove the pot off the burner and slowly pour the syrup down the side of the mixing bowl with the egg whites on medium speed.
- Once the egg whites are fully incorporated, increase the speed to medium high until egg whites form glossy, stiff peaks.
- Mix a ⅓ of the egg white mix to the almond mixture and stir together until the batter is slightly lighter and less pasty. From then on, fold in ⅓ of the egg white mixture at a time until the mixture “flows like magma”. The mixture should be smooth and run thick ribbons off the spatula.
- With a pastry bag fitted with a ½ in. plain tip, pipe 1¼ – 1½ in. rounds.
- The piped batter may have peaks but should smooth away in a minute or two.
- Sprinkle coffee grounds on only 1/3 of the macaron shell.
- Let the batter stand until the tops of the macarons are dry to the touch, about 30 minutes to 1 hour.
- Preheat the oven to 325-350˚F. If your oven tends to run hot go for 325˚F, if not then 350˚F.
- Lower the heat to from 350˚F to 300˚F. (If starting from 325˚F, lower to 275˚F.)
- Bake 10-12 minutes, until the feet are formed and the tops are smooth. The macaron shell is done when you slightly wiggle it and it starts to come off of the parchment paper / silicone mat.
- Remove pan from oven and reheat oven to higher temperature for 10 minutes before baking the next tray, lowering the temperature when you start baking it.
- Continue until you bake all of the macaron shells.
- Once the macarons have cooled, dilute brown food coloring in some vodka to make it paint-like.
- With a flat brush (food-only use), draw a thick line down the middle of the macaron.
- Once all the macarons have been drawn, dilute food coloring with a drop or two of vodka for a stronger color and turning the flat brush to the side, draw a thin stripe down the thick light brown stripe.
- Let dry and fill with coffee frosting.
For the coffee frosting:
Ingredients:
1 c. whole milk
¼ c. flour
⅛ tsp. salt
8 oz. (2 sticks) unsalted butter, room temperature
½ c. sugar
1 – 1½ tbsp. coffee emulsion
Instructions:
- In a small pot over medium heat, whisk milk, salt and flour until combined.
- Continuously whisk mixture until thickened to a pudding like consistency.
- Once thickened, strain through a mesh strainer into a bowl with a spatula to remove lumps.
- Place a piece of plastic wrap on top of the flour mixture (to prevent skin from forming) and put bowl into the fridge until fully cool.
- In a mixer bowl fitted with the whisk attachment, mix the sugar and butter on high speed until fluffy and pale about, 5-10 minutes.
- Add the chilled flour mixture and continue to whip on high speed until the sugar is completely dissolved and the mixture is no longer gritty, about 5-10 minutes.
- Add 1 tbsp. coffee emulsion and mix until combined.
- Taste and if you want a stronger flavor, add another ½ tbsp. coffee emulsion.

 It’s December! I can’t believe that it’s already more than a week into December and Christmas is fast approaching. No, I haven’t done my holiday shopping yet but I can already envision the empty bank account as I think about the things I have to buy. But the Christmas tree is up and I’m glad I got that done at least.
 When December rolls around, cookies seem to be extra popular to bake. I’ve never done cookie exchanges or made cookie platters but I think it’s always fun to see people enjoy the things you make in the kitchen. These green tea white chocolate sugar cookies are extra tender and soft. The white chocolate in the batter softens the taste of green tea, which can come across as bitter to some people. But the green tea flavor is still bold and you might not even notice the white chocolate.
 I put a dollop of royal icing on mine, because I made a whole batch to decorate the same cookies that were cut into Christmas tree shapes. But I didn’t realize that the royal icing wouldn’t stick onto the cookies because of the coating of green tea sugar. I had to force it onto the domed cookies by squeezing it straight onto the cookie and hoping it would stay. So, if you are planning on decorating these, you can skip the green tea sugar coating (ah, but that sugar is so delicious though!!).

 It’s officially fall. Only it’s too cold for fall. Last night it was 35 degrees outside and this morning there was a chance of snow for a couple of hours. As much as I love having four seasons, I feel like fall in New Jersey only lasts a few weeks. Whenever I’m on Pinterest or on Instagram I see posts of girls in short sweater dresses with ankle boots without tights or thick coats, I ask myself, “Just where do these girls live? And how can I get myself there?”
 Although it may not feel so much like fall, we can certainly eat like it is. The color orange seems to be the theme of fall food. Pumpkin, butternut squash, sweet potatoes, acorn squash… all of these have orange flesh that not only taste great but are healthy too. If you’ve never tried Kabocha squash, it also has an orange flesh but is sweeter than a butternut squash. Mix that with the salty bacon and the delicate fruitiness of the Enoki mushroom, you have a winner. I added a dash of Unagi sauce on one of them and it was the perfect touch.
 It is incredibly easy to put together and you don’t even have to put in the Kabocha squash or the Unagi sauce. It can be as easy as wrapping the mushroom with the bacon and you’ll still have a crowd-pleasing appetizer that can be made on the fly.
 I probably won’t be able to write another post before Thanksgiving. So, I hope you have the happiest of Thanksgivings with your loved ones this Thursday and I’m so thankful for all of you reading this. ❤