The Ultimate Oreo Ice Cream Cake with Homemade Crunchies

how to make an ice cream cake

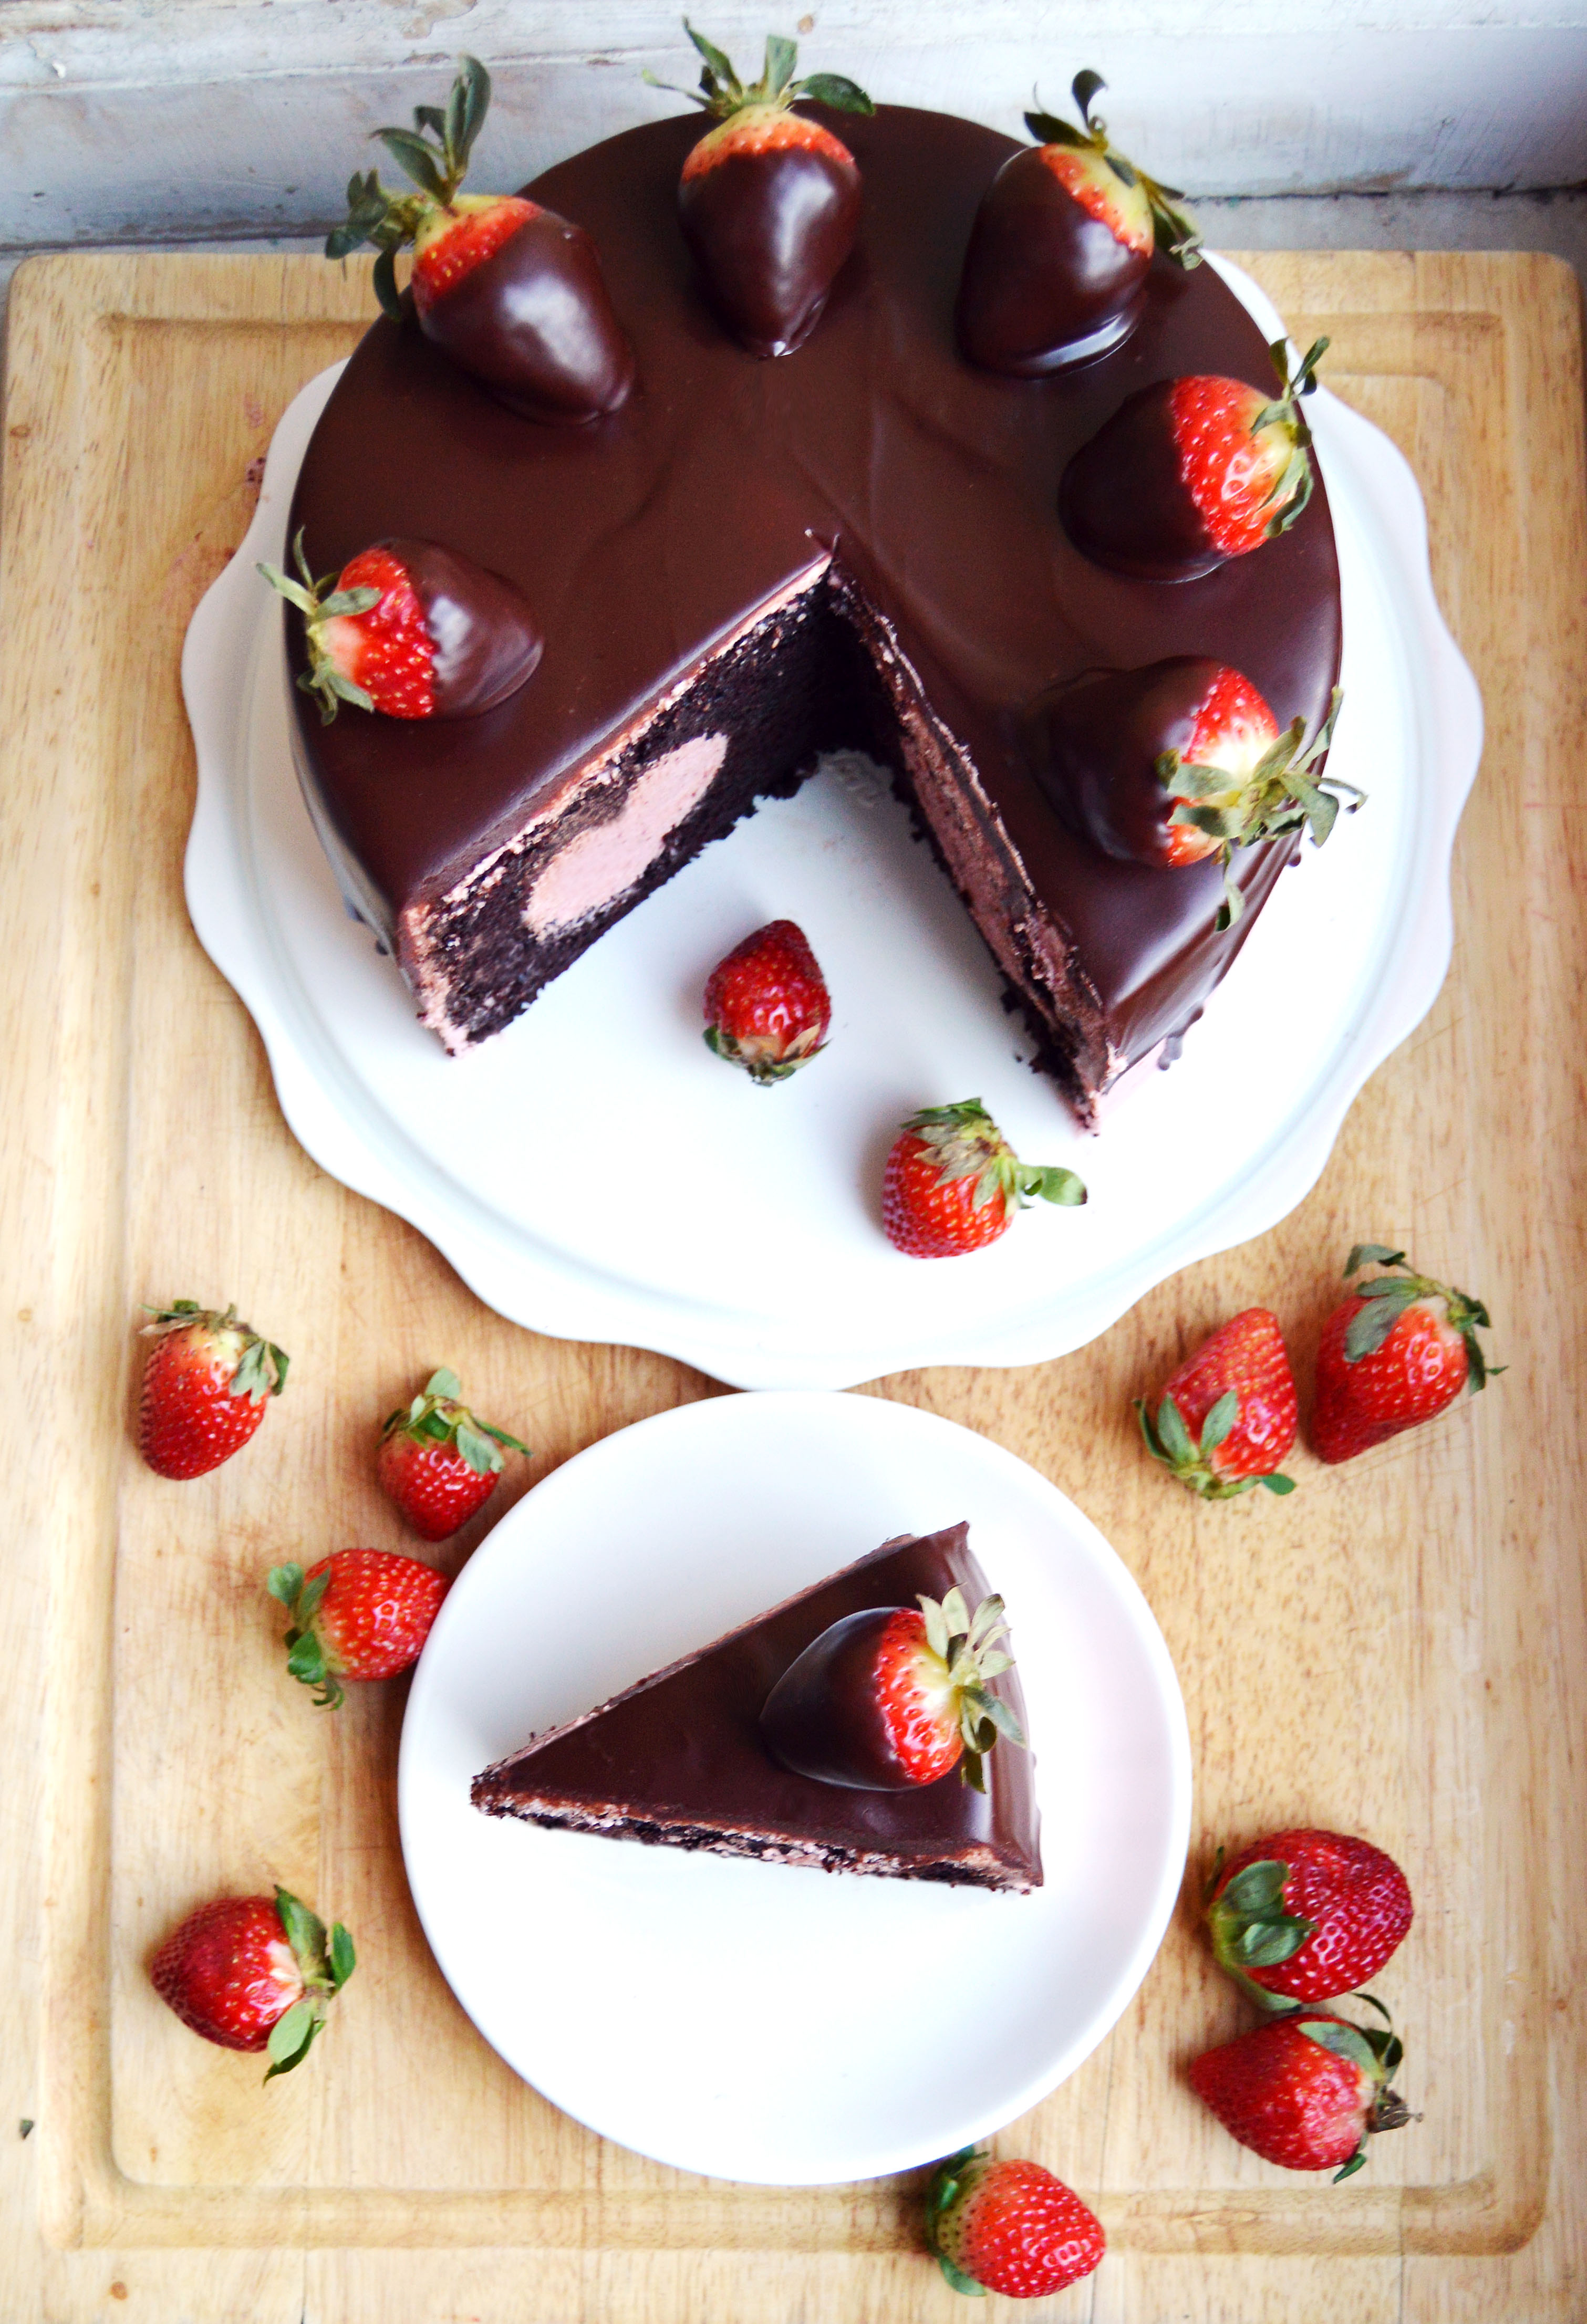
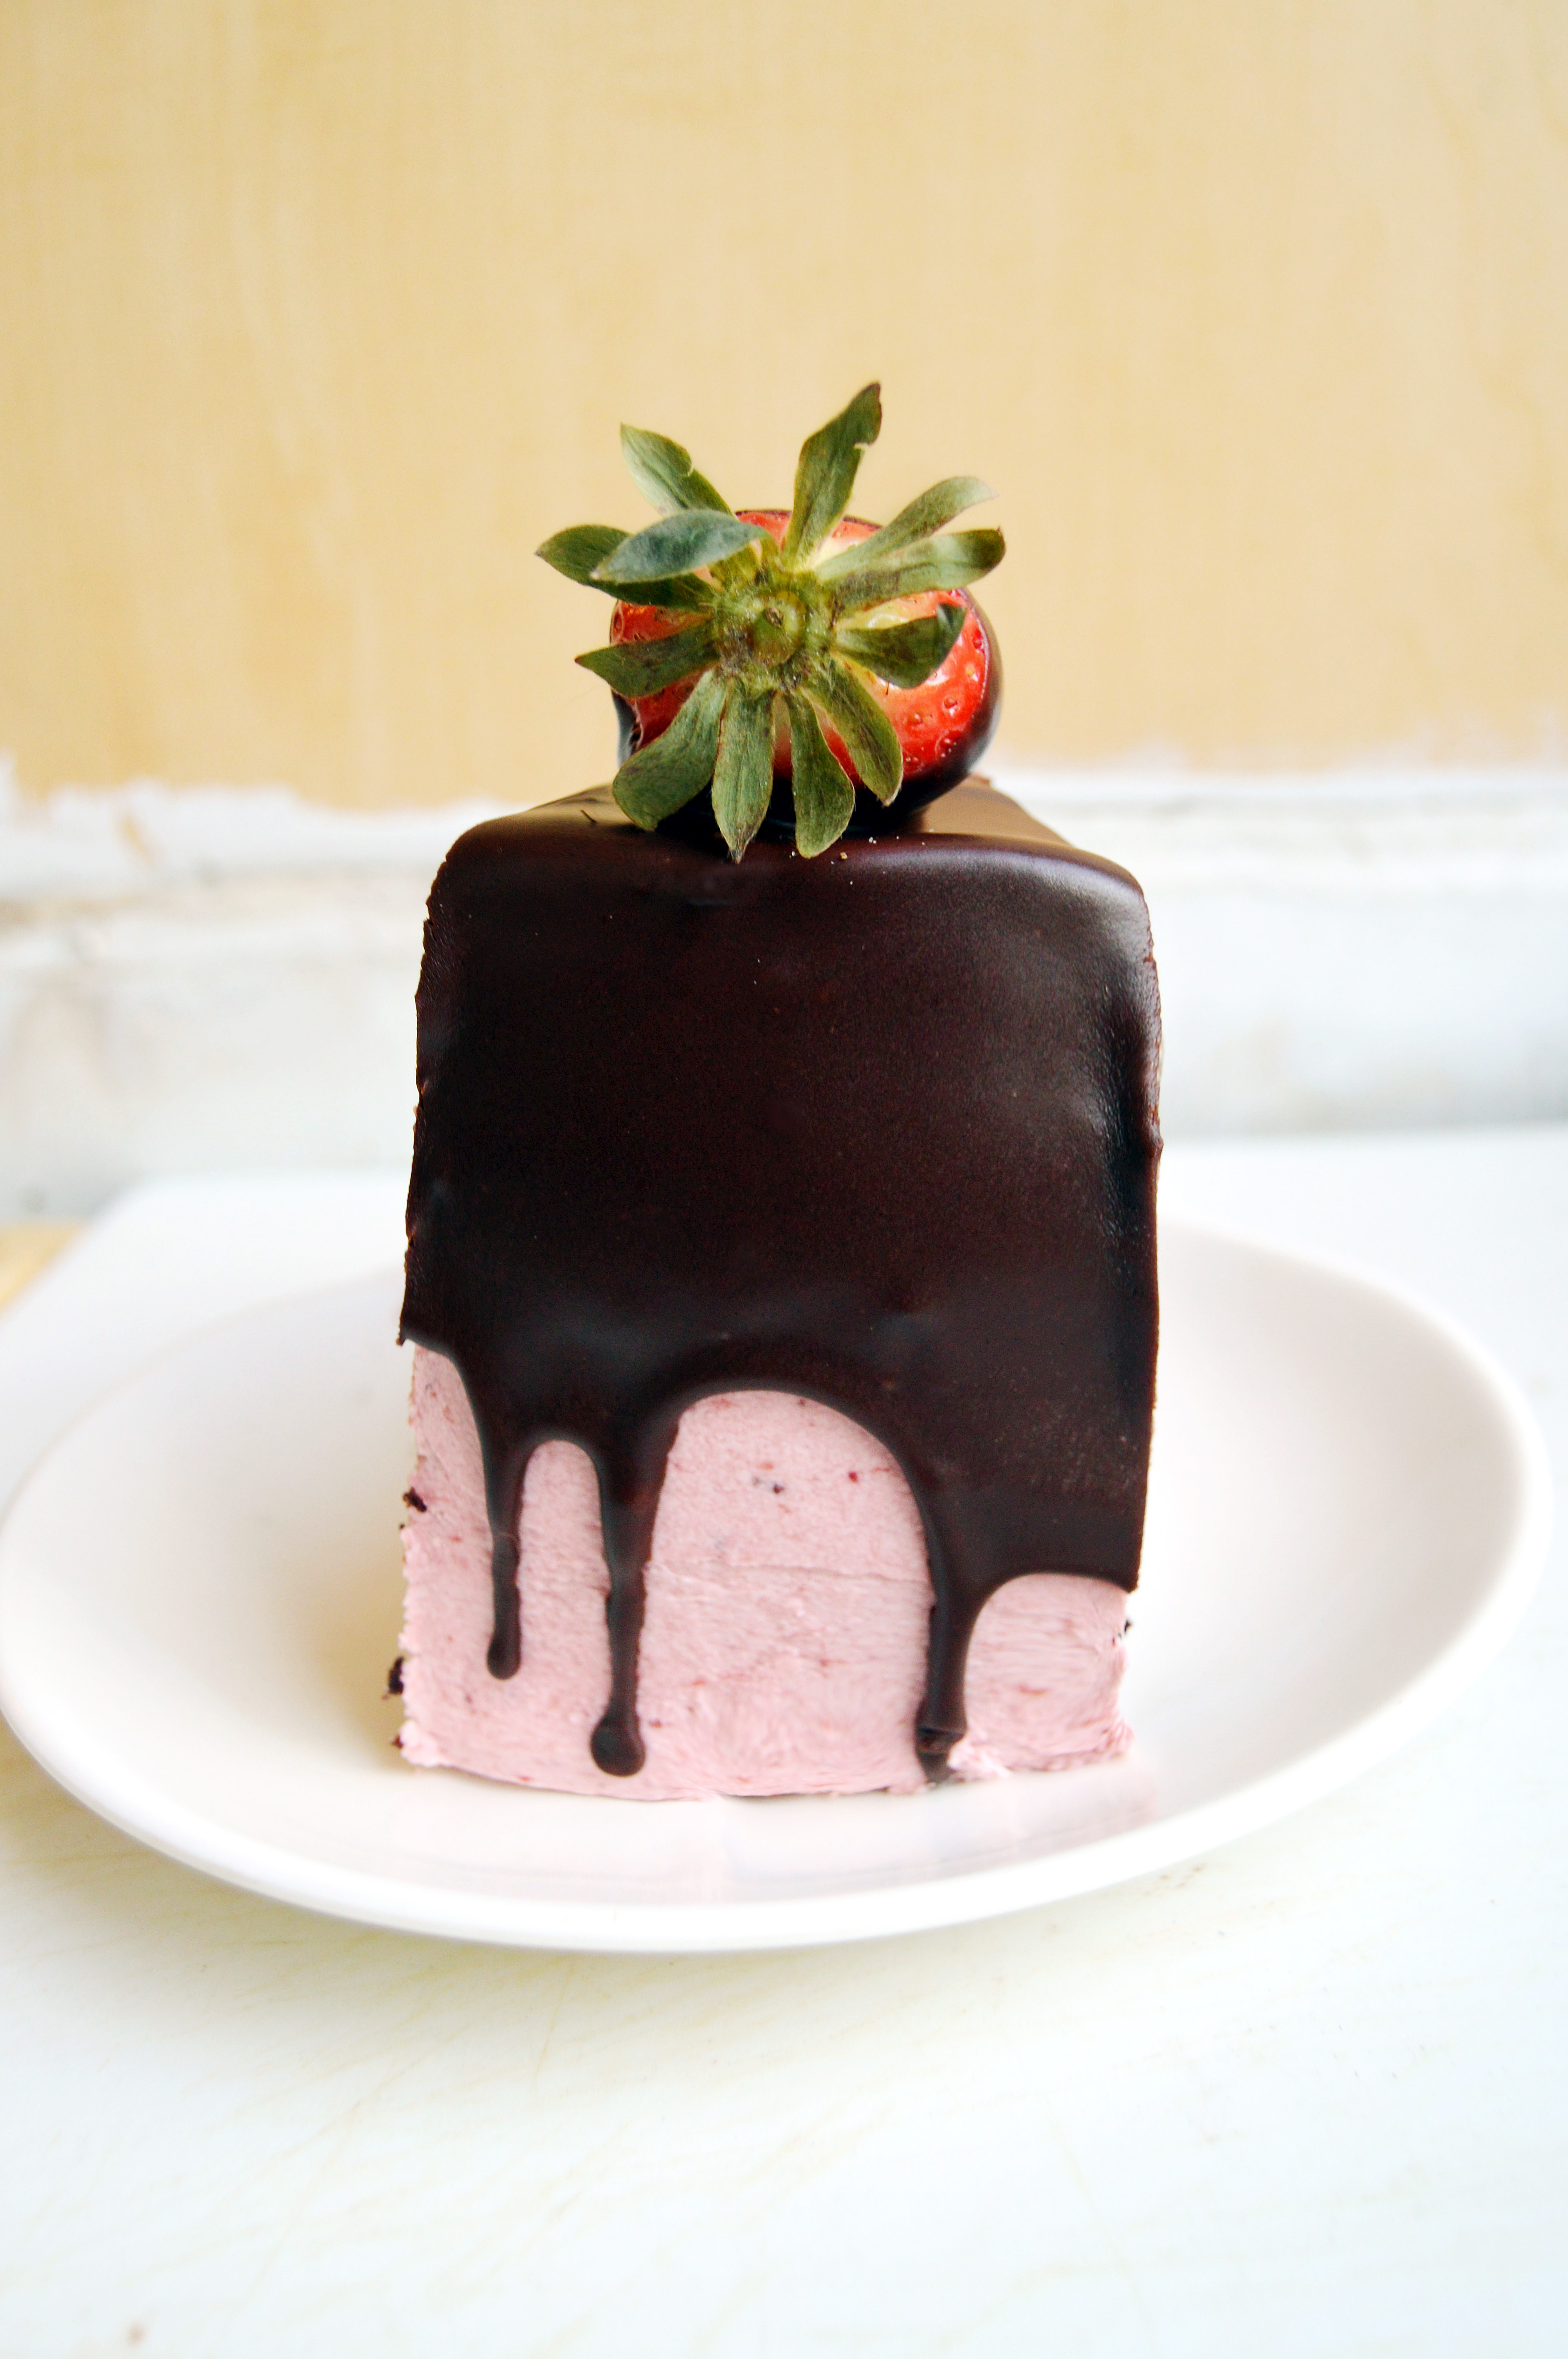
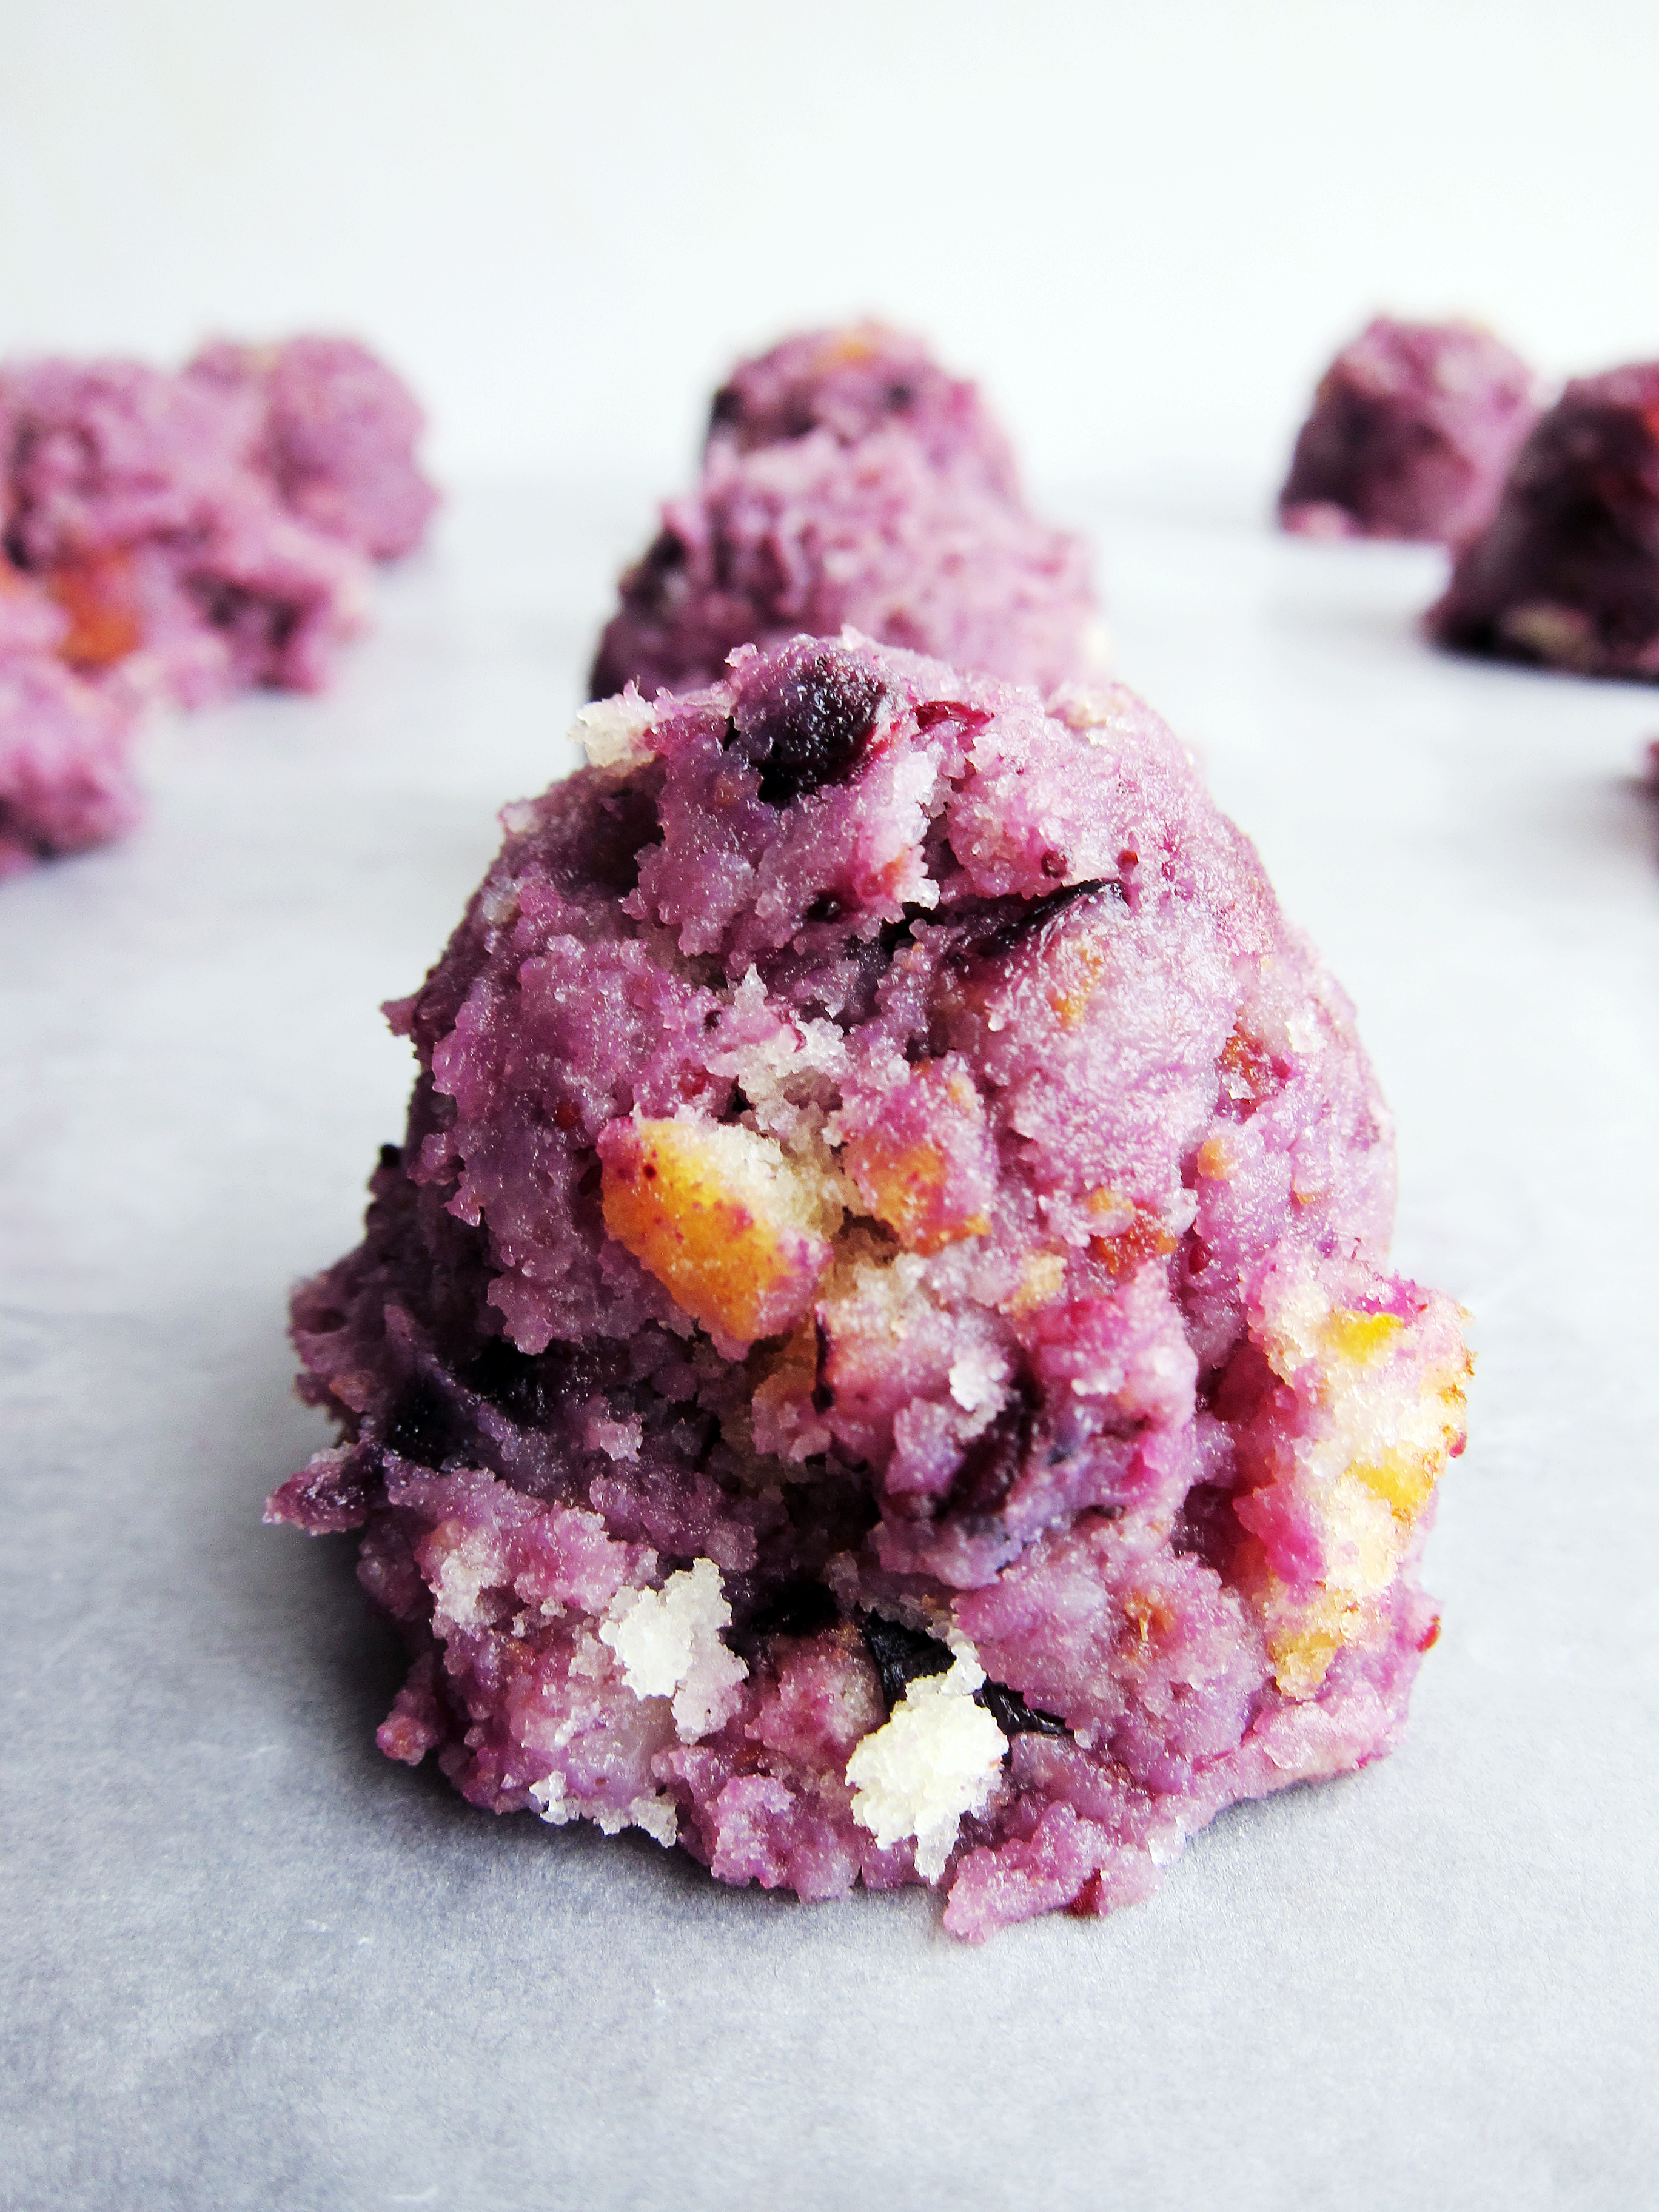
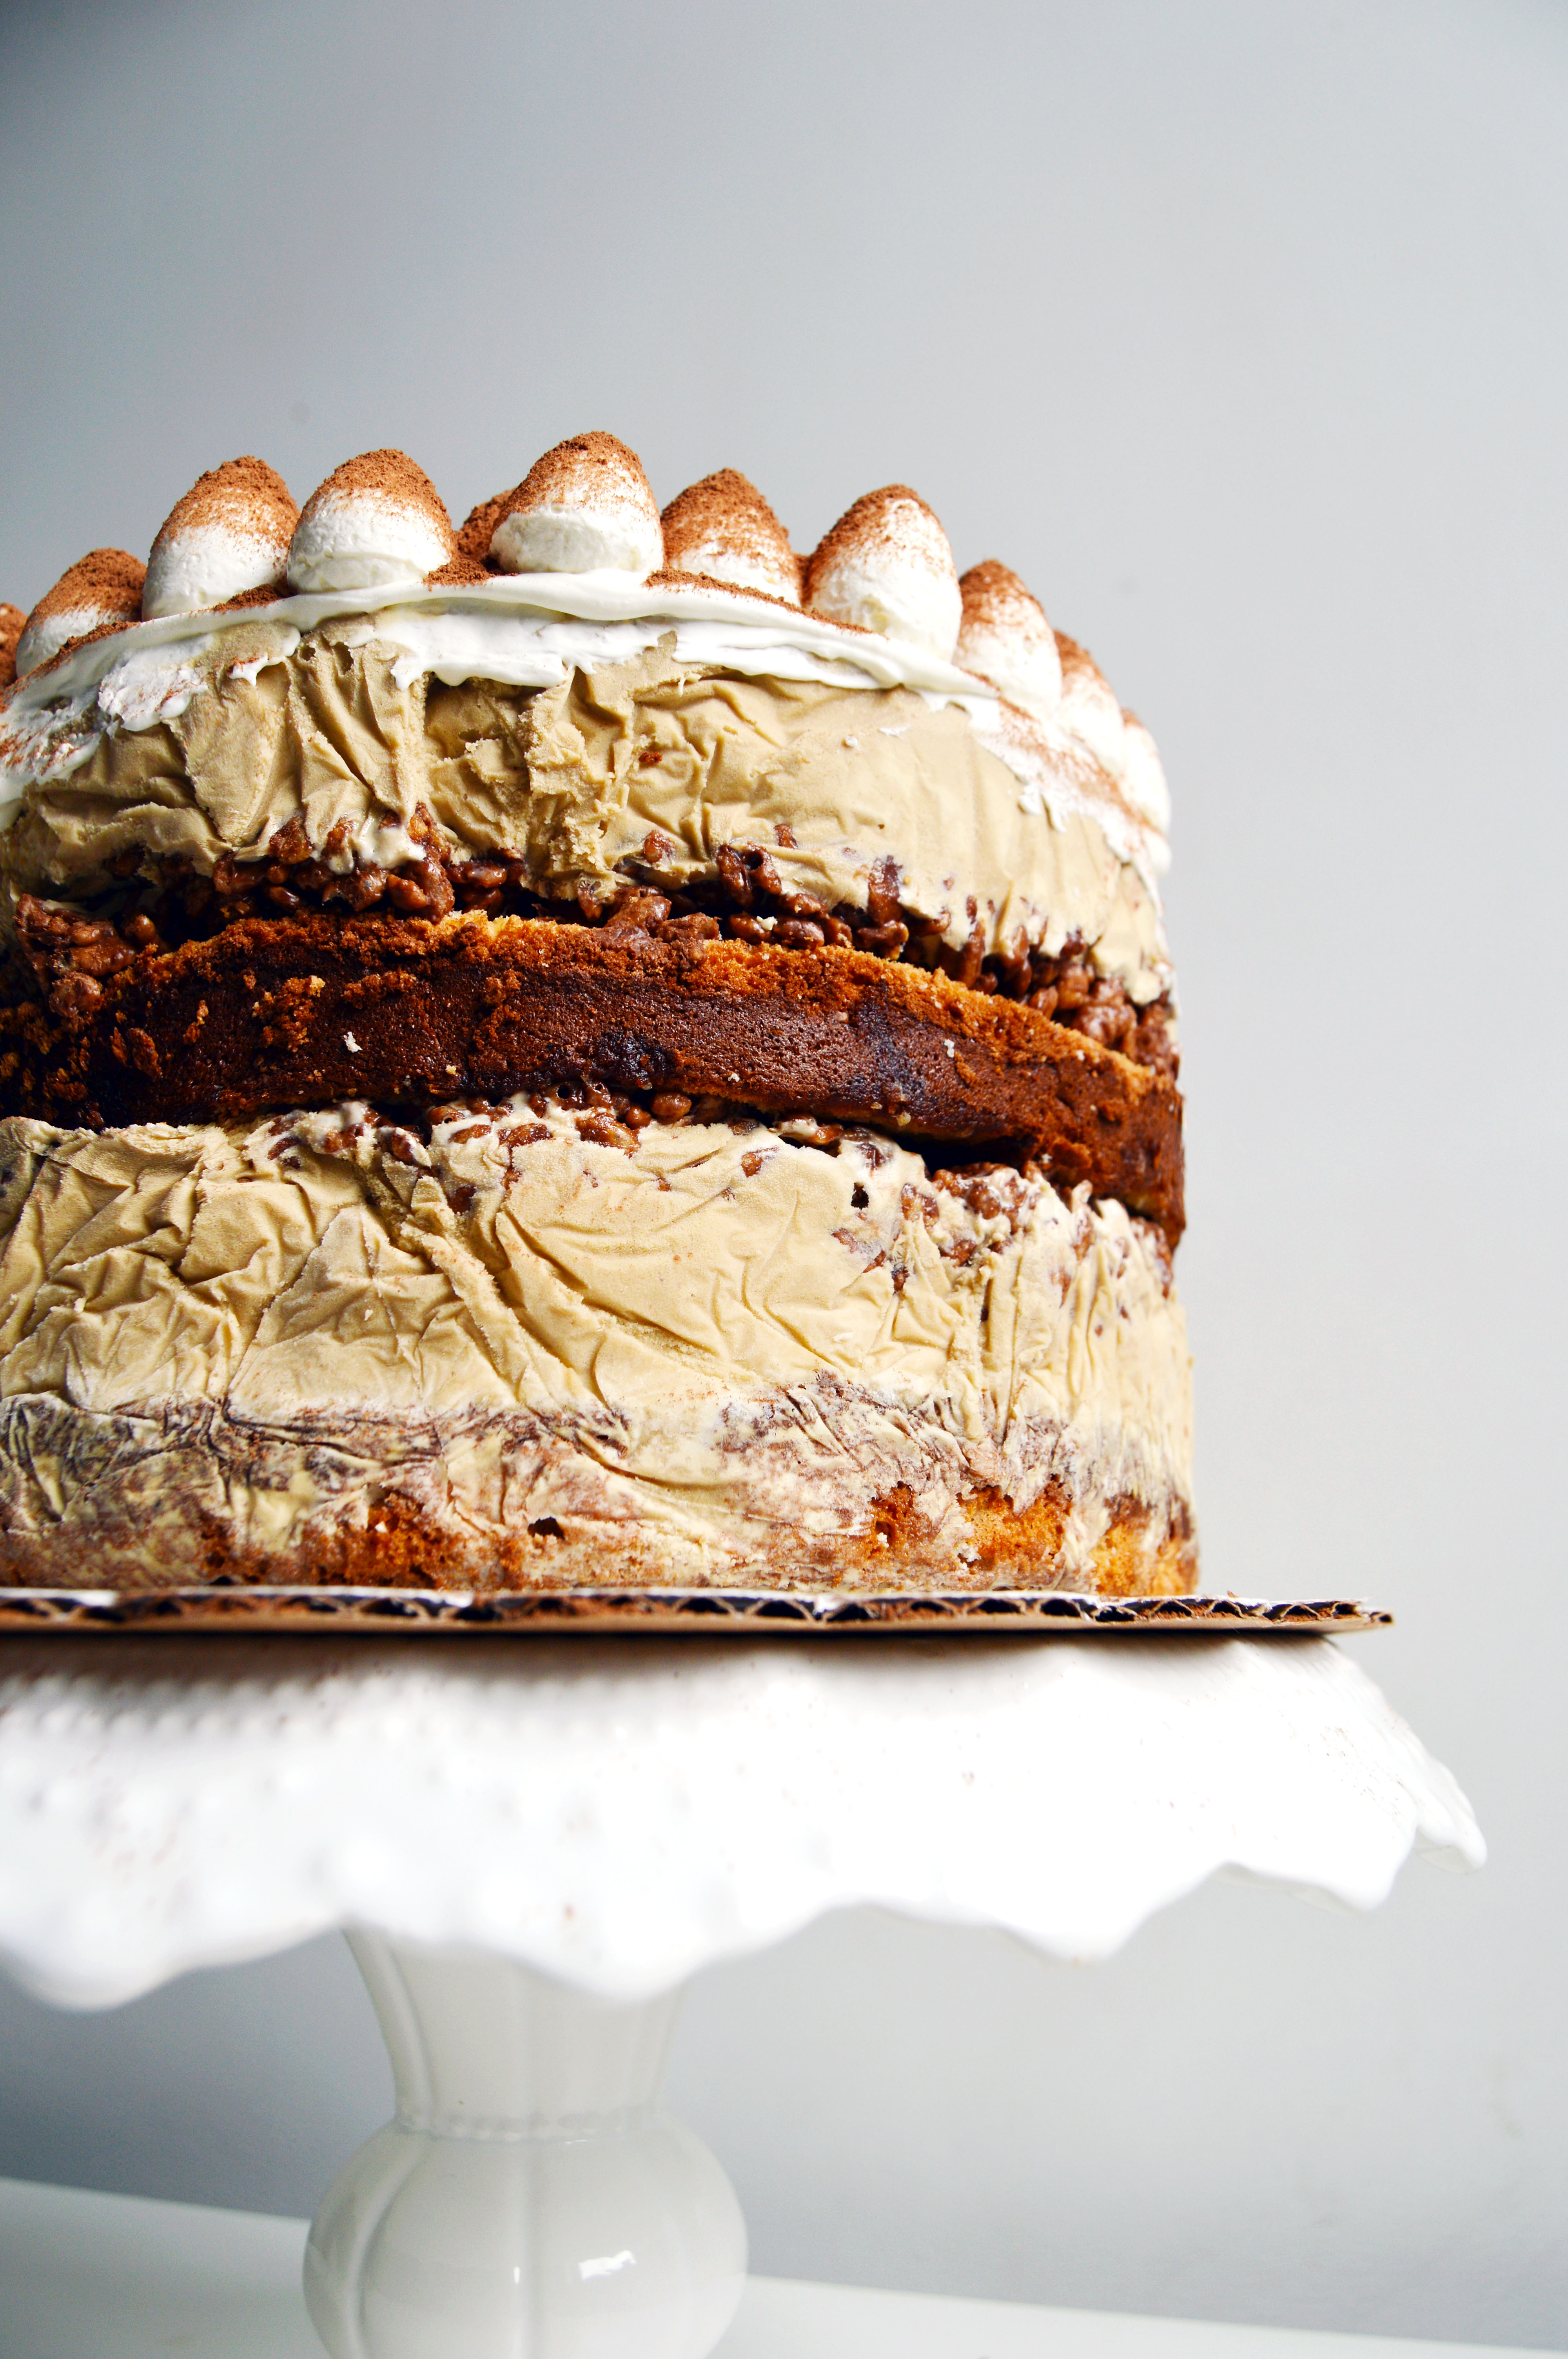
I would say that whenever the topic of ice cream cakes come up, about 75% of the people I talk to gush about how much they love crunchies. You know, the crunchy chocolate crumbs that are usually sandwiched between the vanilla and chocolate ice cream layers in a standard store bought ice cream cake. So when D requested a cookies and cream ice cream cake, with an extra thick layer of crunchies, I set out to make the ultimate cookies and cream ice cream cake.
cookies n' cream ice cream cakeOn another note, I’m not sure if it is cookies n’ cream, cookies n’ creme, cookies and creme, cookies and cream or Oreo. Does anyone know what the “right” way to say it is? The grammar Nazi in my brain says “cookies and cream” but the media uses all of them.  So instead of driving myself crazy, I’m going to use them all interchangeably.
cookies and cream ice cream cakeTo be honest, I was a little disappointed when he requested such a standard flavor. My mind was whizzing with all sorts of crazy flavor combinations (something along the lines of toasted marshmallows, drizzly caramel, crushed salted nuts…) and went to a complete stop when he said cookies and cream. But it’s okay because I took cookies and cream to the next level with this cake. (Kind of like that episode in Friends where Phoebe takes cups and ice to the next level.)
oreo brownies
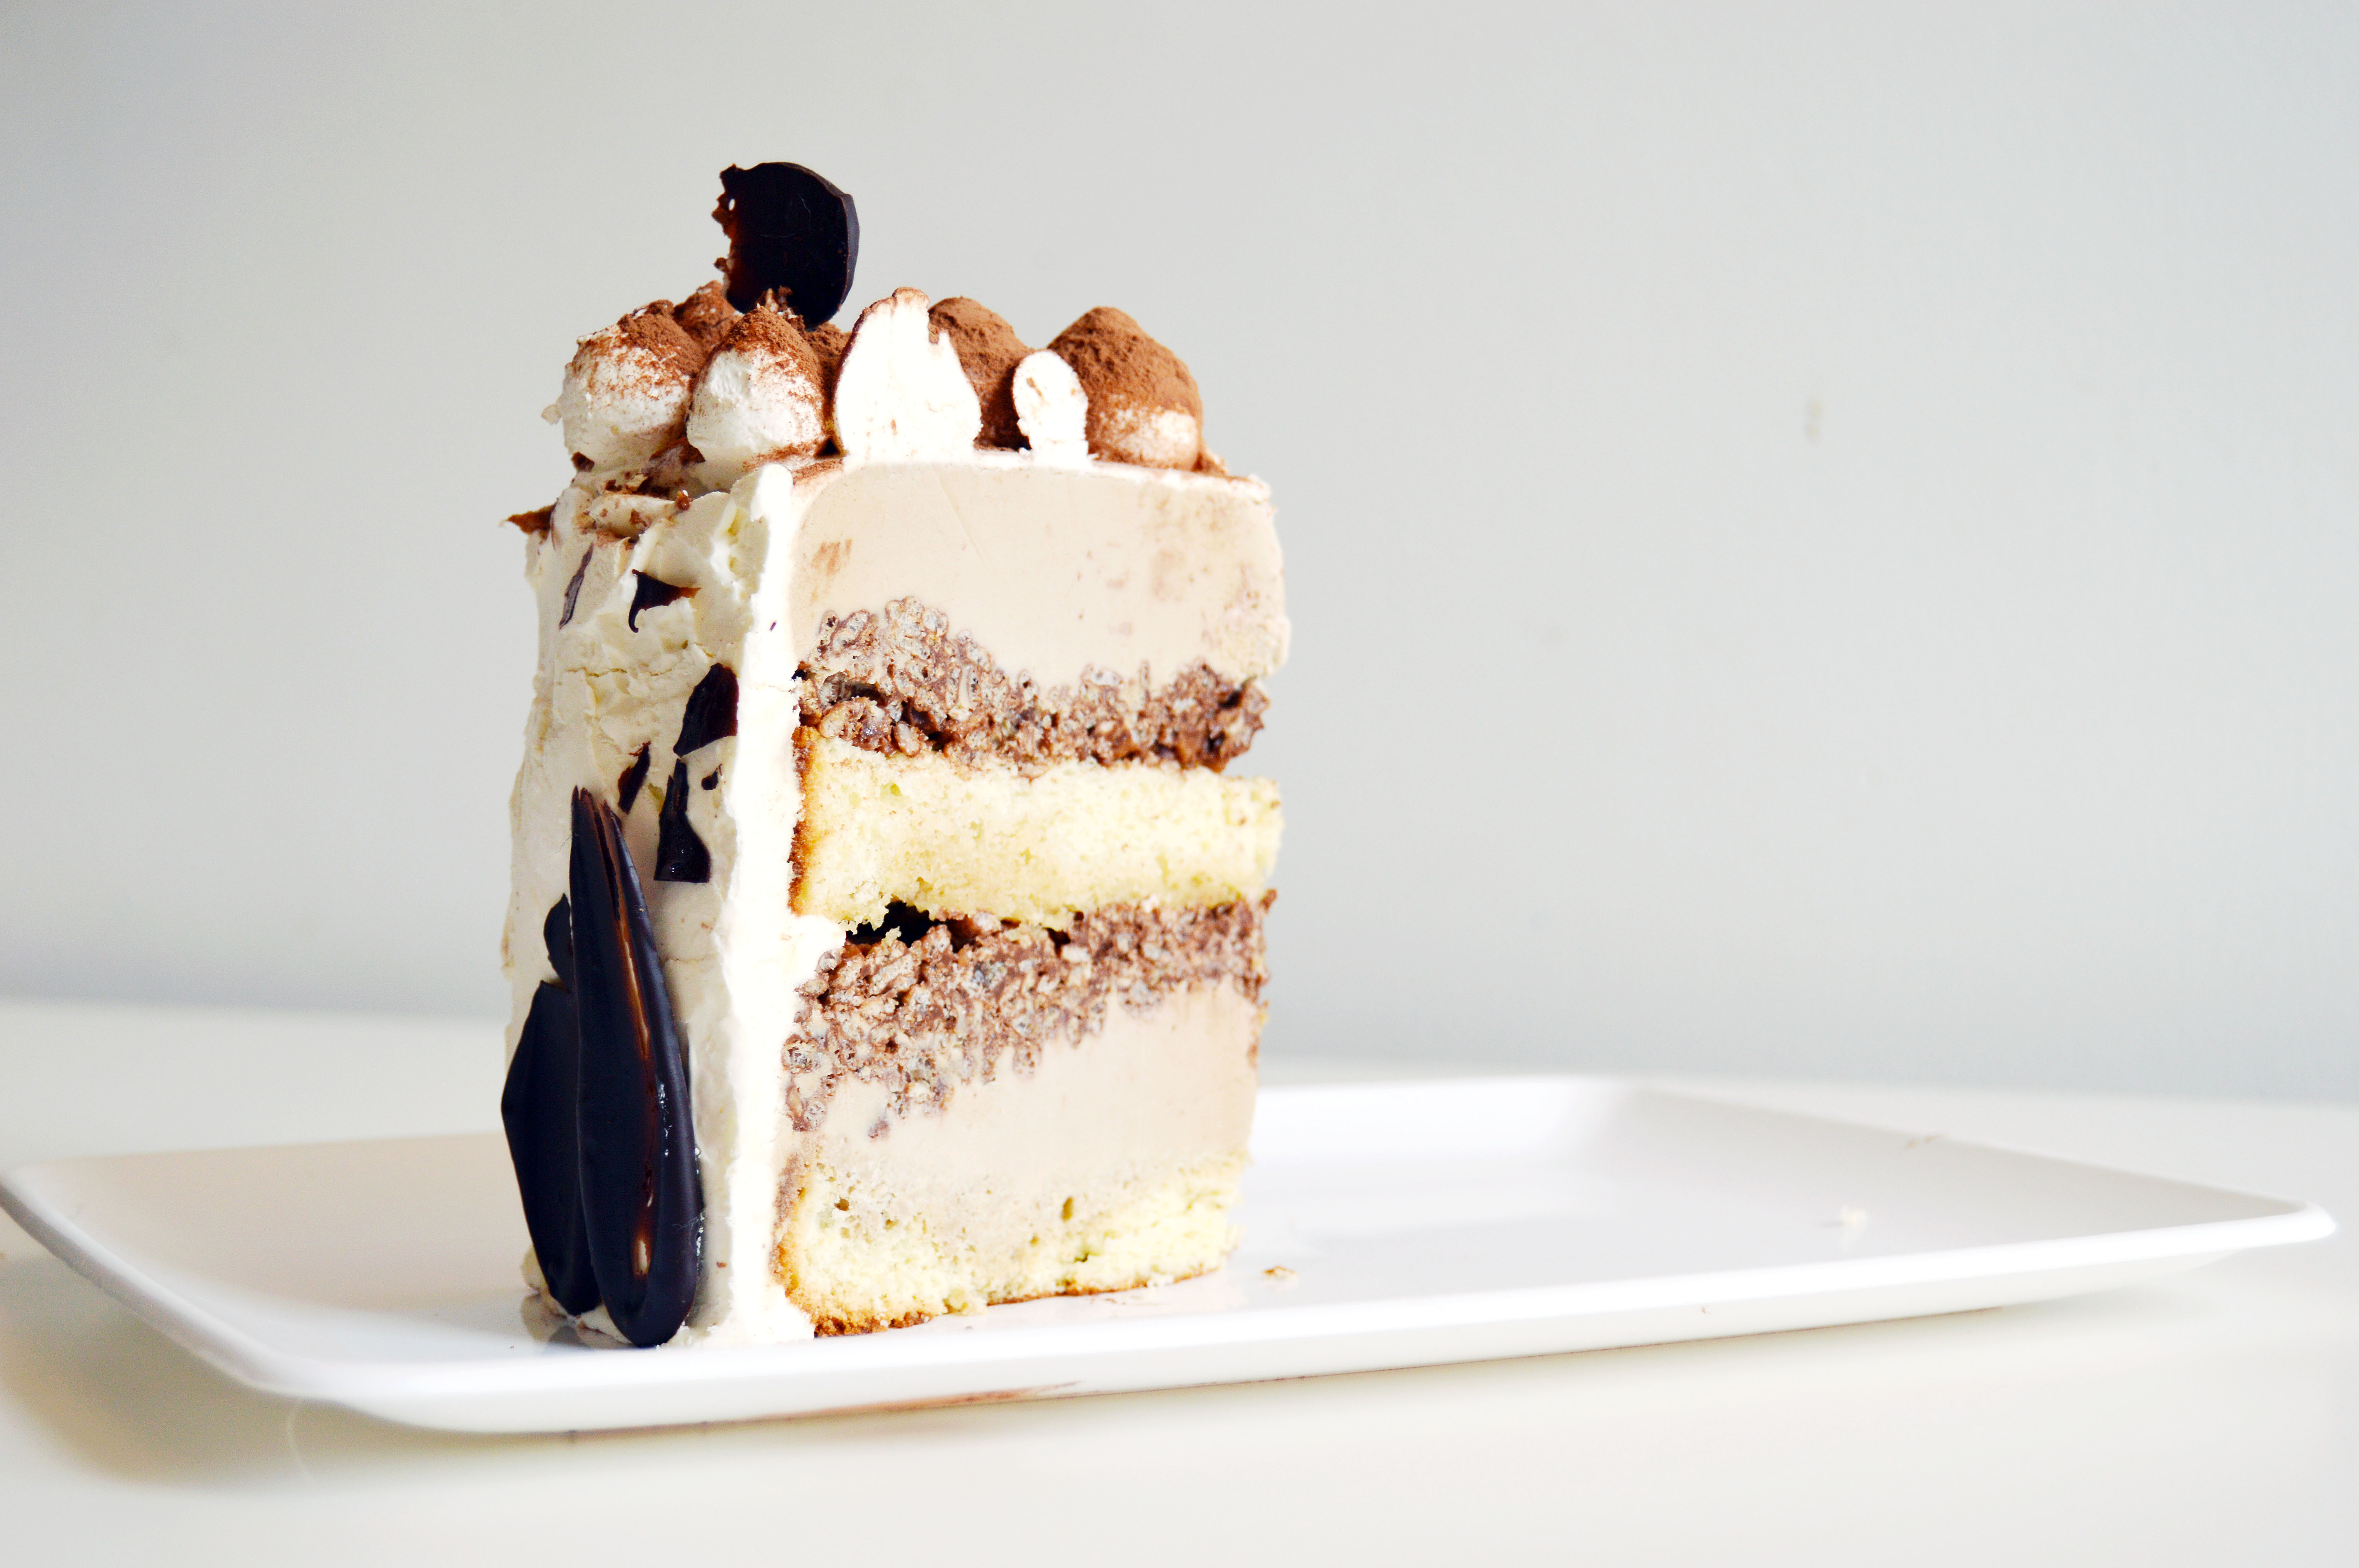
It starts with an Oreo brownie base, layered with homemade crunchies (just two ingredients, and so easy), with a very generous layer of cookies and cream ice cream (two quarts!), layered again with crunchies and brownie base.
oreo bark
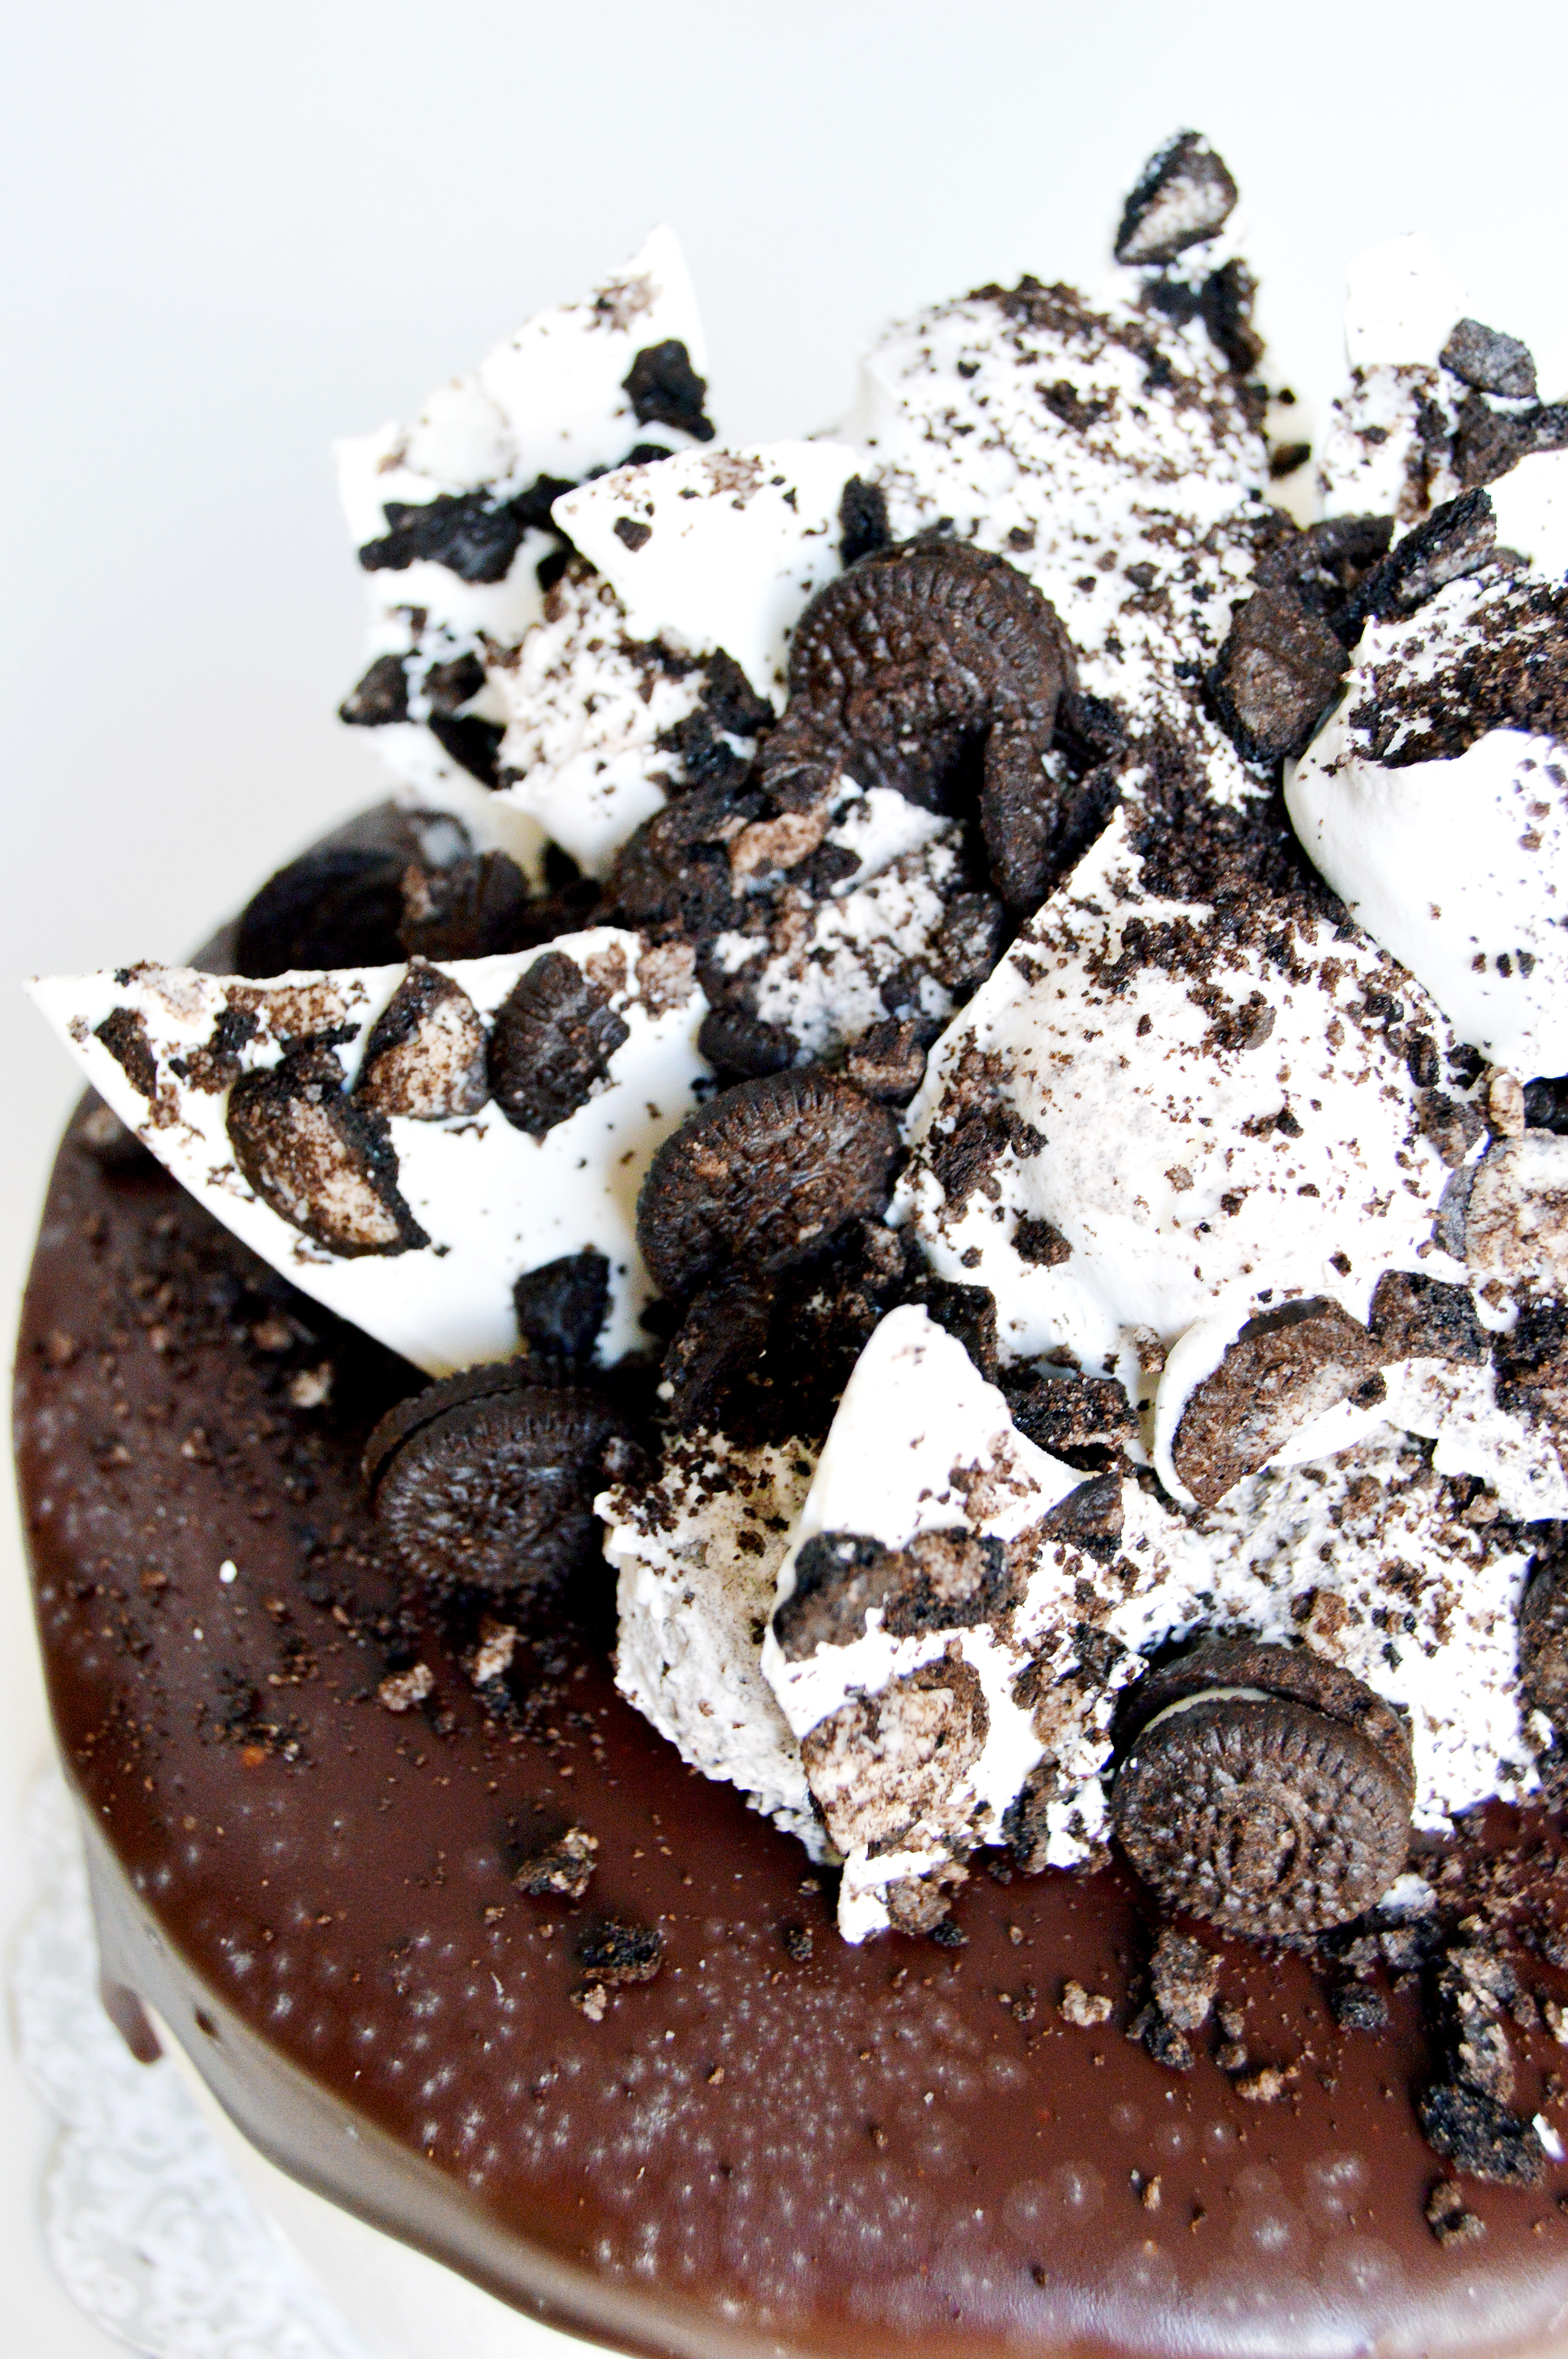
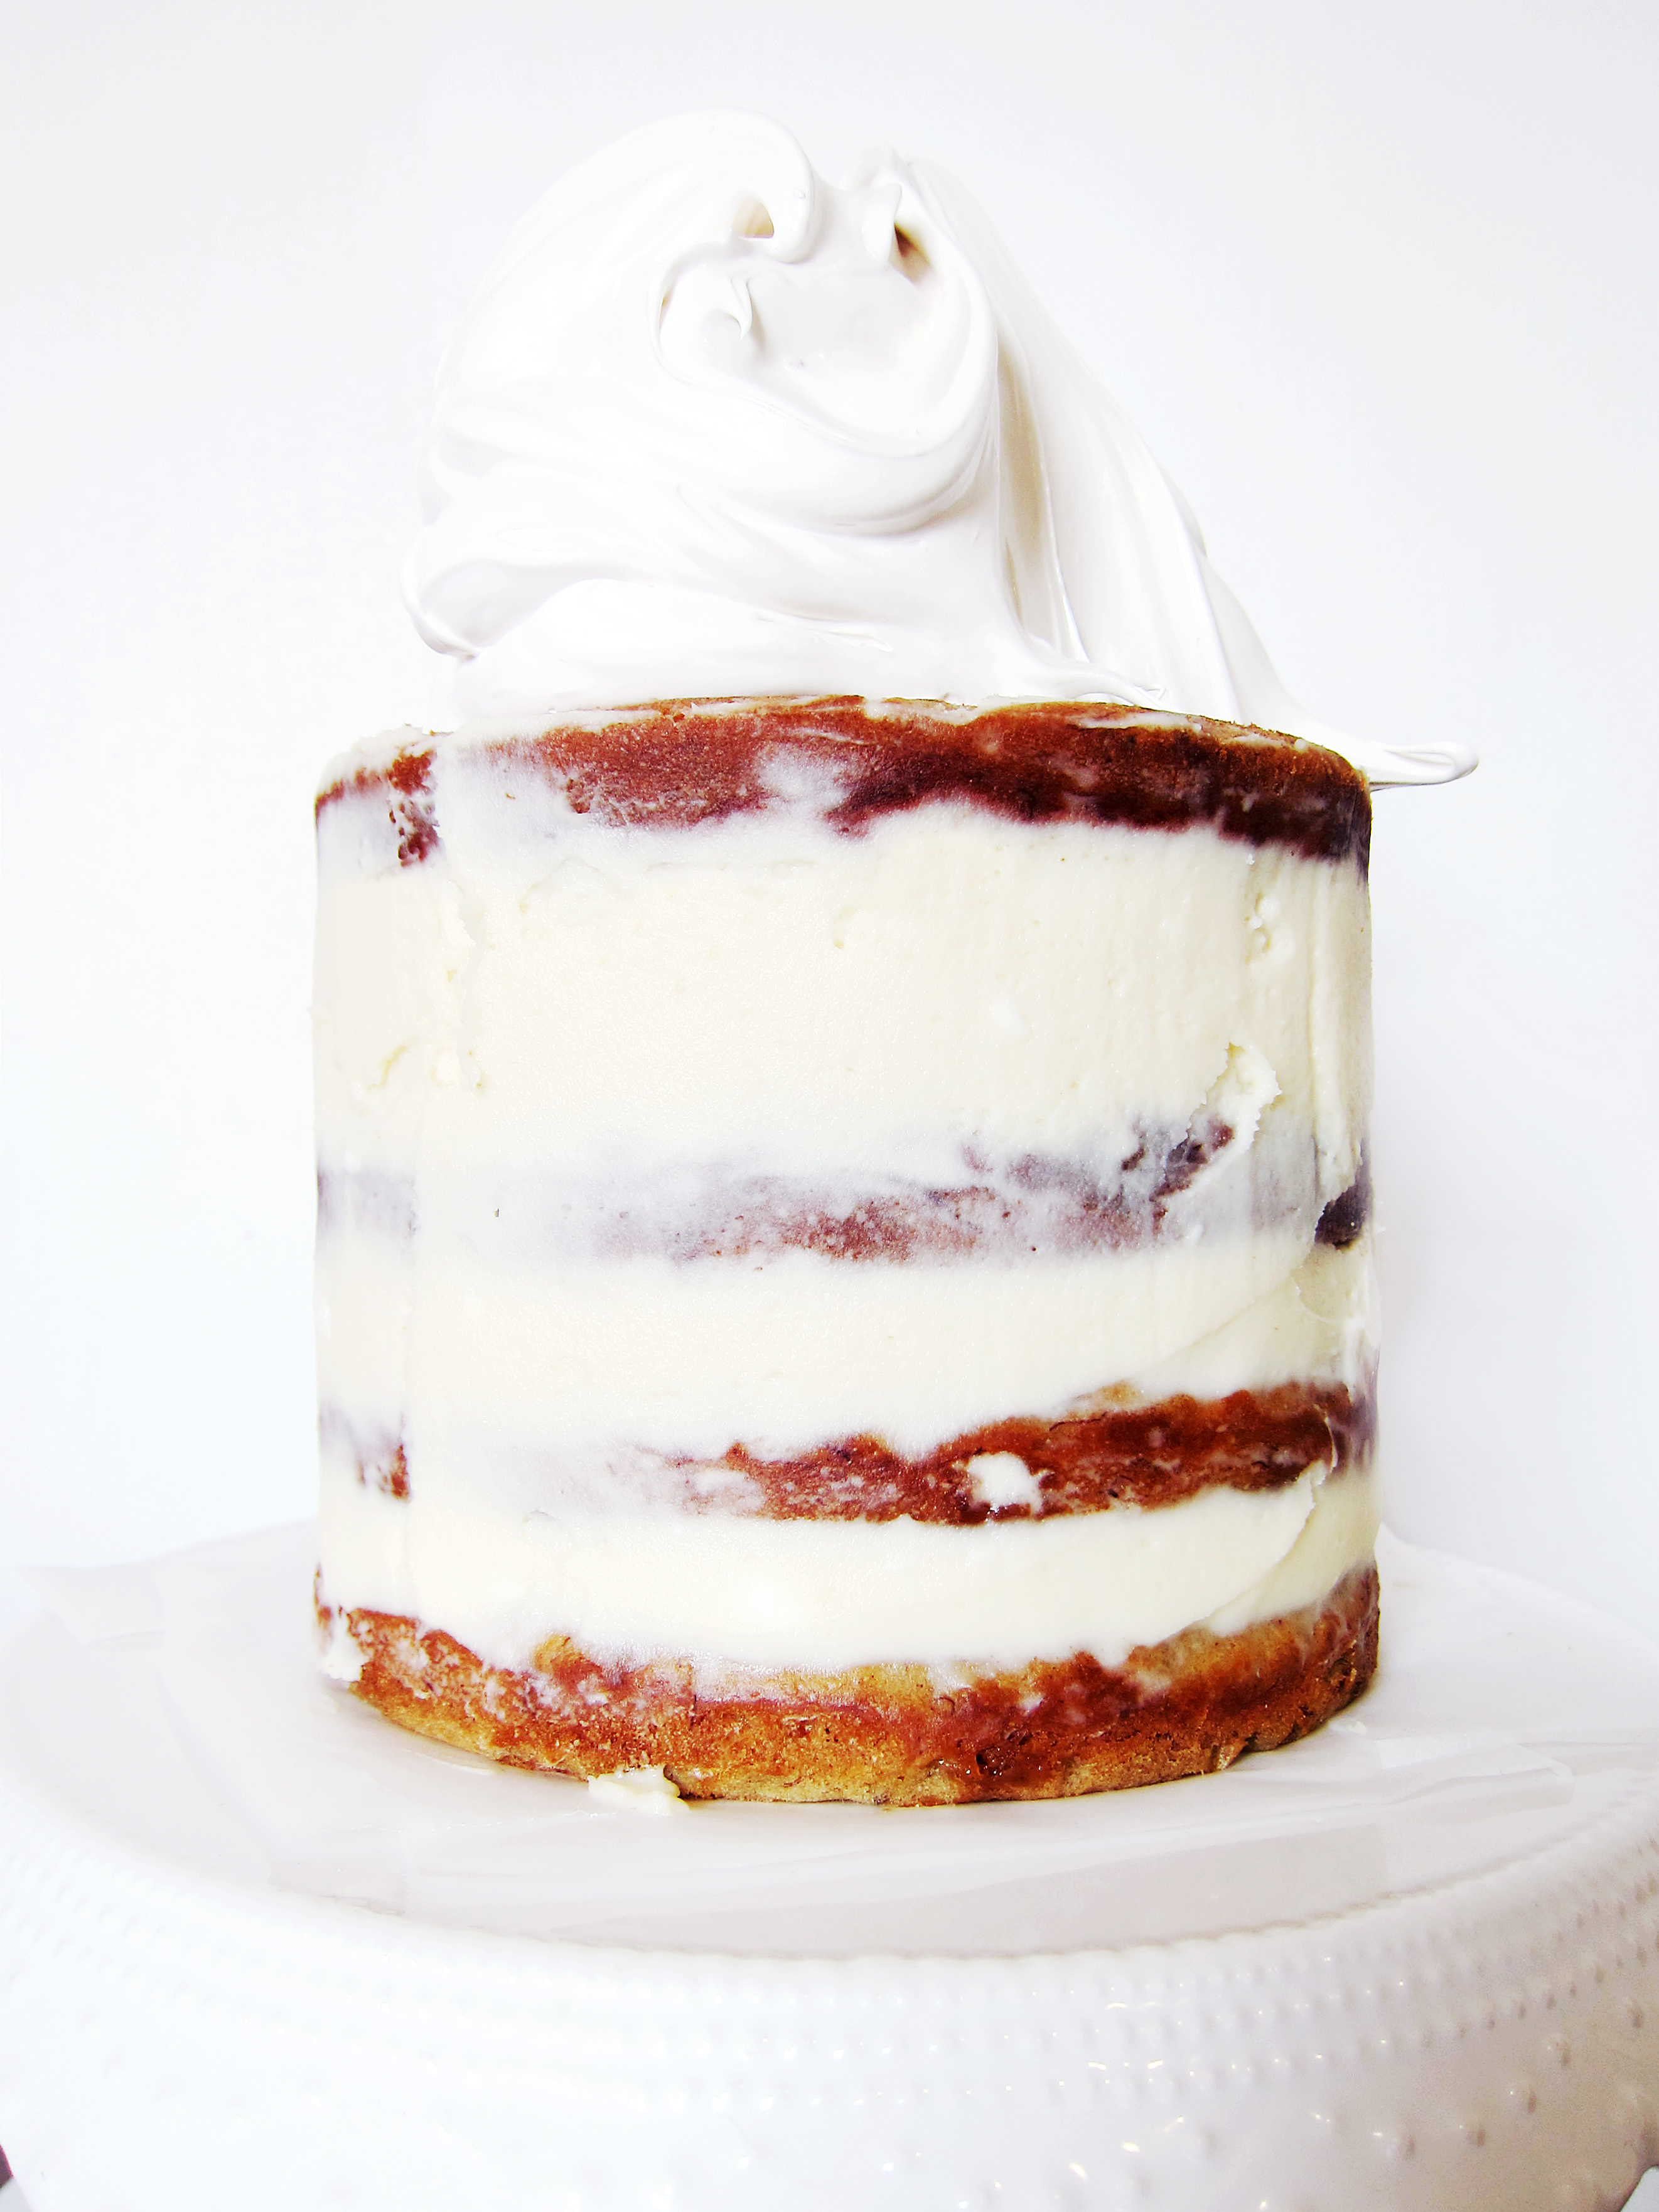
It is then covered in whipped topping, topped with a decadent chocolate ganache (Omg. It was my favorite part of the cake), and decorated with scoops of whipped topping that look like scoops of ice cream (plain and Oreo flavored), and topped with shards of Oreo bark, cookie crumbs and whole mini Oreos. Every single component screams cookies and cream and every bite is as amazing as it sounds.
cookies and cream ice cream cake
The Ultimate Oreo Ice Cream Cake with Homemade Crunchies

Ingredients
2 – 8” round Oreo brownie layers (recipe below)
1 batch homemade crunchies (recipe below)
2 quarts of cookies and cream ice cream, softened*
20 oz. cool whip
chocolate ganache (recipe below)
mini Oreos
¼ c. white chocolate or white candy melts

Instructions:

  1. Line two 8-inch cake pans with plastic wrap. In each pan, put in one Oreo brownie layer.
  2. Split the batch of homemade crunchies in half and spread each half on top of each Oreo brownie layer.
  3. Layer a quart of cookies and cream ice cream in each cake pan, smoothing the top.
  4. Top with plastic wrap and freeze until completely frozen, either over night or 8 hours.
  5. Unmold each cake pan carefully and sandwich the two layers, the ice cream layer meeting in the center and brownie layer facing outwards. Refreeze in freezer for 10 minutes.
  6. Frost the outside of the cake with cool whip. Refreeze in freezer until cool whip is firm.
  7. Crush some mini Oreos and mix Oreo crumbs in half of the remaining cool whip. Leaving the other half plain.
  8. Once cool whip has set, smooth ganache over the top of the cake, letting it drip down the sides. Sprinkle some cookie crumbs on top of ganache before it sets. Place cake in freezer until ganache is completely set.
  9. Using a cookie scoop, layer alternating scoops of Oreo and plain cool whip, sprinkling with cookie crumbs as you go. Freeze to set.
  10. While ice cream is freezing, melt white chocolate/candy melts in a microwave safe bowl being careful not to burn the chocolate.
  11. Line a small sheet pan with wax paper and smooth the melted chocolate evenly using an offset spatula. Top with crushed mini Oreos, and whole mini Oreos. Put in freezer to set.
  12. Break chocolate into shards and reserve for cake.
  13. Once the ice cream cake is set, remove cake from freezer, and decorate the top with the white chocolate shards and top with extra mini Oreos for a grand effect.

Oreo Brownies

Ingredients:
1 box brownie mix, plus ingredients needed to make brownies according to mix**
16 Oreos

Instructions:

  1. Prepare two 8-inch cake pans by spraying with nonstick spray and lining the bottom with parchment paper.
  2. Preheat oven to temperature on the package.
  3. Mix brownie batter according to package and divide evenly between two cake pans.
  4. Place 7 Oreos in a circular formation in each pan, and Oreo in the center.
  5. Bake half of the time said on the package.
  6. Let cool and reserve for cake.

Homemade Crunchies

Ingredients:
30 Oreo cookies
1 – 7.25 oz. bottle of Magic Shell ice cream topping

Instructions:

  1. Using a food processor, Crush Oreos into even crumbs.
  2. In a medium bowl, mix cookie crumbs and ice cream topping until each crumb is well coated.
  3. Reserve for cake.

Chocolate Ganache

Ingredients:
8 oz. dark chocolate, chopped
¾ c. heavy whipping cream

Instructions:

  1. In a heatproof bowl, pour heavy cream on top of chocolate and microwave for one minute.
  2. Let stand 3 minutes and stir until combined.

*I’ve said it before and I’ll say it again, you want to use the premium stuff for ice cream cakes. Because the higher quality ice cream has less air content, it will melt slower. I used Trader Joe’s Joe-Joe’s n’ Cream.
**Yes, I shun cake mixes, but brownie mixes are pretty good in my book. I’m in love with the Ghirardelli brand mixes. Plus, when making a cake with this many components, simplifying any part is worth it.
***Homemade crunchies recipe from Our Best Bites.

Tiramisu Crunch Ice Cream Cake

Tiramisu Crunch Ice Cream Cake 1I made this cake for my sister’s birthday last week. As far as sisters go, my sister and I are as different as night and day. We don’t look alike, with the exception that we both share freckles. Growing up, I would be pale from staying in and reading books while she would be as tan as can be from playing outside. She loves the color black while I love white. She is loud and I am quiet. She prefers vegetables, while I prefer steak. She likes things simple and casual while I cannot get enough frills and bows. She favors pants in comparison to my preference to dresses. She is also not partial to desserts whereas I cannot live without them (as evidenced by this blog). I always tell people that whatever she is good at, I lack it and whatever I am good at, she lacks it.
Tiramisu Ice Cream Cake 3I love creating cakes and I look forward to baking one for all of my family members on their special day. But my sister does not like cake. HOW?! As someone whose life (or a good part of their life) revolves around frosting, and sugar and flour, it is hard to understand someone who does not like cake. So every year on her birthday, I resort to an ice cream cake. Because let’s face it, who doesn’t like ice cream?
Tiramisu Crunch Ice Cream Cake 2Tiramisu was one of my least favorite desserts because I used to rarely drink coffee. If anything, I loved it for the mascarpone cream. (Ah, mascarpone cream… everything you touch becomes a magical milky confection.) But ever since I gave up diet coke, I’ve been leaning towards coffee for my caffeine fix and I’ve managed to fall in love with the bitter brew. My sister’s preferred choice of drink has always been coffee, so tiramisu was a no-brainer when it came to a flavor choice.
layoutI have to say, this cake ranks as one of the best cakes to come out of my kitchen. It features layers of coffee ice cream sandwiched between coffee syrup soaked sponge cake, chocolate almond crispies (!!!), and is covered by a blanket of mascarpone whipped cream and adorned with dark chocolate accents and cocoa powder. I know. It sounds like it is too much work and it is true that there are many components to the cake. However, each part is simple to make!
mascarpone cream I always use high quality ice cream when it comes to ice cream cakes. It is important to have the lower air content so that the ice cream stays firmer, longer. I used Haagen-Dazs in mine. The sponge cake is a standard sponge cake that is divided in half. The coffee syrup is nothing more than a mix of sugar and dark brewed coffee. The chocolate almond crispies provide a crunch and a textural contrast to the smooth ice cream and cake. To make it, you simply stir chocolate almond spread with Rice Krispies cereal until it is evenly coated. The mascarpone whipped cream is a mix of vanilla extract, powdered sugar, mascarpone, and cool whip. I am not a fan of cool whip, but when it comes to ice cream cakes, I think it is superior in terms of spreadability and stability. To make the chocolate accents, simply melt some chocolate and using a small offset spatula, drag a dollop of chocolate over parchment paper and repeat until you have as many pieces as you need. They will not all look uniform, but I think that’s what makes it look slightly “rustic”.
Tiramisu Ice Cream Cake 4I understand if you are a little overwhelmed by it. But trust me, it is worth every minute you spend making it. 😉

Tiramisu Crunch Ice Cream Cake

Ingredients:

56 oz. premium coffee ice cream, softened
sponge cake, halved horizontally (recipe below)
coffee simple syrup (recipe below)
chocolate almond crispies (recipe below)
whipped mascarpone cream (recipe below)
dark chocolate, melted (for garnish)
cocoa powder (for garnish)

Instructions:

  1. Line two 8-inch cake pans that are 3 inches deep with a double layer of plastic wrap that overhangs over the cake pan.
  2. In one of the cake pans, place one half of the sponge cake and brush liberally with coffee syrup. (You do not want to soak the cake, but put enough of it that it is moist.)
  3. Layer 28 oz. of coffee ice cream over the cake base, smooth so that the coffee base is as smooth as you can get it.
  4. Place pan in freezer for about 10 minutes.
  5. Meanwhile, make the chocolate almond crispies.
  6. Get half of the chocolate almond crispies and layer it over the ice cream, flattening it with an offset spatula to make it as flat, even and smooth as possible.
  7. Wrap the overhanging plastic wrap over the cake pan and place in freezer until completely frozen, preferably overnight.
  8. In the second lined cake pan, smooth 28 oz. of coffee ice cream with offset spatula evenly.
  9. Chill in freezer for 10 minutes.
  10. Layer the remaining chocolate almond crispies over the coffee ice cream.
  11. Place the second half of the sponge cake and brush liberally with coffee simple syrup.
  12. Wrap the overhanging plastic wrap over the cake pan and place in freezer until completely frozen, preferably overnight.
  13. On a cake board you are planning to serve, carefully unmold the first cake pan you put together by lifting the plastic wrap off of the pan and unwrapping it completely.
  14. Take the second cake pan and unmold it, and place on top of the first cake pan layer with the sponge cake layer facing downwards. Apply pressure to fuse the two layers together.
  15. Place in freezer to harden for about 20-30 minutes.
  16. Meanwhile, make the whipped mascarpone cream.
  17. Remove frozen cake from freezer and frost the outside of the cake with ¾ of the whipped mascarpone cream.
  18. Place cake back in the freezer and put the remaining whipped mascarpone cream in a piping bag with a plain large round tip.
  19. Remove cake from freezer and use the piping bag to place decorative dollops of cream over the top of the cake by making even vertical rows of cream.
  20. Using a mesh strainer, liberally dust the top of the cake with cocoa powder. The cocoa powder will dust the surface of the cake board too, carefully use a wet paper towel to clean the cake board off.
  21. Place cake back in the freezer.
  22. While cake is freezing, make decorative chocolate pieces.
  23. Line two baking sheets with parchment paper.
  24. Using a small offset spatula, drag dollops of dark chocolate to create a streak. Use larger dollops for the bottom and smaller dollops for the top. Place in refrigerator to set for 5-10 minutes.
  25. When set, remove the cake from the freezer and decorate the bottom of the cake with the longer chocolate pieces and the top of the cake with the smaller chocolate pieces.
  26. Refrigerate until ready to serve.

Vanilla Sponge Cake

Ingredients:

½ c. all-purpose flour
½ c. cornstarch
4 large eggs, separated
1 tsp. vanilla extract
¾ c. sugar, divided
pinch of salt

Instructions:

  1. Preheat oven to 350˚F and grease the inside of an 8 inch baking pan with nonstick spray.
  2. In a small bowl, sift together flour and cornstarch.
  3. In the bowl of a standing mixer fitted with the whisk attachment, beat the egg yolks, vanilla extract, and ½ c. sugar on high until thick and pale.
  4. Transfer mixture into a large bowl.
  5. Thoroughly wash and dry mixing bowl and whisk attachment.
  6. In a clean bowl of a standing mixer fitted with the whisk attachment, beat egg whites and salt until soft peaks form.
  7. Slowly incorporate the remaining ¼ c. of sugar into the egg whites and mix until whites are stiff and glossy.
  8. Fold egg whites into the egg yolk mixture in three additions.
  9. Fold in flour mixture
  10. Transfer batter into the prepared cake pan.
  11. Bake 30-40 minutes or until a cake tester inserted into the center of the cake comes out clean.
  12. Cool cake on a wire rack until ready for use.

Coffee Simple Syrup

Ingredients:

½ c. strong, dark coffee
¼ c. sugar

Instructions:

  1. Heat coffee and sugar together until sugar is completely dissolved.
  2. Cool until ready for use.

Chocolate Almond Crispies

Ingredients:

3 c. Rice Krispies Cereal
1 c. chocolate almond spread (I used this one from Trader Joe’s)

Instructions:

  1. Heat chocolate almond spread until easily pourable.
  2. In a large bowl, mix chocolate almond spread and cereal until cereal is evenly coated.
  3. Cool mixture until ready for use.

Whipped Mascarpone Cream

Ingredients:

12 oz. Cool Whip (thawed)
1 lb. mascarpone cheese
3 tbsp. powdered sugar
1 tsp. vanilla extract

Instructions:

  1. In a large bowl, whip Cool Whip and half of mascarpone cheese until smooth with an electric hand mixer.
  2. Add the remaining half of the Cool Whip and mix until incorporated. Do not over whip.
  3. Add powdered sugar and vanilla extract and whip until homogeneous.

* Vanilla Sponge Cake recipe from Martha Stewart.

A (Belated) Blogiversary, A Funfetti Cake Batter Cake & A Giveaway

Funfetti Cake Batter Cake and Macarons 3It’s my first Blogiversary! One year ago, I started blogging on this little website with a lot of encouragement from friends and family. I cannot believe that it has already been a year. Each time I am able to share recipes, tutorials or whatever this brain of mine thinks of, I am so grateful to be able to send off a little piece of my creativity into the webosphere.  I’m even more grateful to the all of you who take the time out of your day to read the little bits of me that I post on my wee space on the internet.
funfetti macarons Funfetti Cake Batter Cake and Macarons 2Because anything celebratory requires sprinkles (or glitter) in my brain, I made a little cake chock-full with sprinkles for this post. It has sprinkles in the frosting, around the outside, and on the macarons. (I originally wanted to do a funfetti cake, but being me I totally forgot to add the sprinkles to the cake batter so instead it went into the frosting.) And because I love all things macarons, I added some funfetti macarons. The cake and the macarons are filled with cake batter frosting. My secret ingredient to making it taste like cake batter? Boxed cake mix. *GASP*I know. I never ever ever ever ever use boxed cake mix but this is the one time exception. And because it uses boxed cake mix, it is definitely on the sweeter side of the dessert spectrum. It also has that nostalgic bake sale cupcake taste that I loved in my youth.
Funfetti Cake Batter Cake and Macarons 5 Funfetti Cake Batter Cake and Macarons 6To celebrate my ridiculously belated blogiversary, I’m hosting a giveaway! If you know me at all, Target is one of my favorite places to shop. I’m telling you, I cannot walk out of that store without something in my hand! It literally has everything you need so I’m giving away a $25 gift card so that you too can enjoy a small shopping trip to Target.*  Entering the giveaway is so simple! Simply follow me on Instagram and like my giveaway photo and for an extra entry, like and leave a comment on this post about what kind of cake you like. The giveaway ends on Friday, May 8th and if the winner does not respond within 3 days, I will be selecting another one. Funfetti Cake Batter Cake and Macarons 4Funfetti Cake Batter Cake and Macarons

Vanilla Buttermilk Cake (recipe below)
Funfetti Cake Batter Frosting (recipe below)
Funfetti Macarons (recipe below)
1-2 c. Sprinkles

Instructions:

  1. Evenly fill and stack each layer of vanilla cake with funfetti cake batter frosting.
  2. Crumb coat the cake with a thin layer of cake batter frosting (funfetti cake batter frosting without the sprinkles.)
  3. Place cake in freezer for 5 minutes until the frosting on the outside sets firmly.
  4. Once crumb coat is set, frost the entire cake with cake batter frosting.
  5. Take a handful of sprinkles and slowly cup the outside of the cake, patting it to ensure full coverage. (This part will create a mess. Sprinkles will bounce and fall everywhere.)
  6. Let frosting set in freezer for 5 minutes.
  7. Take cake out and frost little mounds of frosting around the top of the cake and attach a funfetti macaron for decoration.

Vanilla Buttermilk Cake

Ingredients:
1.5 c. cake flour
1  c. sugar
½ tbsp. baking powder
⅛ tsp. salt
¾ c. buttermilk, divided
4 oz. unsalted butter, room temperature
2 eggs, room temperature
1 egg yolk
1 tsp. vanilla extract

Instructions:

  1. Preheat the oven to 350˚F and line four 6-inch cake pans with parchment paper.
  2. In a bowl of a standing mixer with the paddle attachment, add flour, sugar, baking powder, and salt. Mix until combined.
  3. On low speed, add ½ c. buttermilk and butter and mix until combined.
  4. In a separate bowl, whisk eggs, egg yolk, ¼ c. buttermilk, and vanilla extract until homogenous.
  5. On low speed, slowly add the egg mixture to the flour mixture.
  6. Increase speed to medium, and mix until combined.
  7. Evenly divide cake batter into the three cake pans.
  8. Bake about 20-25 minutes until cake is done or until a toothpick inserted into the center comes out clean.
  9. Let cool in pan for 10 minutes, and then move onto a cooling rack until completely cool.

Funfetti Cake Batter Frosting

Ingredients:
3 c. whole milk
¾ c. flour
¼ tsp. salt
1½ 1b. (6 sticks) unsalted butter, room temperature
3 c. sugar
¼ c. cake mix
1 tbsp. vanilla extract
½ c. sprinkles

Instructions:

  1. In a saucier pan, put milk, salt and flour and whisk until combined on medium heat.
  2. Continuously whisk mixture until thickened to a pudding like consistency.
  3. Once thickened, strain through a mesh strainer into a bowl with a spatula to remove lumps.
  4. Place a piece of plastic wrap on top of the flour mixture and put into the fridge until fully cool.
  5. In a mixer bowl fitted with the whisk attachment, mix the sugar and butter on high speed until fluffy and pale about, 5-10 minutes.
  6. Add the chilled flour mixture and continue to whip on high speed until the sugar is completely dissolved and the mixture is no longer gritty, about 5-10 minutes.
  7. Add the vanilla extract and cake mix and mix until combined.
  8. Reserve ⅔ of the mixture for filling the macarons and frosting the outside of the cake.
  9. Mix ½ c. sprinkles into the remaining frosting for filling the cake.

Funfetti Macarons

Ingredients:
212 g. almond meal
212 g. powdered sugar
172 g. egg whites, divided to 82 g. and 90 g (aged, if possible)
236 g. sugar
158 g. water
nonpareils for decorating
cake batter frosting (recipe above)

Instructions:

  1. Line two baking sheets with parchment paper or silicone mats.
  2. In the bowl of a food processor, add the almond meal and powdered sugar and pulse until thoroughly combined.
  3. Sift the mixture over a large mixing bowl, throwing out the lumps as they appear.  Add the crystalized lemon and 82 g. of the egg whites and stir until you get a thick mixture.
  4. In a small pot attached with a candy thermometer, combine the sugar and water over medium heat and boil until the syrup reaches 200˚F.
  5. Once the syrup reaches 200˚F, start whipping the remaining 90 g. in the bowl of your stand mixer with the whisk attachment on medium speed until soft peaks are reached.
  6. Once the syrup reaches 248 ˚F, remove the pot off the burner and slowly pour the syrup down the side of the mixing bowl with the egg whites on medium speed.
  7. Once the egg whites are fully incorporated, increase the speed to medium high until egg whites form glossy, stiff peaks.
  8. Mix a ⅓ of the egg white mix to the almond mixture and stir together until the batter is slightly lighter and less pasty.  From then on, fold in ⅓ of the egg white mixture at a time until the mixture “flows like magma”.  The mixture should be smooth and run thick ribbons off the spatula.
  9. With a pastry bag fitted with a ½ in. plain tip, pipe 1¼ – 1½ in. rounds.
  10. The piped batter may have peaks but should smooth away in a minute or two.
  11. Sprinkle nonpareils evenly over macaron shells.
  12. Let the batter stand until the tops of the macarons are dry to the touch, about 30 minutes to 1 hour.
  13. Preheat the oven to 275-325˚F.  If your oven tends to run hot go for 275˚F, if not then 325˚F.
  14. Bake 10-13 minutes, until the feet are formed and the tops are smooth.  The batter is done when you slightly wiggle it and it starts to come off of the parchment paper / silicone mat.
  15. Once cool, frost the inside of the macaron shell with cake batter frosting and sandwich with another macaron shell.

* Open to U.S. Residents only. Winner will be contacted via email.

Chocolate Covered Strawberry Cake

Chocolate Covered Strawberry Cake  3Is it the middle of February already?? I feel like February just started and here it is already nearing its end. As Valentine’s Day approaches, I can’t help but feel a little more love and happiness in the air. Maybe it’s all the hearts plastered every way I turn or people posting all things related to love on social media, but I’m digging the atmosphere. Yes, I know that you should show your love and affection to your significant other/ loved ones every day of the year but what’s the harm of celebrating that love?
Chocolate Covered Strawberry Cake  2I once had an ex-boyfriend who frequently bought me chocolate covered strawberries from Godiva. Not knowing how much they cost ($7 a piece!!), I used to eat them in one seating without much thought. I only found out how much they cost recently and boy, do I feel bad about not savoring them. But that was my first encounter with chocolate covered strawberries and it’s been one of my favorite flavor parings since.
Chocolate Covered Strawberry Cake  4This cake is my spin on a chocolate covered strawberry. A rich dark chocolate cake is filled and frosted with fresh strawberry frosting and covered in a chocolate ganache and adorned with chocolate dipped strawberries. Because fresh strawberries in February are not the tastiest, I suggest buying frozen strawberries for the frosting to ensure full strawberry flavor. I happened to have this cake pan that I bought on clearance a year or two ago, and I thought it fit the theme perfectly. If you do not have the cake pan, you can always make the same cake sans the strawberry frosting heart in the middle. Talking about clearance, am I the only person that scours the holiday section at Target after every major holiday? I cannot resist the themed sprinkles and sparkling sugar at a deep discount. Sometimes, I’ll land on a real gem… like this cake pan at 75% off. It’s a guilty pleasure and I look forward to going to Target post February 14th. 😉
Chocolate Covered Strawberry Cake  1Chocolate Covered Strawberry Cake

Chocolate Cake

Ingredients:
1 ¾ c. all-purpose flour
2 c. sugar
¼ c. natural unsweetened cocoa powder
½ c. Dutch-process unsweetened cocoa powder
2 tsp. baking soda
1 tsp. baking powder
1. tsp. kosher salt
½ c. vegetable oil
2 extra-large eggs, room temperature
1 tsp. vanilla extract
1 c. strong, hot coffee

Instructions:

  1. Preheat oven to 350 degrees and grease and line 2 cake pans with parchment paper.
  2. In a stand mixer fitted with the paddle attachment, mix flour, sugar, both cocoa powders, baking soda, baking powder and salt until fully combined.
  3. In a separate bowl, whisk vegetable oil, eggs, and vanilla extract until combined.
  4. With the mixer speed on low, add the egg mixture to the flour mixture until combined.
  5. Turn off the mixer. With a spatula, scrape the sides of the bowl to fully incorporate the two mixtures.
  6. Turn the mixer on low and slowly add the hot coffee to the batter. Once added, raise the speed to medium until completely homogenous.
  7. Divide batter equally among the two cake pans and bake about 25-30 minutes. Checking at 20 minutes for doneness with a toothpick test.*
  8. Let stand for 5-10 minutes when done, then put onto a cooling rack to fully cool.

Strawberry Puree

Ingredients:
2 lbs of strawberries, smashed
1 tbsp. lemon juice

Instructions:

  1. In a small pot, cook strawberries and lemon juice on medium heat until mixture thickens and reduces 1/3-1/2 of the original volume, about 20-30 minutes.
  2. Once thickened, put in a bowl to cool and refrigerate.

Basic Vanilla Frosting

Ingredients:
2 c. whole milk
½ c. flour
¼ tsp. salt
1 1b. (4 sticks) unsalted butter, room temperature
2 c. sugar
1 tbsp. vanilla extract

Instructions:

  1. In a saucier pan, put milk, salt and flour and whisk until combined on medium heat.
  2. Continuously whisk mixture until thickened to a pudding like consistency.
  3. Once thickened, strain through a mesh strainer into a bowl with a spatula to remove lumps.
  4. Place a piece of plastic wrap on top of the flour mixture and put into the fridge until fully cool.
  5. In a mixer bowl fitted with the whisk attachment, mix the sugar and butter on high speed until fluffy and pale about, 5-10 minutes.
  6. Add the chilled flour mixture and continue to whip on high speed until the sugar is completely dissolved and the mixture is no longer gritty, about 5-10 minutes.
  7. Add the vanilla extract and mix until combined.

Strawberry Frosting

Ingredients:
1 batch of strawberry puree
1 batch of vanilla frosting

Instructions:

  1. Mix vanilla frosting with strawberry puree until the mixture turns strawberry pink and fluffy.

Chocolate Ganache

Ingredients:
8 oz. dark chocolate, chopped
¾ c. heavy whipping cream

Instructions:

  1. In a heatproof bowl, pour heavy cream on top of chocolate and microwave for one minute.
  2. Let stand 3 minutes and stir until combined.

Assembly

1 batch chocolate cake
1 batch strawberry frosting
1 batch chocolate ganache
6-8 strawberries, rinsed and dried

Instructions:

  1. Fill and frost chocolate cake with strawberry frosting.
  2. Chill in freezer for 15-20 minutes.
  3. Pour ¾ of chocolate ganache and use offset spatula to push ganache over the edge.
  4. Before the ganache sets completely, dip the strawberries in the remaining ganache and garnish the cake.

* Chocolate cake recipe adapted from Ina Garten.

Peaches and Cream Crêpe Cake

Crêpe Cake 6It’s been a while. Residency was kicking my butt and I ate too well for my birthday week and decided to go on a diet. Two weeks later, residency is still kicking my butt and the diet was a disaster. What happens when a food blogger decides to go on a diet? They lose content. Lesson learned. I won’t do it again. I promise.
Crêpe Cake 3Several weeks ago my good friend, H, brought two slices of crêpe cake from Lady M Confections. If you don’t know already, Lady M is a chain of cake boutiques that specialize in crêpe cakes. I never tried a crêpe cake before and was pleasantly surprised by the delicate layers and the light taste. But when H told me how much she paid, I was shocked at the price tag. $8 for a slice of cake?? As delicious it was, I could not justify that kind of cost and said I would never pay that that much for a slice of cake, ever.
Peaches and Cream Crêpe Cake 1Fast forward two weeks and as my birthday approached closer, I couldn’t help but think of that ridiculously expensive crêpe cake. Do I just bite the bullet and buy it or should I try it on my own? I’ve never attempted at making crêpes at home but it was my birthday, and I decided I would make one if I wanted to.
Crêpe Cake 2I know some people think making your own birthday cake is sad or depressing and until this year, I’ve been blessed with significant others that would buy me the cake of my desire. But you know what, making your own cake is better because you get exactly what you want and how you want it. Plus, if you make a mistake or mess up, you don’t feel guilty or pressured about ruining someone’s special day.
Crêpe Cake 4I had some fresh picked peaches when I went peach picking in August, so I decided to incorporate it into the cake. If I could redo this cake, I would make the crêpes thinner. As a novice, I was worried about it tearing and made them on the thicker side. In hindsight, it wasn’t necessary. So go thin if you decide to make it.
Crêpe Cake 5In the end, it was worth the effort and I suggest eating it immediately after caramelizing the sugar.  Because when you take a bite of the crisp bits of sugar with the light cake, you will be in heaven. Plus when you refrigerate it, the sugar melts and you get an odd syrup that may or may not pool all over your refrigerator shelf. (Yes, this happened. No, I was not fun cleaning it up.)

Peaches and Cream Crêpe Cake

For the Crêpes

Ingredients:
6 tbsp. butter
3 c. milk
6 large eggs
1 ½ c. all-purpose flour
7 tbsp. sugar
pinch kosher salt

Instructions

  1. Prepare the batter a day before you want to serve the cake.
  2. In a small saucepan, melt and brown the butter.
  3. In a separate saucepan, heat the milk and cool for 10 minutes. (Do not boil milk.)
  4. In a food processor, pulse eggs, flour, sugar and salt until fully combined.
  5. Add milk and butter and pulse until fully combined.
  6. Refrigerate batter for 8-24 hours.
  7. On the day of, bring the batter to room temperature.
  8. Heat a 6” nonstick pan and spray the pan with nonstick spray and wipe off.
  9. Spread 3 tbsp. of batter and swirl to cover the pan.
  10. Cook until the bottom begins to brown and flip the crêpe cook the other side until it sets.
  11. Repeat until all of the batter is used.

For the Pastry Cream

Ingredients:
2 c. milk
¼ c. sugar
2 egg yolks
1 egg
¼ c. cornstarch
¼ c. sugar
2 tbsp. unsalted butter
1 tsp. vanilla extract

Instructions:

  1. Prepare the pastry cream a day before you want to serve the cake.
  2. In a medium saucepan, bring milk and ¼ c. sugar to a boil.
  3. In another medium bowl, mix egg yolks, egg, cornstarch and ¼ c. sugar until a paste forms.
  4. Using a ladle, drizzle a ladleful of milk while continuously whisking the egg mixture. Continue to drizzle in hot milk a little at a time until you mix in ¾ of the milk.
  5. Take the egg milk mixture and pour it into the saucepan with the remaining milk.
  6. Cook the mixture while stirring constantly over medium heat until mixture is thickened and pudding like.
  7. Remove saucepan from heat and mix in butter and vanilla extract. Set aside.

To Assemble

Ingredients:
1 ½ c. heavy cream
3 tbsp. powdered sugar
2 tbsp. Kirsch
3 large very ripe peaches, cut into small bits
granulated or powdered sugar for garnish (optional)
sliced peaches for garnish (optional)

Instructions:

  1. Whip the heavy cream and powdered sugar until stiff peaks form.
  2. Fold in prepared pastry cream, Kirsch and peaches.
  3. Lay two crêpes on a cake plate. Using an offset spatula, spread a thin layer of peach pastry cream. Cover with a crêpe and repeat until all the crêpes are used. Save the best looking crêpe for the top.
  4. Chill for at least 2 hours to set.
  5. When ready to serve, you can:
    1. Dust the top with powdered sugar.
    2. Sprinkle the top with granulated sugar and caramelize with a blowtorch.
    3. Garnish the top with sliced peaches, sprinkle the top with granulated sugar and caramelize with a blowtorch.

Crepe Cake recipe adapted from NY Times.

Toasted Marshmallow Caramel Banana Cake with Cheesecake Frosting

Toasted Marshmallow Caramel Banana Cake with Cheesecake Frosting 2Wordy, I know.  This journey of mine started when I was trying to figure out what to post next for the blog.  I have this great caramelized banana bread recipe that I use and was going to blog about that.  But right when I was about to start baking, I realized that banana bread recipes are a dime a dozen on the internet.
Toasted Marshmallow Caramel Banana Cake with Cheesecake Frosting 4Why would I bore you with something that has been done for the umpteenth time?  No, I needed to do something different, maybe even drastic.  That’s when I spotted a bag of caramel bits that I picked up at Target a few months ago and the cogs in my brain started turning.

Toasted Marshmallow Caramel Banana Cake with Cheesecake Frosting 6It starts with a soft caramelized banana cake.  What makes it “caramelized” banana cake?  Because you caramelize bananas with sugar and melted butter until it starts to smell like banana heaven in your kitchen.  Then you mix your caramel bits into the batter to increase the caramel factor.
Toasted Marshmallow Caramel Banana Cake with Cheesecake Frosting 5Next, the cake layers are sandwiched with cheesecake frosting which is essentially my version of a cream cheese frosting only it is extra thick and tastes very much like cheesecake.  Then the entire cake is surrounded by marshmallow frosting which you toast with your kitchen torch (or in your oven if you don’t have one) and as if you really needed more, you finish it off with a caramel drizzle.
Toasted Marshmallow Caramel Banana Cake with Cheesecake Frosting 1Sweet, gooey, soft, toasty, and slightly chewy (from the caramel bits) this cake is definitely worth making for a celebration… or for no reason because it’s your kitchen and you can bake if you want to. 😉
Toasted Marshmallow Caramel Banana Cake with Cheesecake Frosting 3Toasted Marshmallow Caramel Banana Cake with Cheesecake Frosting

Makes one 6 inch 4-layer cake

Caramelized Banana Cake

Ingredients:
2 oz. unsalted butter
¾ c. brown sugar
3 medium brown bananas
½ c. buttermilk
2 tbsp. vegetable oil
2 large eggs
1 c. all-purpose flour
1 c. cake flour
¾ tsp. baking soda
½ tsp. ground cinnamon
½ tsp. kosher salt
8 oz. caramel bits

Instructions:

  1. Preheat oven to 350˚F and prepare four 6 inch cake pans by spraying them with non-stick spray and lining the bottom with parchment paper.
  2. In a small pot, melt the butter. Once the butter melts, add the brown sugar and bananas and cook for 4 minutes.  Cool mixture for 10 minutes before transferring mixture into a bowl of a stand mixer fitted with a paddle attachment.  Beat for 2-3 minutes until mixture is cool and combined.
  3. In a small bowl, whisk buttermilk, vegetable oil and eggs until homogeneous.
  4. In another bowl, mix both kinds of flour with baking soda, cinnamon and salt.
  5. With the mixer on low, add half the buttermilk mixture followed by half the flour mixture.
  6. Finish the batter by alternating the buttermilk mixture and flour mixture again.
  7. Fold in the caramel bits into the batter.
  8. Divide the batter evenly between 4 pans and bake about 12-15 minutes until a toothpick comes out clean.
  9. Let cool for 10 minutes in the pan and then remove from pan and let cool completely on a wire rack.

Cheesecake Frosting

Ingredients:
10 oz. cream cheese
4 oz. unsalted butter, softened
1 ½ c. powdered sugar
8 oz. mascarpone cheese
2 tsp. vanilla extract
1 pinch of kosher salt

Instructions:

  1. In a standing mixer fitted with a paddle attachment, beat cream cheese and butter until combined.
  2. Add the powdered sugar slowly, followed by the mascarpone cheese, vanilla extract and kosher salt.  Do not overbeat the mascarpone cheese it will separate if you do.

Marshmallow Frosting

Ingredients:
4 large egg whites
¾ c. sugar
¼ tsp. cream of tartar
1 tsp. vanilla extract

Instructions:

  1. In a metal bowl of a standing mixer, whisk egg whites, sugar and cream of tartar over a small saucepan with simmering water.
  2. Whisk until sugar is dissolved and whites are slightly foamy and warm to the touch, about 2-3 minutes.
  3. Transfer bowl to the standing mixer fitted with the whisk attachment and beat starting from low speed and gradually moving to high speed until stiff and glossy.
  4. Mix in the vanilla extract to finish the frosting.

Caramel Drizzle

Ingredients:
3 oz. caramel bits
¼ c. heavy cream

Instructions:

  1. In a small saucepan, melt caramel bits with heavy cream until a thick sauce forms. If the sauce is too thick, feel free to add more heavy cream.

Assembly:

  1. Frost each layer of banana cake with cream cheese frosting, ending with a layer of banana cake. Make sure you smooth the sides as well as you can. (As shown above.)
  2. Generously frost the top and sides with marshmallow frosting using your spatula to make swirl patterns along the cake. This will make a more impressive cake when you toast the frosting.
  3. Toast the frosting with a torch (kitchen, butane, or propane your choice) until golden brown.
  4. Drizzle caramel frosting.
  5. Stand back and enjoy your work of art.

Caramelized banana cake adapted from espresso and cream.
Marshmallow frosting adapted from Martha Stewart.

Elsa Doll Cake

Elsa Doll Cake 1This is a little late in the whole Frozen craze, but I finally made an Elsa Doll Cake.  But it must’ve been in the stars because I was lucky enough to simultaneously have a doll cake request and was finally able to get my hands on an Elsa doll.  It blows my mind that even after 9 months of its release, it is still difficult to obtain an Elsa figure.  How?? Does every little girl in the world want an Elsa doll?  It’s either that or they are releasing them ever so slowly to keep the demand up.  By the way, I still can’t stop listening to the Frozen soundtrack which is a testament to how great it was.  Speaking of soundtracks, did you guys watch Guardians of the Galaxy?  If so, one phrase… Awesome Mix Vol 1.  That’s it.  If not, watch it.  It’s fantastic in every way.
Elsa Doll Cake 4Back to the cake. The thing about Elsa is, unlike Sofia the First, her dress is fairly simple from the waist down.  It’s a sparkly slinky number with a high slit and there is no place to fit a cake under there.  So this is my interpretation of what a poofy Elsa dress would look like.
how to make an elsa doll cakeIt’s fairly straight forward in terms of decorating it, but here are a few tips when creating your own doll cake: 1) Make sure your cake is well chilled- it will help reduce the number of crumbs when you carve it.  2) Try to make your frosting as smooth as possible to reduce the number of bumps and lumps when you put on the fondant.  3) When rolling out your fondant, make sure it isn’t too thick (it will be hard to mold) or too thin (it will tear when you drape it).  4) If your fondant shapes become too soft, toss it in the freezer for about 30 seconds to firm up.  Do not freeze fondant, it will melt when it comes to room temperature.  Above all, have fun making it.  The world is your oyster when it comes to designing a doll cake.
Elsa Doll Cake 2Elsa Doll Cake

You will need:

light teal fondant
teal fondant
white fondant
snowflake fondant cutters
edible glitter, silver star shape
white shimmer dust
silver pearl dust
an Elsa doll

Instructions:

  1. Prepare a lightly frosted, 4 layered 6 inch cake that has a hole cut in the middle for your doll. (pictures 1 and 2)
  2. Chill the cake and while the cake is chilling, prepare your Elsa doll by removing her skirt and wrapping the bottom portion of the doll completely and tightly with plastic wrap. Put her arms up and her cape up and over her head and wrap the top portion of her body with plastic wrap. (picture 3)
  3. Remove the cake, insert the plastic wrapped doll and cut along the top quarter of the cake at a 45˚ angle. Use your eye to gauge where you want the skirt to start and the desired slope of the skirt. (picture 3)
  4. Crumb coat the cake, giving it a rough shape and making sure to cover the gap between the hips and the cake. (picture 4)
  5. Give it a second coat of frosting, hiding the crumbs and making it as smooth as possible to make it easier for the fondant to stick. (picture 5)
  6. Roll out a piece of light teal fondant and cut a rounded door shape for the front of her dress. Adhere it onto the front of the dress. (picture 6)
  7. Roll out a larger piece of teal fondant and drape it over the waist down to the bottom of the cake, making sure to have all of the buttercream covered. (picture 7)
  8. Using your hands, roll a skinny teal fondant rope to blend the top and the bottom of the dress together. Adhere it where the waist meets the cake. (picture 8)
  9. Cut out a white snowflake fondant and adhere it to the center of the dress to cover the seam. (picture 9)
  10. Using vodka, paint white shimmer dust and pearl silver dust all around the teal portion of the dress to give it a shimmery effect. (picture 10)
  11. Take the silver stars and place it over the light teal fondant portion of the dress. (picture 11)
  12. Using your fondant cutter, cut out various shapes of white and light teal snowflakes and adhere it to the teal portion of the dress. Feel free to use any pattern that suits you, but remember that there will be a transparent snowflake cape that covers the back of the cake. (picture 12 and 13)
  13. Remove the plastic wrap from the top portion of the doll, be careful about positioning the arms and letting the snowflake cape flow over the back of the cake.  (picture 14)

Blueberry Cake Balls

Blueberry Cake Balls 3So, I made blueberry cake balls that look like blueberries.  Where in the world did I get such an idea?  It all started with a text from my sister, who sent me a photo of a strawberry layer cake that looked like a strawberry.  I wasn’t surprised that it originated from my favorite macaron café of all time, Laudrée.  This image fueled my creative fire and with the help of a good friend, we came up with an idea for this cake ball.
Blueberry Cake Balls 1Blueberries are in season right now, and here in Jersey we grow some very tasty ones.   They’re really fat and juicy, but I feel that the most “blueberry flavored” blueberries are wild blueberries.  They are very small, but they pack a huge wallop of blueberry flavor.  This cake ball uses both kinds of blueberries for the biggest berry impact.
IBlueberry Cake Balls 2The cake ball consists of blueberry vanilla cake mixed with blueberry frosting then dipped in a thin coat of chocolate (your preference dark, milk, or white) and then finished off with a thin layer of fondant.  When I tried this recipe out, I dipped a handful of the cake balls in chocolate and left the others plain.  When I proceeded to wrap both kinds in fondant, I was surprised that they both held up well.  Unfortunately, I celebrated too early because the moisture from the blueberries in the cake and frosting started melting the fondant on the non-chocolate coated ones.  Lesson learned: you must cover this with chocolate before proceeding to the fondant portion
Blueberry Cake Balls 6Please tell me I’m not the only person who thought of Violet Beauregarde from Charlie and the Chocolate Factory when I saw these.  If you don’t know, Violet is the girl who turns rotund and blue like a blueberry in the book and movie.  To get this shade of blueberry, I mixed three kinds of gel food coloring: Wilton’s violet, Spectrum’s royal blue and Americolor’s super black.  As for the fondant, I tried to mimic the flared crown by doing a double layer of fondant but it wouldn’t stay.  So I settled on drawing it in with black food coloring and a small paint brush (which I reserve for food use only).
Blueberry Cake Balls 5I know there may be a few of you who are looking at this post (or maybe many of my other posts) thinking, “Yeah, I can never do that”.  Whenever I try a novel concept, I always have my doubts whether it will work or not.  Am I wasting precious time, ingredients and money?  Is it worth the pile of dishes?  But in the end, I always feel like the risk of taking the dive outweighs watching from the sidelines.  If I fail, I fail but not without learning something.  So, why don’t we just dive together? 🙂

Blueberry Cake Balls

You will need:
1 batch of blueberry cake
1 batch of blueberry frosting
chocolate or candy melts
blue tinted fondant
black gel food color

Instructions:

  1. Mix blueberry cake with a third of the blueberry frosting until fully incorporated. If the cake does not hold shape, add more frosting and mix until desired consistency is reached.
  2. Scoop tablespoon sized portion of cake and roll into slightly flattened circles.
  3. Chill in the freezer while you melt your chocolate.
  4. Once the chocolate has melted, dip your cake balls into the chocolate using a fork and make sure to tap off the excess.
  5. Chill the chocolate covered cake balls while you roll out the fondant.
  6. Roll out the fondant as thin as possible.
  7. At this point the chocolate should have set, if not then refrigerate until the chocolate has set.
  8. Cover the cake balls and make sure you smooth it out so that there are no lumps.
  9. Mix your black gel food color with a little bit of water to loosen up the pigment.
  10. Draw a five pointed crown on the top of your blueberry and a dot in the center.

Blueberry Cake

Ingredients:
1 ½ c. cake flour
1  c. sugar
½ tbsp. baking powder
⅛ tsp. salt
¾ c. buttermilk, divided
4 oz. unsalted butter, room temperature
2 eggs, room temperature
1 egg yolks
1 tsp. vanilla extract
1 pint fresh blueberries, washed and drained

Instructions:

  1. Preheat the oven to 350˚F and line a 9×9 in cake pan with parchment paper.
  2. In a bowl of a standing mixer with the paddle attachment, add flour, sugar, baking powder, and salt. Mix until combined.
  3. On low speed, add ½ c. buttermilk and butter and mix until combined.
  4. In a separate bowl, whisk eggs, egg yolk, ¼ c. buttermilk, and vanilla extract until homogenous.
  5. On low speed, slowly add the egg mixture to the flour mixture.
  6. Increase speed to medium, and mix until combined.
  7. Fold in fresh blueberries
  8. Bake about 25-30 minutes until cake is done or until a toothpick inserted into the center comes out clean.
  9. Let cool in pan for 10 minutes, and then move onto a cooling rack until completely cool.

Blueberry Frosting

Ingredients:
2 c. frozen wild blueberries
¼ c. sugar
2 tsp. lemon juice
4 tbsp. butter, room temperature
½  tsp. vanilla
1 tbsp. heavy cream
⅔ c. powdered sugar

Instructions:

  1. In a small pot, cook blueberries, sugar and lemon juice until the mixture reduces to about half or until thickened.
  2. In another bowl, beat butter, cream and vanilla.
  3. Slowly add powdered sugar ⅓ c. at a time until completely used.
  4. Once the blueberry mixture has thickened and cooled, add to the sugar mixture until fully incorporated.

Mini Green Tea Cake

Mini Green Tea Cake 2It’s been forever since I posted something on the blog.  This is what happened…  The weekend before I left for my vacation to Korea, I made a wedding cake, mini wedding desserts and did desserts for a confirmation banquet.  It was jam packed with sugar, whipped cream, flour and butter.   At this point, I was so sick and tired of seeing ingredients I had to take a break.  If you follow me on Instagram, you probably saw that I went on a two week vacation to South Korea and by the time I got back, I was so jet lagged I didn’t have it in me to do anything.  And so here I am, three weeks later posting a new recipe for you guys.  I think I’m sufficiently rested and I hope to continue on this culinary journey with you with no more stops in the road.
Mini Green Tea Cakes 4This green tea cake was inspired by my trip to O’Sulloc Tea Museum in Jeju, South Korea.   Unfortunately the weather was horrible the day we went and I wasn’t able to see the plantation but, I did enjoy some green tea desserts.Mini Green Tea Cakes 1I paired my cake with both red bean and sweet potato frosting.  The slight bitterness of the green tea balances well with the smooth creamy sweet potato and the red beans give it a pop of interesting texture.  While we are talking about sweet potatoes, I should let you know that I do not mean the orange fleshed American sweet potato.  This is the potato I am talking about.   The Korean/Japanese sweet potato has purple skin and yellow flesh.  When baked, it tastes slightly like a perfectly roasted chestnut and is less water logged than its American cousin. With that bit of information, I hope you give it a try! Enjoy 🙂Mini Green Tea Cake 3

Mini Green Tea Cakes

Green Tea Cake

Ingredients:
¾ c. cake flour
2 tbsp. matcha powder
1/2 tsp. baking powder
¼ tsp. kosher salt
4 large eggs, separated
pinch of cream of tartar
¾ c. granulated sugar, divided
2 tablespoons buttermilk

Instructions:

  1. Preheat oven to 350˚F and line a half sheet pan with parchment paper.
  2. In a bowl, sift together cake flour, matcha powder, baking powder and salt. Set aside.
  3. In a bowl of a standing mixer fitted with a whisk attachment, whisk egg whites and cream of tartar on medium speed until foamy.  Once foamy, slowly add ¼ c. granulated sugar until incorporated and raise speed to high until stiff peaks form.
  4. In a separate bowl of a standing mixer fitted with a whisk attachment, whisk egg yolks until pale and thickened.  Then add ½ c. granulated sugar and mix until thick and the batter forms ribbons when whisk is lifted.
  5. Stir in buttermilk to the egg yolk mixture until combined.
  6. Fold in flour mix into the egg yolk mix until just combined.
  7. Fold in egg white mixture until fully incorporated.
  8. Pour batter into the prepared pan and spread evenly.
  9. Bake for 10-12 minutes until a toothpick comes out clean or the cake is springy to the touch.
  10. Let cool.

Sweet Potato Frosting

Ingredients:
1 lb. Korean/Japanese sweet potatoes, roasted and peeled
2 tbsp. heavy cream
pinch kosher salt
⅓ c. vanilla frosting

Instructions:

  1. In a food processor, add all the ingredients and puree until smooth.

Red Bean Frosting

Ingredients:
8 oz. canned sweet red beans
⅓ c. vanilla frosting

Instructions:

  1. In a separate bowl, mix red beans and vanilla frosting until completely blended.

Assemble the Mini Green Tea Cakes:

  1. Using a 2” cookie cutter, cut out 2” cake rounds.
  2. Use the same cookie cutter to assemble the cake.
  3. Place a cake round into the cookie cutter and proceed to layer the red bean frosting, a cake round, sweet potato frosting and finish off with a cake round.
  4. Slowly remove the cookie cutter to reveal your layered cake.
  5. If desired, you can garnish the tops of the cake with powdered sugar.

Green Tea Cake adapted from Oh Sweet Day!


Hi Hat Cake Cones

Hi Hat Cake Cones 3The weather is finally starting to warm up and these ice cream cones were screaming to be used.  I originally used them for my ice cream cone macarons, but I had half a box that was sitting on my counter looking useless and forlorn.  I wanted my next post to be hi hat cupcakes, so I stuffed it into a cone.
Hi Hat Cake Cones 1It’s ridiculously fun and easy to eat.  The crisp chocolate coating breaks into the soft marshmallow frosting and rich chocolate cake.  You can also sprinkle it with different combinations of toppings and change the color of the candy melts to suit the occasion.  I used Swedish pearl sugar and sanding sugar as toppings, but you can use anything you want to top it.  It also looks very cute with sprinkles.
Hi Hat Cake Cones 2On another note, why is the weather cloudy 80% of the time I’m trying to shoot photos?  Can’t a sista catch a break once in a while?  Every time I start conjuring up an idea for a project, the forecast is bound to be cloudy or rainy.  If you are into photography, you know the value of natural light and can understand my frustration.   If you’re not, then please excuse this rant of mine.
Hi Hat Cake Cones 4Hi Hat Cake Cones

You will need:
1 batch of chocolate cake batter (recipe below)
1 batch of marshmallow frosting (recipe bleow)
white candy melts
pink candy melts
blue candy melts
pink sanding sugar
Swedish pearl sugar
mini ice cream cones

Chocolate Cake

Ingredients:
1 c. all-purpose flour
1 c. sugar
1/3 c. Dutch-process unsweetened cocoa powder
1 tsp. baking soda
½ tsp. baking powder
½ tsp. kosher salt
¼ c. vegetable oil
1 extra-large egg, room temperature
1/2 tsp. vanilla extract
1/2 c. strong, hot coffee

Instructions:

  1. Preheat oven to 350 degrees and put one mini ice cream cone in each cup of a mini cupcake pan.
  2. In a stand mixer fitted with the paddle attachment, mix flour, sugar, both cocoa powders, baking soda, baking powder and salt until fully combined.
  3. In a separate bowl, whisk vegetable oil, eggs, and vanilla extract until combined.
  4. With the mixer speed on low, add the egg mixture to the flour mixture until combined.
  5. Turn off the mixer.  With a spatula, scrape the sides of the bowl to fully incorporate the two mixtures.
  6. Turn the mixer on low and slowly add the hot coffee to the batter.  Once added, raise the speed to medium until completely homogenous.
  7. Fill mini ice cream cones½ full with batter and bake about 10-13 minutes. Checking at 10 minutes for doneness with a toothpick test.*
  8. Let stand for 5-10 minutes when done, then put onto a cooling rack to fully cooled.

Marshmallow Frosting

Ingredients:
4 egg whites (120 g.)
1 c. sugar
a pinch of cream of tartar
a pinch of salt
1 tsp. vanilla extract

Instructions:

  1. In a small pot fill about 1 in. of water and let it come to a simmer.
  2. In the bowl of a stand mixer, whisk egg whites, sugar, cream of tartar and salt until homogenous.
  3. Once the water comes to a simmer, place the bowl on top of the pot and whisk the egg white mixture until the sugar is completely dissolved and no longer grainy.
  4. Move the bowl to your standing mixer fitted with a whisk attachment and beat on high speed until glossy and stiff.
  5. Add the vanilla extract and mix completely.
  6. Fill a piping bag fitted with an open star tip.

Assembly:

  1. Pipe a swirl of frosting onto cooled cake cone.
  2. Put into the freezer for 15-30 minutes until completely cold.
  3. In two separate bowls, melt white and pink candy melts and blue and white candy melts.
  4. Remove the cake cones from the freezer and dip the frosting portion into the melted chocolate.  Do not be afraid, the frosting will not fall off if sufficiently cooled.
  5. Before the chocolate sets, sprinkle sanding sugar and Swedish pearl sugar.
  6. Let chocolate set and enjoy.

* The toothpick test: insert a toothpick into the cake and if the toothpick comes out clean or with a few crumbs clinging to it, it is done.