Salted Dark Chocolate Caramel Cookies

Salted Dark Chocolate Caramel Cookies 6
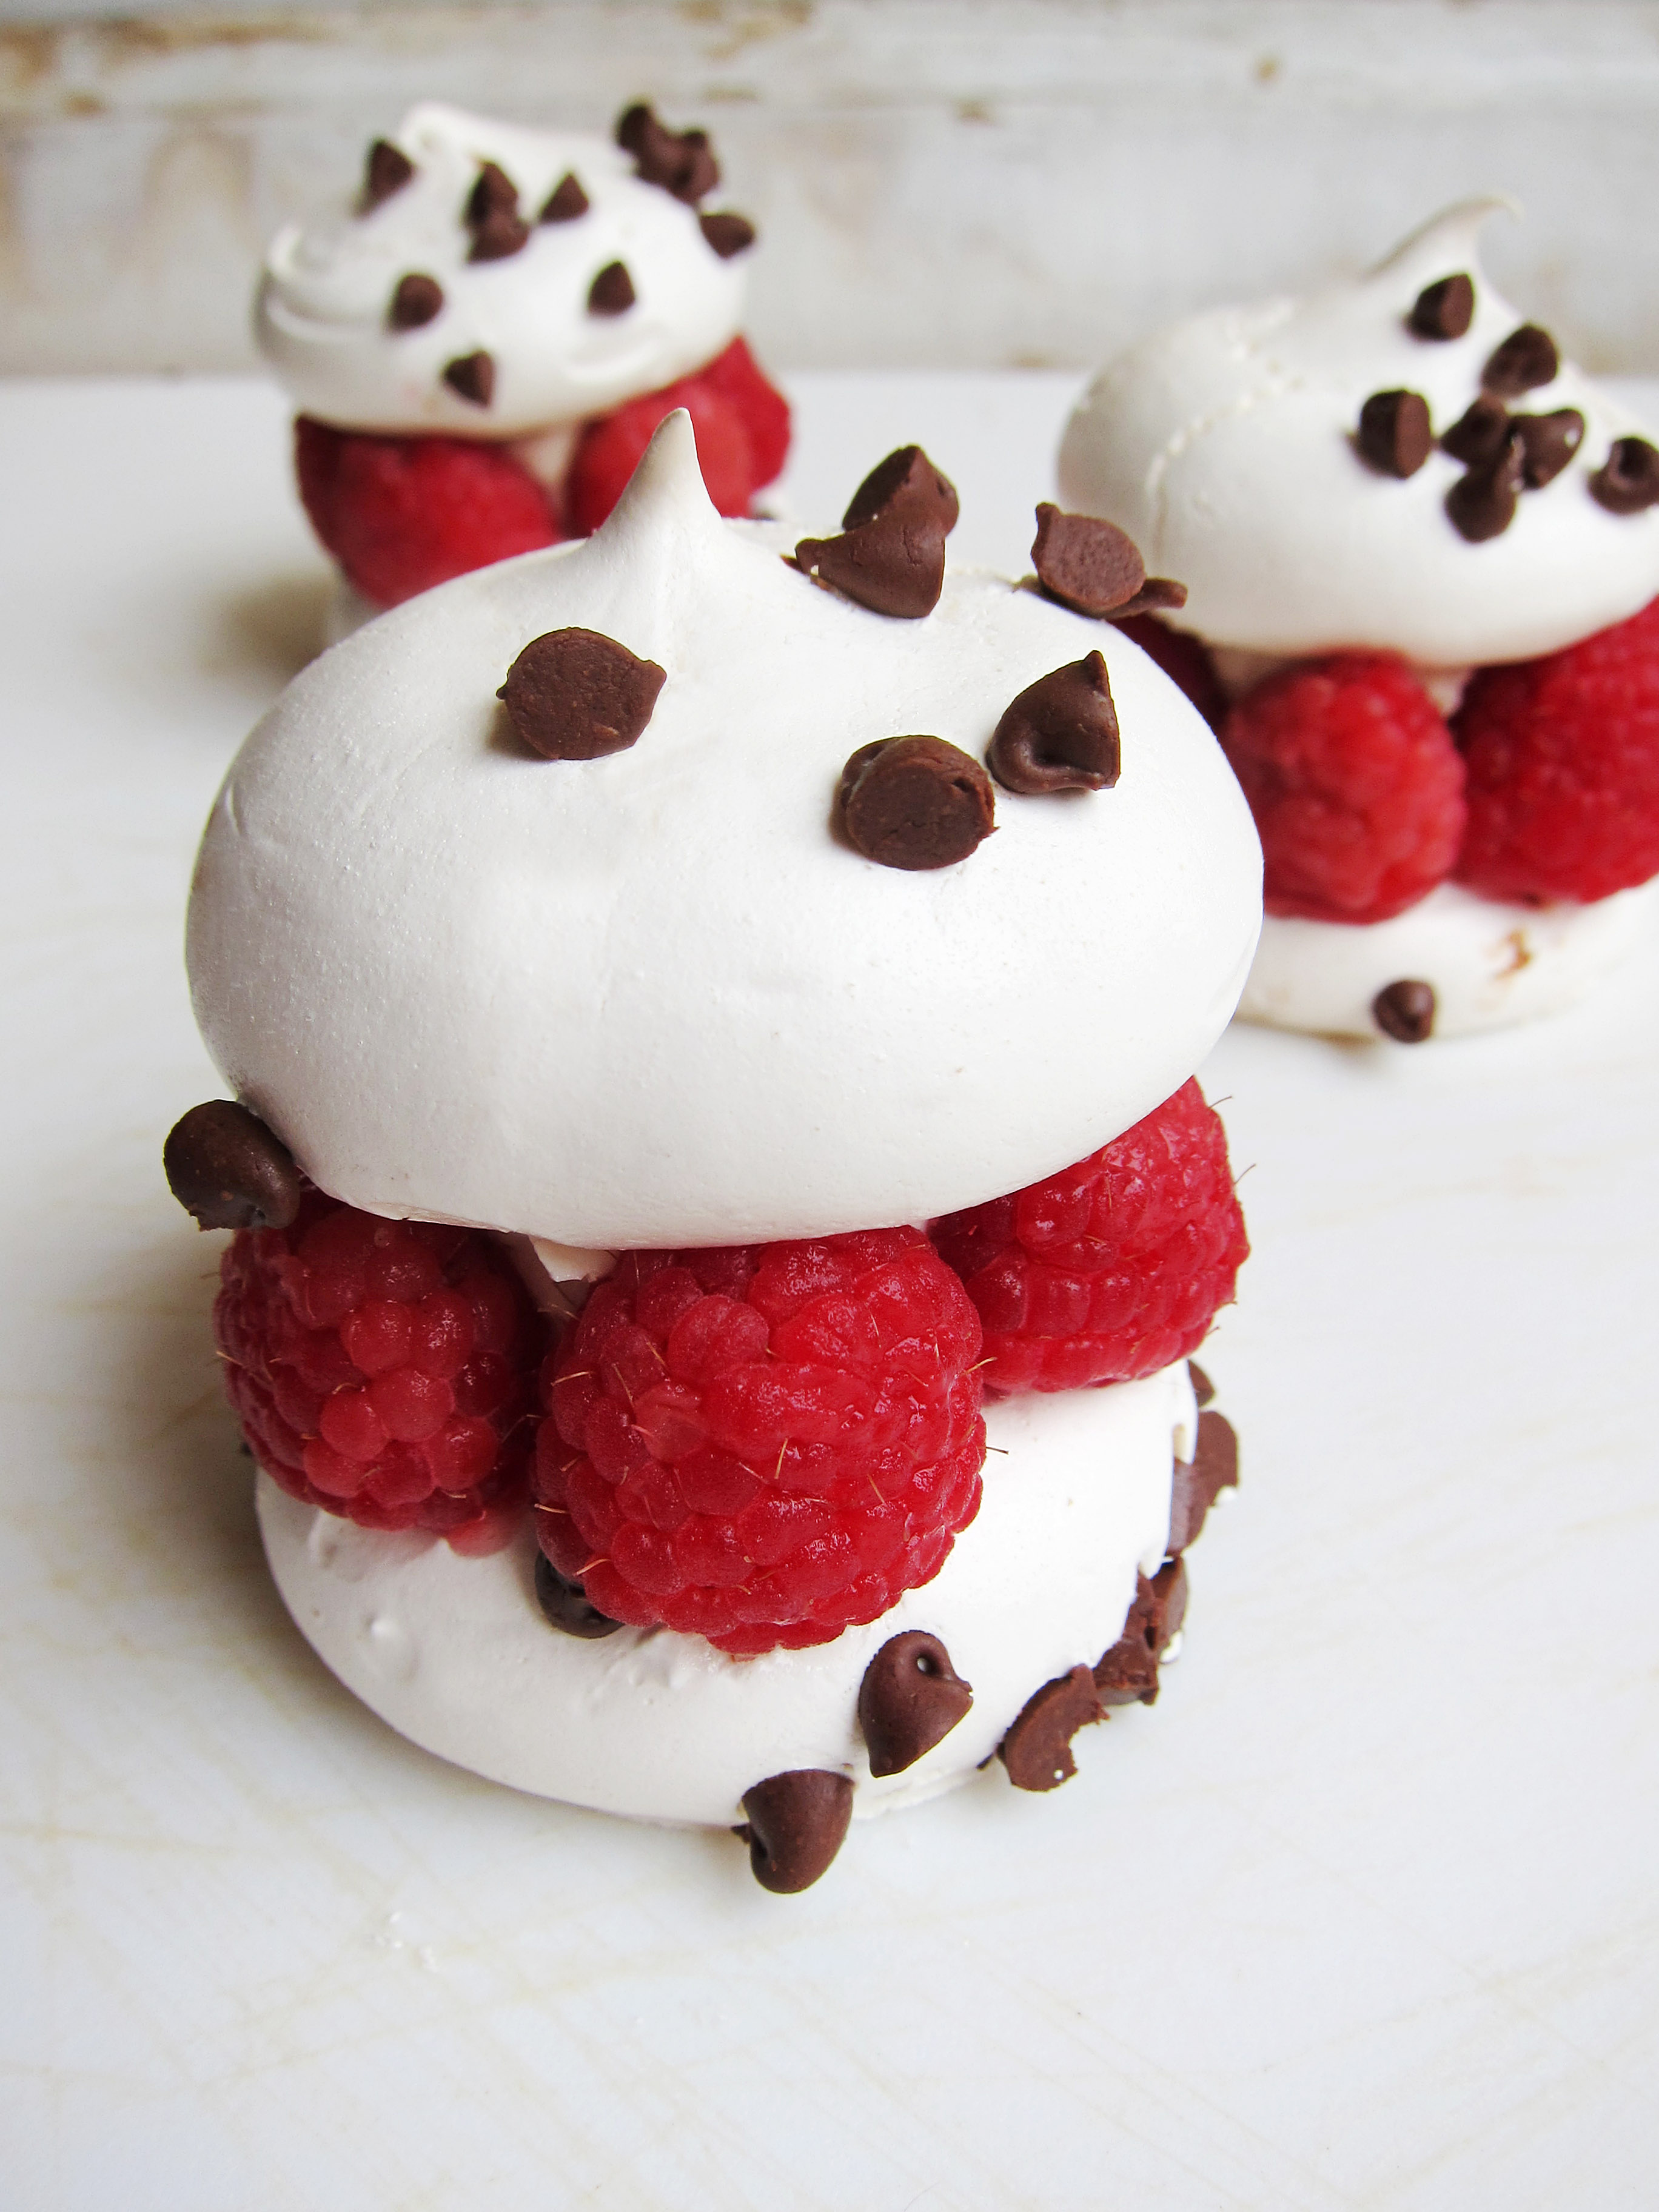
I hope you all had a great Memorial Day weekend!  If you follow me on Instagram, you probably saw I had some good eats during my weekend.  I know many of you are on diet mode for the upcoming swimsuit season and I’m sorry to do this to you, but you must make these cookies, especially if you love salty/sweet desserts.
Salted Dark Chocolate Caramel Cookies 2What makes this cookie so great is the sum of its parts.  First, you have the moist chocolate cookie base.  The secret to having it so deliciously soft is by under baking it.  10 minutes! No more!  Second, you have the cocoa nibs that cut the sweetness and have a satisfying crunch.  Think of it as a more cocoa-y nut alternative.  Third, you have the perfectly melted caramel center.  Personally, I love caramel and you can use regular caramels instead of Rolos.  However Rolos have the chocolate coating that enhances it.
Salted Dark Chocolate Caramel Cookies 4Finally, the sprinkling of Maldon salt finishes the balance of the cookie.  Some of the delicate flakes melt into the cookie fusing their salty goodness while the larger chunks withstand the heat and sparkle when you take them out.
Salted Dark Chocolate Caramel Cookies 3The recipe makes 12 large cookies.   You can easily double it, but I kept my body conscious readers in mind as I baked this.  It’s definitely not healthy food, but as the saying goes, “a balanced diet is a cookie in each hand”.
Salted Dark Chocolate Caramel Cookies 5Salted Dark Chocolate Caramel Cookies
Makes 12 large cookies

Ingredients:
4 oz. butter, room temperature
½ c. sugar
½ c. brown sugar
1 egg, room temperature
1 tsp. vanilla extract
⅓ c. Dutch-processed cocoa powder
1 c. all purpose flour
½ tsp. baking soda
½ tsp. kosher salt
¾ c. cocoa nibs
12 Rolos, unwrapped
Maldon sea salt

Instructions:

  1. In the bowl of a stand mixer fitted with the paddle attachment, beat butter, sugar and brown sugar until lighter in color and fluffy.
  2. Add egg and vanilla on medium speed and mix until glossy.
  3. Add cocoa and mix until homogeneous.
  4. Change the speed to low and add the flour, baking soda, and salt.  Mix until just combined.
  5. Fold in cocoa nibs.
  6. Chill dough in refrigerator for 1 hour.  This step will make it easier for you to roll the cookies.
  7. Preheat oven to 350˚F and line large cookie sheet with parchment paper.
  8. Form two, 1 tablespoon balls of cookie dough.
  9. Sandwich a Rolo in between the two balls of cookie dough and completely encase the Rolo by rolling it around in your hand.
  10. Repeat steps 8 and 9 until all of the dough and Rolos are used.
  11. Sprinkle Maldon salt over the tops of cookie dough balls.
  12. Bake for 10 minutes, rotating the pan 180˚ halfway.
  13. Let cool and enjoy.

Hi Hat Cake Cones

Hi Hat Cake Cones 3The weather is finally starting to warm up and these ice cream cones were screaming to be used.  I originally used them for my ice cream cone macarons, but I had half a box that was sitting on my counter looking useless and forlorn.  I wanted my next post to be hi hat cupcakes, so I stuffed it into a cone.
Hi Hat Cake Cones 1It’s ridiculously fun and easy to eat.  The crisp chocolate coating breaks into the soft marshmallow frosting and rich chocolate cake.  You can also sprinkle it with different combinations of toppings and change the color of the candy melts to suit the occasion.  I used Swedish pearl sugar and sanding sugar as toppings, but you can use anything you want to top it.  It also looks very cute with sprinkles.
Hi Hat Cake Cones 2On another note, why is the weather cloudy 80% of the time I’m trying to shoot photos?  Can’t a sista catch a break once in a while?  Every time I start conjuring up an idea for a project, the forecast is bound to be cloudy or rainy.  If you are into photography, you know the value of natural light and can understand my frustration.   If you’re not, then please excuse this rant of mine.
Hi Hat Cake Cones 4Hi Hat Cake Cones

You will need:
1 batch of chocolate cake batter (recipe below)
1 batch of marshmallow frosting (recipe bleow)
white candy melts
pink candy melts
blue candy melts
pink sanding sugar
Swedish pearl sugar
mini ice cream cones

Chocolate Cake

Ingredients:
1 c. all-purpose flour
1 c. sugar
1/3 c. Dutch-process unsweetened cocoa powder
1 tsp. baking soda
½ tsp. baking powder
½ tsp. kosher salt
¼ c. vegetable oil
1 extra-large egg, room temperature
1/2 tsp. vanilla extract
1/2 c. strong, hot coffee

Instructions:

  1. Preheat oven to 350 degrees and put one mini ice cream cone in each cup of a mini cupcake pan.
  2. In a stand mixer fitted with the paddle attachment, mix flour, sugar, both cocoa powders, baking soda, baking powder and salt until fully combined.
  3. In a separate bowl, whisk vegetable oil, eggs, and vanilla extract until combined.
  4. With the mixer speed on low, add the egg mixture to the flour mixture until combined.
  5. Turn off the mixer.  With a spatula, scrape the sides of the bowl to fully incorporate the two mixtures.
  6. Turn the mixer on low and slowly add the hot coffee to the batter.  Once added, raise the speed to medium until completely homogenous.
  7. Fill mini ice cream cones½ full with batter and bake about 10-13 minutes. Checking at 10 minutes for doneness with a toothpick test.*
  8. Let stand for 5-10 minutes when done, then put onto a cooling rack to fully cooled.

Marshmallow Frosting

Ingredients:
4 egg whites (120 g.)
1 c. sugar
a pinch of cream of tartar
a pinch of salt
1 tsp. vanilla extract

Instructions:

  1. In a small pot fill about 1 in. of water and let it come to a simmer.
  2. In the bowl of a stand mixer, whisk egg whites, sugar, cream of tartar and salt until homogenous.
  3. Once the water comes to a simmer, place the bowl on top of the pot and whisk the egg white mixture until the sugar is completely dissolved and no longer grainy.
  4. Move the bowl to your standing mixer fitted with a whisk attachment and beat on high speed until glossy and stiff.
  5. Add the vanilla extract and mix completely.
  6. Fill a piping bag fitted with an open star tip.

Assembly:

  1. Pipe a swirl of frosting onto cooled cake cone.
  2. Put into the freezer for 15-30 minutes until completely cold.
  3. In two separate bowls, melt white and pink candy melts and blue and white candy melts.
  4. Remove the cake cones from the freezer and dip the frosting portion into the melted chocolate.  Do not be afraid, the frosting will not fall off if sufficiently cooled.
  5. Before the chocolate sets, sprinkle sanding sugar and Swedish pearl sugar.
  6. Let chocolate set and enjoy.

* The toothpick test: insert a toothpick into the cake and if the toothpick comes out clean or with a few crumbs clinging to it, it is done.

Chocolate Chip Raspberry Meringues

Chocolate Chip Raspberry Meringues 1Happy National Chocolate Chip Day!  Chocolate chips are such a simple concept yet so pivotal in the world of baking.  It’s so versatile and can be subbed for chocolate in a lot of recipes.  I always wondered if Ruth Graves Wakefield kicked herself for exchanging her invention for a lifetime supply of chocolates. Chocolate Chip Raspberry Meringues 2I know chocolate chips are synonymous with chocolate chip cookies, but since I just posted a recipe involving a cookie cake, it seemed redundant.  Usually chocolate conjures up rich, heavy and decadent desserts and I ran the opposite direction with it this time.  It’s a light chocolate chip studded meringue cookie sandwiched with fresh whipped cream and raspberries.  It melts in your mouth, but still has a chewy middle.  It’s so yummy and easy to make, yet fancy enough to serve to guests.  In other words, a win-win-win.Chocolate Chip Raspberry Meringues 3Chocolate Chip Raspberry Meringues

Meringues

Ingredients:
4 large egg whites, room temperature
1 c. sugar
pinch of cream of tartar
1 tsp. vanilla extract
1 c. mini chocolate chips, divided

Instructions:

  1. Preheat oven to 200˚F and line a sheet pan with parchment paper or a silicone mat.
  2. In a small pot, fill it with an inch of water and let it come to a simmer.
  3. In a bowl of a standing mixer, whisk egg whites, sugar, and cream of tartar.
  4. Place bowl over the small pot and whisk until the mixture reads 160 degrees.
  5. Whip with a stand mixer until stiff, glossy peaks form.
  6. Add in the vanilla and fold in ¾ c. mini chocolate chips.
  7. In a piping bag fitted with a plain tip, pipe half of the batter as 2“ round, flat bases and the other half as 2” round, domed tops.
  8.  Bake in oven for about 30 minutes or until the cookies are firm and dry to the touch.

Whipped Cream

Ingredients:
1 c. heavy cream
1 tsp. vanilla extract
1 tbsp. confectioner’s sugar

Instructions:

  1. In a bowl of a standing mixer with the whip attachment, add the heavy cream and whip on high speed until soft peaks are just about to form.
  2. Add the vanilla extract and sugar and whip on medium speed until stiff peaks form.
  3. Do not over whip! The cream will turn into butter.

Assembly:

  1. On a round, flat meringue cookie base, arrange raspberries around the circumference of the cookie.
  2. Put about 2 teaspoons of whipped cream in the center of the cookie.
  3. Finish with a domed meringue cookie top.

Rose Cake

rose cake 2This weekend was crazy busy for the Park family.  We had a graduation, Mother’s Day and my dad’s birthday lined up 3 days in a row.  We ended up celebrating Mother’s day and my dad’s birthday in one go, and I tried to think of a birthday cake that would serve both occasions.  I suppose the mauve color of the cake was a little too feminine for a man’s birthday, but my mom didn’t get any flowers for Mother’s day so I hope this made up for it a bit.
Rose cake 1Like many celebration cakes, this cake takes a long time to decorate but isn’t necessarily challenging.  What takes the most time is rolling out the petals and chilling the petals in between steps.  I wanted to use 100% modeling chocolate for the cake, but something went wrong during the process and I had to add about 30% fondant to make it useable.  Do not fight the weather, as soon as your modeling chocolate/fondant starts to lose its shape, stop and chill it in the freezer.  This will save you a lot of frustration and heartache down the line.
rose cake 3It does have a certain eye opening charm and it’s very flexible in terms of the variation of celebrations and colors.  An all-around crowd pleaser.
rose cake 4Rose Cake
You Will Need:
14 oz of modeling chocolate or a mixture of fondant and modeling chocolate
1 batch of vanilla buttercream
1 8” cake, layered and filled
a set of round cookie cutters 
round ended fondant tool

Instructions:

  1. Frost your cake with vanilla frosting into a dome shape.*  (Pic 1)
  2. Mold a 1½ in. cone with modeling chocolate and place in center of the cake. (Pic 2)
  3. From this point on, the modeling chocolate will be rolled out to 1/8-1/16 in. thickness.
  4. With your 1.75 in. round cutter, cut out 2 pieces of modeling chocolate and mold it to a petal shape using a round ended fondant tool.
  5. Wrap the cone with the 2 petals with some buttercream, overlapping each other to form a bud. (Pic 3 and 4)
  6. With your 1.75 in. round cutter, cut out 3 pieces of modeling chocolate and mold it to a petal shape using a round ended fondant tool.
  7. Wrap the bud with the 3 petals with some buttercream, overlapping each other at the edges. (Pic 5 and 6)
  8. With your 2.25 in. round cutter, cut out 5 pieces of modeling chocolate and mold it to a petal shape using a round ended fondant tool.
  9. Wrap the bud with the 5 petals with some buttercream, overlapping each other at the edges. (Pic 7 and 8)
  10. With your 2.5 in. round cutter, cut out 5 pieces of modeling chocolate and mold it to a petal shape using a round ended fondant tool.
  11. Wrap the bud with the 5 petals with some buttercream, overlapping each other at the edges. (Pic 9 and 10)
  12. With your 2.75 in. round cutter, cut out 5 pieces of modeling chocolate and mold it to a petal shape using a round ended fondant tool.
  13. Wrap the bud with the 5 petals with some buttercream, overlapping each other at the edges. (Pic 11 and 12)
  14. With your 3 in. round cutter, cut out 5 pieces of modeling chocolate and mold it to a petal shape using a round ended fondant tool.
  15. Wrap the bud with the 5 petals with some buttercream, overlapping each other at the edges. (Pic 13)
  16. With your 3.25 in. round cutter, cut out 7 pieces of modeling chocolate and mold it to a petal shape using a round ended fondant tool.
  17. Wrap the bud with the 7 petals with some buttercream, overlapping each other at the edges. (Pic 15)
  18. Cut 2-3 in. wide strips of molding chocolate and curl the edges with a straw, about 8-13 pieces.
  19. Chill in the freezer to set, about 1-3 minutes.
  20. Use some frosting to wrap the cake with the strips, overlapping at the edges and curled edge pointing up.  (Pic 16)

* This is what I did.  In hindsight, you could do the regular sharp corners, it shouldn’t make a difference.

Sofia the First Doll Cake

sofia the first doll cake 1There are many things that make birthdays special: friends, family, presents, food… the list goes on.  My favorite part of a birthday is the cake.  I’m not sure what the exact reason is.  It may be because it’s the centerpiece of a celebration or because it foreshadows the inevitable sweet ending of a party or simply because I love cake.
sofia the first doll cake 3I did not have many birthday parties when I was little, but I do remember seeing many beautiful cakes at American bakeries wishing I would have one for my birthday.  I always ended up getting a Korean cake.  By Korean cake, I mean a simple sponge cake filled with whipped cream and fruit and a simple decoration on top.  (I have to say, Korean bakeries have stepped up their decorating game since I was a little kid.) Many a day did I wish for the sugary sweet American buttercream counterpart but it just didn’t happen.  So that’s why when it’s someone’s birthday I try to make it special the only way I know how, with cake.
sofia the first doll cake 4Andy’s niece LOVES Sofia the First, along with Minnie Mouse and Max & Ruby.  I’ve always wanted to try my hand at doll cakes so the present was twofold: the cake and the doll in one.

steps 2If you’ve never made doll cakes before, I’ll tell you that it’s definitely more time consuming than a layer cake but the reaction you get makes it worth the trouble.  When we walked in the door, the first thing she screamed was “Sofia!!” and asked to hold it thinking it was a real doll.  We were successful keeping her hands off until the end when the urge was too great and she made a grab for it. 🙂
sofia the first doll cake 5

Sophia the First Doll Cake

You will need:
Purple Fondant
White Fondant
White Buttercream
White Sugar Pearls
4 layers of 6” round cake
Purple Food Marker
Isomalt (optional)
Small Gem Mold (optional)

Instructions:

  1. Cut out holes in the cake layers so that it would fit your doll.  I used this doll.
  2. Prep your doll by tying its hair up, taking off the dress, and wrapping the doll with plastic wrap.
  3. Roll out a piece of purple fondant and drape around the doll adhering it with either a very thin layer of buttercream or water. (As shown above.)
  4. Frost and layer the cake layers and place your doll inside.
  5. Mold the cake into a dress shape by cutting it along the top in a rounded shape.
  6. Frost the cake smoothly up to below the waist of the doll.  (As shown above.)
  7. Roll out a piece of white fondant and cut out a 2-3 in. strip.  Drape it around the bottom of the dress to form the underskirt of the dress. (As shown above.)
  8. Roll out a piece of purple fondant and cut out a ¼ in. strip.  Adhere the purple strip over the white fondant with either buttercream or water to form the stripe around the underskirt. (As shown above.)
  9. Roll out a large piece of purple fondant (about 10 in. in height) and cut out scalloped shapes along the bottom.  Drape right below the waist of the doll connecting the two ends together in the back. (As shown above.)
  10. Roll out two more pieces of fondant in a semi-circle shape and drape around each side of the doll to create the top layer of her dress. (As shown above.)
  11.  Roll and cut a thin ribbon of fondant and wrap around the waist to meld the top and bottom together.
  12. With the purple marker, draw two lines and a loop design on the front of her dress. (As shown above.)
  13. Adhere pearls along the neckline and the purple stripes. (As shown above.)
  14. Adhere pearls along the top layer of the dress. (As shown above.)
  15. Optional: If you have time, you can continue the pearl all across the back of the dress.  I did not so I opted to continue it with a white ribbon made of white fondant.
  16. Adhere pearls all along the top and bottom skirt of the dress
  17. For the circular pattern along the bottom of the dress you can either:
    1. Cut out the pattern with the fondant and adhere it.
    2. Make white teardrop jewels with a small gem mold with either sugar or isomalt. This gives it an interesting 3D effect to the dress.  You can cut out the triangular shapes with fondant and adhere it.
  18. If you have time, you can fancy the dress up in the back with more pearls and sugar jewels. (As shown above.)
  19. Optional: You can also paint the crown with silver paint and bling it out with little purple gems like I did above.  It makes the cake look a little more expensive and detailed. (As shown above.)

Star Wars Day 2014

Star Wars Day 2014 1This is the third year I’ve hosted a Star Wars Day party.  It involves good food with punny names, watching SW movies and SW themed board games.  The first SW party I threw was just a small surprise for a special someone but through the years it’s evolved into a bigger celebration.  I can’t say that I’m a huge fan of Star Wars, but I can say that I love throwing themed parties.  So in a way, I do love Star Wars Day.
Star Wars Day 2014 2Star Wars Day 2014 4
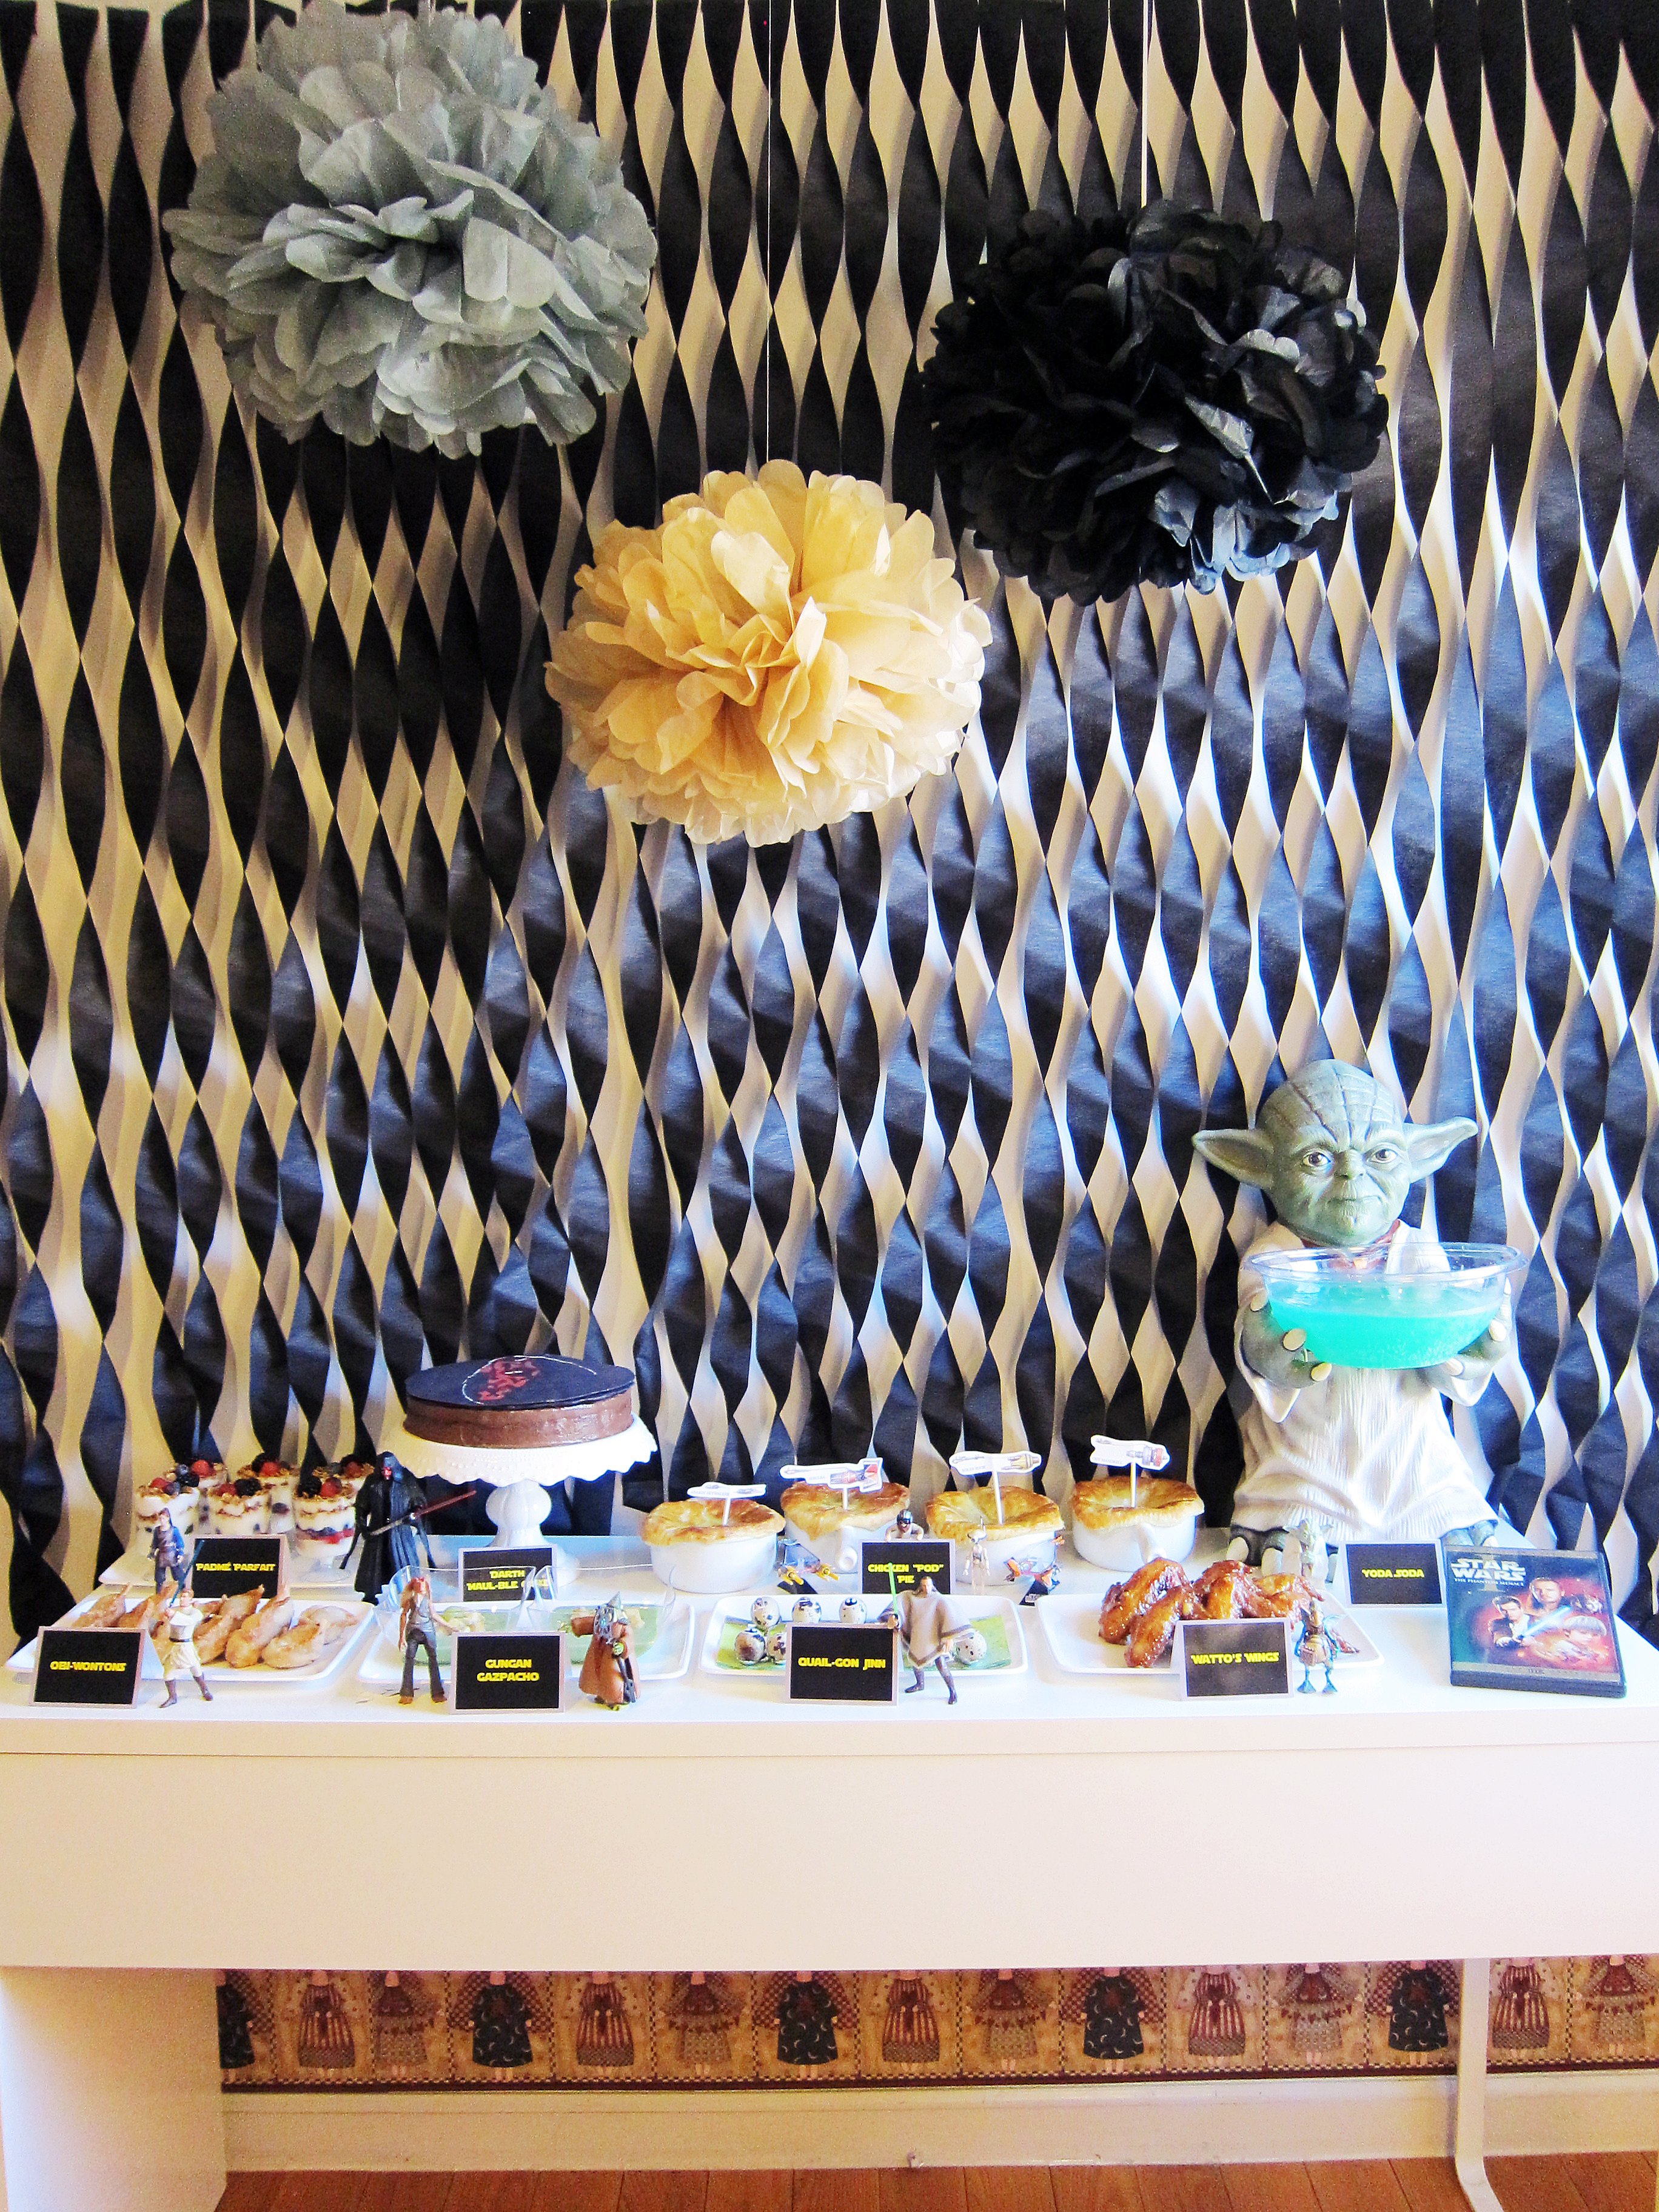
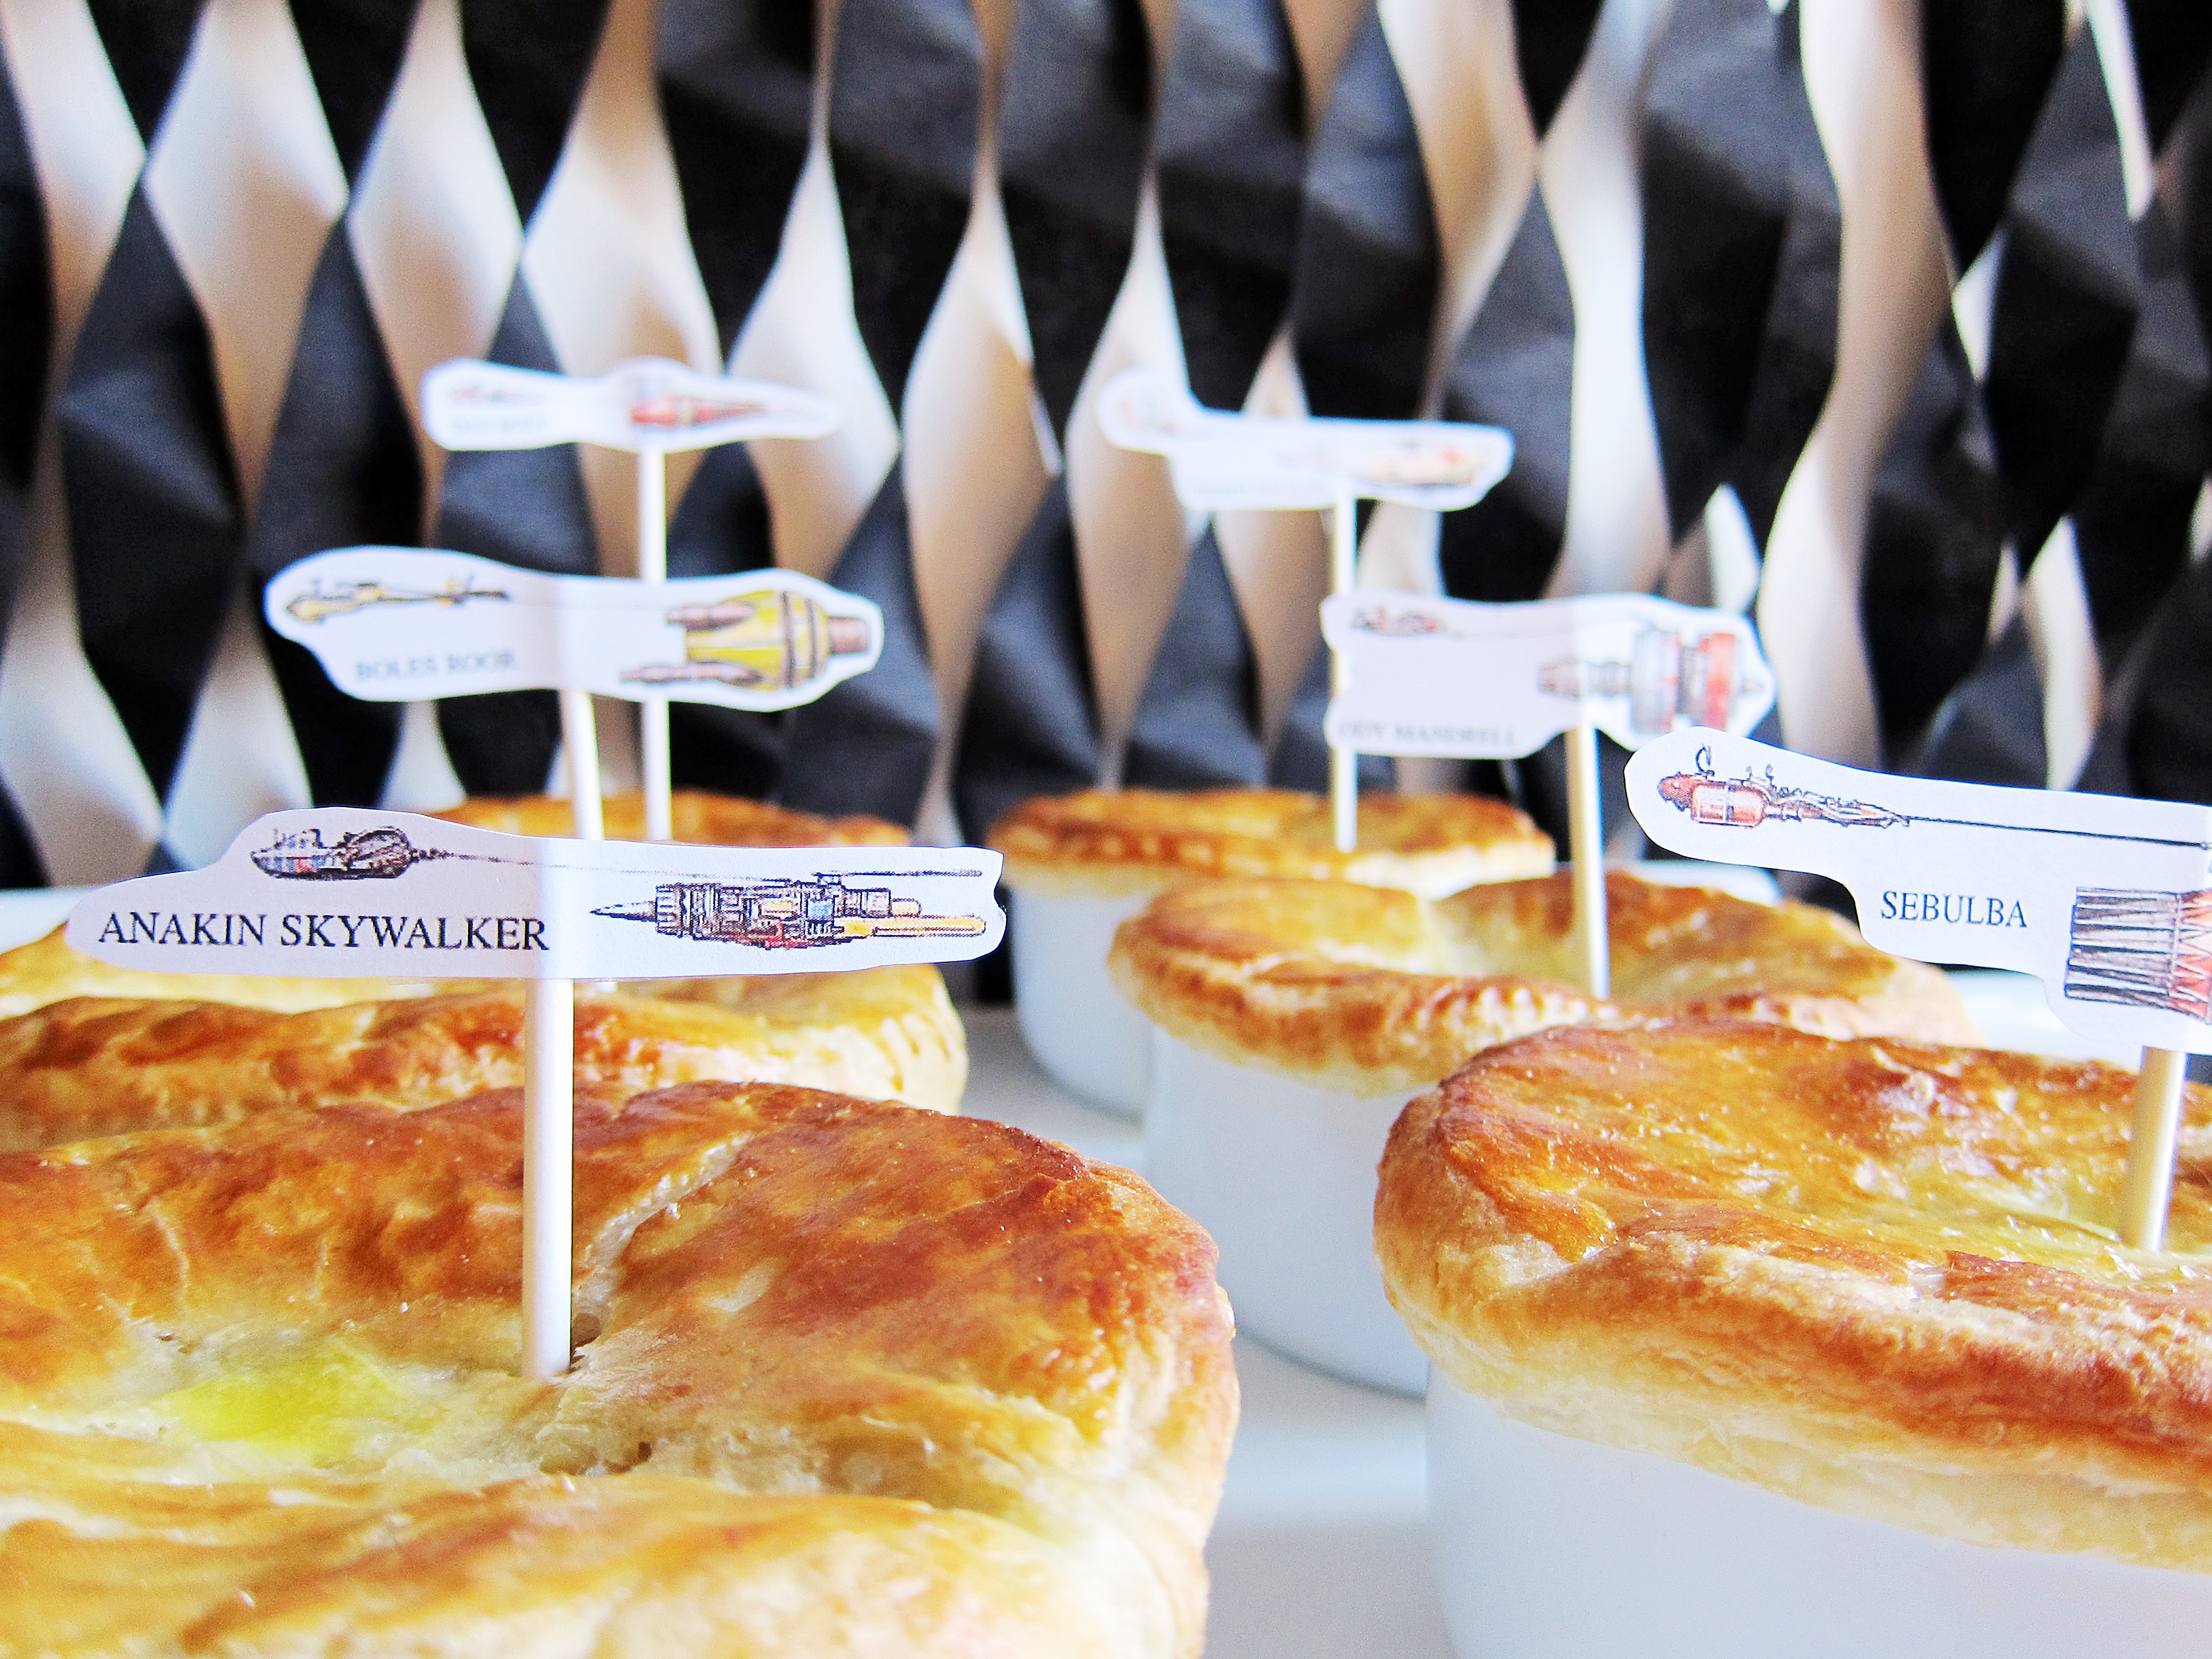
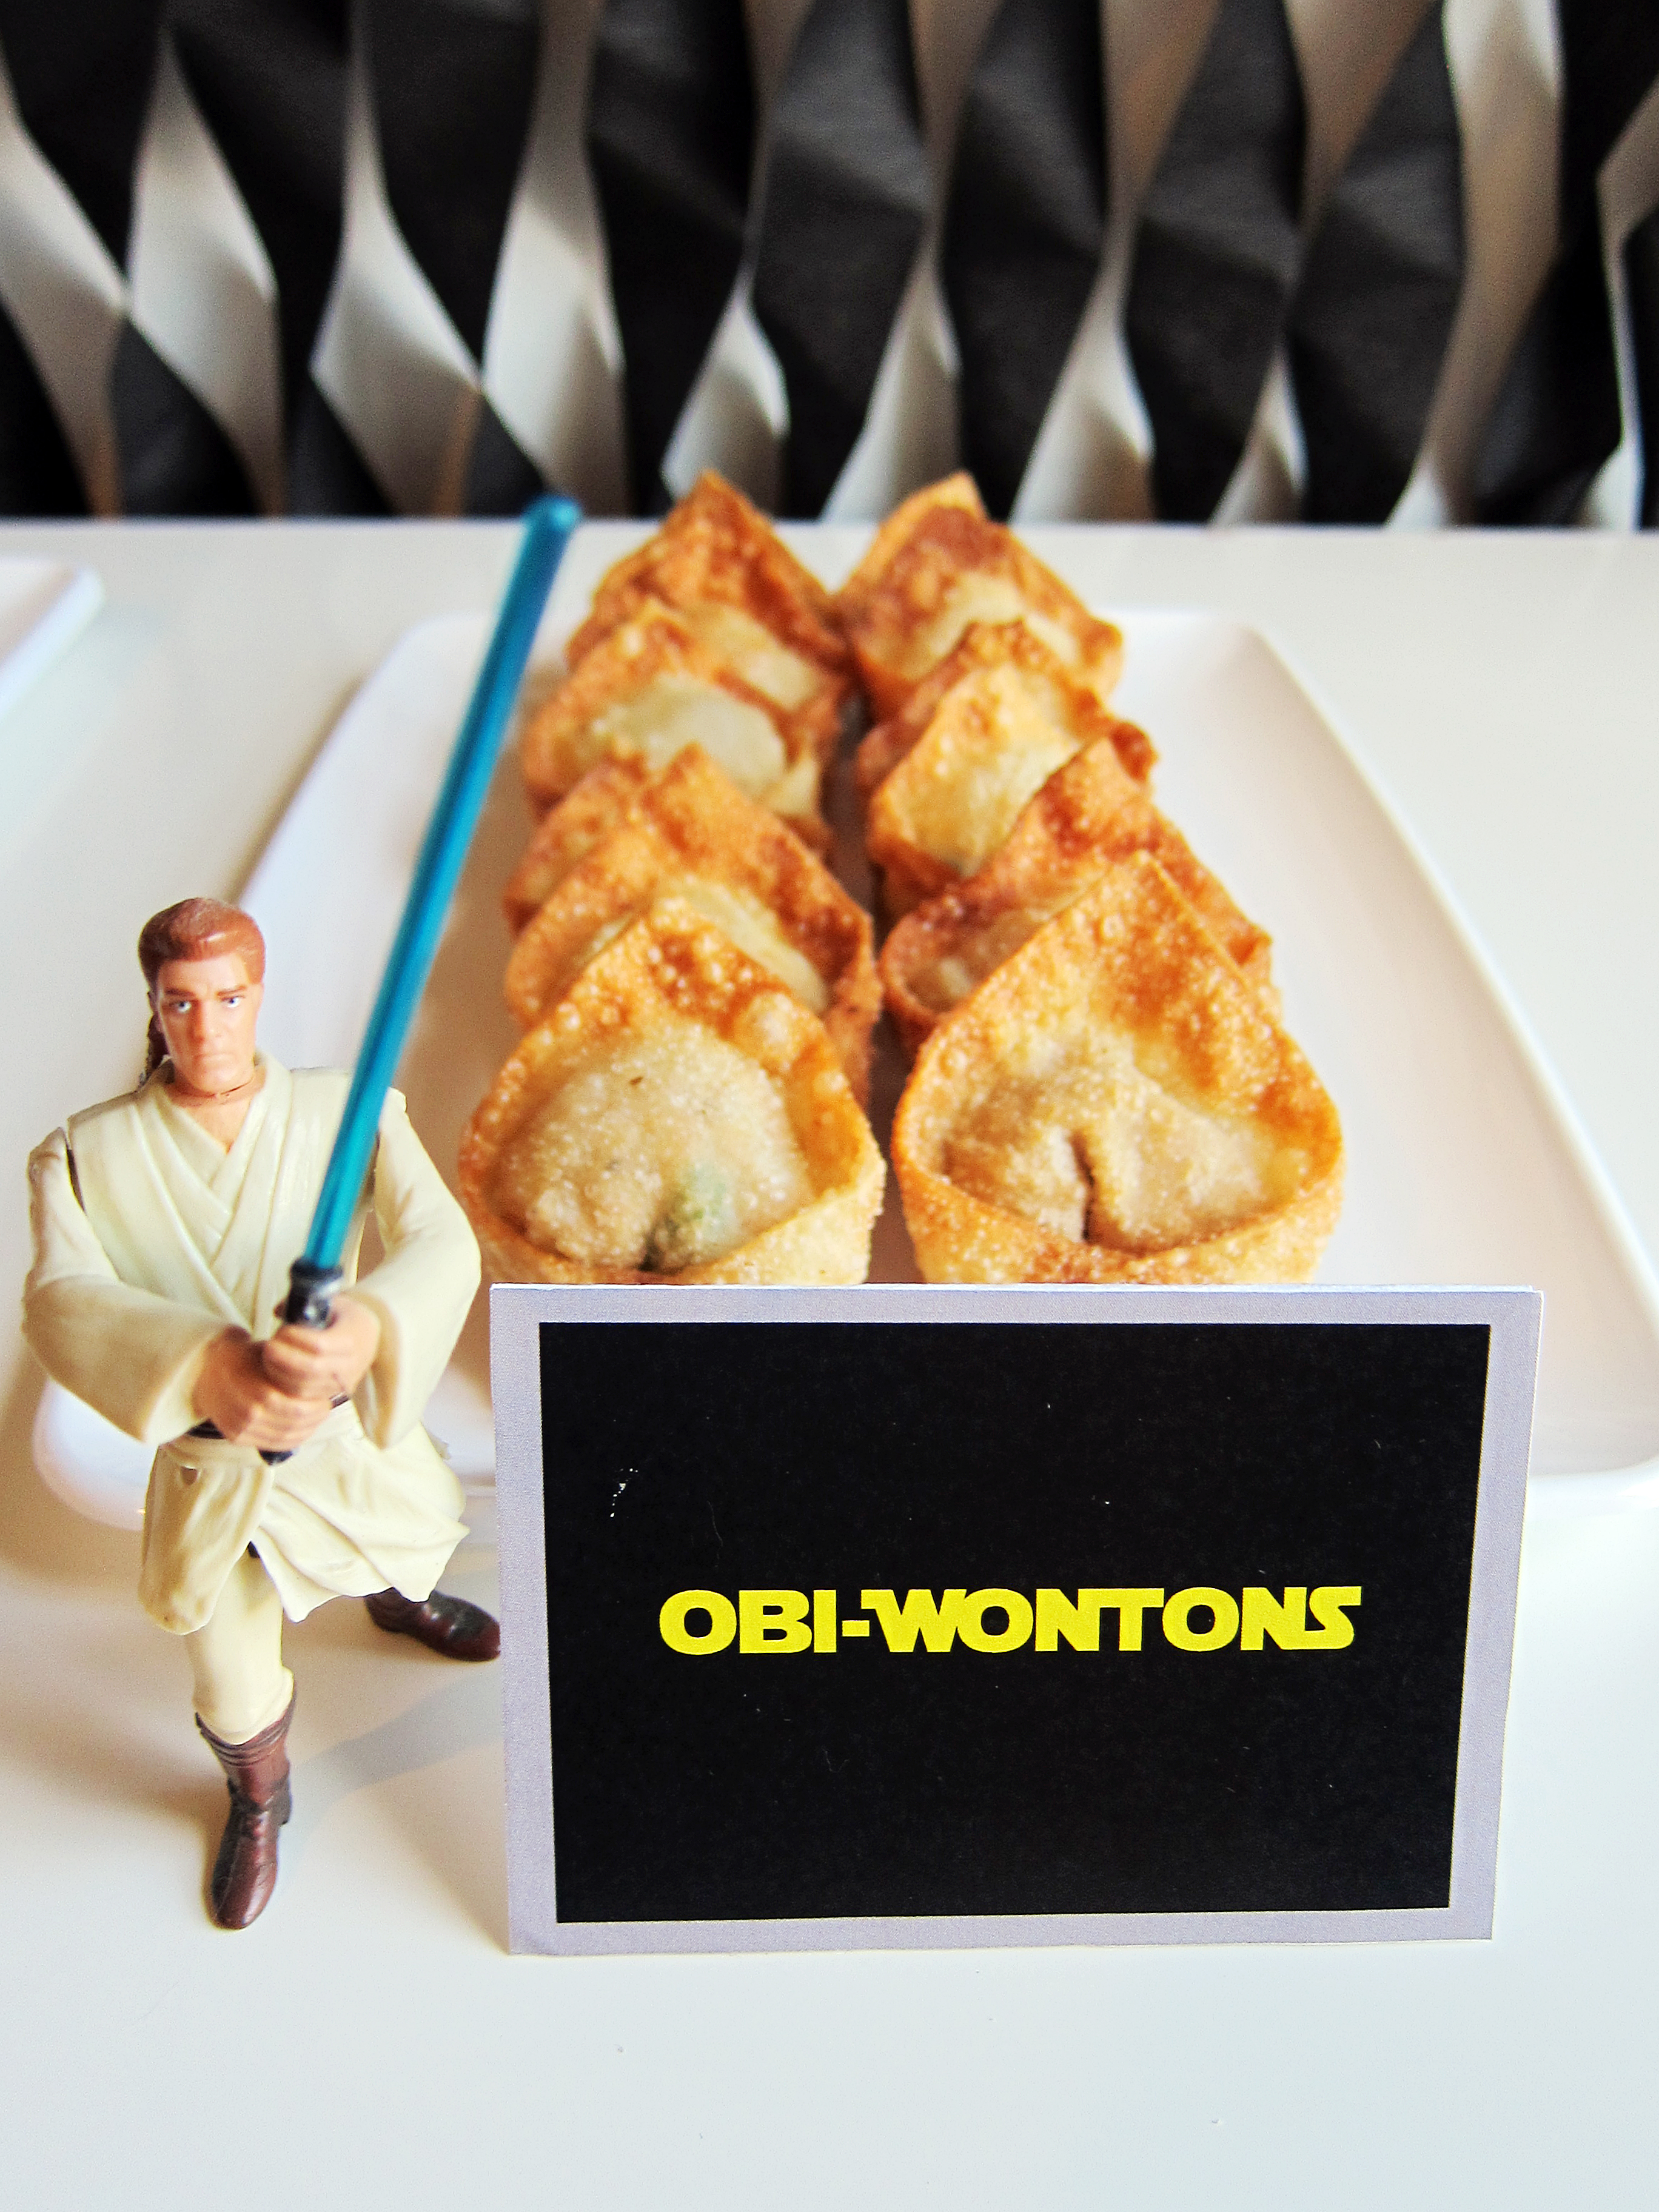
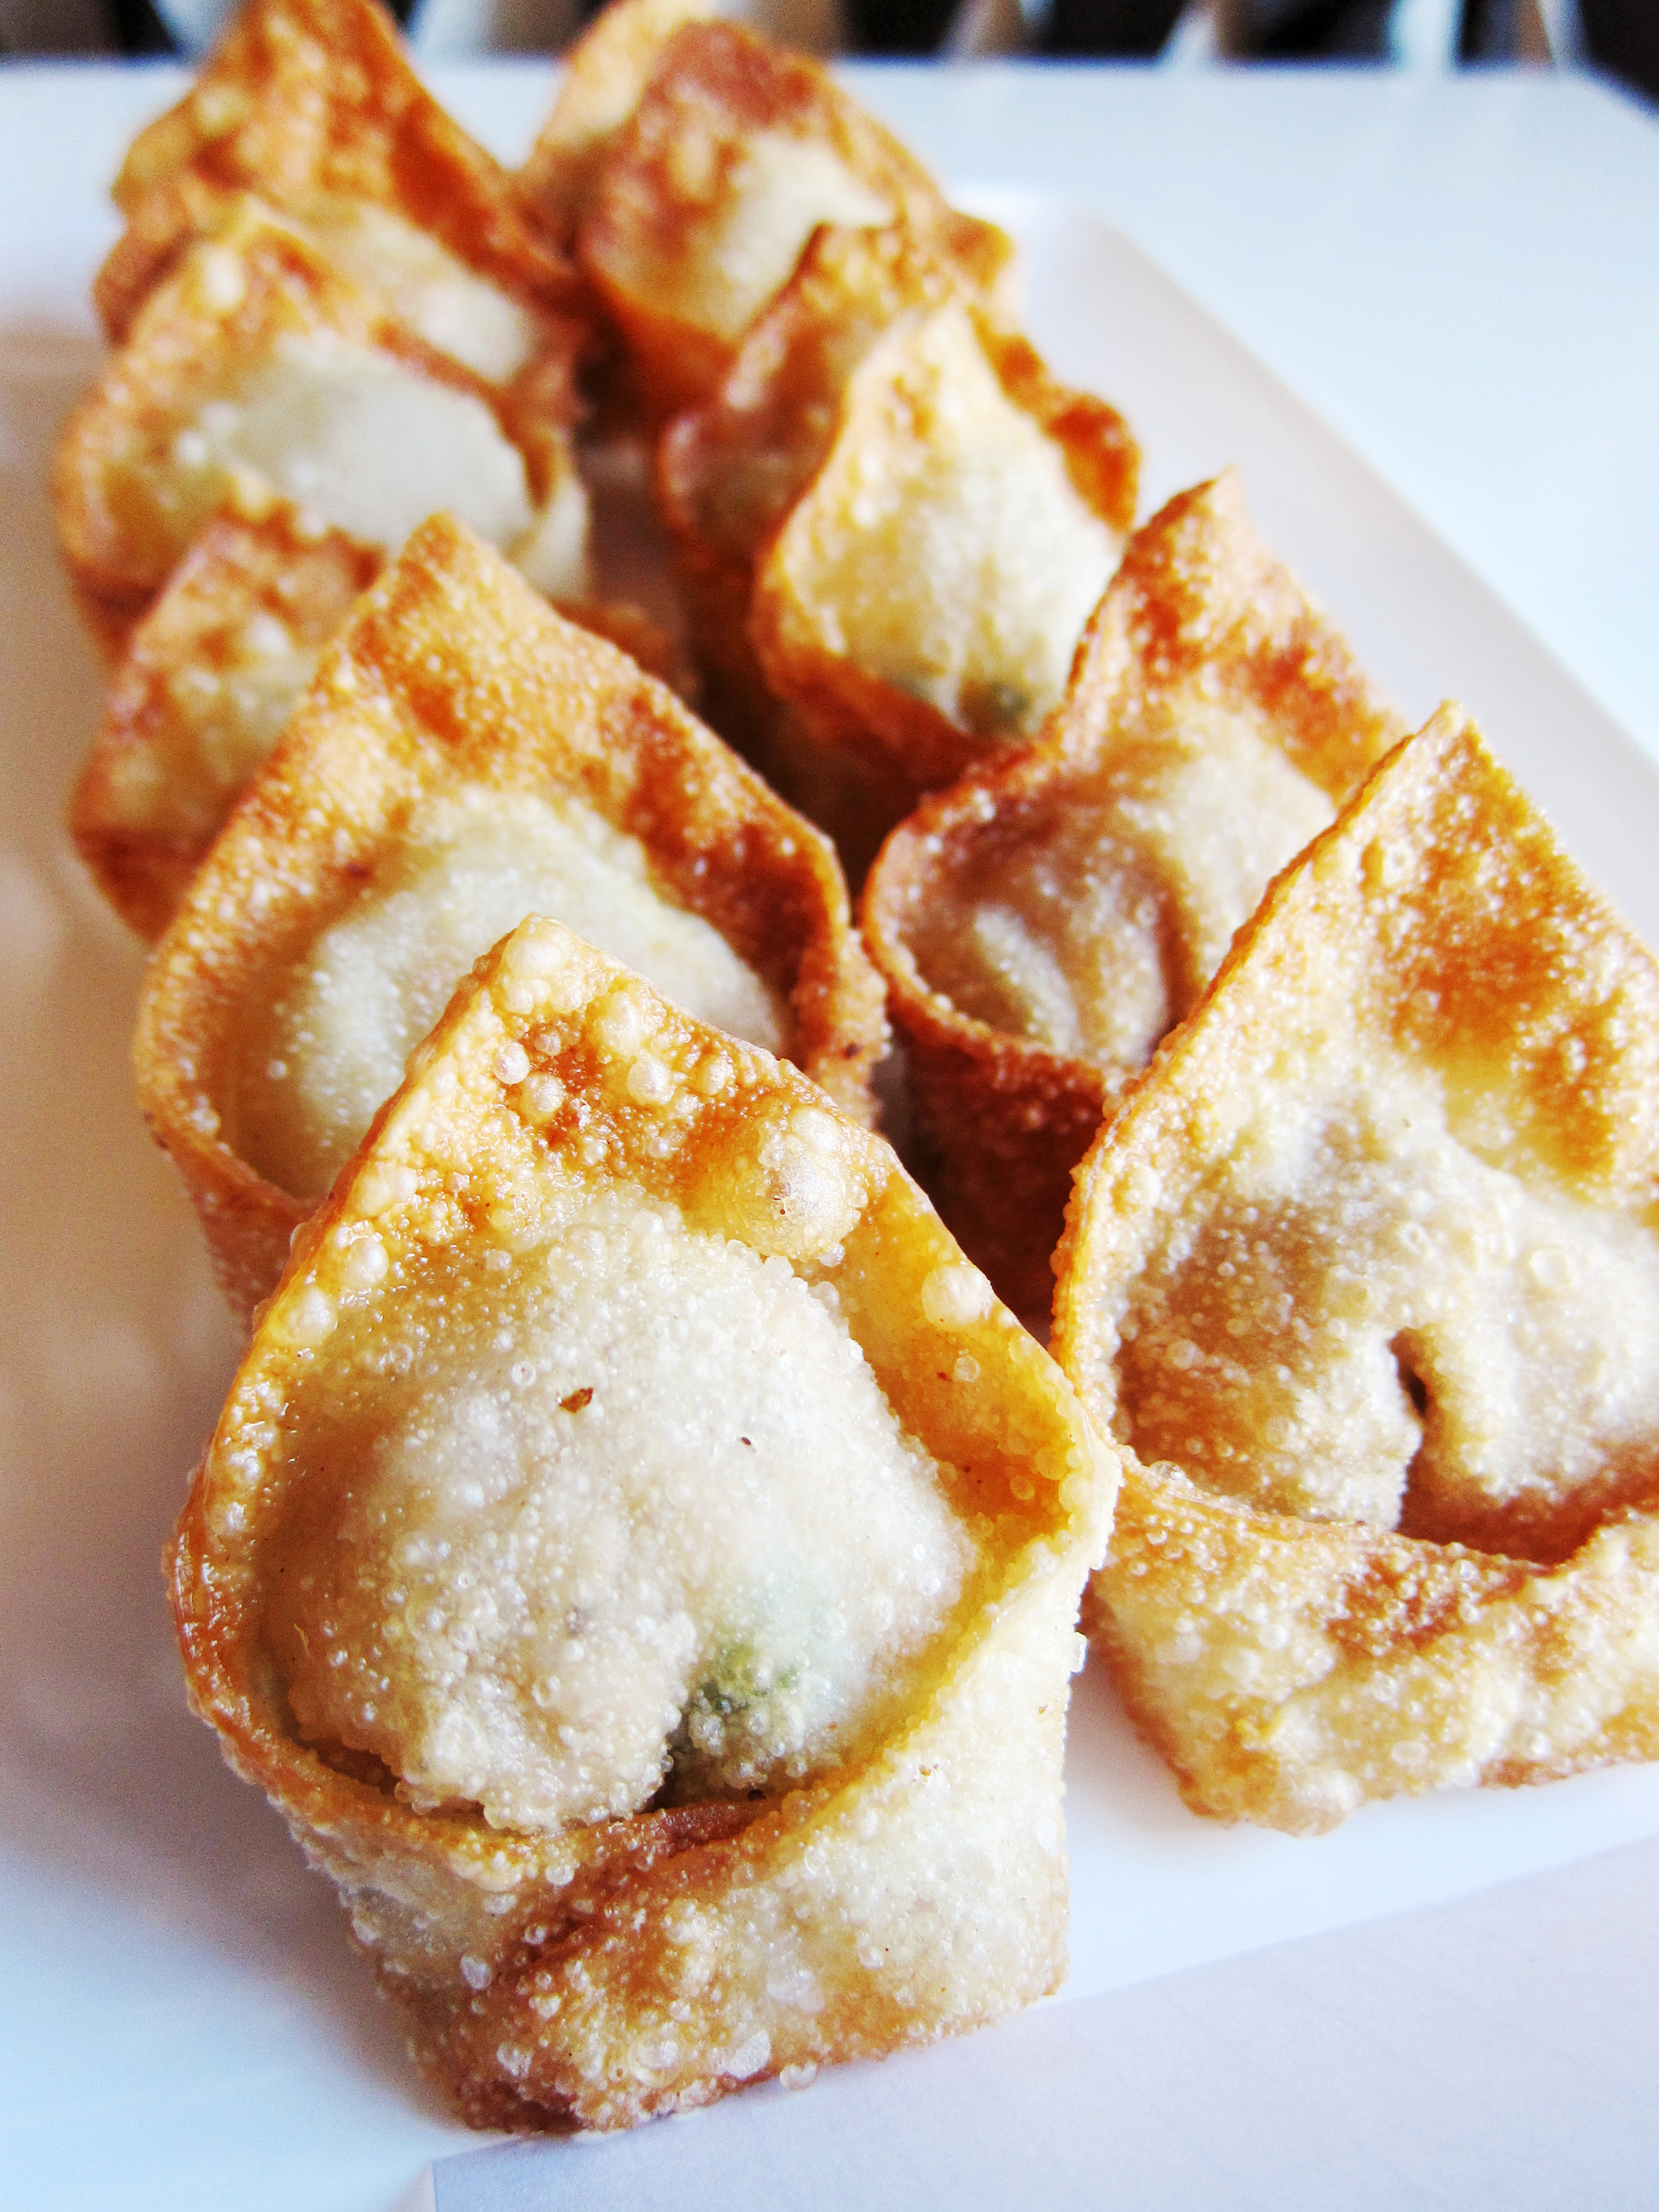
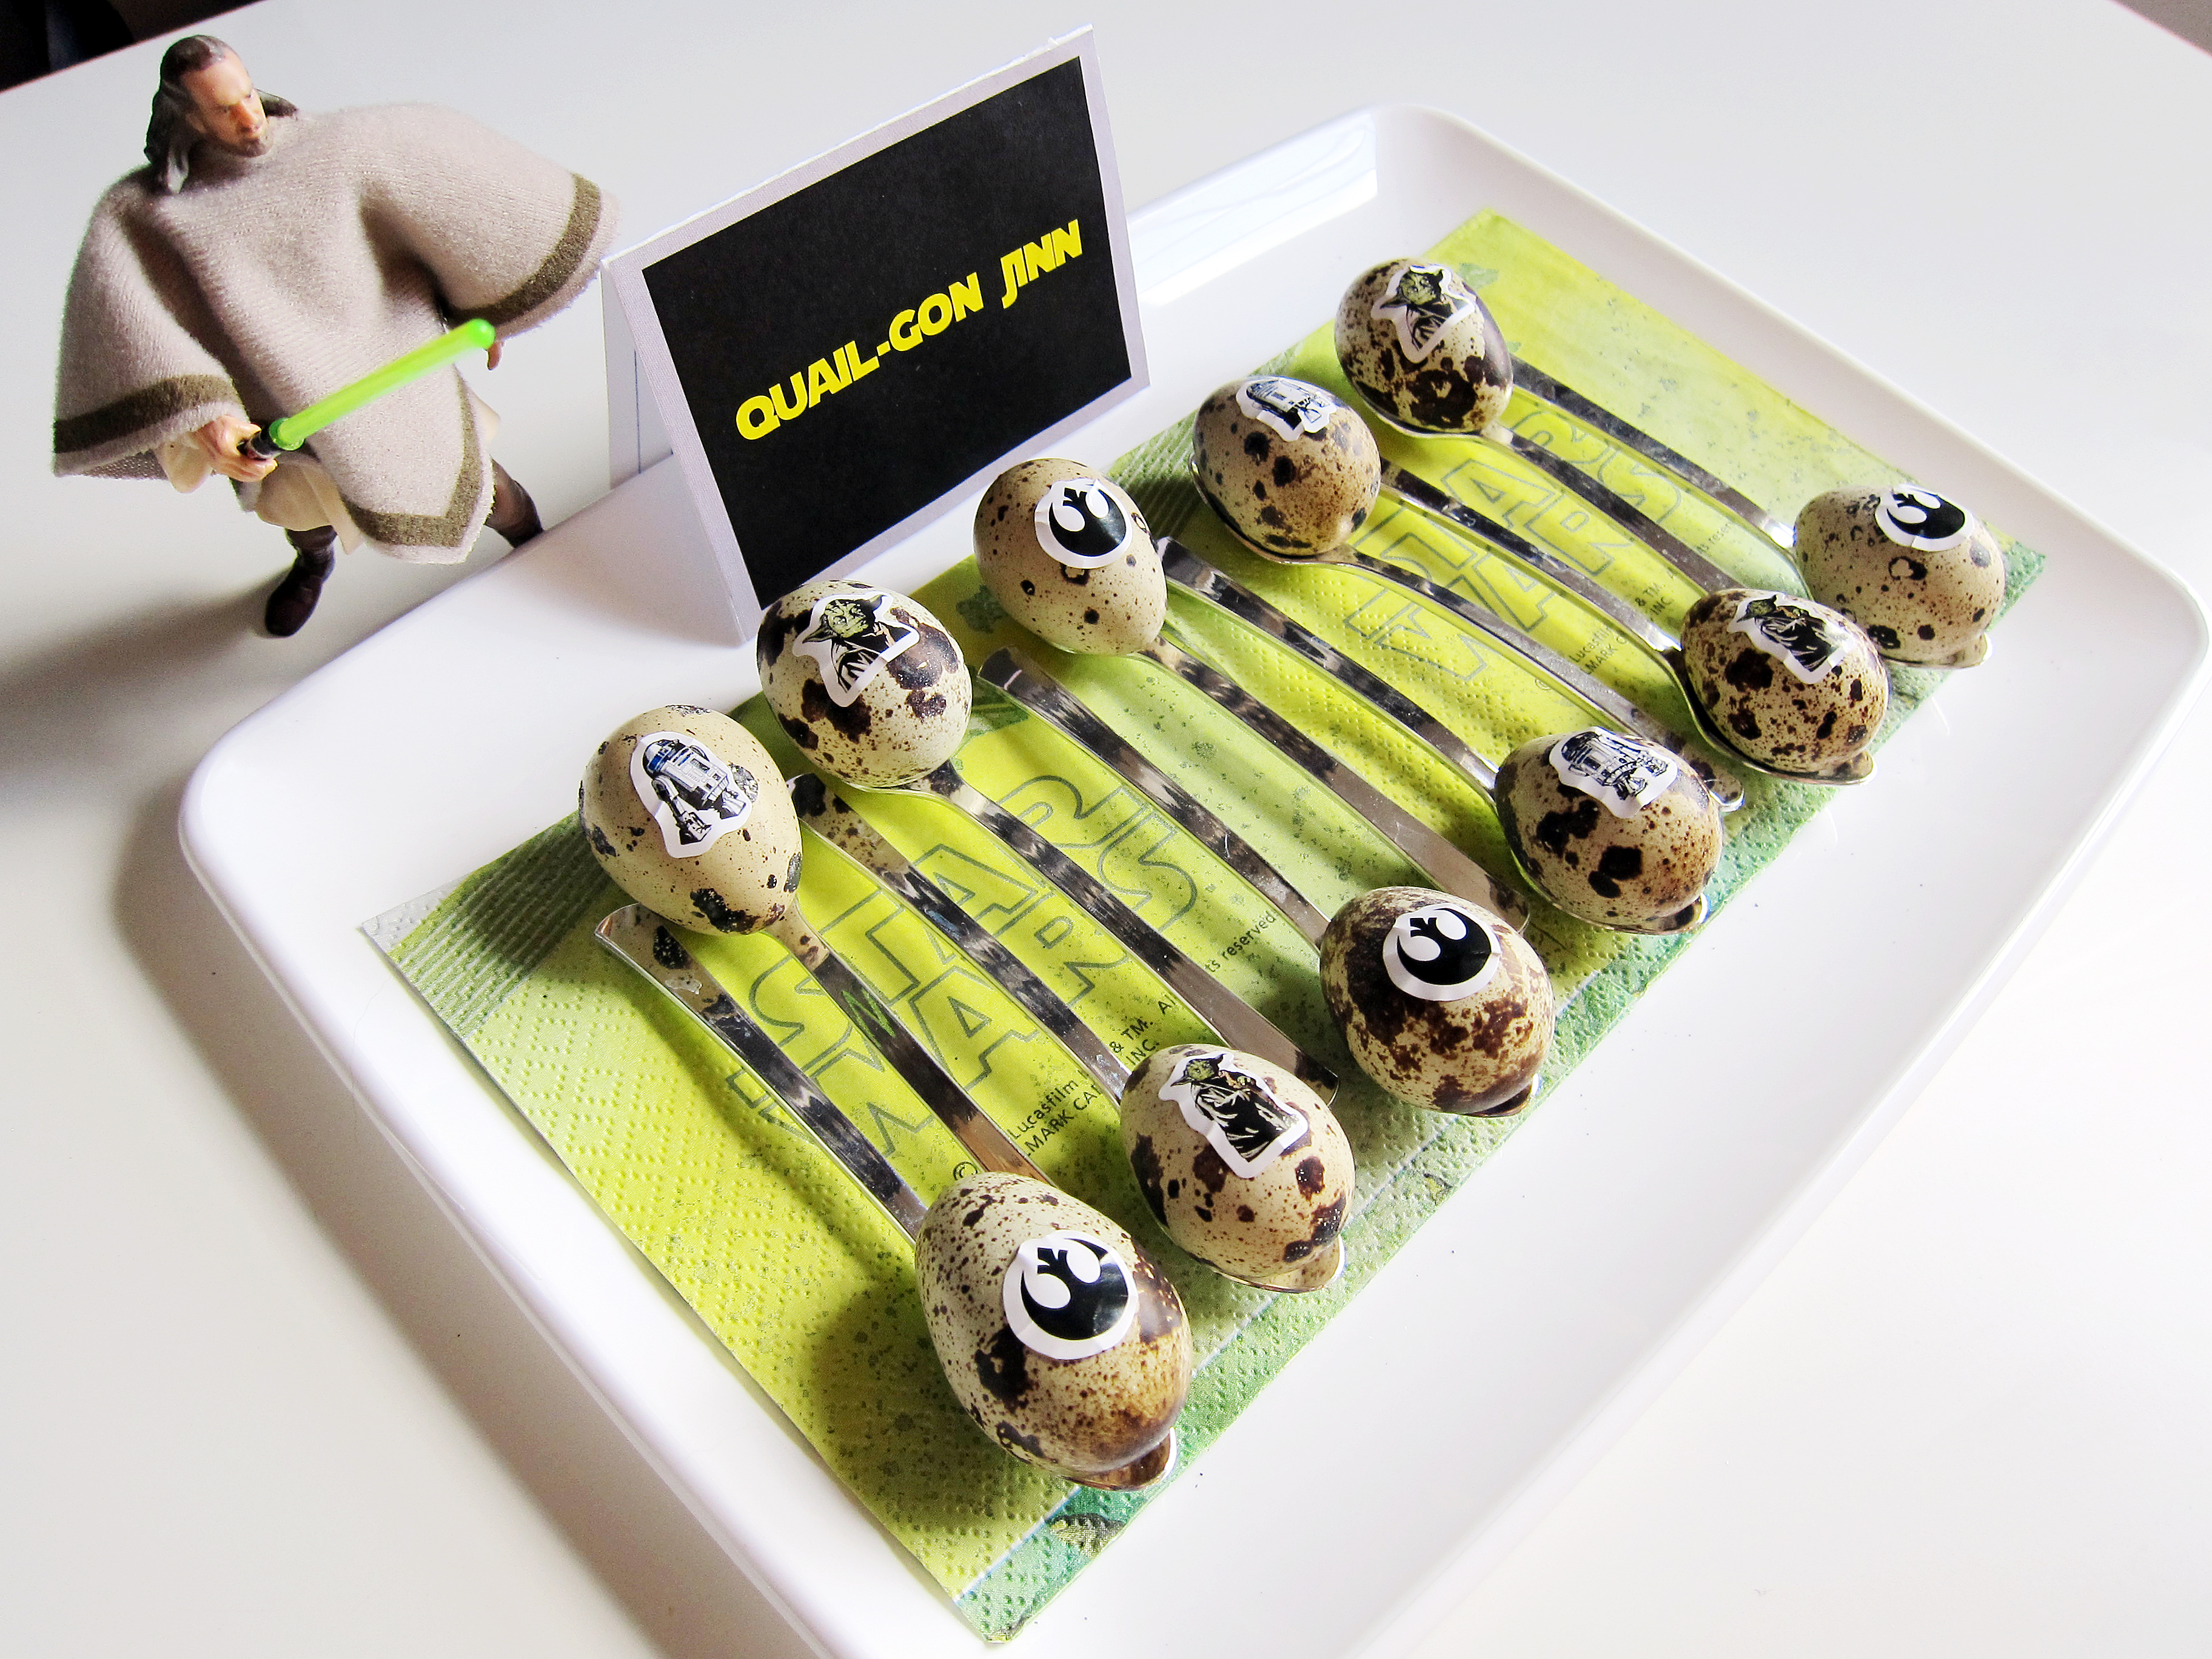
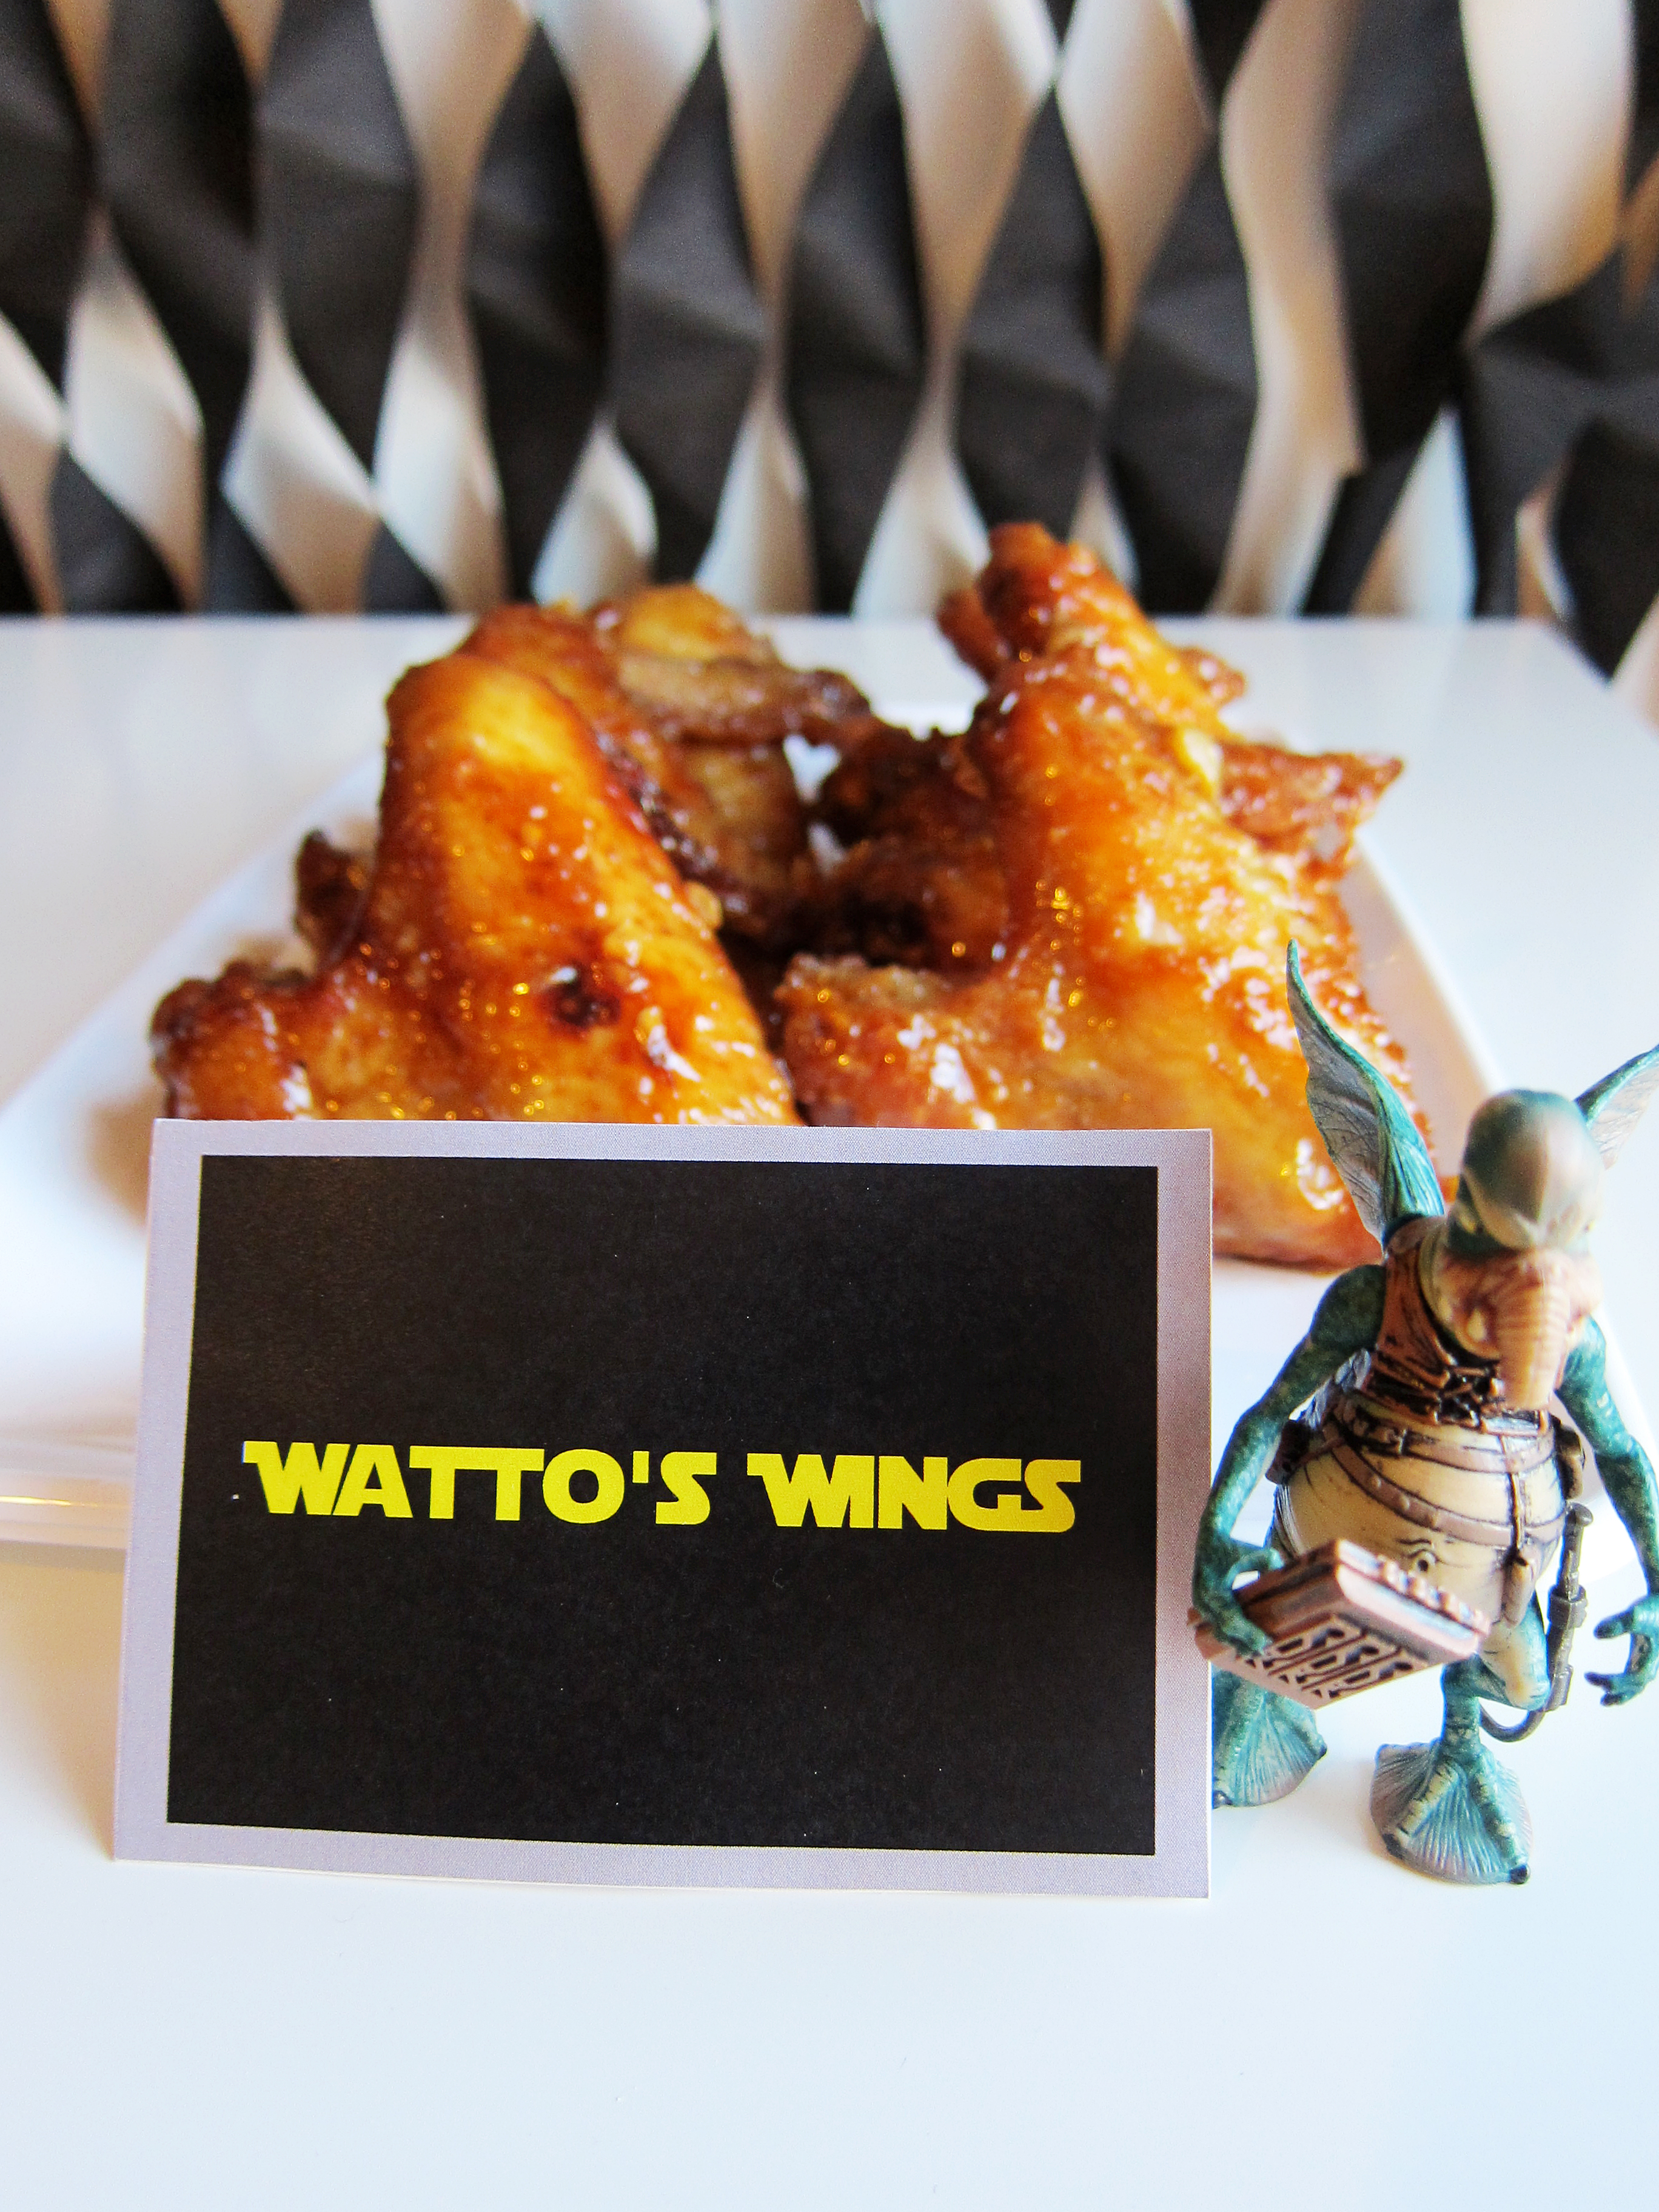
This year‘s party theme was Episode 1: The Phantom Menace, so all of the food and activities were centered on Episode 1 characters and settings.  Here are the things we made for SW Day*:
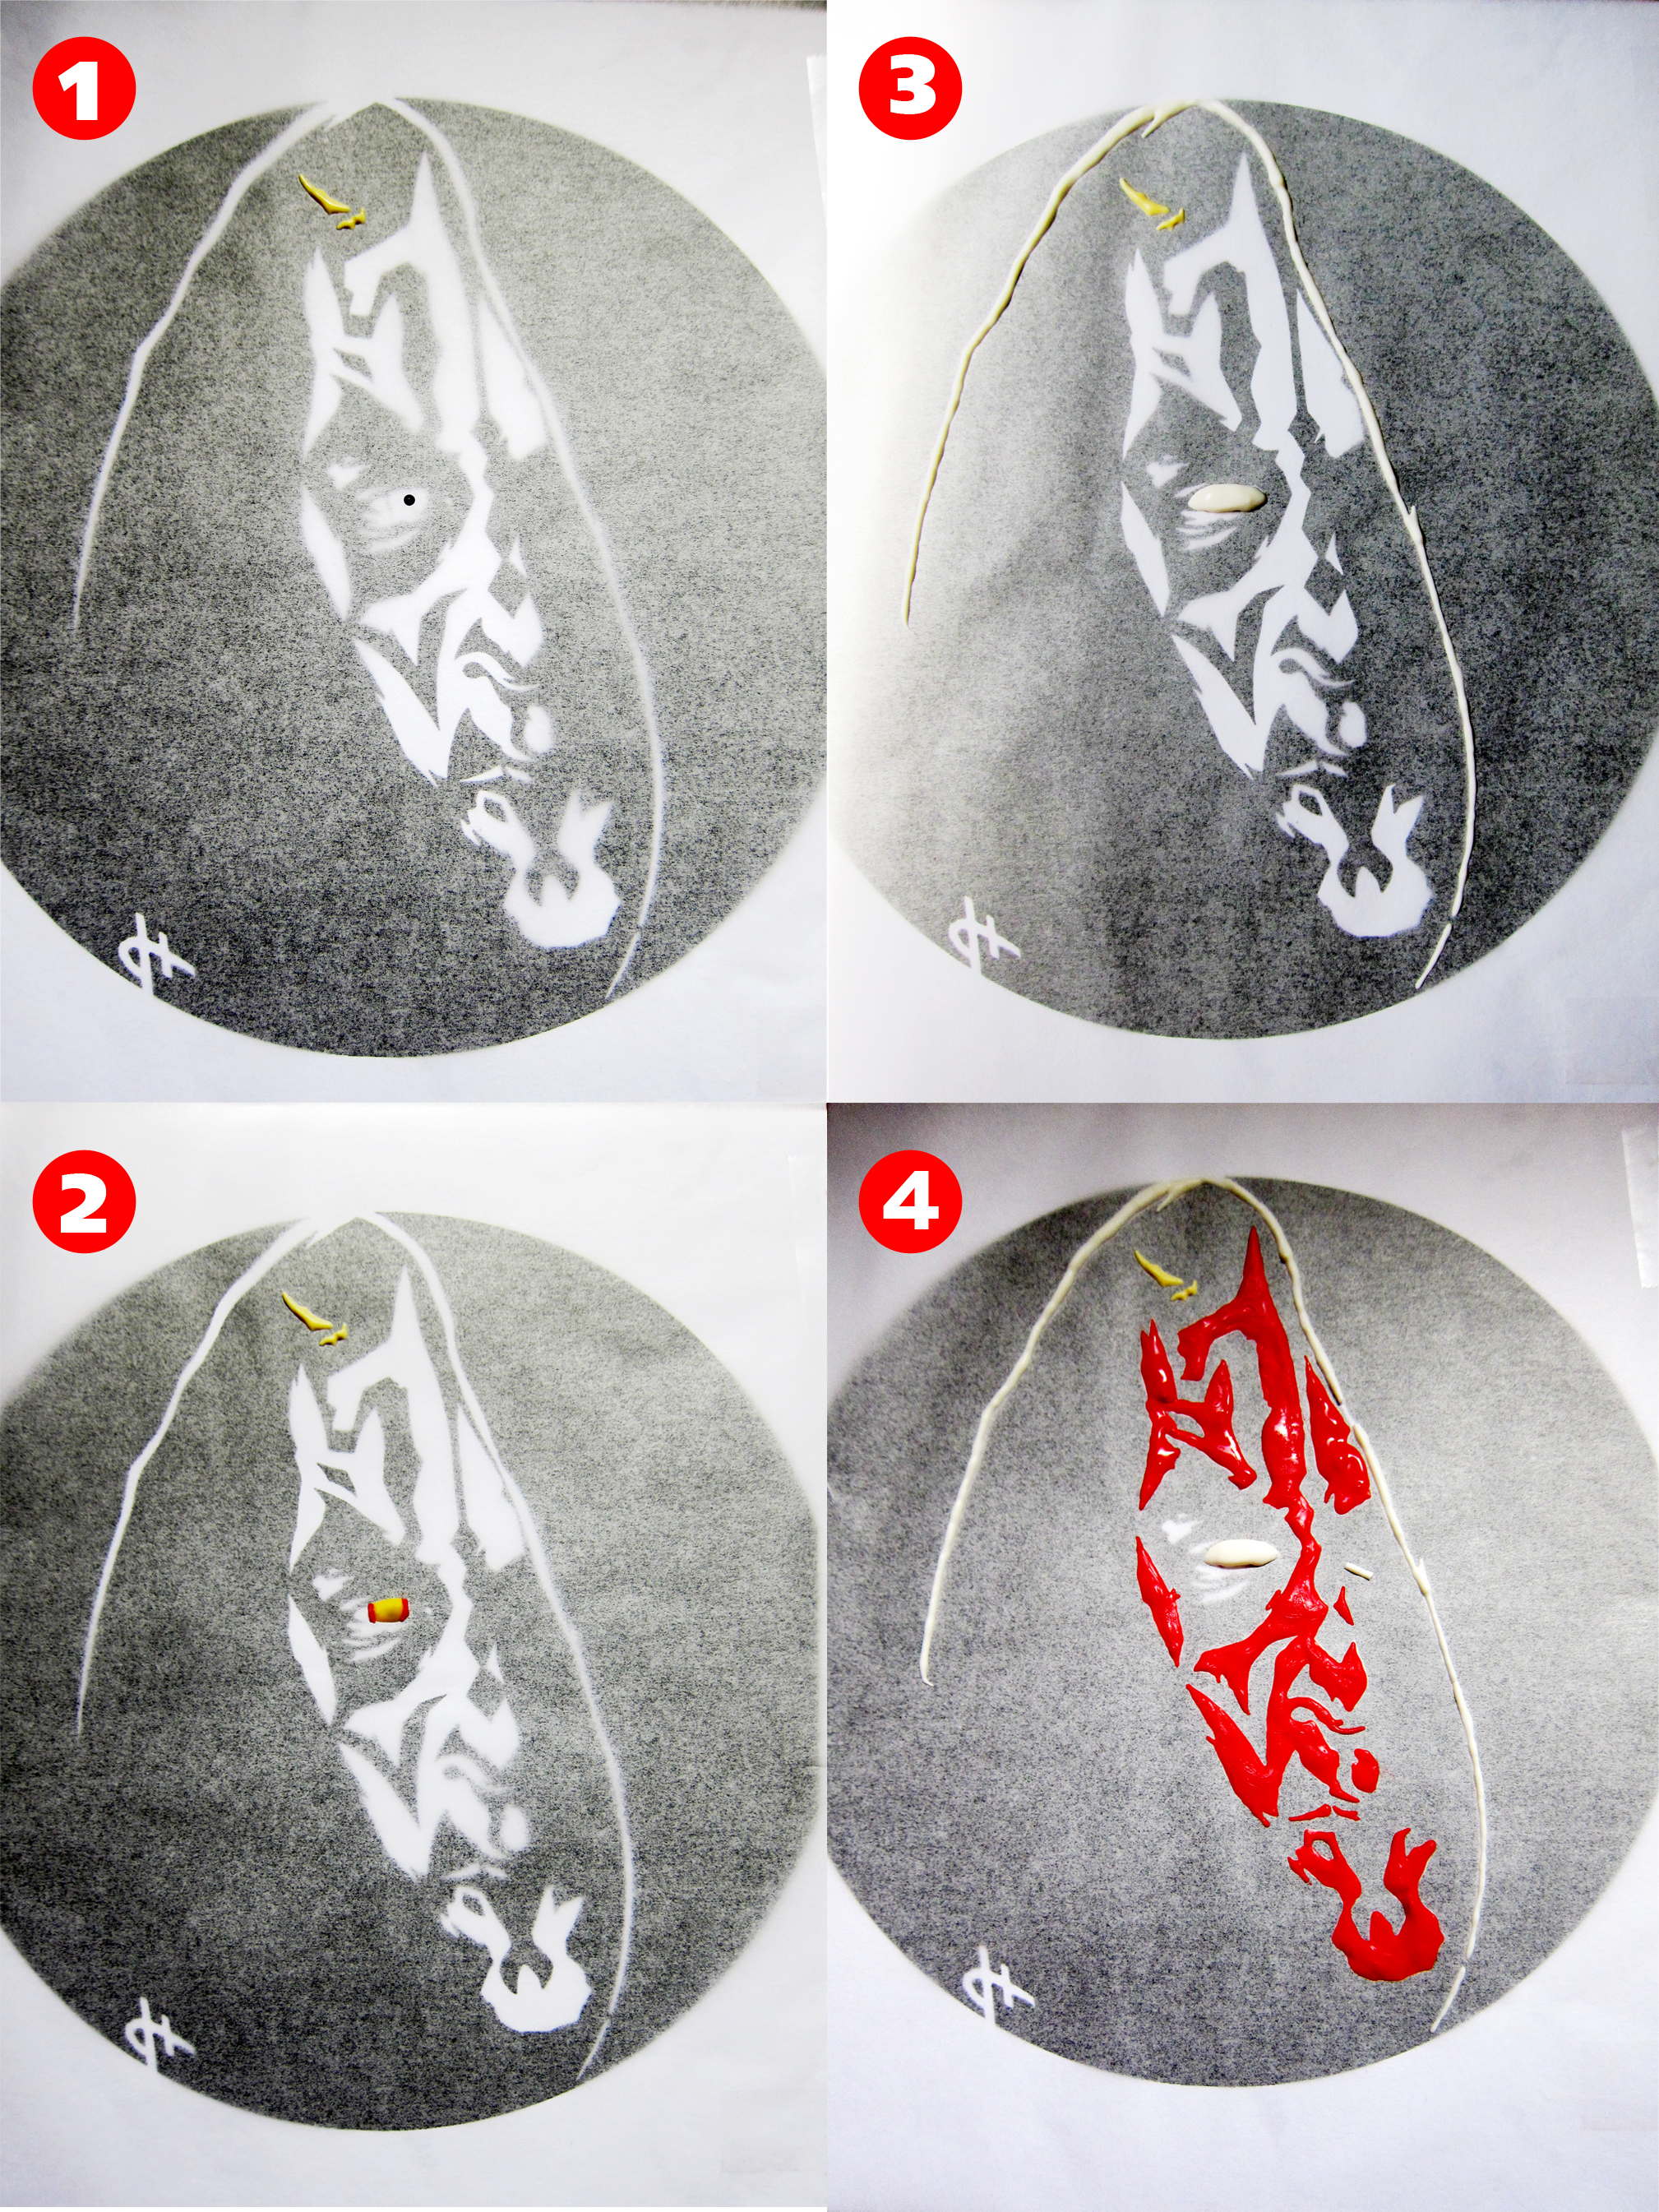
chicken pod piechicken pod pie 2Star Wars Day 2014 7 Star Wars Day 2014 8obi wontons obi wontons 2padme parfaitpadme parfait 2quail gon jinn 1 quail gon jinn 2watto's wings 1 watto's wings 2The centerpiece of the table was my Darth Maul-ble Cake, a marble cake with chocolate frosting and a chocolate transfer of Darth Maul.   There was a small chorus of “wows” when I revealed it.  Chocolate transfers can take a bit of time, but it is straight forward and simple to do.  I used the same technique for this piece and it turned out fabulous.
steps darth maulI think Darth Maul is quite scary.  To be completely honest, I got a wee bit frightened trying to find the right photo for the transfer.  Filling in the chocolate parts was no walk in the park either, he was just as scary.  I know it sounds silly, but if your imagination runs as wild as mine does I’m sure you understand. Revenge of the Six-th indeed. 🙂
Star Wars Day 2014 19Darth Maul-ble Cake

You will need:

1 Chocolate Marble Cake – Recipe Below
1 Batch of Chocolate Frosting – Can be found here
Black Candy Melts
Red Candy Melts
Yellow Candy Melts
White Candy Melts
A mirrored image of this printout in a black circle

Instructions:

  1. Tape the printout onto a baking sheet or any desired flat surface.
  2. Tape a piece of parchment paper over the printout making sure it covers the entire image.
  3. Melt a small amount of black, red, yellow and white candy melts (do not meld the colors together).
  4. Remember, chocolate transfers are all about layering.  Each time you fill out the next step, you will be going over the previously filled portion.
  5. Using either a toothpick or a piping bag fitted with either a #1 or #2 round tip, fill in the pupil of the eye with the black candy melt. (As shown in the above photo.)
  6. Mix the yellow and white candy melt to get a light ivory hue for the horns. Fill in. (As shown in the above photo.)
  7. Once the pupil is set, fill in the iris with the yellow candy melt.  Let set. (As shown in the above photo.)
  8. The outer edge of the iris has a red outline.  Carefully, trace a red border around the yellow candy melt. Let set. (As shown in the above photo.)
  9. Fill in the sclera with the white candy melt.  (As shown in the above photo.)
  10. Fill in the white edge of the hood while the sclera sets. (As shown in the above photo.)
  11. Using the red candy melt, start filling in the mask like patterns on the face.  Try not to lose the detailed edges because that’s what makes the image pop. (As shown in the above photo.)
  12. Once the red candy melt is set, melt some black candy melts.  Make sure it is not piping hot because you will lose some detail if it is.
  13. Smooth over the entire circumference with the black candy melts.  Let completely set.
  14. Place on top of frosted cake and you’re done!

Chocolate Marble Cake

Ingredients:
1⅔ c. all-purpose flour
½ tsp. baking powder
¼ tsp. baking soda
¼ tsp. kosher salt
4 oz. unsalted butter, melted
1 c. sugar
1 egg, room temp
¼ c. Greek yogurt
¾ c. + 1 tbsp. milk, divided
1 tsp. vanilla extract
¼ c. unsweetened cocoa powder

Instructions:

  1. Preheat the oven to 350˚F and prep a 9” cake pan by coating it with nonstick spray and lining the bottom with parchment paper.
  2. Mix melted butter and sugar in a mixing bowl.  Set aside.
  3. In a separate bowl, mix flour, baking powder, baking soda and salt until combined.
  4. Add the egg, Greek yogurt, ¾ c. milk and 1 tsp. vanilla extract to the butter mixture and mix until homogenous.
  5. Add the flour mixture to the butter mixture and fold until smooth.
  6. Transfer ½ of the mixture to another bowl, mix in 1 tbsp. milk and cocoa powder until a thick chocolate batter forms.
  7. Put half of the vanilla batter into the prepared cake pan and spread out.
  8. Pour all of the chocolate batter on top of the vanilla mixture.
  9. Pour the rest of the vanilla batter over the chocolate batter.
  10. Using a toothpick or a butter knife, make swirls all over the cake. Be careful not to over swirl, or you will lose the marbling.
  11. Bake 18-25 minutes until golden brown or a toothpick inserted in the center of the cake comes out clean.

Cake recipe adapted from sally’s baking addiction.


* If you would like detailed info on any of the food I’ve prepared, don’t be afraid to leave a comment or shoot me an email!

Brown Butter Chocolate Chip Marshmallow Cookie Cake

cookie cake 5First thing I need to say is… this Sunday is Star Wars Day!!  You can be sure that I’ll have a post on all the goodies I’ll be making for this year next week.  Now back to the cookie cake, this cookie cake is everything I would want in a cookie: sweet, salty, crispy, chewy, marshmallow-y… I could go on about it.  The last time I served this was during this year’s Super Bowl and while people ate this, it was very quiet.  It was that good.
cookie cake 2To be honest, this recipe is like my baby.  This cookie recipe has been over 5 years in the making!  I almost didn’t want to write it down because well, it’s mine and I didn’t want to share.  But I figured someone must be having a day somewhere and this cookie would be sure to cheer them up.  So whip up a batch, and make yourself or someone smile because a smile is free therapy.
cookie cake 6Brown Butter Chocolate Chip Marshmallow Cookie Cake

Makes one 9” cookie cake

Ingredients:
6 oz. butter, divided
½ c. sugar
¾ c. brown sugar
1 tsp. kosher salt
1 egg
1 egg yolk
2 tsp. vanilla extract
2 c. all purpose flour
1 tsp. baking soda
1 tbsp. cornstarch
¾ c. chocolate chips
¾ c. mini marshmallows

Instructions:

  1. Preheat oven to 350˚F and line a 9” cake pan with parchment paper along the bottom and the sides.
  2. In a small pot, brown 5 oz. of butter.
  3. While the butter is browning, mix sugar, brown sugar and kosher salt in a medium mixing bowl.
  4. Once the butter is brown, add the remaining 1 oz. of butter and stir to get the brown bits off the bottom of the pot.
  5. Add the hot browned butter to the sugar mixture and stir.  Let cool for 5-10 minutes.
  6. Add the egg, egg yolk, and vanilla extract until glossy and homogenous.
  7. Fold in flour, baking soda, and cornstarch until just combined.
  8. Fold in chocolate chips and marshmallows until just combined.
  9. Bake 15-20 minutes until center is set and slightly underdone.
  10. Let cool 15 minutes before serving.

Churro Cupcakes

churro cupcake 2
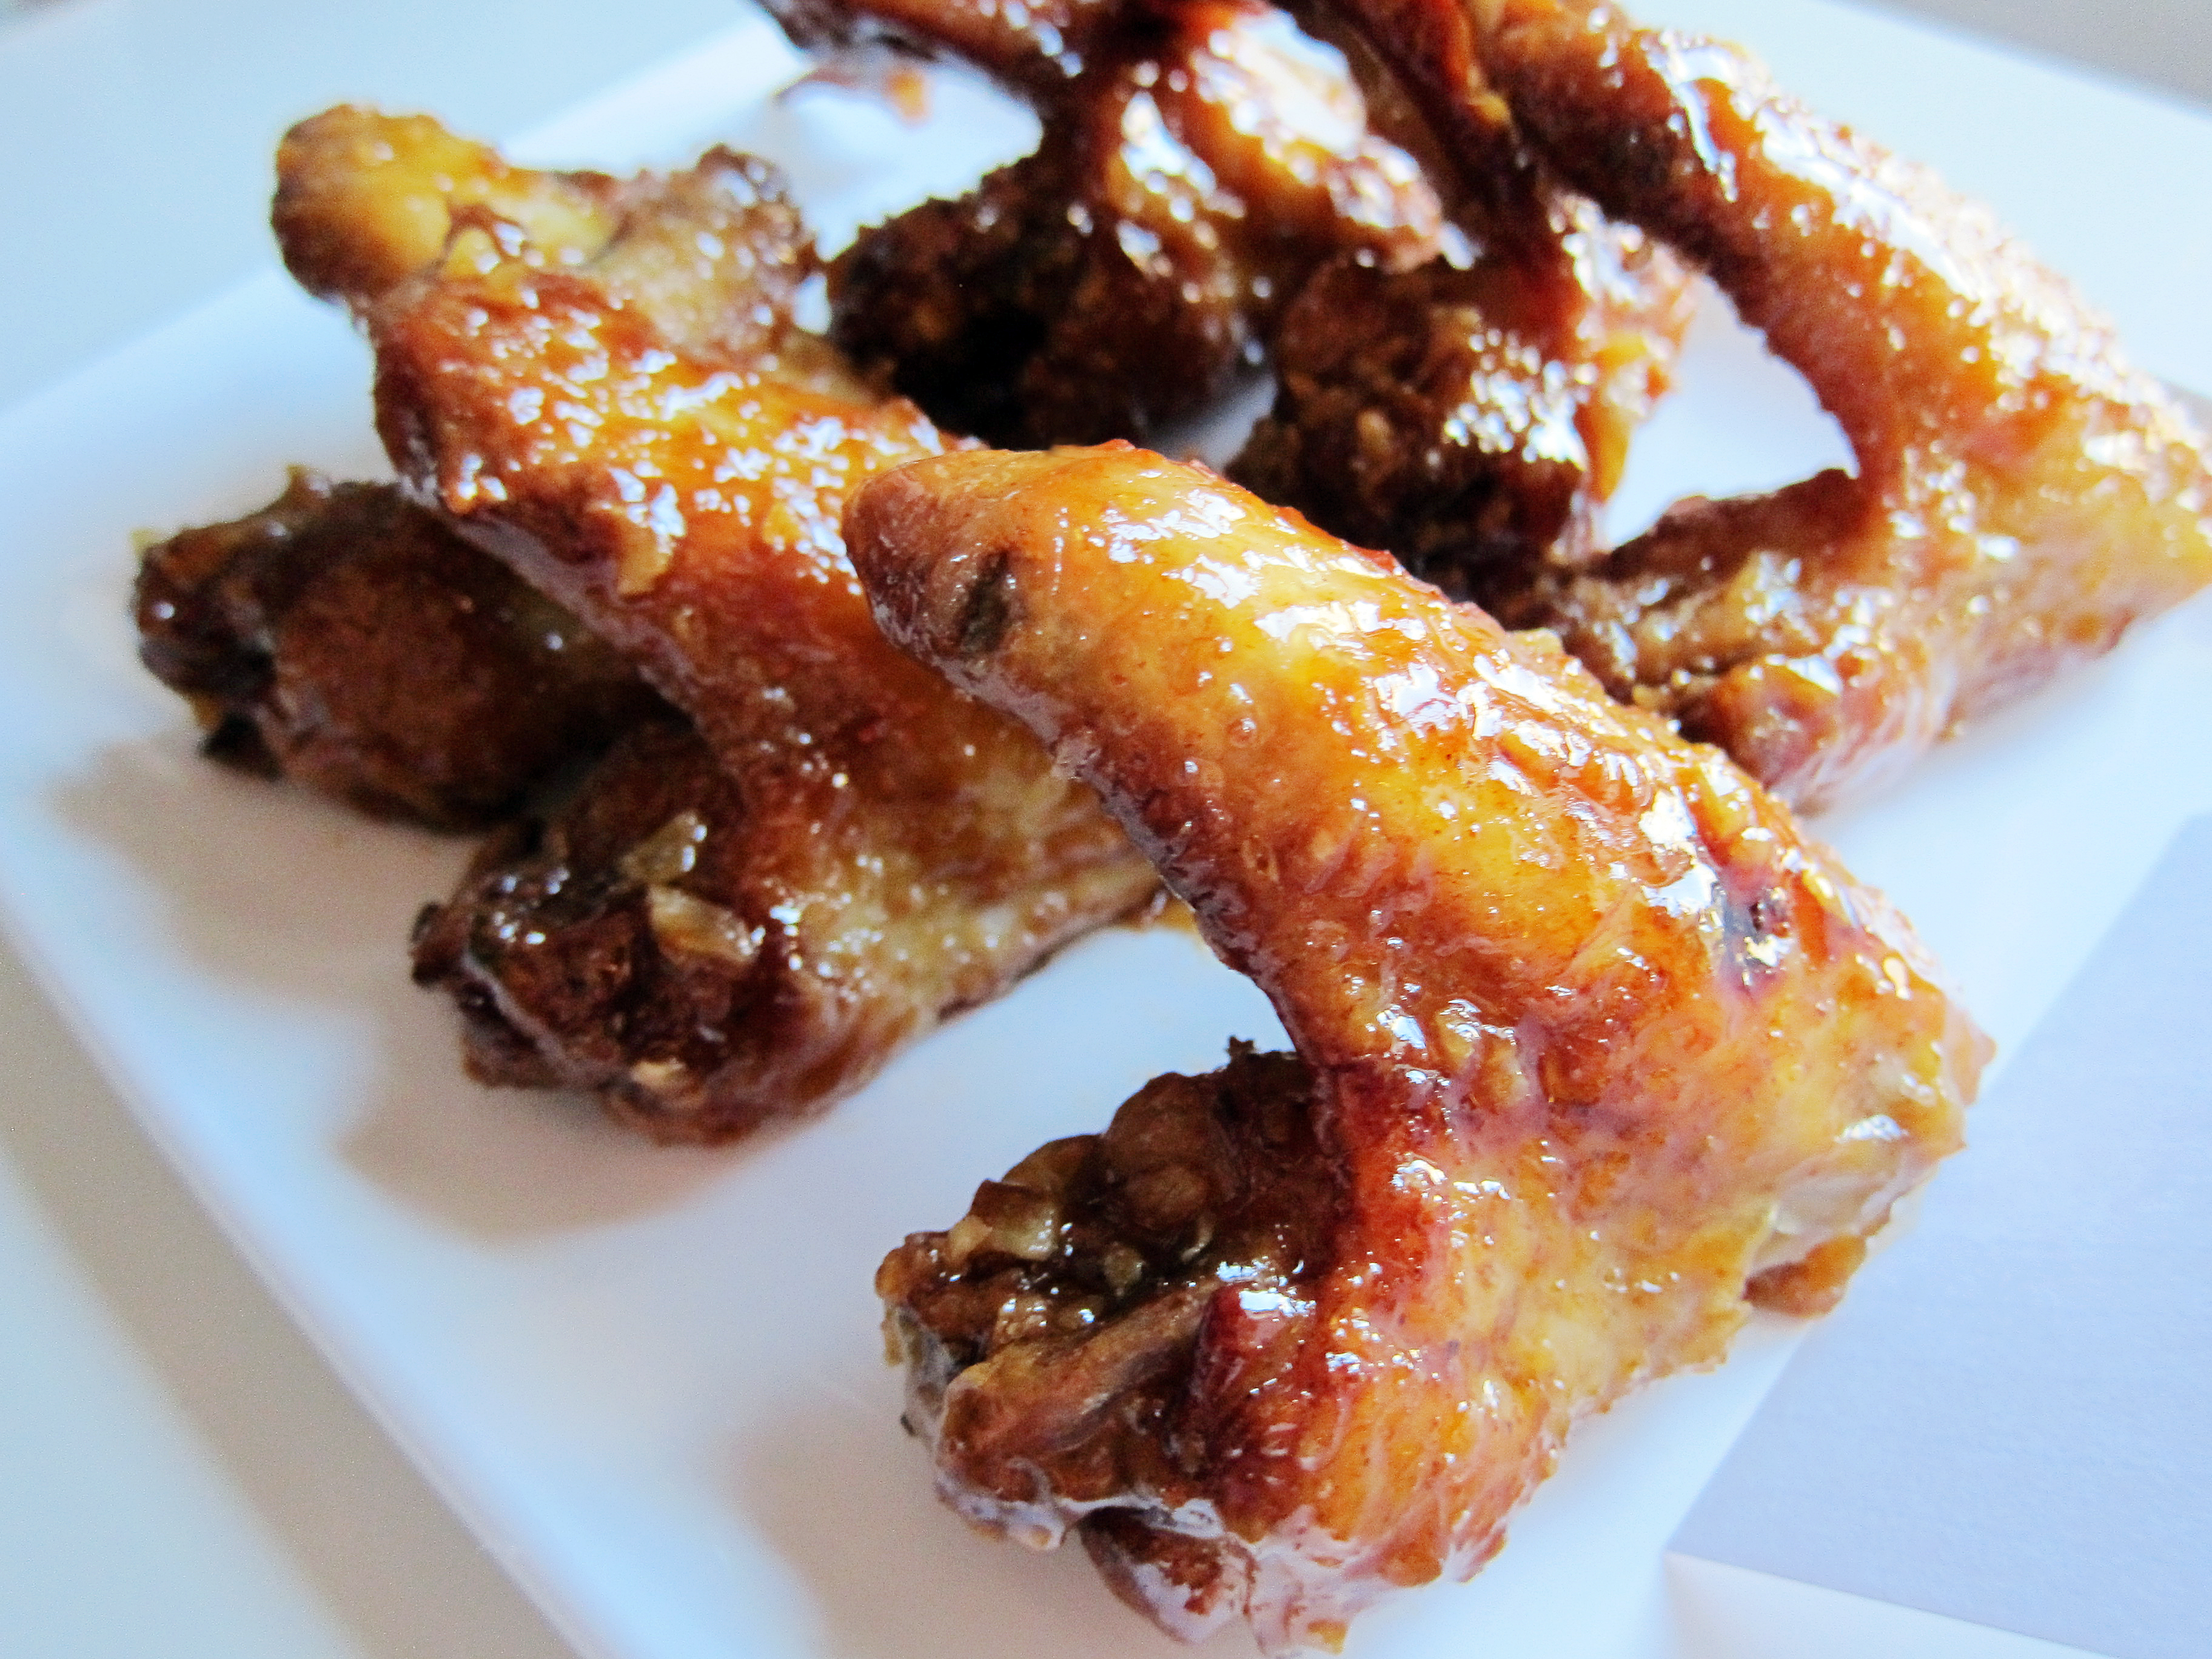
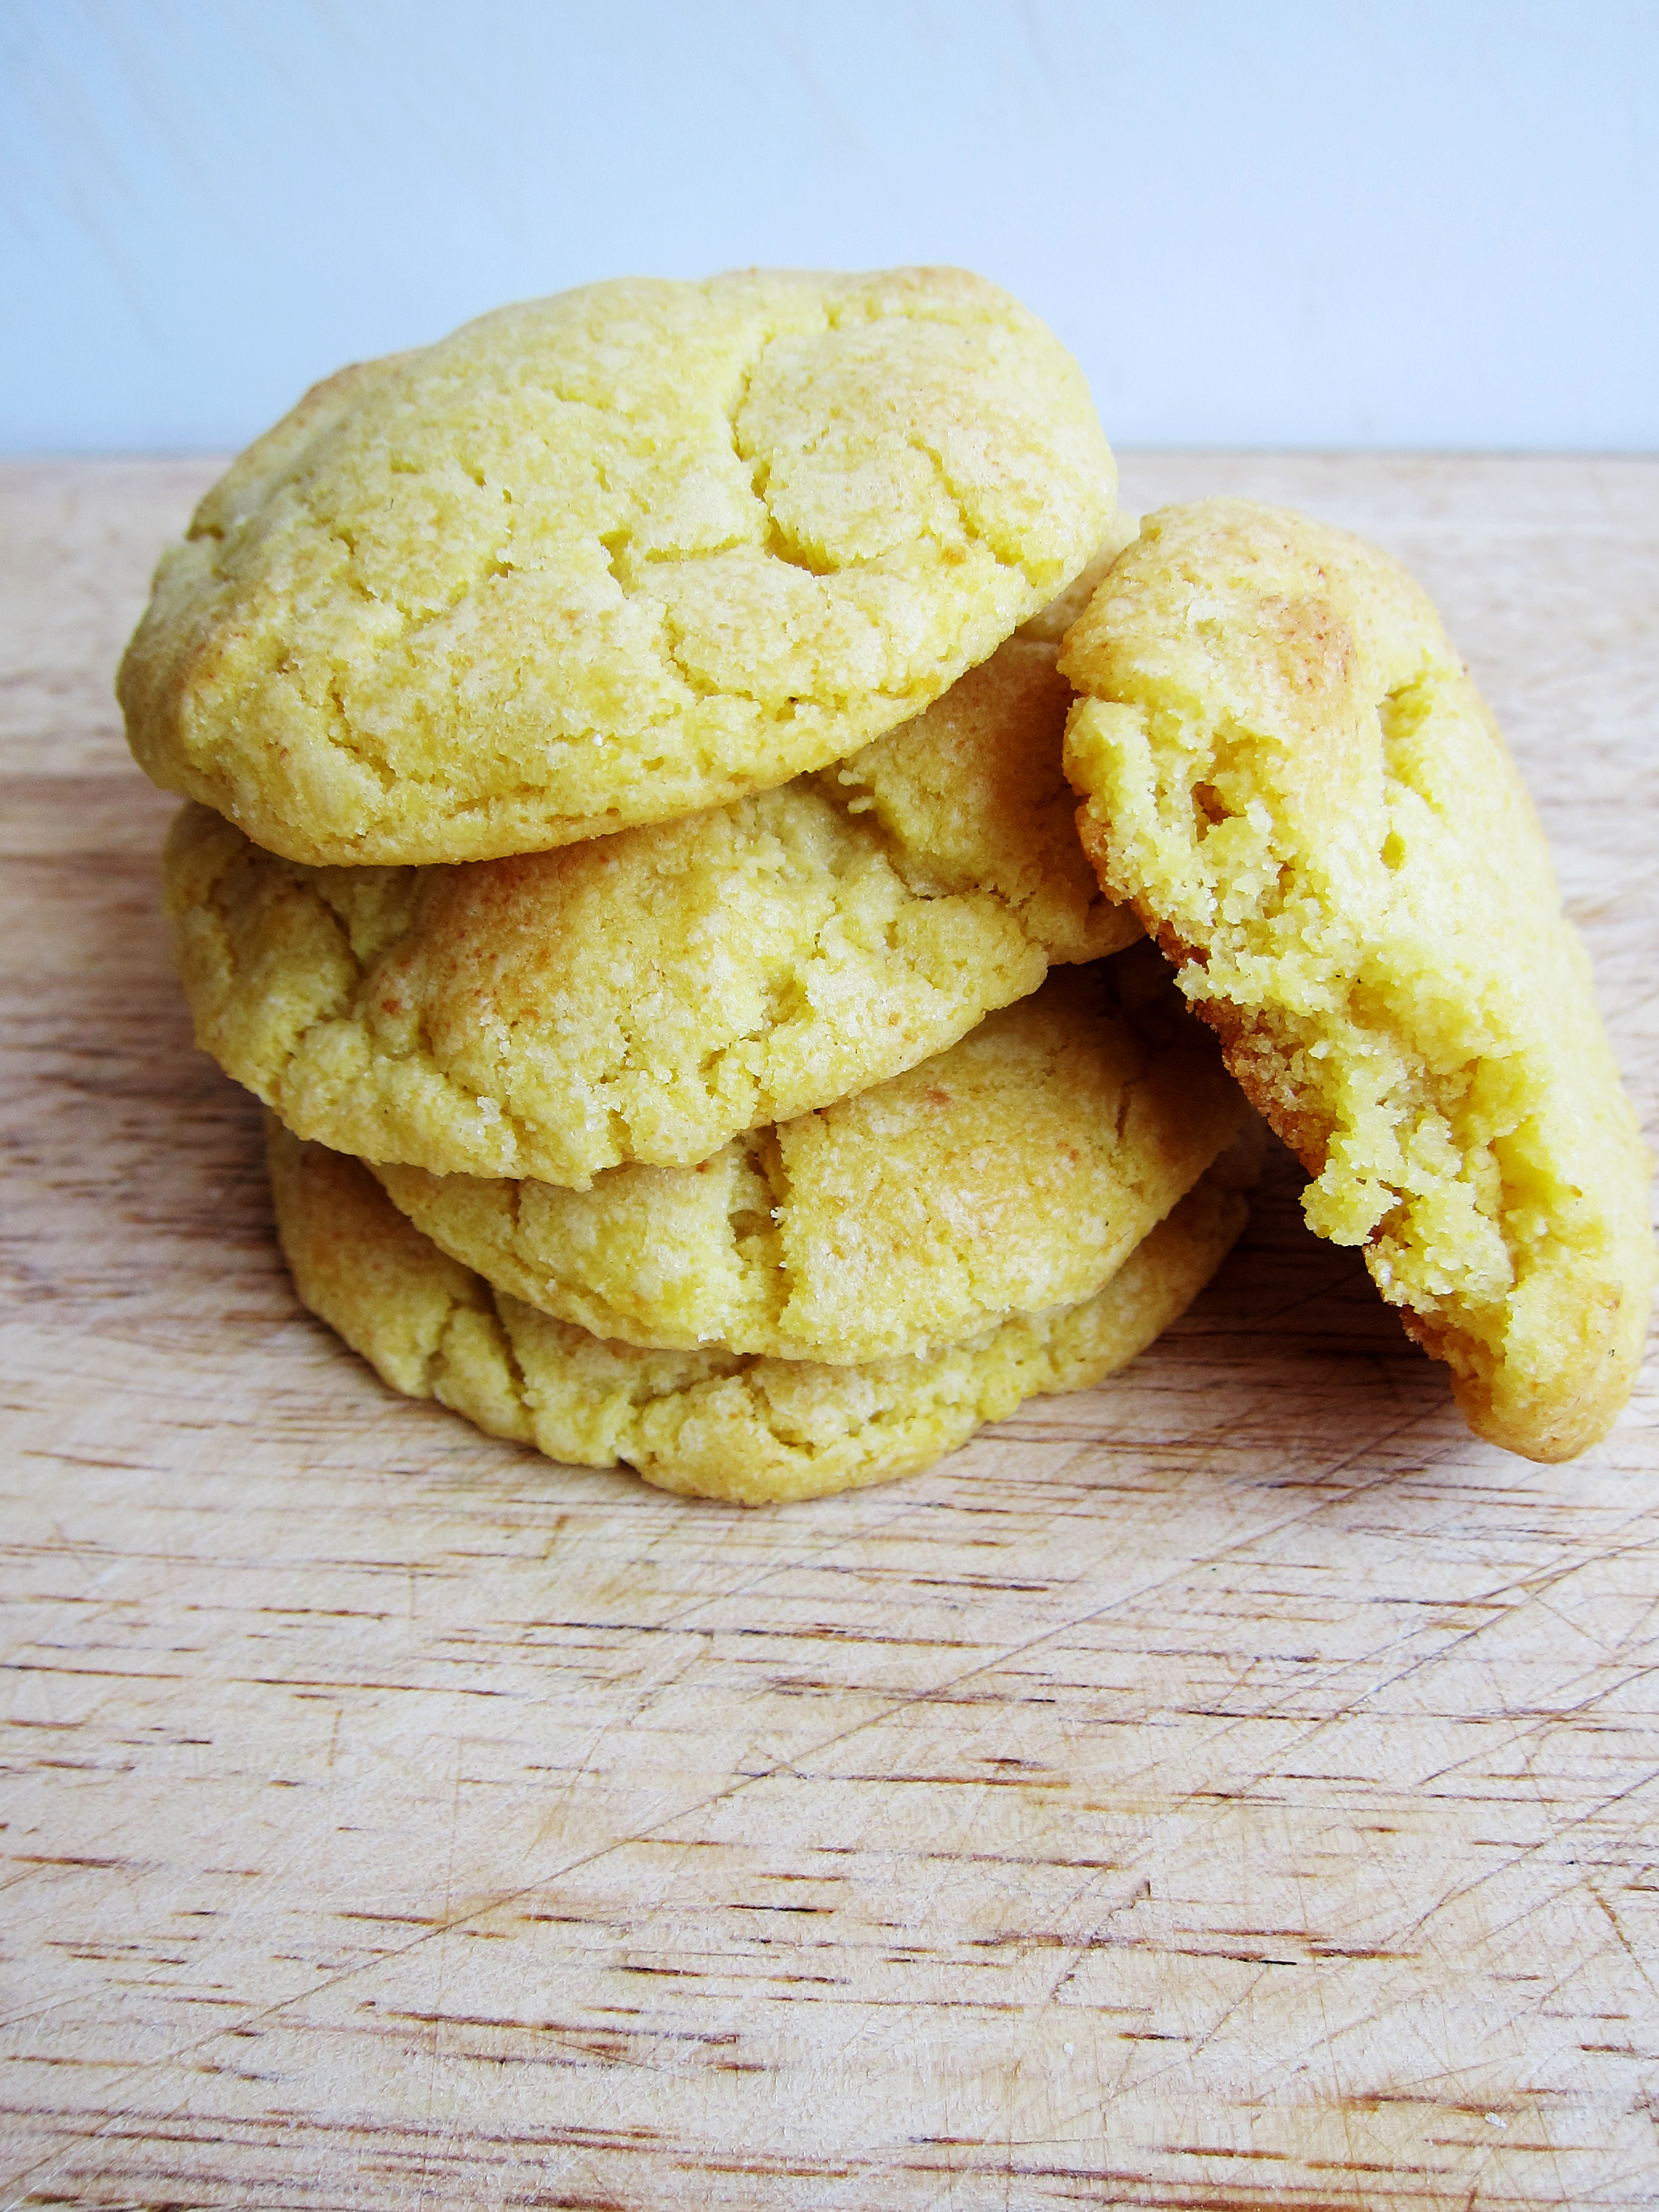
Have you ever had a churro before?  It’s a giant stick of fried dough with tons of cinnamon sugar on it.  It’s different from zepoles and funnel cakes because it’s more dense and has a thicker outer crust.  I get my churro craving satisfied at Costco.  It’s just one dollar for about 1½ feet of sweet fried goodness.  Such a good bargain!  The trick is to get it before you start shopping so you have a little snack, and you don’t have to worry about a cinnamon sugar trail being left in the house.
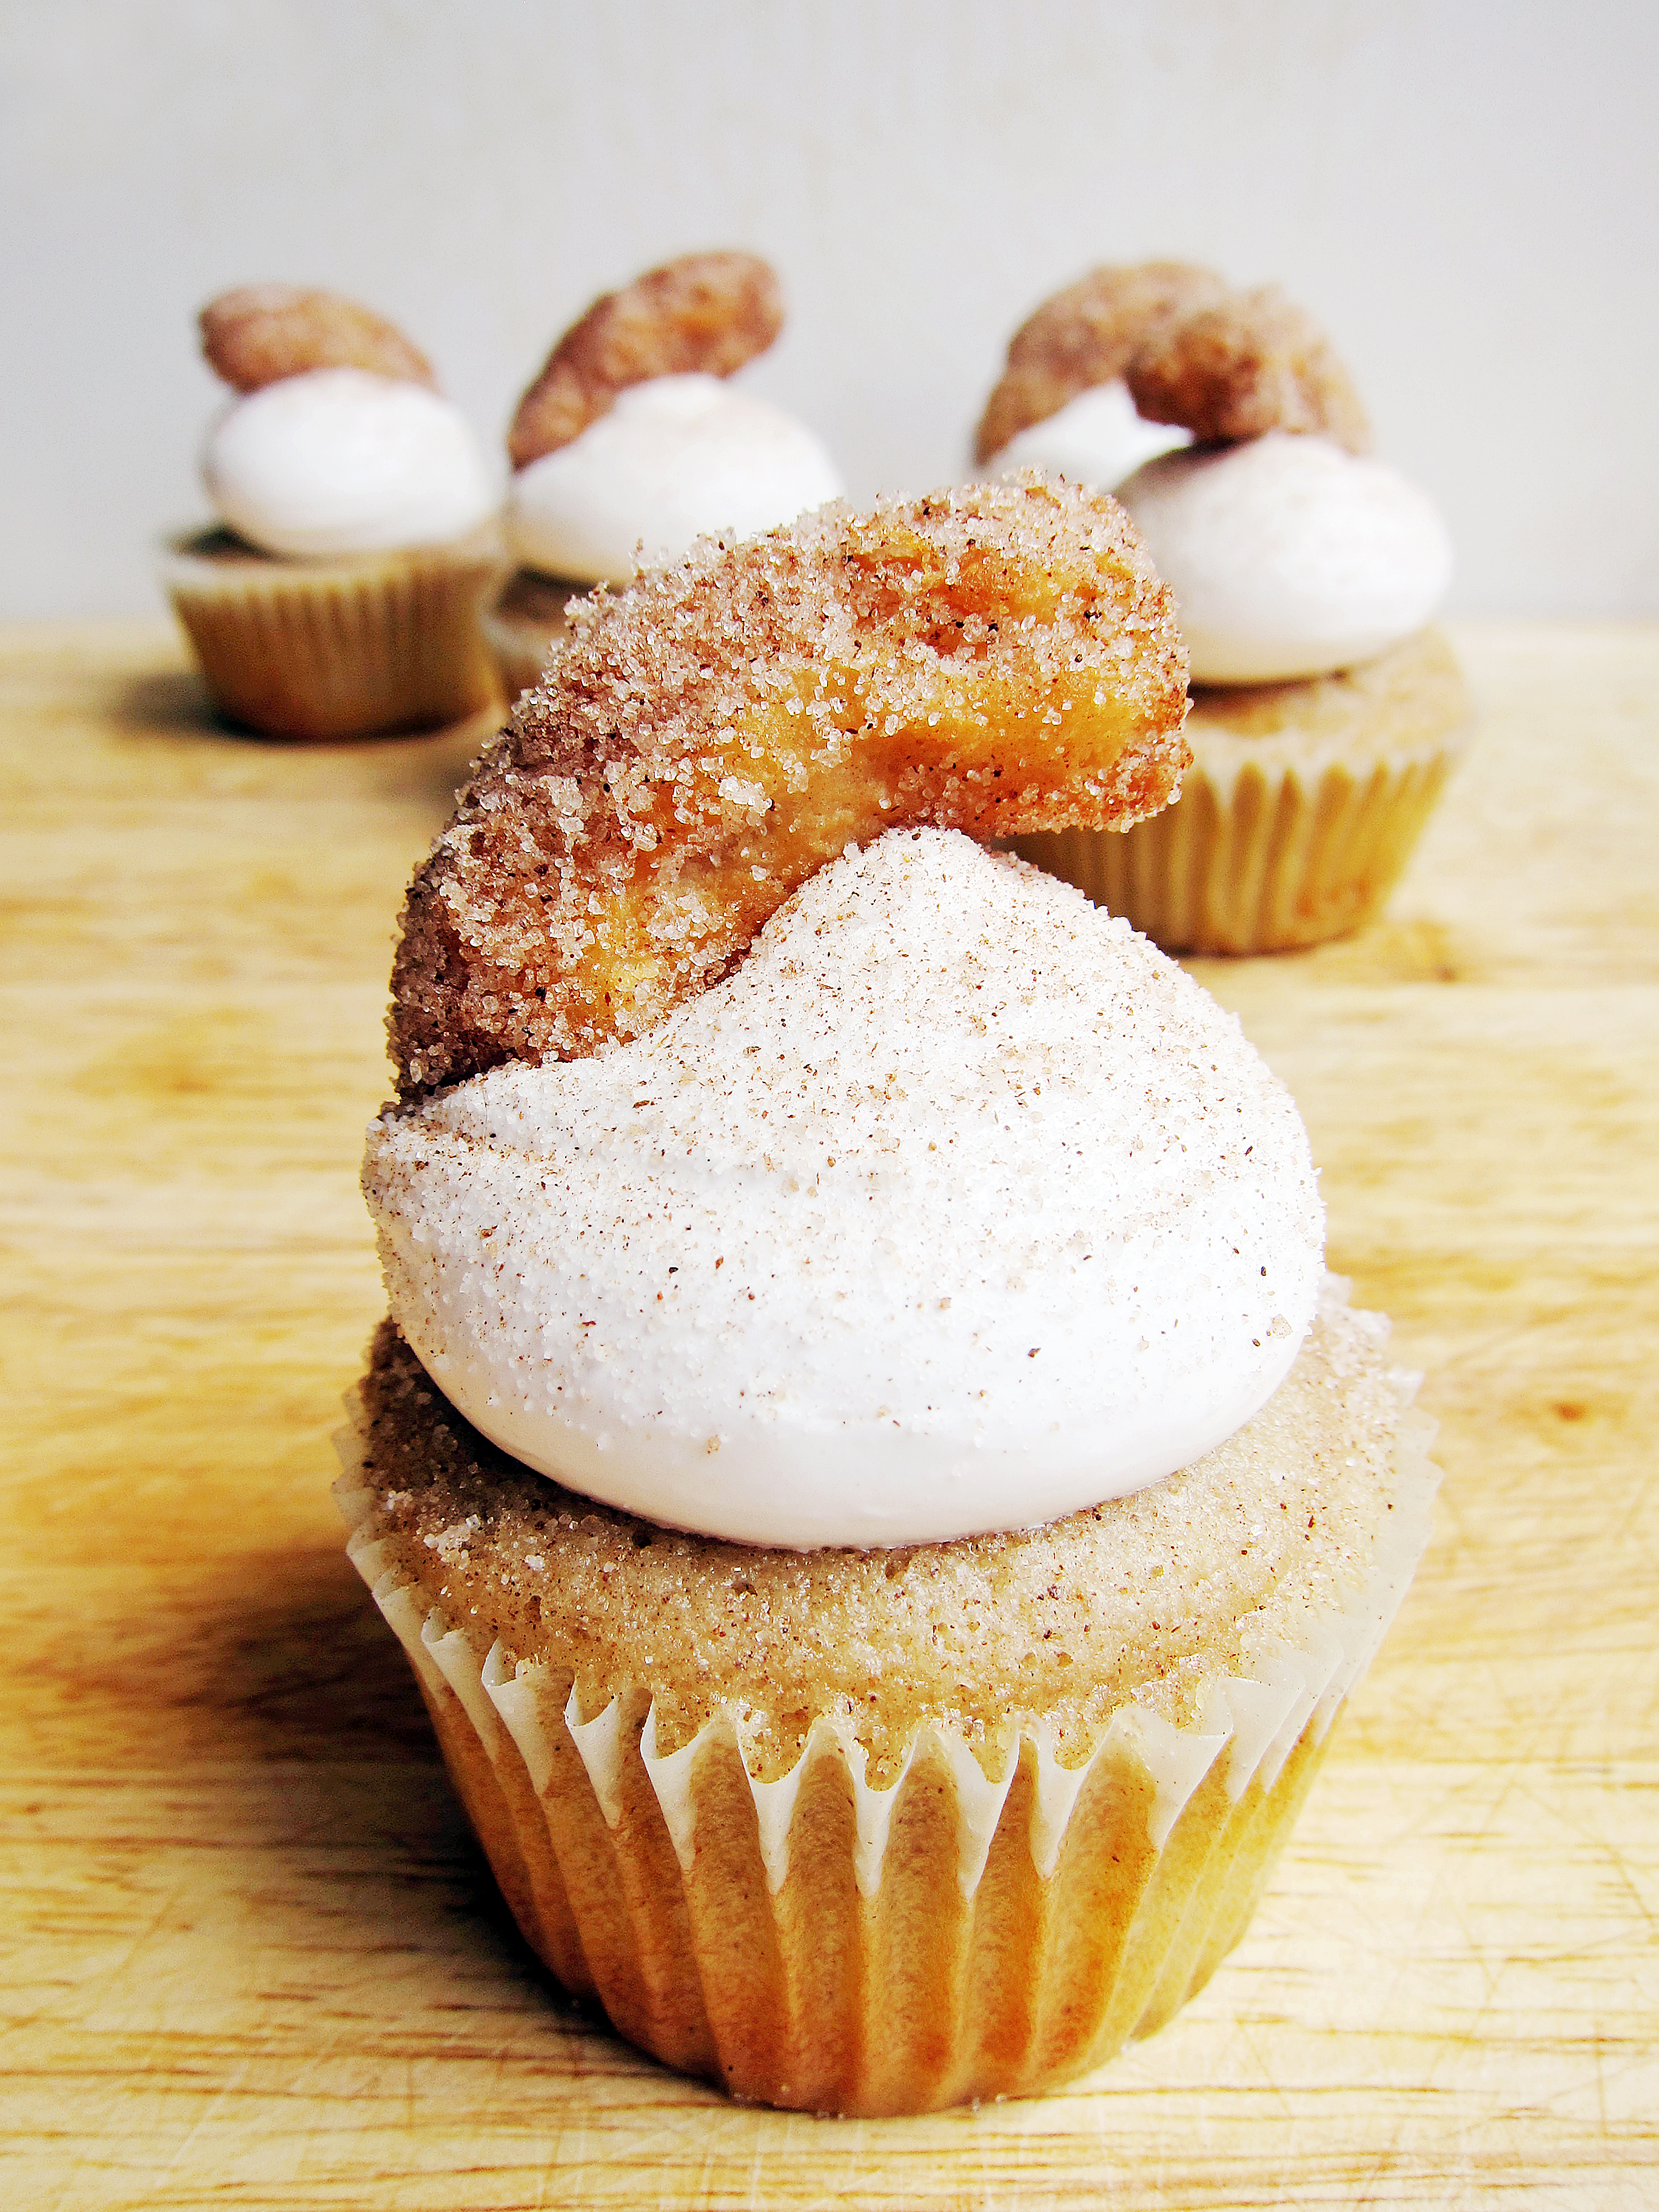
churro cupcake 1Here is my ode to a churro.  It is a cinnamon buttermilk cake with fluffy marshmallow frosting topped with cinnamon sugar and a bite-sized churro.  It takes a bit of work to make but it’s a lot of fun and a great idea for Cinco De Mayo. 🙂
churro cupcake 3Churro Cupcakes

Makes about 28 cupcakes

Cinnamon Buttermilk Cake

Ingredients:
3 c. cake flour
2  c. sugar
1½ tsp. ground cinnamon
1 tbsp. baking powder
¼ tsp. salt
1¼  c. buttermilk, divided
8 oz. unsalted butter, room temperature
4 eggs, room temperature
2 egg yolks
2 tsp. vanilla extract

Instructions:

  1. Preheat the oven to 350˚F and line muffin pans with cupcake liners.
  2. In a bowl of a standing mixer with the paddle attachment, add flour, sugar, ground cinnamon, baking powder, and salt. Mix until combined.
  3. On low speed, add 1 c. buttermilk and butter and mix until combined.
  4. In a separate bowl, whisk eggs, egg yolk, ¼ c. buttermilk, and vanilla extract until homogenous.
  5. On low speed, slowly add the egg mixture to the flour mixture.
  6. Increase speed to medium, and mix until combined.
  7. Fill 2/3 of cupcake liners.
  8. Bake about 13-16 minutes until cake is done or until a toothpick inserted into the center comes out clean.
  9. Let cool in pan for 10 minutes, and then move onto a cooling rack until completely cool.

Churros

For the cinnamon sugar
Ingredients:
½ c. sugar
1½ tsp. ground cinnamon

For the batter
Ingredients:
1½ tbsp. sugar
1 c. water
½ tsp. salt
2 tbsp. plus 2 quarts vegetable oil, divided
1 c. all-purpose flour

Instructions:

  1. In a medium shallow bowl, mix together ½ c. sugar and ground cinnamon.  Set aside.
  2. In a small saucepan combine sugar, water, sat and 2 tbsp. vegetable oil and bring to a boil.
  3. Take the pan off heat and stir in flour until a ball of dough forms.
  4. In a medium heavy bottomed pan, heat oil to 375˚F and line a sheet pan with paper towels for draining.
  5. Transfer dough to a piping bag fitted with a large star tip.
  6. Squeeze out 1-2 inches of dough and have it ready for frying.
  7. Once the oil is ready, use a slotted spoon or a spider to transfer the dough into the hot oil and fry until golden brown.
  8. Remove the fried dough onto the sheet pan with a slotted spoon or a spider and let drain for about a minute.
  9. Toss the warm churros into the cinnamon sugar mixture.  Reserve leftover cinnamon sugar mixture to dust on top of cupcakes.

Marshmallow Frosting

Ingredients:
6 egg whites (180 g.)
1½ c. sugar
¼ tsp. cream of tartar
1 pinch of salt
1½ tsp. vanilla extract

Instructions:

  1. In a small pot fill about 1 in. of water and let it come to a simmer.
  2. In the bowl of a stand mixer, whisk egg whites, sugar, cream of tartar and salt until homogenous.
  3. Once the water comes to a simmer, place the bowl on top of the pot and whisk the egg white mixture until the sugar is completely dissolved and no longer grainy.
  4. Move the bowl to your standing mixer fitted with a whisk attachment and beat on high speed until glossy and stiff.
  5. Add the vanilla extract and mix completely.
  6. Fill a piping bag fitted with the biggest plain piping tip you have.

Assembly:

  1. Pipe a large dollop onto the cupcake by holding the piping bag perpendicular to the cupcake and squeeze using an even pressure until your desired size forms.
  2. In a fine mesh sieve, dust reserved cinnamon sugar topping onto the frosted cupcake.
  3. Garnish with a piece of churro.

Cake recipe adapted from sky high.
Churro recipe adapted from just a taste.
Marshmallow frosting recipe adapted from Marth Stewart.

Milk Bar Corn Cookies

corn cookie 3After hearing about Christia Tosi’s amazing creations for years, I finally had the opportunity to go to a Momofuku Milk Bar last weekend.  Everything sounded delicious but I had three things I just had to try:

1) crack pie
2) cereal milk soft serve with cornflake crunch
3) corn cookie

corn cookie 2They were all good but I think I set my bar way too high because I was not impressed for the most part.  My favorite out of all three was the corn cookie and even that was disappointing because I wanted it to be more corn-y.
corn cookie 1I had the recipe for corn cookies bookmarked from Christina Tosi’s book for years, but I didn’t want to make it before I had the real thing.  So with finally having a Milk Bar experience under my belt, I gave the recipe a spin.  I followed all the instructions: bought European butter, King Arthur bread flour, corn flour, and freeze dried corn, measured every single ingredient by weight, and even did two batches of cookie dough, one resting for 1 hour and another 24 hours.  (FYI a 24-hour rest yielded a better cookie.)
corn cookie 5And guess what, it wasn’t the same!  It didn’t have the buttery smooth interior of the original and the flavor wasn’t all there.   I’m not saying it was a bad cookie.  It was delicious with a slight corn scent and a lingering crispness.  I guess you could say that I was looking for a clone, but I found a sibling instead.
corn cookie 4I’m working on my own corn cookie, a cornier and chewier version.  But until then, I’ll leave you with the official recipe.  (It’s still really good! I promise!)

Milk Bar Corn Cookies
From Momofuku Milk Bar by Christina Tosi, David Chang

Ingredients:
16 tbsp. or 2 sticks (225 g) butter*, at room temperature
1½ c. (300 g) sugar
1 egg
1⅓ c. (225 g) flour**
¼ c. (45 g) corn flour***
⅔ c. (65 g) freeze-dried corn powder****
¾ tsp. (3 g) baking powder
¼ tsp. (1.5 g) baking soda
1½ tsp. (6 g) kosher salt

Instructions:

  1. Combine the butter and sugar in the bowl of a stand mixer fitted with the paddle attachment and cream together on medium-high for 2 to 3 minutes. Scrape down the sides of the bowl, add the egg, and beat for 7 to 8 minutes.
  2. Reduce the mixer speed to low and add the flour, corn flour, corn powder, baking powder, baking soda, and salt. Mix just until the dough comes together, no longer than 1 minute. Scrape down the sides of the bowl.
  3. Using a 2 3/4-ounce ice cream scoop (or a 1⁄3-cup measure), portion out the dough onto a parchment-lined sheet pan. Pat the tops of the cookie dough domes flat. Wrap the sheet pan tightly in plastic wrap and refrigerate for at least 1 hour, or up to 1 week. Do not bake your cookies from room temperature–they will not bake properly.
  4. Heat the oven to 350°F.
  5. Arrange the chilled dough a minimum of 4 inches apart on parchment- or Silpat-lined sheet pans. Bake for 18 minutes. The cookies will puff, crackle, and spread. After 18 minutes, they should be faintly browned on the edges yet still bright yellow in the center; give them an extra minute if not.
  6. Cool the cookies completely on the sheet pans before transferring to a plate or to an airtight container for storage. At room temp, the cookies will keep fresh for 5 days; in the freezer, they will keep for 1 month.

*European butter is recommended for the higher fat content and its characteristic yellow color.
**King Arthur Bread Flour is recommended for the higher protein content.  However because of the higher protein, you must be careful when adding your flour.  Once the flour is mixed, be careful not to over mix because it will easily form tough cookies.
***Corn flour can be found online or in well stocked supermarkets.   I found mine at Whole Foods.
****You can make your own freeze-dried corn powder by grinding freeze-dried corn in a food processor or blender.  You can find it online or in well stocked supermarkets.  I found mine at Target.

Karamel Sutra Macarons (Chocolate Caramel Macarons)

Ice Cream MacaronsI love ice cream.  In high school, I used to eat an entire pint of ice cream in one sitting without blinking an eye.  It was a habit that quickly stopped once I started counting calories in college.  Yes the number of calories scared me, but I didn’t love it any less.
Ice Cream MacaronOne of my favorite ice cream is Karamel Sutra from Ben and Jerry’s.  Featuring “a core of soft caramel encircled by chocolate & caramel ice creams & fudge chips”, it is a sinfully indulgent treat.  I’ve been haunted by the idea of putting macarons on mini ice cream cones for the longest time. So, I decided to take the plunge with one of my all-time favorites.
Ice Cream MacaronsIce Cream MacaronsSitting on top of a caramel filled cone and chocolate frosting, this macaron has a chewy caramel center that is encased by chocolate frosting.  It is delightfully charming and insanely delicious.  So delicious in fact, the entire batch disappeared within one night! (FYI This is pretty rare.)
Ice Cream Macarons

Karamel Sutra Macarons
(Chocolate Caramel Mini Ice Cream Macarons)

You will need:
Mini Ice Cream Cones
Macarons
Chocolate Frosting
Salted Caramel Filling
Whipped Cream (Optional)
Sprinkles (Optional)
Maldon Salt (Optional)

Basic French Macarons
Adapted from Bouchon Bakery by Thomas Keller, Sebastien Rouxel

Ingredients:
212 g. almond meal
212 g. powdered sugar
172 g. egg whites, divided to 82 g. and 90 g (aged, if possible)
236 g. sugar
158 g. water

Instructions:

  1. Line two baking sheets with parchment paper or silicone mats.
  2. In the bowl of a food processor, add the almond meal and powdered sugar and pulse until thoroughly combined.
  3. Sift the mixture over a large mixing bowl, throwing out the lumps as they appear.  Add 82 g. of the egg whites and stir until you get a thick mixture.
  4. In a small pot attached with a candy thermometer, combine the sugar and water over medium heat and boil until the syrup reaches 200˚F.
  5. Once the syrup reaches 200˚F, start whipping the remaining 90 g. in the bowl of your stand mixer with the whisk attachment on medium speed until soft peaks are reached.
  6. Once the syrup reaches 248 degrees, remove the pot off the burner and slowly pour the syrup down the side of the mixing bowl with the egg whites on medium speed.
  7. Once the egg whites are fully incorporated, increase the speed to medium high until egg whites form glossy, stiff peaks.  Add two drops of the pink gel food color and mix until batter turns a light shade of pink.
  8. Mix a ⅓ of the egg white mix to the almond mixture and stir together until the batter is slightly lighter and less pasty.  From then on, fold in ⅓ of the egg white mixture at a time until the mixture “flows like magma”.  The mixture should be smooth and run thick ribbons off the spatula.
  9. With a pastry bag fitted with a ½ in. plain tip, pipe 1¼ – 1½ in. rounds.
  10. The piped batter may have peaks but should smooth away in a minute or two.  Let the batter stand until the tops of the macaron batter are dry to the touch, about 30 mins to 1 hour.
  11. Preheat the oven to 275-325˚F.  If your oven tends to run hot go for 275˚, if not then 325˚.
  12. Bake 10-13 minutes, until the feet are formed and the tops are smooth.  The batter is done when you slightly wiggle it and it starts to come off of the parchment paper / silicone mat.
  13. Let cool and fill.

Salted Caramel Filling

Ingredients:
1 c. sugar
3 tbsp. light corn syrup
3 tbsp. water
¾ c. heavy cream
3 tbsp. unsalted butter, room temp
½ tsp. kosher salt
¼ tsp. vanilla extract

Instructions:

  1. In a small pot, mix and boil sugar, corn syrup and water until a golden amber color forms.
  2. While the sugar mixture is boiling, mix the heavy cream, unsalted butter, kosher salt, and vanilla in a separate bowl.
  3. When the sugar mixture turns amber, add the cream mixture.  Be careful!  It will bubble up and create a lot of steam.
  4. Attach a candy thermometer and cook sugar mixture until the mixture reaches 235 degrees.
  5. Promptly remove to a large glass spout cup and cool.
  6. Once cooled, transfer into a squeeze bottle.

Chocolate Frosting

Ingredients:
⅔ c. all-purpose flour
⅓ c. cocoa powder
1 c. milk
⅛ tsp. salt
8 oz. butter
⅔ c. sugar
8 oz. chocolate, melted and cooled
½ tsp. vanilla extract

Instructions:

  1. In a saucier pan, put milk, salt, cocoa powder and flour and whisk until combined on medium heat.
  2. Continuously whisk mixture until thickened to a pudding like consistency.
  3. Once thickened, strain through a mesh strainer into a bowl with a spatula to remove lumps.
  4. Place a piece of plastic wrap on top of the flour mixture and put into the refrigerator until fully cool.
  5. In a mixer bowl fitted with the whisk attachment, mix the sugar and butter on high speed until fluffy and pale about, 5-10 minutes.
  6. Add the chilled flour mixture and continue to whip on high speed until the sugar is completely dissolved and the mixture is no longer gritty, about 5-10 minutes.
  7. Add the vanilla extract and melted chocolate and mix until combined.
  8. Fill frosting in a piping bag fitted with a ¼ or ½ in. plain piping tip.

Assembly:

If the filling has cooled too much at any point of the assembly, rewarm in the microwave for 15-20 seconds until fluid once more.

  1. On one cooled macaron shell, frost a round dam around the edge of the cookie.
  2. Put into freezer to set frosting for 5 minutes.
  3. Fill the inside of the macaron with caramel filling. Top with another macaron shell.
  4. In a mini ice cream cone, fill about 1/3 of the way with caramel filling.  Pipe a round of chocolate frosting onto the lip of the ice cream cone.  It should look somewhat like a doughnut. (As shown in the above photo.)
  5. Put an assembled macaron on top of the chocolate frosting on the ice cream cone and set in the freezer for about 5 minutes.
  6. From here you can enjoy as is or go further with your decorations:
    1. Top your macaron with another macaron for a double scoop effect. (As shown in the above photo.)
    2. Top your macaron with reserved caramel filling and sprinkle with maldon sea salt (or any other flaky sea salt you have on hand). (As shown in the above photo.)
    3. Top your macaron with reserved caramel filling and top with whipped cream and sprinkes. (As shown in the above photo.)