Key Lime Passion Fruit Tart with Oatmeal Cashew Crust

Take a bite of the sunny tropics with this key lime passion fruit tart with oatmeal cashew crust. Buttery cashews and oatmeal create a golden crust that is layered with caramelized white chocolate crumbles and topped with a brightly balanced key lime and passion fruit filling made with Amoretti natural artisan flavors. 

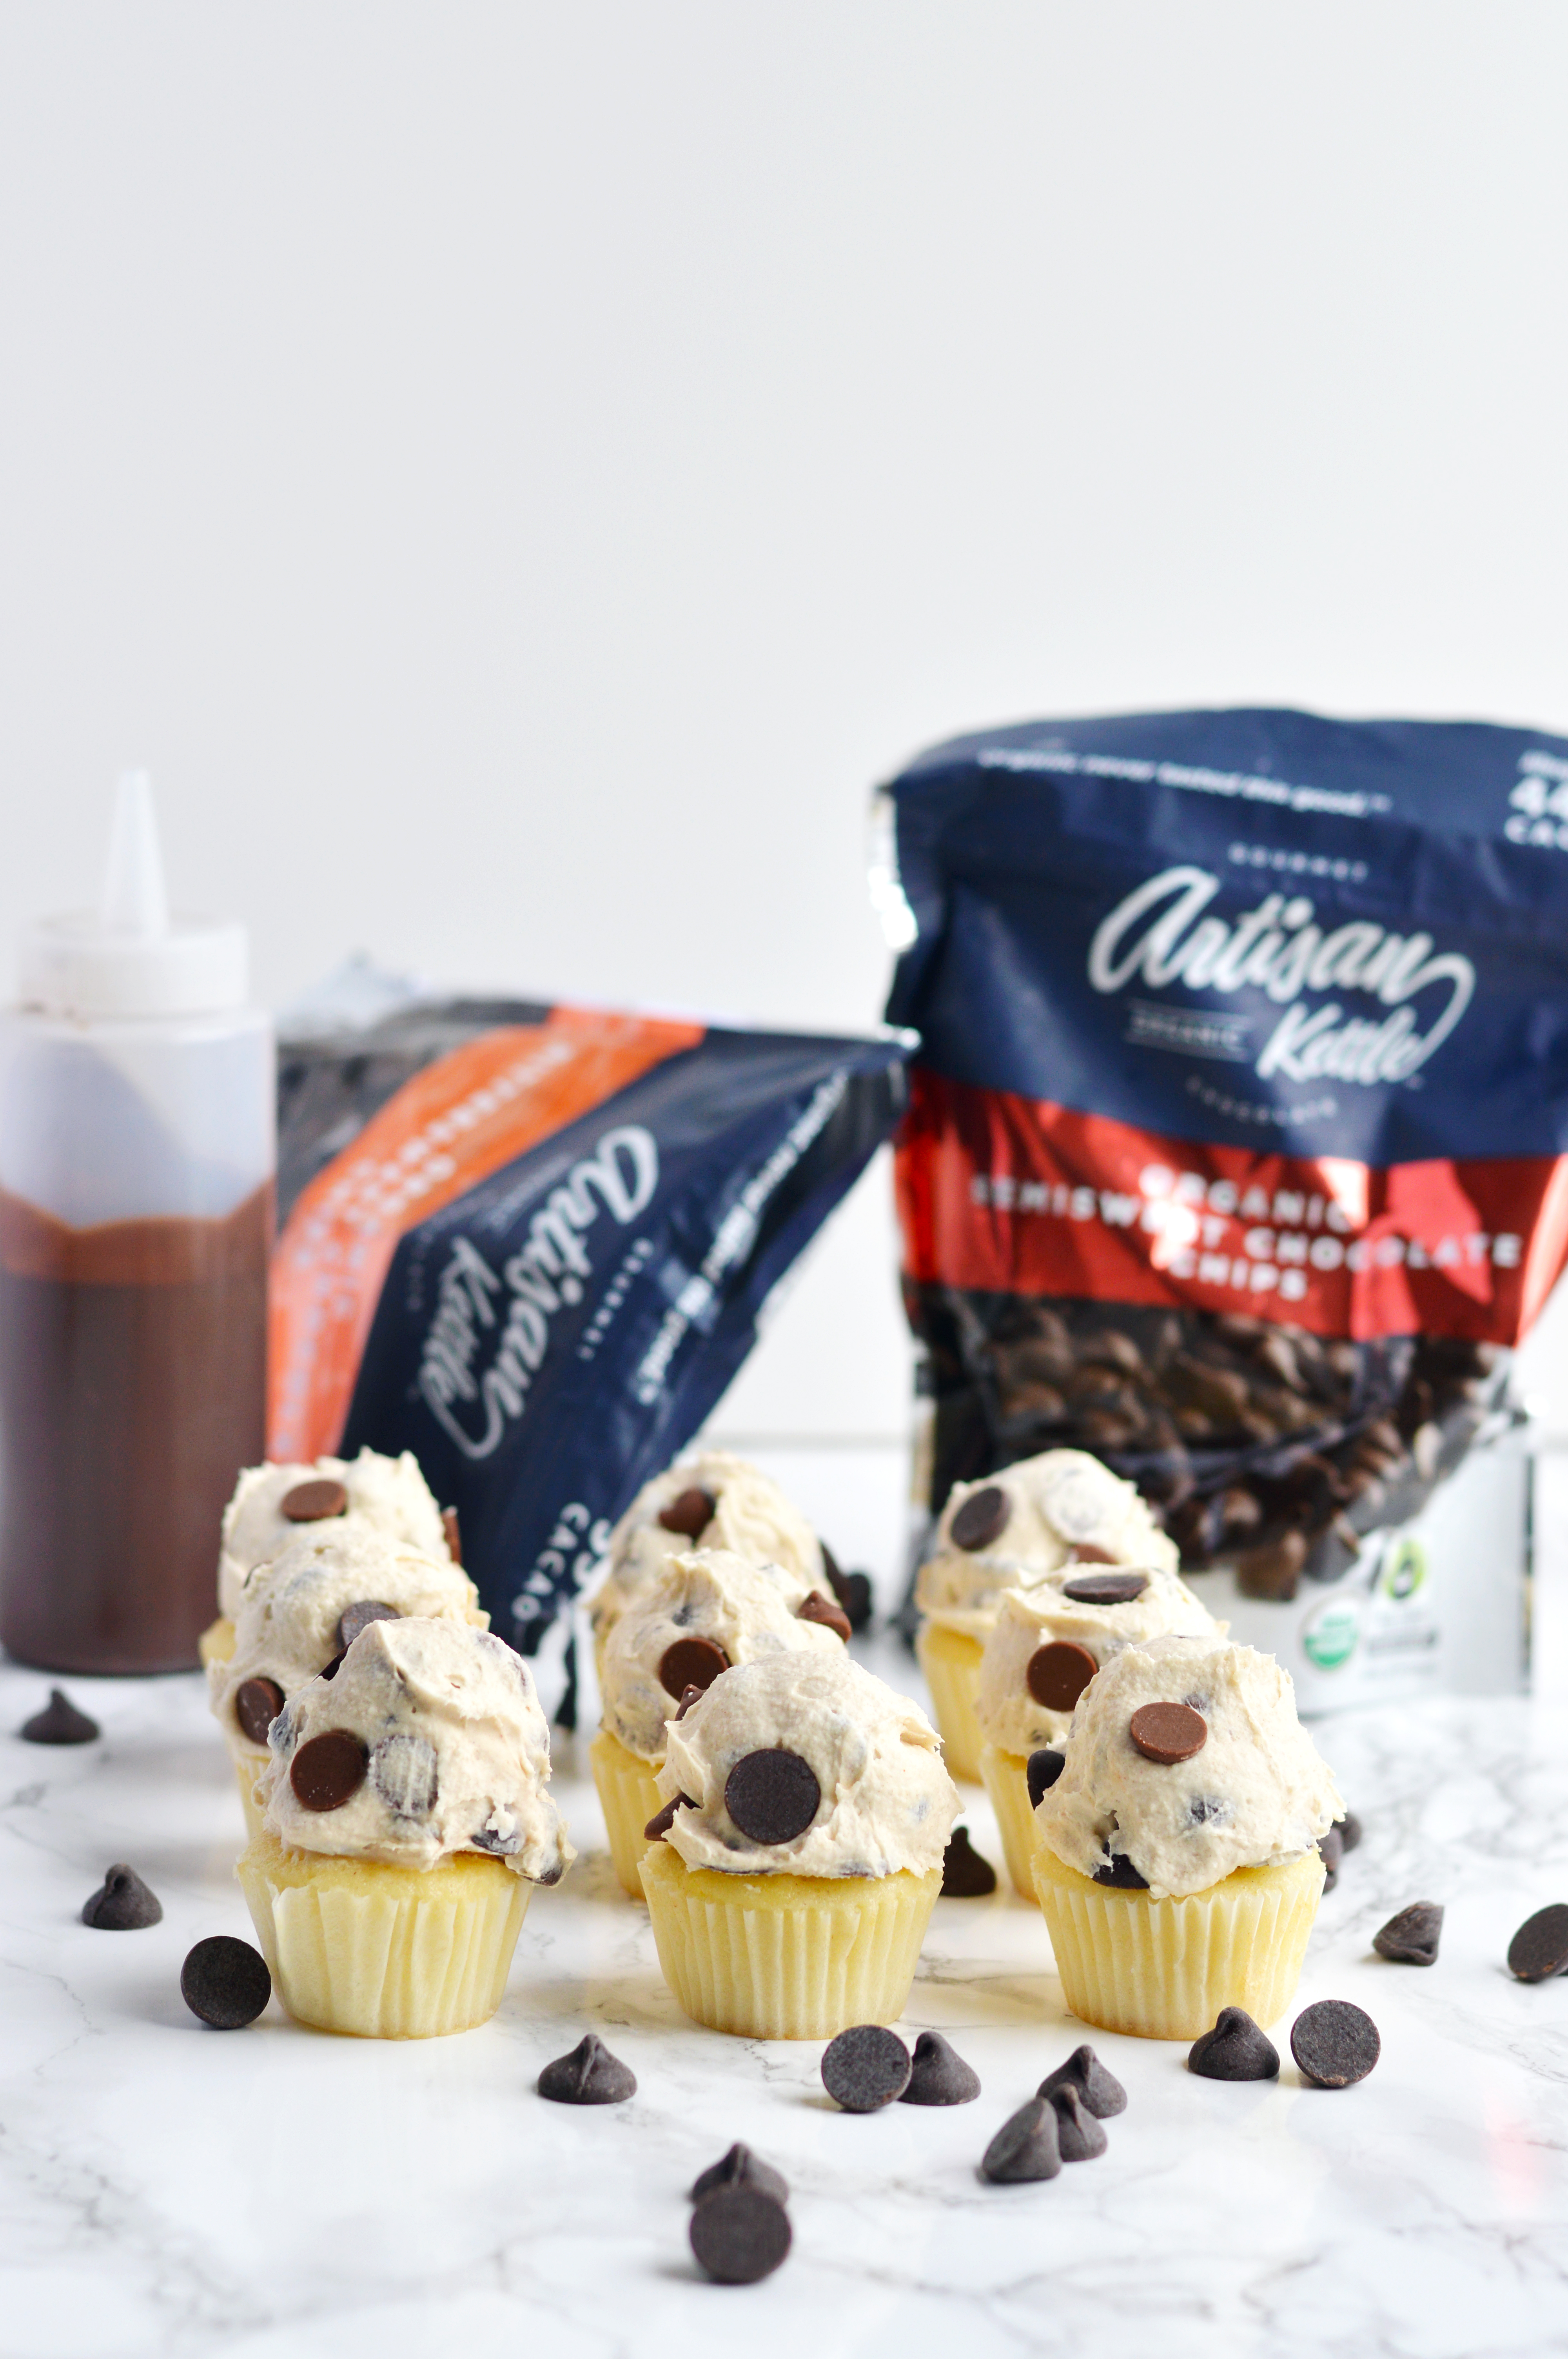
Time sure gets away from us, huh? It’s been nearly 3 years since the pandemic has started. Life seems dull and bleak. So when Amoretti reached out to me to try out their Artisan flavors, I nabbed the key lime and passion fruit: IMO the brightest of the bunch.

Living on the northeast coast really limits the types of fruit that will be in stock and these flavors really give a boost of true fruit flavor without having to procure it. I wanted to grab some passion fruit for taking photos of these and visited every market available to me (even specialty stores) and could not find fresh passion fruit. And honestly, even if you could procure it, squeezing tiny key limes and removing the seeds from the passion fruit pulp is tedious. You’re welcome, I’ve saved you time and freed you from unnecessary labor. 🙂 

Key Lime Passion Fruit Tart with Oatmeal Cashew Crust

Ingredients:

1 batch of caramelized white chocolate crumbles, recipe below
1 batch of oatmeal cashew crust, recipe below
1 batch key lime passion fruit filling, recipe below
sweetened whipped cream, for serving
fresh fruit, for topping

For the Caramelized White Chocolate Crumbles:

8 oz. chopped high-quality white chocolate, see notes 1
¼ cup feuilletine flakes

For the Oatmeal Cashew Crust:

1½ cups old-fashioned rolled oats
½ cup cashews
¼ cup packed light brown sugar
¼ cup all-purpose flour
½ teaspoon kosher salt
6 tablespoons unsalted butter

For the Key Lime Passion Fruit Filling

28 ounces sweetened condensed milk
2 limes, zested
¼ cup freshly squeezed key lime or lime juice, see notes 2
¼ cup passion fruit puree, see notes 3
1 tablespoon Amoretti natural key lime artisan flavor
1 tablespoon Amoretti natural passion fruit artisan flavor
½ cup plain Greek yogurt
1 large egg yolk

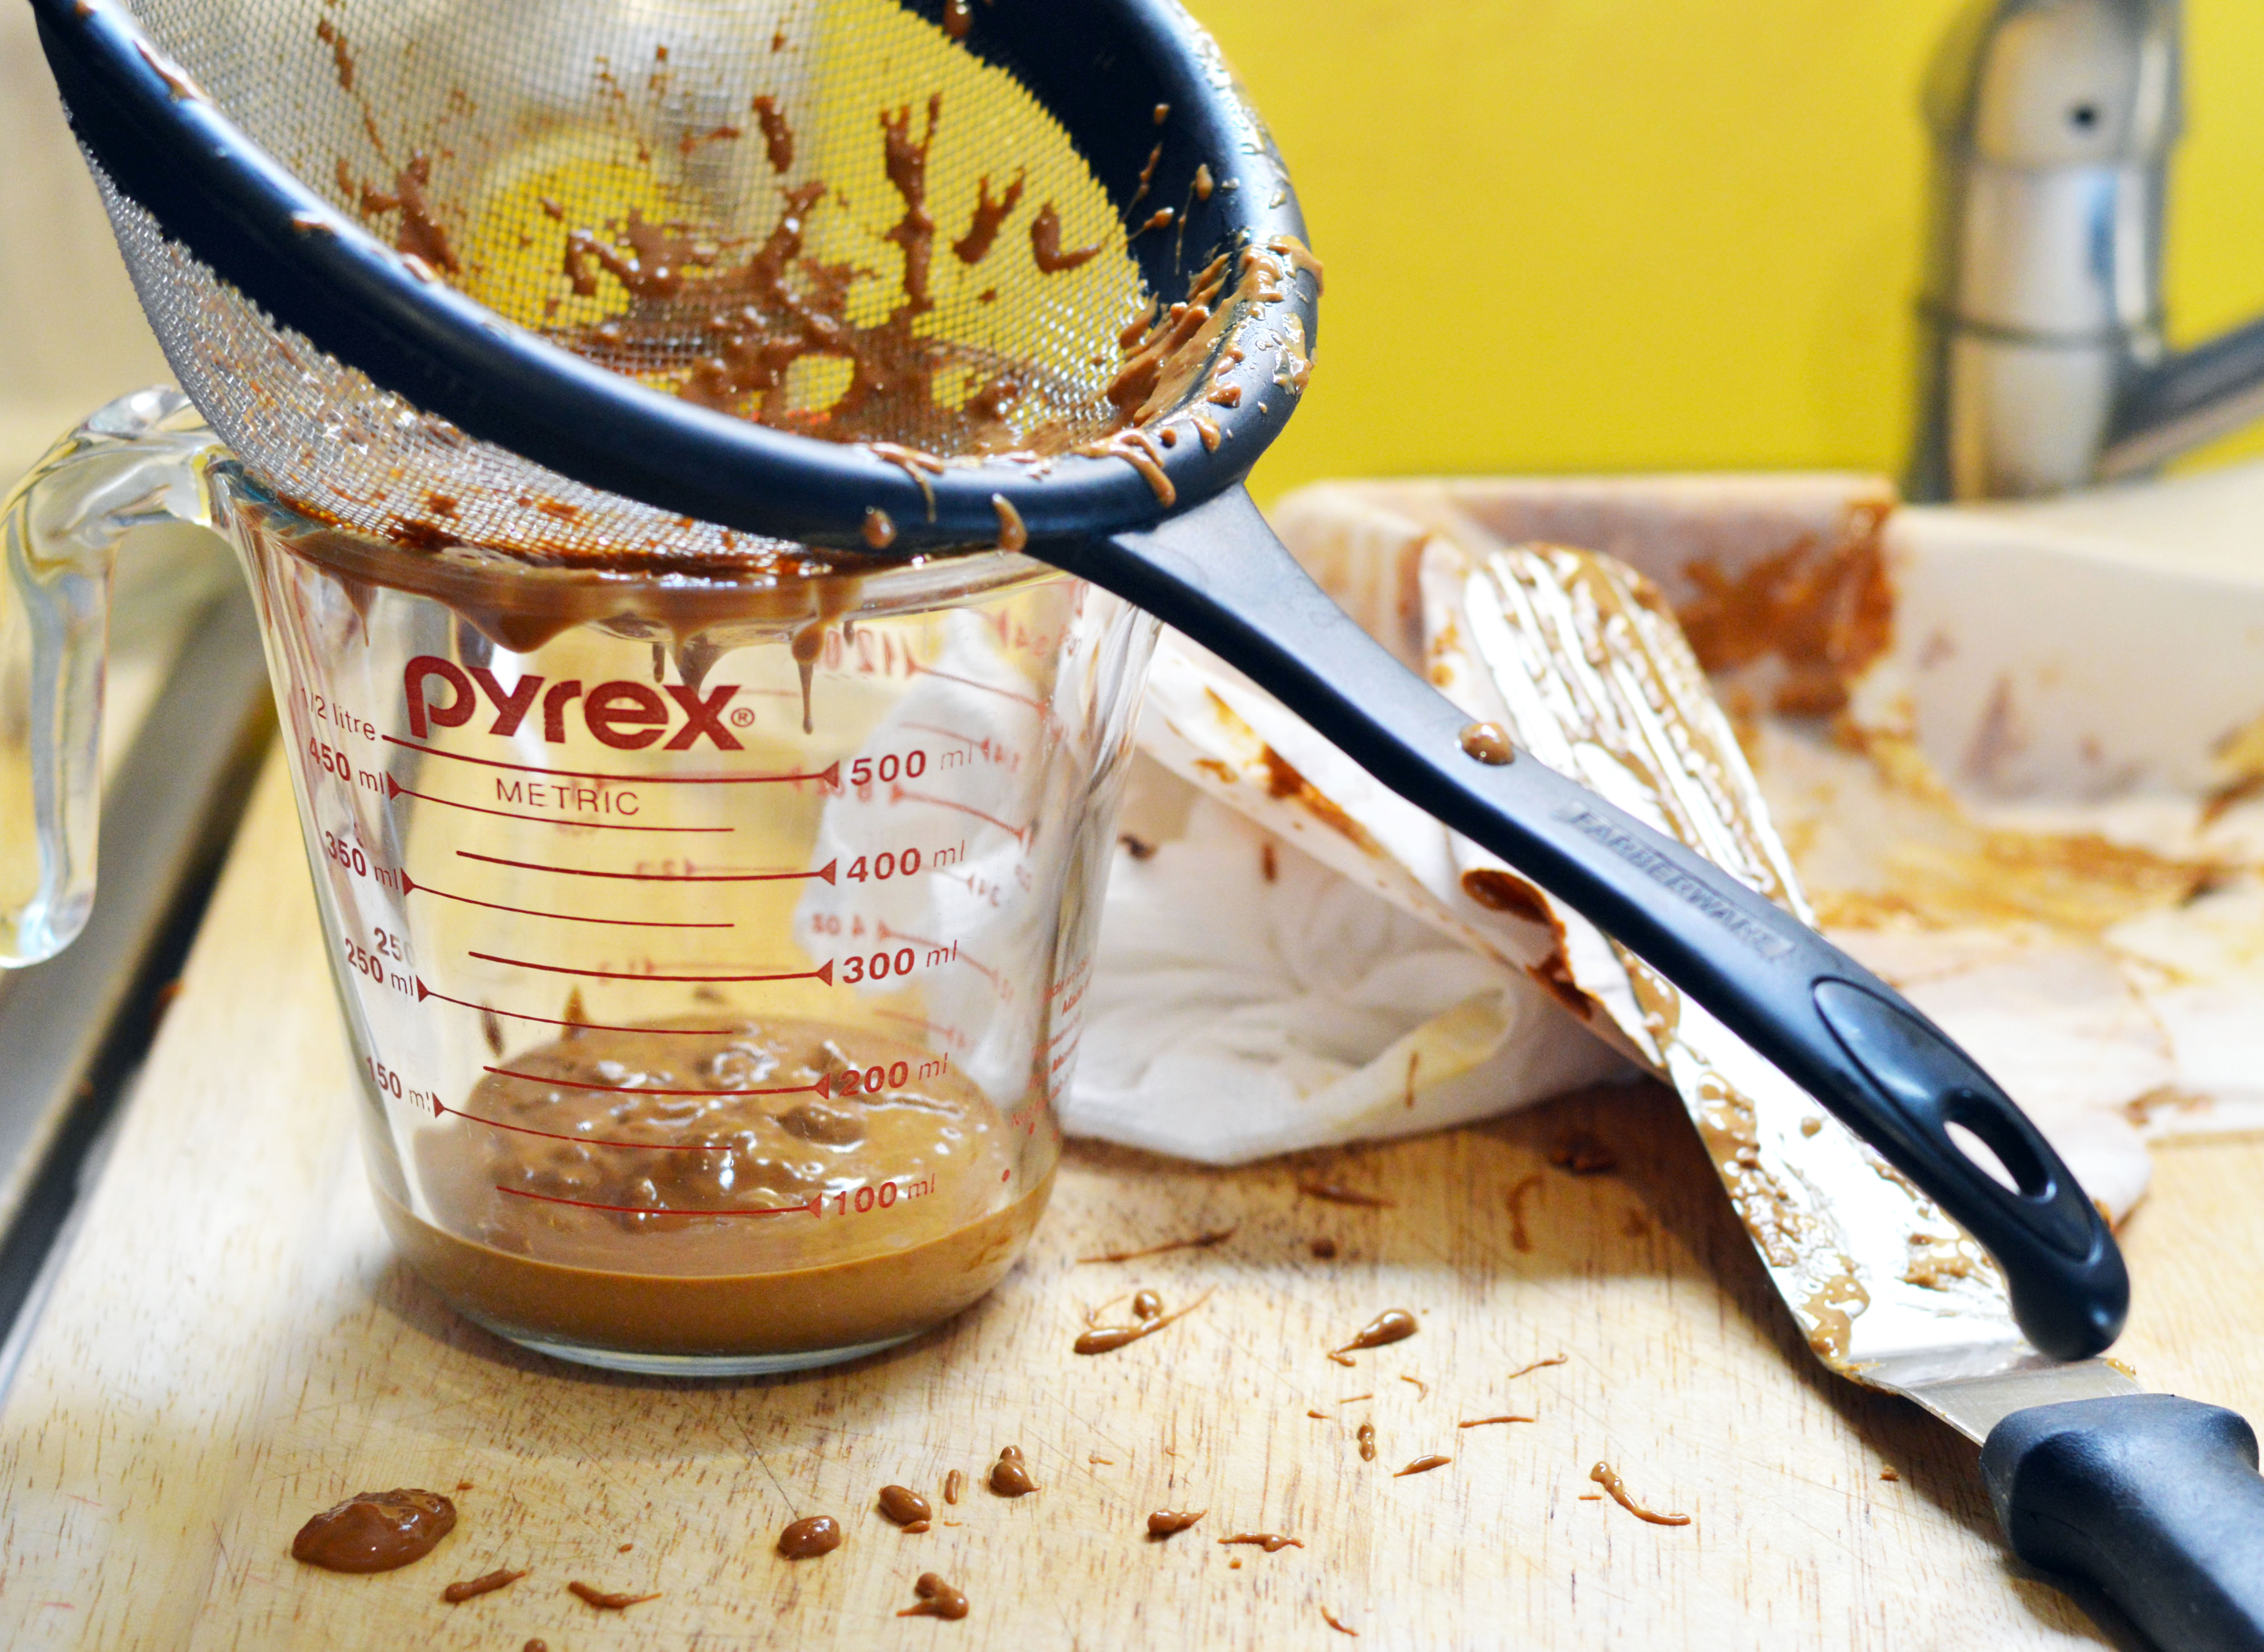
  1. Make the caramelized white chocolate. Preheat the oven to 250°F. Place the chopped white chocolate on a quarter sheet pan.
  2. Heat the white chocolate in the oven for 10 minutes and then stir. Return back to the oven. Repeat until the chocolate is golden brown and caramelized, about 40 minutes. 
  3. Transfer the caramelized white chocolate into a heatproof bowl and let cool until thickened. Fold in the feuilletine flakes. Set aside. (See notes 4.)
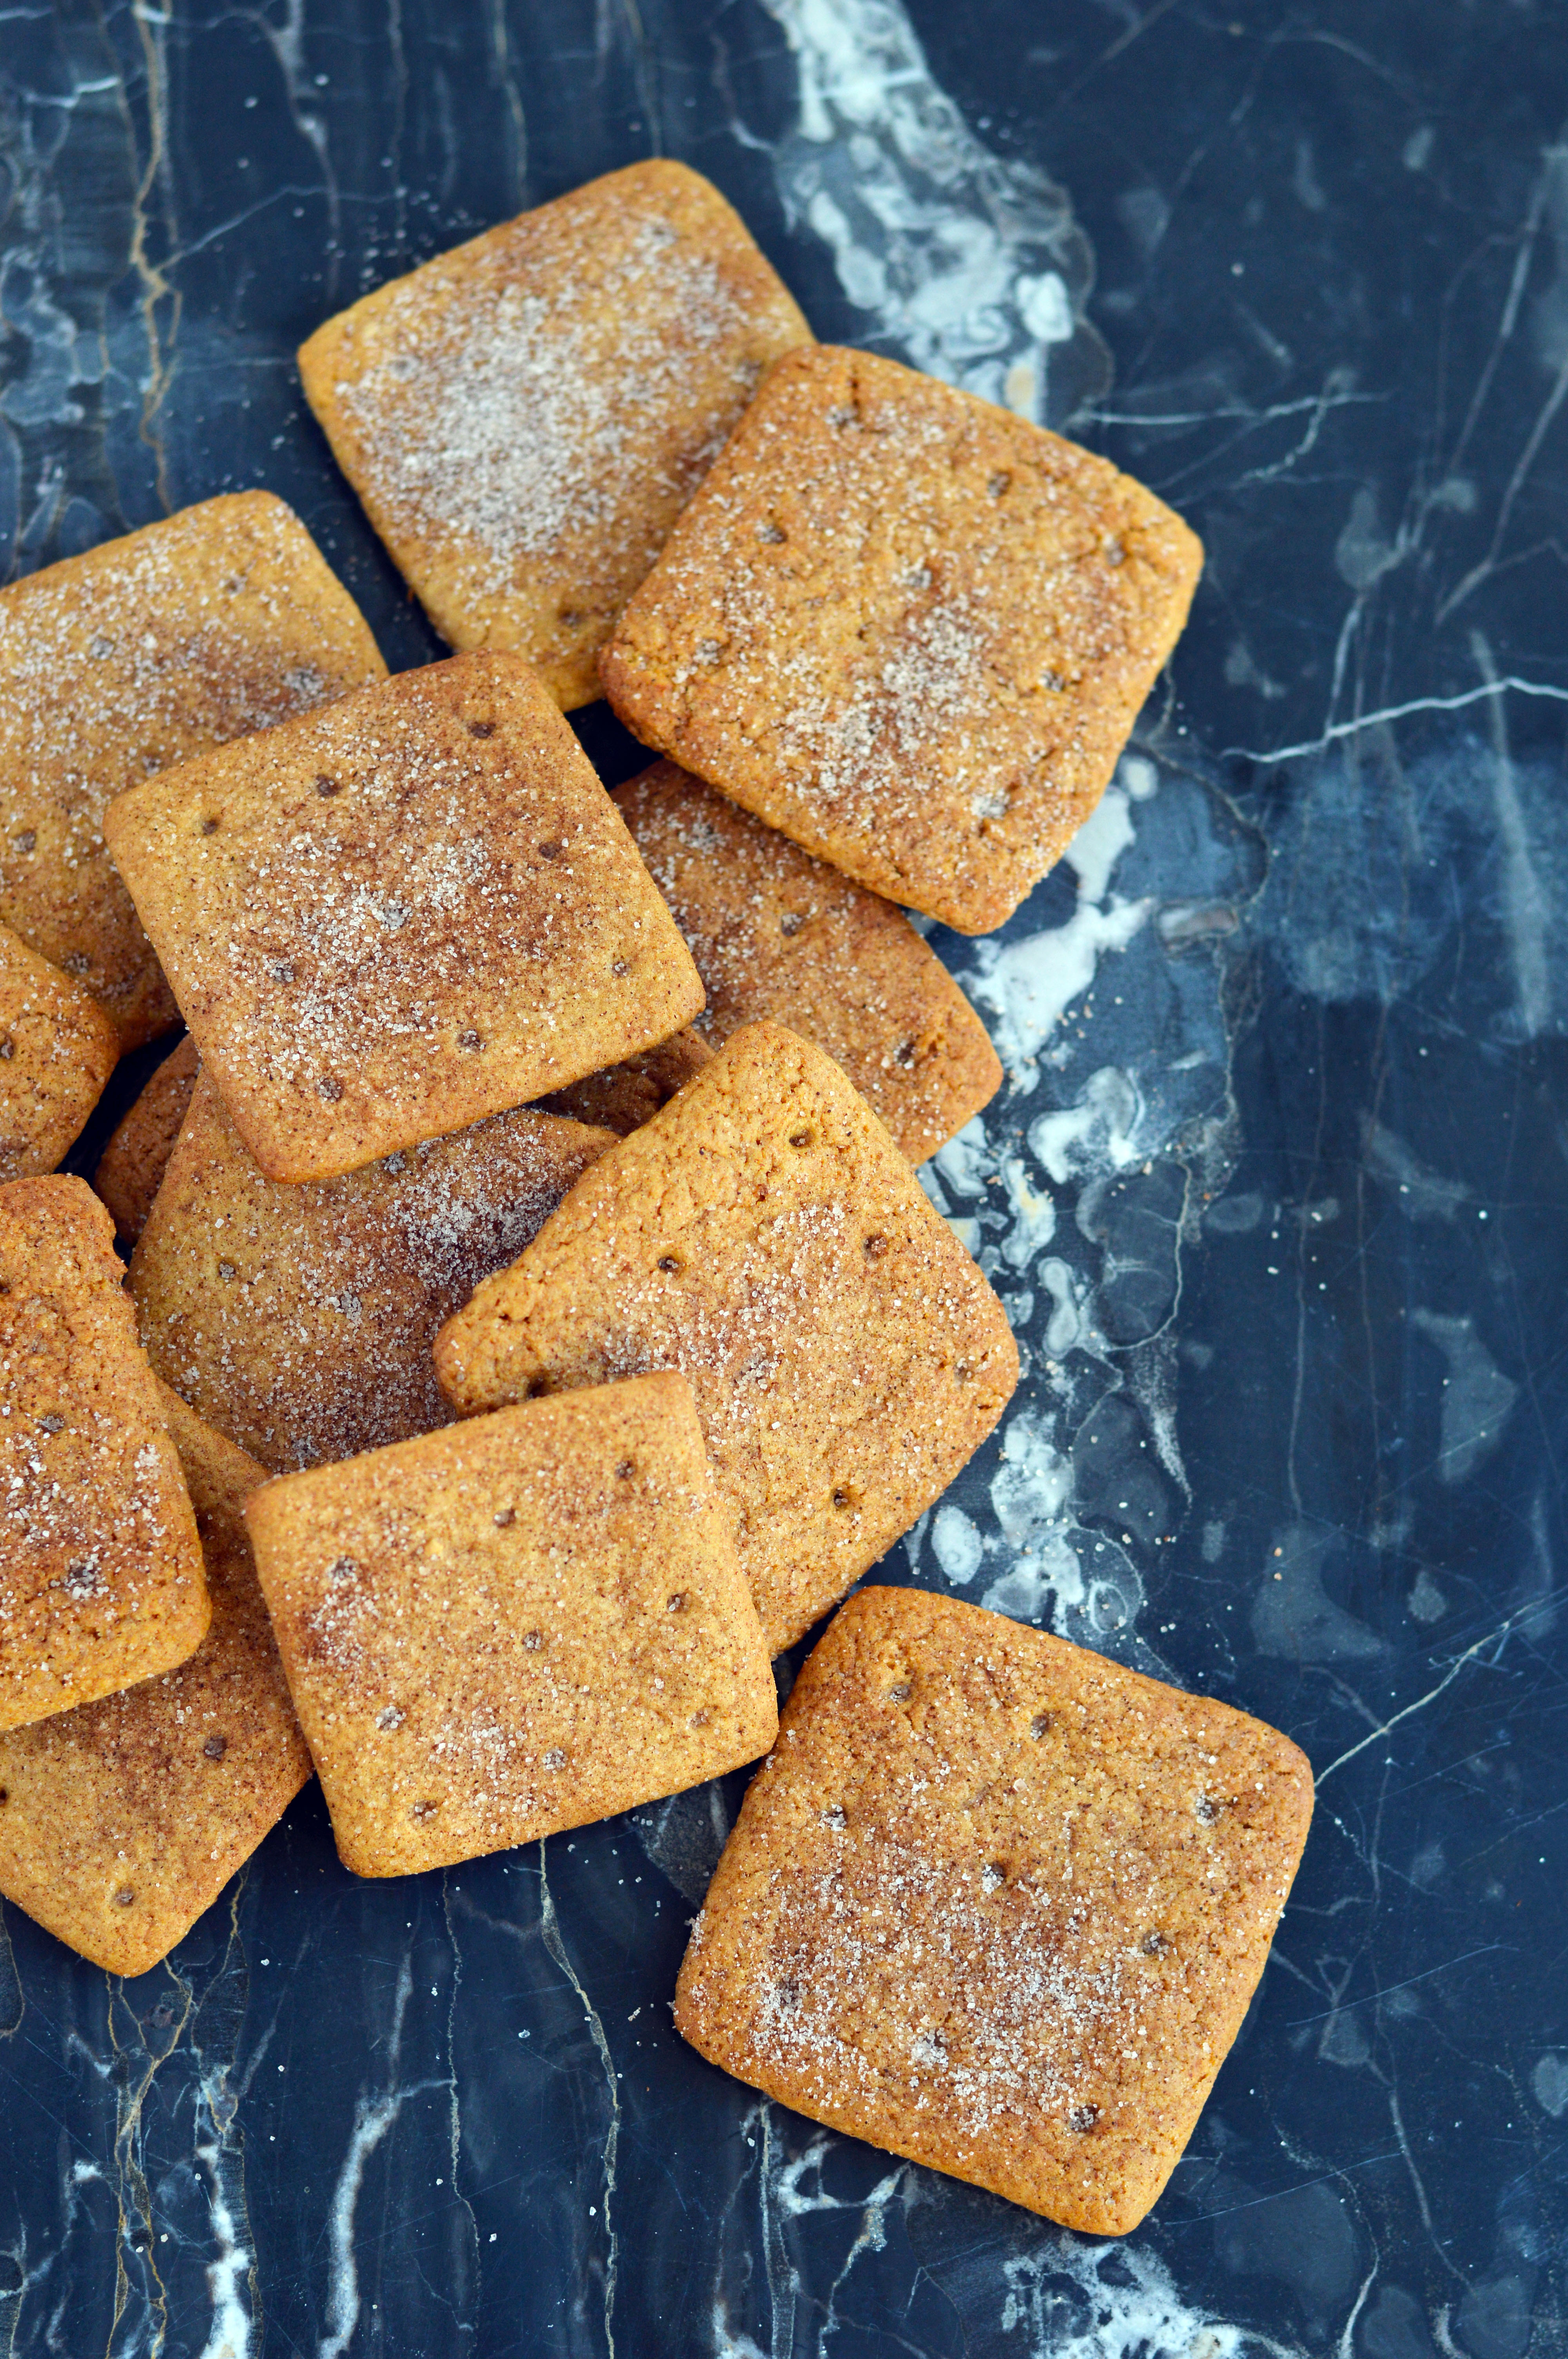
  4. Preheat the oven to 350°F. In the bowl of a food processor, combine the rolled oats and cashews. Pulse until finely chopped.
  5. Add the brown sugar, all-purpose flour and kosher salt. Pulse until combined. 
  6. Cut the butter into small cubes and add to the mixture. 
  7. Pulse the dough sticks to the sides of the bowl of the food processor.
  8. Transfer the dough into a 9-inch tart pan with a removable bottom. Use a glass cup with a flat bottom to press the crumbs evenly into the bottom and up the sides of the pan. 
  9. Bake until the crust is lightly browned, about 18-20 minutes. Remove the tart from the oven and lower the heat to 325°F. 
  10. Use the same glass cup to flatten the bottom and sides of the tart.
  11. Let the tart crust cool completely. While the tart crust cools, make the key lime passion fruit filling. 
  12. In a mixing bowl, whisk together the condensed milk, zest of two limes, lime juice, passion fruit puree, Amoretti natural key lime artisan flavor, Amoretti natural passion fruit artisan flavor, Greek yogurt and egg yolk. 
  13. Once the tart crust is completely cooled, fill it will the key lime passion fruit filling. 
  14. Bake the tart for about 40-45 minutes or until the edges are set and the center wobbles slightly. 
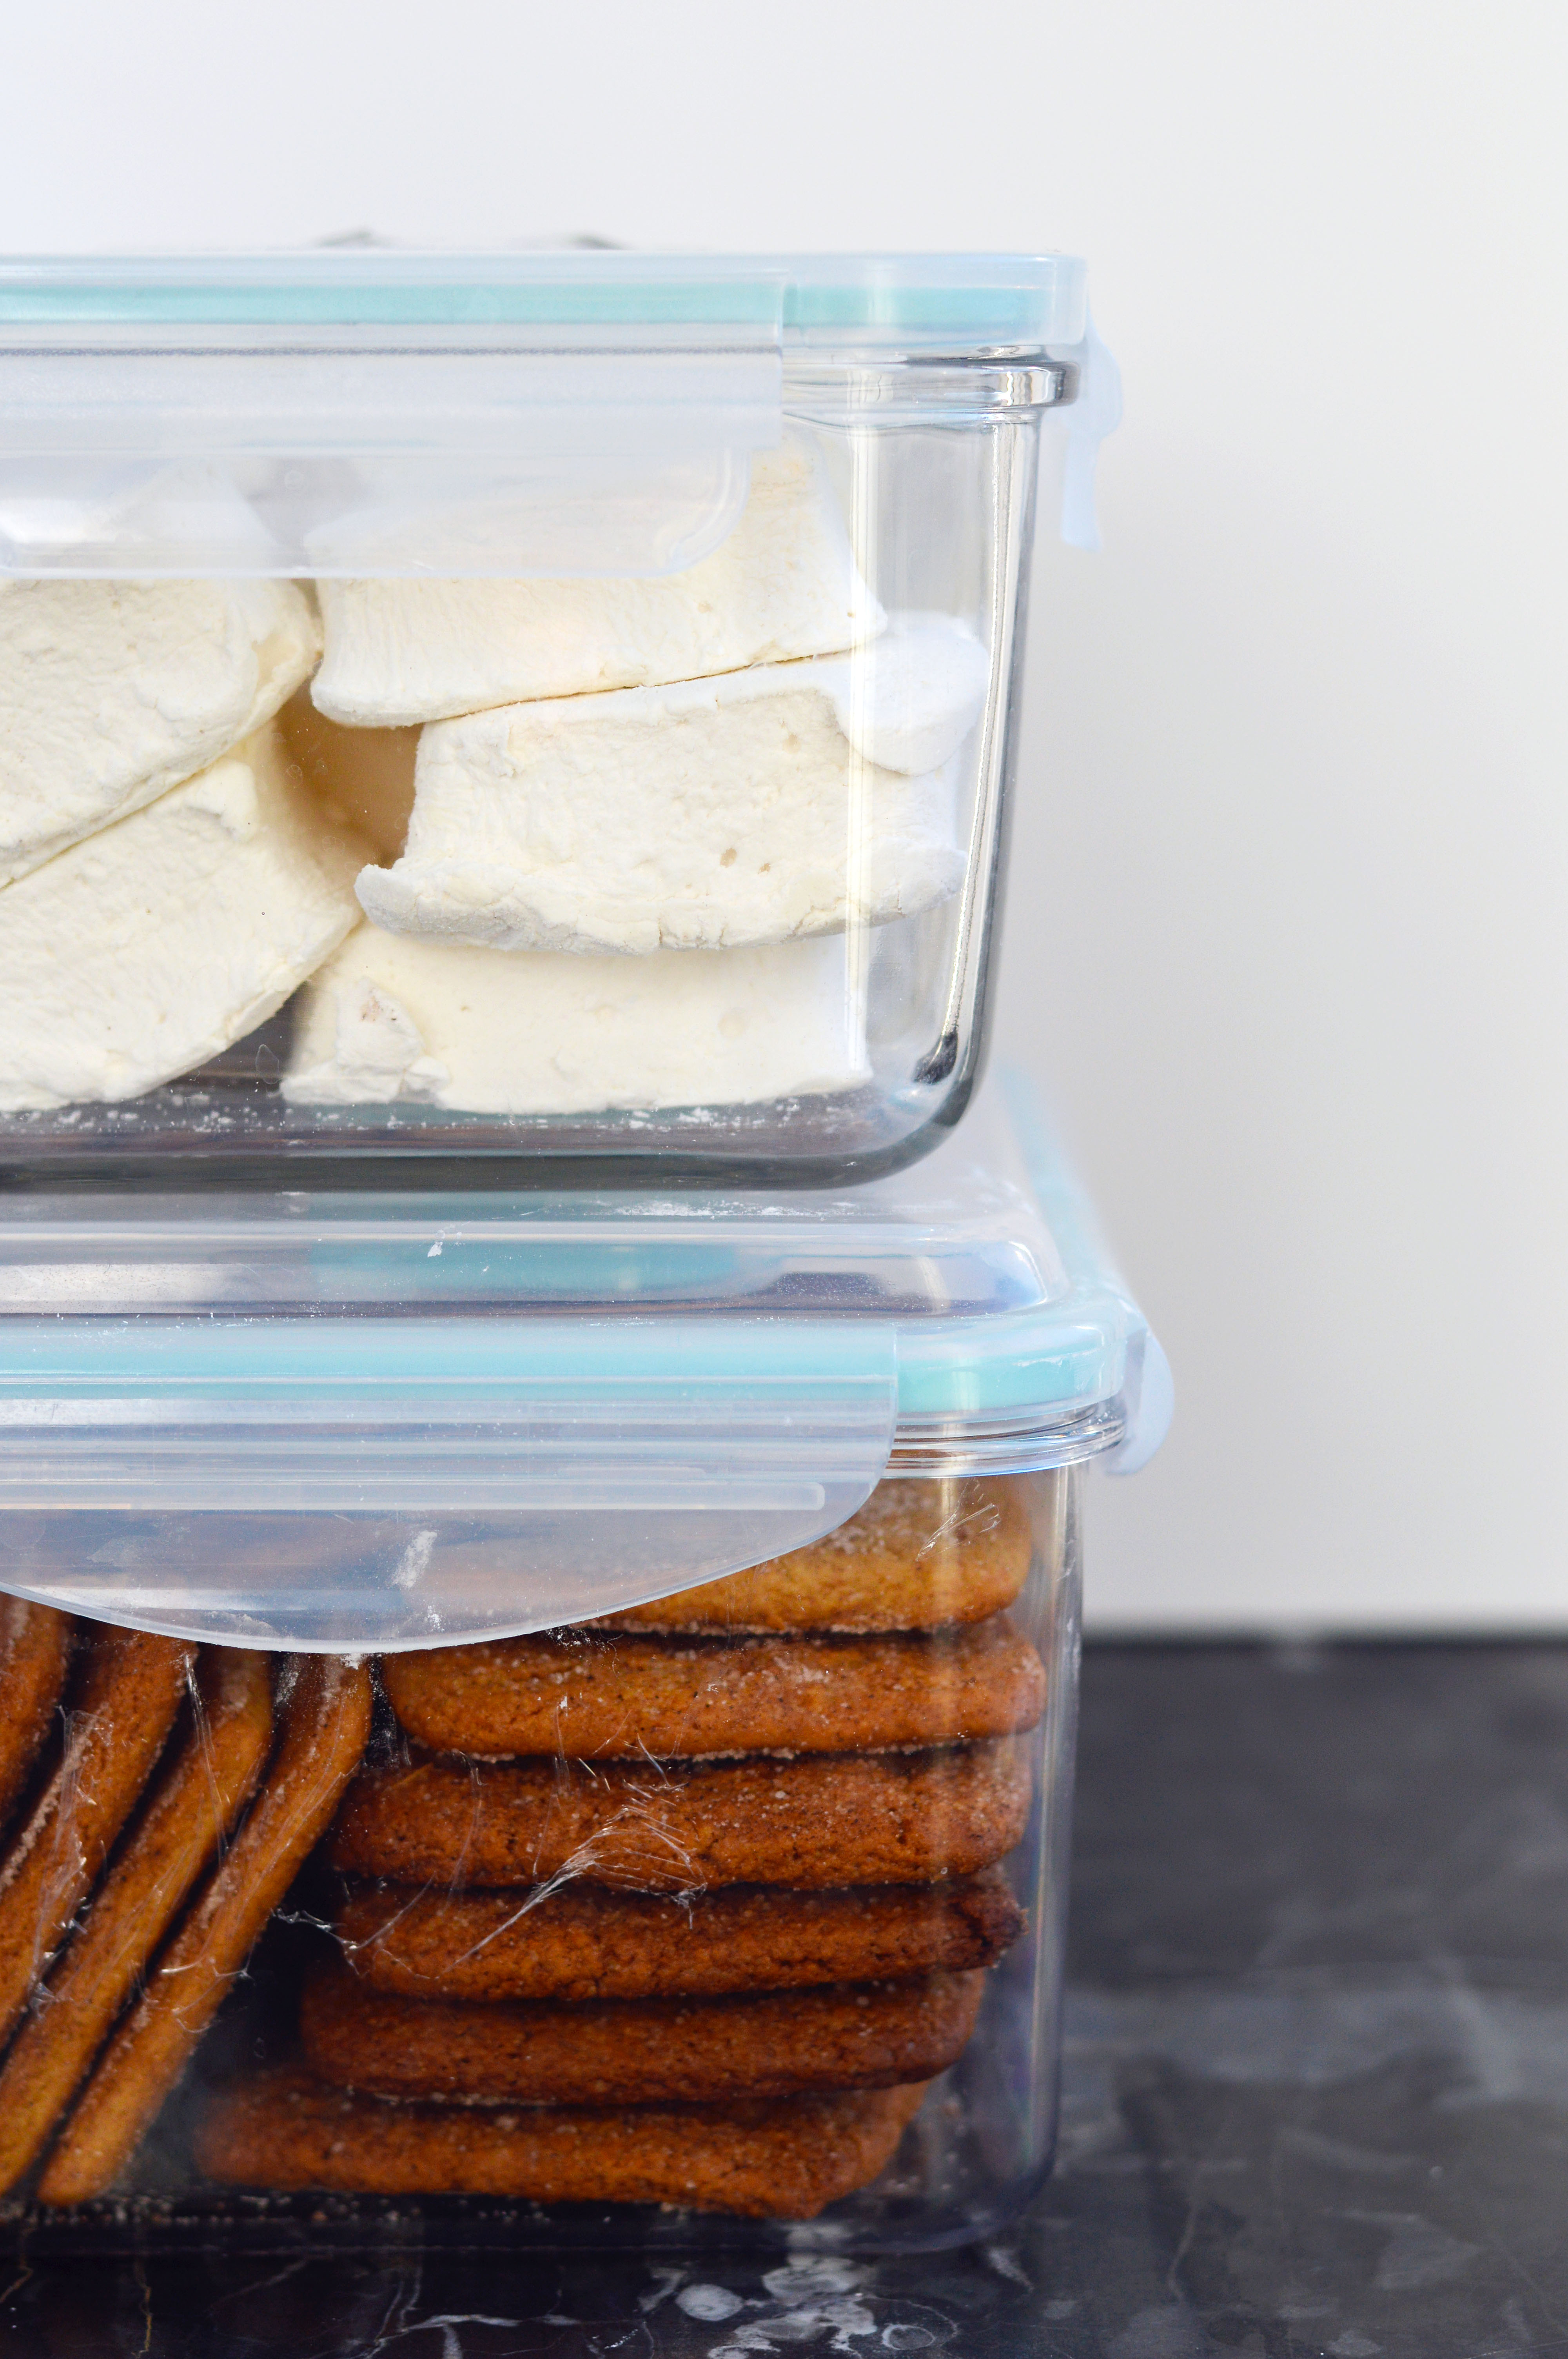
  15. Let the tart cool completely before covering with plastic wrap and refrigerating until completely chilled, at least 2 hours or overnight.
  16. When ready, top with 

Notes:

  1. High-quality white chocolate of at least 30% cocoa butter must be used. If not, the caramelized white chocolate will become grainy.
  2. Alternatively, you can use 1-2 tablespoons of the Amoretti natural key lime artisan flavor.
  3. Alternatively, you can use 1-2 tablespoons of the Amoretti natural passion fruit artisan flavor.
  4. You can speed up the cooling process by putting the chocolate in the freezer.

Funfetti Ooey Gooey Butter Cake

Sometimes the universe aligns to bring something new and that’s how this funfetti ooey gooey butter cake was born. I happened to see a recipe for a plush confetti cake and a gooey butter cake at the same time and I was sold. I needed to have both asap.

The confetti cake portion is vegan (!) and becomes borderline too moist (very similar to a tres leches cake) with the gooey butter topping. The almond-vanilla scented cake was a happy accident as the original recipe called for ⅛ th of a teaspoon of almond extract. My hand unexpectedly had a nervous tremor (probably from trying to measure out a tiny fraction) and I put a bit more, I’m guessing ½ – 1 teaspoon. The end result is an almond-vanilla scented cake that I think cuts the cloying sweetness of most gooey butter cakes. 

It feeds a crowd and is a perfect cake to bake for celebrations. I baked to celebrate me (yay!) on my birthday. 🙂

Funfetti Ooey Gooey Butter Cake

Ingredients:

For the Funfetti Cake Layer:

1 ½ c. all-purpose flour
⅗ c. granulated sugar
1 ½ tsp. baking powder
½ tsp. kosher salt (I use diamond kosher)
1 c. unsweetened non-dairy milk
⅓ c. vegetable oil
2 tbsp. fresh lemon juice
½ tbsp. vanilla extract
½ – 1 tsp. almond extract
⅓ c. rainbow sprinkles

For the Ooey Gooey Layer:

8 oz. cream cheese, room temperature
4 oz. butter, room temperature
12 oz. powdered sugar, plus more for garnish
¼ tsp. kosher salt
2 large eggs
2 egg yolks
2 tablespoons vanilla extract

Instructions:

  1. Preheat the oven to 350℉. Grease and line a 9×13-inch baking pan with parchment paper.
  2. Prepare the ingredients for the funfetti cake. In a large mixing bowl, whisk together the flour, sugar, baking powder and salt. Set aside.
  3. In a large measuring cup (I like that it has a spout) or a medium bowl, whisk together the non-dairy milk, oil, lemon juice, vanilla and almond extract. Set aside.*
  4. Start the ooey gooey layer. In the bowl of a stand mixer fitted with a paddle attachment, combine the cream cheese, butter and salt. Mix on medium speed until combined.
  5. Turn the speed to low and add the powdered sugar in slowly to minimize the sugar dust.
  6. Once all of the powdered sugar is incorporated, turn up the speed to medium-high and mix until the mixture is fluffy, about 8-10 minutes.
  7. In a small bowl, whisk together the eggs, egg yolks and vanilla extract.
  8. Turn the speed of the stand mixer to low and add the egg mixture to the sugar mixture. Mix until combined. Set aside.
  9. Assemble the funfetti cake. Pour the milk mixture over the flour mixture and mix until just combined.
  10. Fold in the rainbow sprinkles.
  11. Pour the funfetti cake batter over the prepared 9×13-inch baking pan. Spread evenly.
  12. Use a spatula to evenly dollop the gooey layer over the cake batter. Smooth evenly.
  13. Bake the cake about 35-45 minutes, until the top layer is toasted golden brown and the cake is cooked through.
  14. Let the cake cool completely before dusting with powdered sugar and serving.*

I delay combining the funfetti cake ingredients to prevent the baking powder from reacting prematurely.

I prefer to serve the cake cold (it helps the cake keep its shape) with hot, unsweetened black coffee.

Meyer Lemon Creme Brûlée Cheesecake

What are you doing this Valentine’s Day? I think Mr. Spatula and I are going to stay in and cook up something tasty. It’s a little different from our usual tradition which consists of going out to a good restaurant and eating delicious food while people-watching other couples. I’d like to think that while many restaurants are no-gos for many of us, that we are all enjoying a delicious meal with our loved ones. Because breaking bread together is always one of the best ways to share love. 

This cheesecake bar really is a marriage of a lemon bar with the hint of lemon and the shortbread crust and a creme brûlée cheesecake. The sugar torched topping is not an option. It really gives it the perfect crisp shell for a dessert that is fitting for Valentine’s day. I used Meyer lemons because they’re in season and they’re less intense than lemons. But if you can’t get your hands on Meyer lemons, please feel free to use regular lemons. Just expect a more lemon-y punch. 🙂

Left: Before Torching | Right: After Torching

Meyer Lemon Creme Brûlée Cheesecake
Makes about 12 servings, pending on how you large you make your squares

Ingredients:

For the crust:
8 tbsp. (1 stick) unsalted butter, room temp.
½ c. (100 g.)  sugar
1 tbsp. Meyer lemon zest (be careful to not grate the pith of the lemon – the white part)
½ tsp. vanilla extract
1 c. (120 g.) all purpose-flour
¼ tsp. kosher salt

For the filling:
8 oz. (1 box) cream cheese, softened
14 oz. sweetened condensed milk
1 egg, large, room temp.
1 tbsp. Meyer lemon zest (be careful to not grate the pith of the lemon – the white part)
⅓ c. Meyer lemon juice
a pinch of kosher salt

For the burnt sugar crust:
Granulated sugar, as needed (if you have caster sugar, this is the time to use it)

Instructions:

  1. Preheat the oven to 350°F. Grease and line an 8×8 inch baking pan with parchment paper. (This will make it much easier to remove the cheesecake.)
  2. In the bowl of a standing mixer fitted with the paddle attachment, mix the butter, sugar, lemon zest and vanilla on medium speed until well combined.
  3. Switch the mixer speed to low and in the flour and salt, mixing until just combined. 
  4. Press the dough into the prepared baking pan, trying to get it as even of a layer as possible. 
  5. Refrigerate the baking pan with the dough while you prepare the cheesecake layer.
  6. In the bowl of a standing mixer fitted with the paddle attachment (or in another bowl using a handheld mixer), mix the cream cheese on medium speed until smooth. Scrape down the sides. 
  7. Add the sweetened condensed milk, mix on medium speed and scrape down the sides again.
  8. Add the egg, lemon zest and juice and mix on medium-low speed, scrape down the sides and mix again until homogenous. 
  9. Remove the pan from the fridge, pour in the cheesecake filling and bake in the oven for about 20-25 minutes, or until the filling does not jiggle when you lightly shimmy the pan. 
  10. Remove cheesecake from the oven, and let cool completely.
  11. Refrigerate cheesecake until firm. 
  12. Cut the cheesecake into the number of slices that you want. 
  13. Sprinkle sugar over the cheesecake evenly, and use your kitchen torch to heat the tops of the cheesecake until amber – a spotted dark brown. (If you don’t have a kitchen torch, you can apparently do this under a broiler. But I’ve never tried and would advise that you keep a close eye on the caramelizing sugar.) 

Recipe adapted from Lauren’s Latest

The Gaming Series: Pokémon Doughnuts

Pokemon doughnutsI remember holding a Gameboy Color in my hands for the first time. My brother had bought it with months of saving up for it and I couldn’t believe the handheld color display. Along with the Gameboy he purchased Pokémon Red, which was just starting to get its hype. I loved that game and spent hours leveling up Pokémon and discovering glitches like the MissingNo.. This glitch let you duplicate rare candies infinitely which you then used to up your team to level 99. Honestly, leveling up your team so high is useless because you can beat the whole game with much less, but bragging rights seem to never go out of fashion. And while Pokémon Red has a special place in my heart, Pokemon Silver has to be the best one out there. (Don’t @ me, please.)
pokemon doughnutsI’ve made Star Wars doughnuts in the past, so I thought it’d be fun to do a Pokémon version. Only this time I decided to make them into Ditto versions. If you didn’t know, Ditto is a Pokémon that copies the abilities and appearances of other Pokémon except for their face.  I guess this was a way of keeping the same simple face while making fun appendages. But honestly, I think they’re very cute in their own right. Just look at all the plushies that are made of them!
pokemon doughnutsIf you follow me on Instagram, you can see the process of making some of these. Click below to be taken to the page:

Pikachu Doughnut Tutorial
Bulbasaur Doughnut Tutorial
Magnemite Doughnut Tutorial

Mini Doughnuts
makes about 3 dozen mini doughnuts

Ingredients:

2 tbsp. unsalted butter
2 tbsp. vegetable oil
¼ c. granulated sugar
3 tbsp. brown sugar
1 large egg
½ c. whole milk
¾ tsp. baking powder
⅛ tsp. baking soda
¼ tsp. fresh ground nutmeg
¼ tsp. kosher salt
½ tsp. vanilla extract
1 ⅓ c. all-purpose flour

Instructions:

  1. Preheat oven 350˚F. Spray non-stick cooking spray on your mini doughnut pan.
    2. In a medium bowl, whip butter, vegetable oil, and both sugars with a hand-held mixer until smooth.
    3.            Mix in egg and milk until completely combined.
    4.            Stir in baking powder, baking soda, nutmeg, salt and vanilla.
    5.            Stir in flour until smooth, do not over mix.
    6.            In a piping bag, fitted with a medium round tip, fill each doughnut cavity about ½ full.
    7.            Bake 5-7 minutes until the doughnuts spring back when you touch it. Do not wait until the doughnut is golden brown, you will over bake it.
    8.            Let cool in pan about 5 minutes and then transfer to a wire rack to completely cool.
    9.            Repeat steps 6-8 until all of the batter is used.

The Gaming Series: Link Brownies (Salted Brown Butter Rice Krispie Brownies)

I’ve been taking a lot of baking orders for the past year. Not so often that it’s been unmanageable (or even often enough that I’d say it’s profitable), but enough that most of my spare time was spent creating for others. Only recently did I realize I was in a baking rut. I wasn’t making fun things that were inspiring to me. Yes, I tried out new recipes and that is always good but it never tapped into my creative side. So I’ve made a decision on making things for just me (and you, if you are reading this). What does this look like? Probably a smattering of posts of things that I like but mostly will be centered on a series of subjects that I am a fan of. All of the recipes that I’m sharing will be just as delicious, only that they’d reflect the selected theme. So I’m excited to announce that I’m kicking off this season with The Gaming Series.
I’ve loved video games when my brother got his very first Gameboy. I’m talking about that grey box with the monotone green screen. My three siblings and I would crowd around that one tiny screen and watch each other play for hours. Going forward, my younger brother and sister would eventually lose their interest, but my other brother and I would continue with our fandom for years.
Our very first console was a Nintendo 64, and The Legend of Zelda: Ocarina of Time was the first RPG that we played. Because the game is meant for one player, I would be the backseat driver to his playing. And even though I rarely physically held the controller, I was every bit as immersed and taken by the storyline and the gameplay.  I could almost feel the heat of Death Mountain, the cool waters of Lake Hylia and the dryness of the Haunted Wasteland. I wanted to ride on Epona and drink a gallon of Lon Lon Milk. Link was probably my first video game crush. (Even now that blonde hair and blue eyes makes my heart sway a bit.)  So unsurprisingly, my first post is of Link.
First, I have to let you know this recipe is the bomb. The light, crispy, chewy and slightly salty brown butter rice krispy treat offsets the smooth, fudgy brownie base in the best way. Second is that I just love how the candy melts pop against the black background. I have to thank @emilylynncantera because her artwork is what inspired this project.
zelda browniesI hope you enjoyed the post and I’m looking forward to continuing this journey with you. The hint for the next theme has to do with a certain fungi kingdom.

Link Brownies

You will need:

Brownies (recipe below)
Salted Brown Butter Rice Krispies (recipe below)
2 to 3 cups Mini Marshmallows
Candy Melts in Black, Brown, Purple, Yellow, Orange, White, Green and Blue
Link Stencil

Instructions:

  1. Bake the layer of brownies. (*Important, the 8 inch pan must be at least 3 inches tall. Otherwise the recipe will not layer into pan.)
  2. When cool, layer the rice krispies being careful not to pack it in too tightly. This results in dense and tough rice krispies.
  3. In a microwave safe bowl, melt and stir 2 c. mini marshmallows (melt 3 if you want your marshmallow layer to be thicker) in the microwave.
  4. Spread the marshmallow layer over the rice krispies layer.
  5. Melt enough black candy melt to spread over the top of the pan. (About ½ – ¾ c.).
  6. Let set.
  7. Put stencil over the top of the pan and using an x-acto knife, stencil the outline onto the candy melt.
  8. Remove the stencil and using candy melts of the right color, fill in the stenciled area. Let set and enjoy.

Fudgy Cocoa Brownies

Ingredients:

¾ c. dark chocolate chopped into small ¼ in. pieces
10 tbsp. unsalted butter
1 ¼ c. sugar
¾ c. + 2 tbsp. unsweetened cocoa powder
¼ tsp. kosher salt
½ tsp. pure vanilla extract
2 large eggs, cold
½ c. all-purpose flour

Instructions:

  1. Preheat oven to 325˚F, oil and line an 8” square pan with parchment paper.
  2. In a microwave safe bowl, combine chocolate, butter, sugar, cocoa powder and salt. Microwave mixture about 1-2 minutes until mixture is melted and smooth when stirred.
  3. Whisk in the eggs and vanilla extract until batter is smooth and shiny.
  4. Fold in the flour until no streaks of flour remain.
  5. Spread the batter into the prepared pan and bake about 20-25 minutes until a toothpick poked in the center of the batter comes out with moist crumbs.
  6. Let cool completely before adding the rice krispies layer.

Salted Brown Butter Rice Krispies

Ingredients:

8 tbsp (1 stick) unsalted butter, melted
One 10 oz bag of marshmallows
¼ tsp. kosher salt
6 c. (160 g.) crisp rice cereal

  1. In a medium to large pot, melt butter on medium-low heat. Keep stirring butter with a rubber spatula until the butter foams and small brown bits form on the bottom of the pan. (The butter will smell nutty.)
  2. Once the butter is browned, stir in the marshmallows until the marshmallows melt into a smooth mixture.
  3. Stir in the cereal and salt and spread into the pan with the brownies.
  4. Do not firmly squish the cereal into the pan. This will result in jagged, hard rice krispies. Gently push it into the pan and into the corners. Let cool and set.

Brownie recipe adapted from the Feed Feed.
Rice Krispies recipe adadpted from the Smitten Kitchen.

Crème Brûlée Cake

Happy New Year! I say this knowing that it already passed 3 weeks since the beginning of 2018. What better way to start a new year than with cake? Admittedly, I made this cake last year, but that doesn’t make it any less delicious!One of my favorite things to do with dessert is trying different versions of an already established dessert. This time it was crème brulee. Did you guys see this video of a dessert shop that specializes in crème brulees? I just want to dip my spoon into every crispy crackly shell that they advertise. I think that’s one of the great things about it, you can add your spin to just about whatever you want.
As usual, I went out of my way to get the best crème brulee cake that I could make. It is filled with crisp sugar shards, caramelized white chocolate ganache and pastry cream. But the one thing I didn’t prepare for was the pastry cream being absorbed by the cake. I highly recommend you eat this cake sooner than later to fully enjoy all the components.Most of the parts of the cake are things I’ve made before, but the caramelized white chocolate was a new technique for me. You essentially bake very good white chocolate on low heat while stirring to transform it into a complex caramel flavor. I first read about it on David Lebovitz’s blog years ago, but never had the chance to make it. Why did it take so long? Well, one of the biggest factors was the cost of the chocolate. Valrhona Ivoire white chocolate is very pricey! I would be extremely sad if it failed. Luckily, I still had some in stock from baking the ultimate mocha cake.So what does caramelized white chocolate taste like? Kind of like dulce de leche but less sweet and a little more milky. Is it worth the trouble? I’m 50/50 on it. I don’t know if I want to use my precious Valrhona on it again. The answer would be definitely if I had a cheaper option to use. (David says not to use the cheap supermarket chocolate.)Aesthetically, there are two parts that love about the cake. The first being the amazing cake topper made by my friend, Carmiña of Sohnmade. Just look at the details on it! The tiny fork and spoon and the cupcake just kill me. I know cake toppers are super popular these days because they jazz up any cake, but I’ve rarely seen one that has so many details. And of course, because she is multi-talented, she also throws wonderful events and does a whole assortment of custom décor. I highly recommend her. The other part that I love is the sugar shards of the cake. I love the stained glass effect it gives off and I can imagine  making different colored ones and doing actual, edible stained glass work. The ones in the recipe have a similar flavor of the crisp sugar shell of crème brulee because you cook sugar until it gets that toasty taste. Win-win.

Crème Brulee Cake
Makes one 6-inch cake

You will need:
1 batch caramelized white chocolate ganache (recipe below)
1 batch vanilla pastry cream (recipe below)
1 batch vanilla buttermilk cake (recipe below)
1 batch vanilla swiss meringue frosting (recipe below)
1 batch sugar shards (recipe below)

Instructions:

  • On a cake board, place one layer of vanilla cake and using an offset spatula, spread a layer of ganache. (picture #1 in photo above)
  • In a piping bag fitted with a plain tip, fill it with some vanilla frosting. Pipe a dam around the outer edge of the cake. This will keep the cream from spilling out of the sides. (picture #2 in photo above)
  • Use an offset spatula to fill with pastry cream. (picture #3 in photo above)
  • Top with small sugar shards. Note: The sugar shards will dissolve over time. It is best to eat sooner than later to experience the full textural effect. (picture #4 in photo above)
  • Repeat the sequence twice, ending with a layer of cake.
  • Cover the cake with a thin layer of vanilla frosting and freeze to firm.
  • Cover the cake fully with vanilla frosting, smoothing out the sides and top as well as you can.
  • Decorate the top and sides with sugar shards.

Caramelized White Chocolate Ganache

Ingredients:
12 oz. highest quality white chocolate you can get your hands on
Pinch of kosher salt
6 – 8 oz. heavy cream

Instructions:

  1. Preheat the oven to 250˚F and line a baking sheet with parchment paper.
  2. Chop the white chocolate into pieces and evenly distribute over baking sheet.
  3. Place in oven for 10 minutes.
  4. Remove and stir with a spatula. (The mixture will look lumpy and chalky for a while. Picture #1, #2, #3 in photo above)
  5. Place it back into the oven in 10 minute intervals until chocolate is smooth and caramelized. (picture #4 in photo above)
  6. At this point, if there are small lumps in the chocolate, use a fine mesh strainer and strain. (It will be messy, but worth it.)
  7. Heat the chocolate with 6 oz. heavy cream in the microwave for 1-2 minutes and stir. Let cool.
  8. If the mixture is too thick, add the other 1-2 oz. of heavy cream to thin out. The mixture should be thick enough to spread onto cake but not flow off of it, like nutella.

Vanilla Pastry Cream

Ingredients:

2 c. whole milk
½ c. sugar, divided
2 egg yolks
1 large egg
¼ c. cornstarch
2 tbsp. butter
1 tsp. vanilla extract (or if you really want to go fancy, vanilla paste)

Instructions:

  1. In a pot, heat whole milk and ¼ c. sugar and bring to a simmer.
  2. While the milk heats, mix egg yolks, egg, cornstarch and ¼ c. sugar in a medium bowl.
  3. When the milk is hot, use a ladle to slowly drizzle hot milk into the egg mixture while whisking to prevent curdling.
  4. Once all of the milk is introduced into the egg mixture, return all of it back into the pot.
  5. Bring the mixture in the pot to a boil while whisking. When it is thick, remove the pot off the heat.
  6. Add in the butter and vanilla. Once the butter is completely mixed in, move to a bowl and place a piece of plastic wrap directly against the pastry cream (to prevent a skin from forming). Chill completely, about 2-3 hours, before using.

Vanilla Buttermilk Cake

3 c. cake flour
2 c. sugar
1 tbsp. baking powder
¼ tsp. kosher salt
1¼ c. buttermilk, divided
8 oz. unsalted butter, room temperature
4 eggs, room temperature
2 egg yolks
2 tsp. vanilla extract

Instructions:

  1. Preheat the oven to 350˚F and grease and line four 6-inch cake pans with parchment paper.
  2. In a bowl of a standing mixer with the paddle attachment, add flour, sugar, baking powder, and salt. Mix until combined.
  3. On low speed, add 1 c. buttermilk and butter and mix until combined.
  4. In a separate bowl, whisk eggs, egg yolks, ¼ c. buttermilk, and vanilla extract until homogenous.
  5. On low speed, slowly add the egg mixture to the flour mixture.
  6. Increase speed to medium, and mix until combined.
  7. Evenly divide cake batter into the four cake pans.
  8. Bake about 20-25 minutes until cake is done or until a toothpick inserted into the center comes out clean.
  9. Let cool in pan for 10 minutes, and then move onto a cooling rack until completely cool.

Vanilla Swiss Meringue Buttercream

Ingredients:
300 g. (1½ cups) sugar
6 large egg whites
2.66 c. (4 sticks) unsalted butter
2 tsp. vanilla extract
1 pinch kosher salt (I use Diamond Crystal)

Instructions:

  1. Bring a small pot filled with about an inch of water to a simmer.
  2. In a bowl of a standing mixer, whisk the egg whites, sugar, and salt together.
  3. Place the bowl on top of the pot and whisk continuously until the mixture becomes slightly foamy and you cannot feel the grittiness of the sugar, about 5-8 minutes. The mixture will be hot. Be careful.
  4. Move the bowl to the standing mixer fitted with the whisk attachment and whip the egg mixture until the bowl feels cool to the touch.
  5. Add in the butter, and continue to whip until a smooth buttercream forms.
  6. Add in the vanilla extract and continue to whip until incorporated.

Sugar Shards

Ingredients:
3 c. sugar
½ c. water

Instructions:

  1. Line two baking sheets with parchment paper.
  2. In a small pot over medium heat, stir water and sugar together until the sugar dissolves. Stop stirring.
  3. Let the sugar cook until it turns into a caramel color.
  4. Pour out the sugar onto the prepared pans.
  5. Tilt the pans to spread the liquid sugar.
  6. Once the sugar is cooled, break them into shards for decorative use and smaller pieces for the inside of the cake.

Caramelized white chocolate recipe adapted from David Lebovitz.
Pastry cream recipe adapted from All Recipes.
Vanilla buttermilk cake recipe adapted from Sky High Cakes.
Sugar shard recipe and cake inspired by The Cake Blog.
Cake topper by Sohnmade.

S’mores Cookies

Why is s’mores a “summer” thing? Toasted marshmallows and melty chocolate seem more suited for winter, no? Because I like it so much, I decided to go homemade on all the components of it. I’m not knocking on my ol’ standby of Honey Maid graham crackers, Jet-Puffed marshmallows and Hershey’s chocolate, but sometimes a girl’s gotta do some from-scratch projects.
I guess (for most people) the deciding factor boils down to: is it worth it? I won’t lie that the store-bought s’mores are almost as good and are way quicker to make, but do you see the char on that homemade marshmallow? You just can’t get the same toast on a ready-made version. If there was one component of the cookie that is worth making, it would be the marshmallows. The texture and flavor is unbeatable when compared to its commercial counterpart.A couple of notes about making marshmallows: 1) It is very sticky. Do not wrestle with it or try to get every bit out of the mixer. 2) Gelatin smells. When you whip up the gelatin and hot sugar mixture, it will smell awful. It’s hard to explain…but to me, it kind of smells like a farm? (I once took a class in college that required me to take care of a cow. It takes me back to that experience every time.) Either way, it is not a pleasant smell, but it will dissipate when the mixture cools. 3) You NEED a thermometer. There is no way around it. My thermapen might be the most used kitchen gadget and is worth every penny. Please, do not try and buy the $10 thermometers on Amazon. I promise you, you will not regret it.Homemade graham crackers are more flavorful and you can cut them into any shape and thickness that you want. Plus, you know every single ingredient that goes in it. And as for the chocolate coating, you can use way better quality chocolate. Oh! I tried using the sous vide cooker to temper chocolate and I’m not kidding, the best way to do it, EVER. We were having lunch as a group the other day and I was talking smack about my sous vide cooker… how it takes forever, how it’s only good for making steaks. But after this experience, I take it all back. I’m sorry I talked smack about you, I love you forever.
S’mores is one of my favorite cookies because it combines everything I like: crisp cookie, a soft-chewy marshmallow and rich chocolate. So I decided to share it with you guys along with a bunch of other cookies from my very talented blogger friends! Seriously, the list is outrageously delicious. If a recipe stands out to you, please visit and show them some love!

What Should I Make For… – Ugly Sweater Gingerbread Cookies
The Sweet Nerd – Gingerbread Cookies – All Spruced Up
Girl Heart Food – Orange Poppy Seed Shortbread Cookies
The Beach House Kitchen- Hot Chocolate Marshmallow Cookies
Beyond Mere Sustenance – Brandy-Spiked Mexican Hot Chocolate
Seasons & Suppers – Lemon Pistachio Shortbread Cookies
Ciao Chow Bambina – Lemon Drop Italian Cookies
Contemplating Sweets – Hedgehog Cookies
Salt & Lavender – Vegan Gingerbread Cookie Bars
Meg Is Well – Bradshaw Cookies: A Sour Cream Cookie with Cream Cheese Frosting


S’mores Cookies

You will need:

Homemade graham crackers (recipe below)
Homemade marshmallows (recipe below)
8 oz. chocolate, tempered (I used the sous vide method here)
Toppings, optional

Instructions:

  1. Put all the chocolate in a tall container for easier dipping. I used a 2-cup pyrex measuring cup.
  2. Have a sheet pan lined with a parchment paper ready.
  3. Place one square of marshmallow on top of the graham cracker and lower both on an angle so you get a crisp line. Work quickly so your chocolate doesn’t fall out of temper.
  4. Sprinkle the chocolate covered side with any toppings you want. Above, I used nonpareils, freeze dried strawberries, royal icing poinsettias, and flaky salt. The flaky salt looked the least impressive, but tasted the best.
  5. Let set. Toast marshmallow with a kitchen torch before eating for best taste. The chocolate melts a little when you toast the marshmallow, giving you the s’mores effect.

Homemade Graham Crackers

Ingredients:

2 ½ c. plus 2 tbsp. all purpose-flour
1 c. dark brown sugar, lightly packed
1 tsp. baking soda
¾ tsp. kosher salt
7 tbsp unsalted butter, cut into 1-inch cubes and frozen
1/3 c. honey
5 tbsp. whole milk
2 tbsp. vanilla extract

Cinnamon-Sugar Topping:
3 tbsp. sugar
1 tsp. ground cinnamon

Instructions:

  1. In a food processor fitted with the steel blade, pulse together the flour, brown sugar, baking soda and salt.
  2. Add in the chunks of frozen butter and pulse until the mixture looks very crumbly, or a coarse meal.
  3. In a small bowl, mix the honey, milk and vanilla extract and add it to the flour mixture.
  4. Pulse the mixture until the dough barely comes together. Do not over process, the cookies will become tough.
  5. Wrap the dough in a large piece of plastic wrap. The dough will be sticky, so try to avoid using your hands and use the sides of the plastic wrap to form the dough into a large rectangle. Refrigerate the dough for two hours, or overnight.
  6. Take the dough out and divide it in half, refrigerate the half that you are not using.
  7. Roll out the dough (remember, the dough is sticky, so use flour as needed) about ⅛ inch thick, and use a square 2 ½ inch cutter to cut out squares.
  8. Place them on a baking sheet lined with parchment paper.
  9. Take the thicker end of a skewer and poke nine holes in each square, like a cracker.
  10. In a small bowl, mix the sugar and ground cinnamon for the topping.
  11. Sprinkle the tops of the cookies with the topping and refrigerate for about 30-45 minutes until firm. Repeat with the remaining dough. Once you cut out all the squares, put the scraps together and re-roll and cut out more squares.
  12. Preheat the oven to 350˚F and bake the cookies about 10-15 minutes, or until the cookies are golden brown.

Homemade Marshmallows

Ingredients:

3 envelopes of unflavored gelatin
1 c. ice cold water, divided
1 ½ c. sugar
1 c. light corn syrup
¼ tsp. kosher salt
1 tsp, vanilla extract
¼ c. powdered sugar
¼ c. cornstarch

Instructions:

  1. Place the gelatin into a bowl of a standing mixer fitted with the whisk attachment. Add ½ c. ice water and let bloom.
  2. In a small pot either fitted with a candy thermometer (or not, if you’re using an instant-read thermometer), combine ½ c. water, sugar, corn syrup and salt.
  3. Heat mixture over medium high heat and cook until the mixture hits 240˚F, which should take about 6-8 minutes depending on the type of pot you used and the heat of the stove.
  4. Once the mixture hits 240˚F, take it off the heat and start your mixer on low speed.
  5. Add the hot sugar to the gelatin mixture slowly, avoid hitting the whisk.
  6. Once all of the sugar is mixed in gradually raise the speed of the mixer to high.
  7. Mix for about 12-15 minutes, or until the side of the bowl is luke warm and the mixture becomes very thick. Add in the vanilla in the last minute of mixing, taking care to lower the speed while you add it in, so you don’t fling extract everywhere (like I did. Ha!).
  8. Prepare an 8×8 pan, with high sides (at least 2 inches), by spraying the inside with nonstick spray and lining the inside with parchment paper.
  9. Spread the sugar mixture into the 8×8 pan using a silicone spatula also sprayed with nonstick spray. Try to smooth it down the best you can.
  10. In a small bowl, mix the powdered sugar and cornstarch together. Use a mesh strainer to dust the top of the marshmallow mixture and wrap with plastic wrap overnight to cool and set. Save the rest of the powdered sugar mixture for the next day.
  11. When the marshmallow is set, overturn it on a cutting board dusted with the powdered sugar mixture.
  12. Use a 2 ½ in. square cutter to cut out squares of marshmallows. Dust the cutter with the powdered sugar to avoid sticking.
  13. Store in an airtight container.

Graham cracker recipe adapted from the smitten kitchen.
Marshmallow recipe adapted from the food network.

Ranunculus Cake with Sweet Potato Pastry Cream

I’ve been kind of obsessed with flower everything on my cakes these days. Real or buttercream, I love them all. I actually made this cake back in May, and by the time I got to editing photos it was the peak of summer.  And because the filling is sweet potato pastry cream, it just didn’t go with the season. But now that it is on the cusp of fall, I feel like it’s appropriate to post this. (Although, personally, this is my favorite pastry cream of all time and I love it any time of the year.)
The star of this cake is the sweet potato, but not the orange fleshed kind but the purple skinned, yellow fleshed kind. This type of sweet potato is popular in Korean desserts and tastes similar to a roasted chestnut. In the past, I’ve also featured this type of sweet potato in this post: Mini Green Tea Cake.
If you’ve never made pastry cream before, my advice for you is to go slow with pouring the hot milk into the egg mixture, as in a slow drizzle, not a pour. You want to avoid curdling at all costs. But if you do it right, man oh man is it worth it. Gone are the days of powdered mixes. You will never look back. Fill it between your favorite vanilla cake and watch the compliments roll.
As for the decoration, I’ve always loved ranunculus and decided to try to pipe it. It is easier than It looks but is quite time consuming to pipe each flower, especially since they have so many petals. Here are the steps to pipe the flower:

  1. Cut out many squares of parchment or wax paper. You will use one square per flower. (I usually cut mine around 3×3 inches.)
  2. With a flower nail in your hand, pipe a small amount of frosting onto the center of it. (As shown in Photo 2.)
  3. Place a piece of parchment paper on top of the frosting. (As shown in Photo 3.)
  4. Using a small round tip (wilton #2 or #3), pipe a small amount of green frosting in the center of the flower nail in a round, circular shape. (As shown in Photo 4.)
  5. In a piping bag filled with light green frosting and fitted with a petal tip with the wider side facing the flower nail (wilton #102, or larger pending on the size of the flower you want to pipe), pipe a square around the circle, overlapping each other on the ends. (As shown in Photo 5.)
  6. In a piping bag filled with light pink frosting and fitted with a petal tip with the wider side facing the flower nail (wilton #104, or larger pending on the size of the flower you want to pipe), pipe 5 dashes around the light green square overlapping the ends. (As shown in Photo 6.)
  7. Using the same piping bag, pipe 6 dashes around the pink circle. You want to show a little bit of the circle beforehand to create an illusion of overlapping petals. (As shown in Photo 7.)
  8. Continue piping dashes along the outer edge of the flower, increasing the number of dashes by 1 until you reach the size of the flower you desire. (As shown in Photo 8.)

I hope you try it soon! I know it’s been a while I’ve missed you!

Sweet Potato Pastry Cream

Ingredients:

3 medium sized Korean sweet potatoes, roasted and peeled.
2 c. whole milk
½ c. sugar, divided
2 egg yolks
1 egg, large
¼ c. cornstarch
a pinch of kosher salt
2 tbsp. unsalted butter
1 tsp. vanilla extract

Instructions:

  1. In a food processor, mix the sweet potatoes until a smooth puree forms. Set aside.
  2. In a medium saucepan, whisk the milk and ¼ c. of sugar and heat until the milk boils.
  3. While the milk heats, grab a medium bowl and whisk together the egg yolks, egg, ¼ c. sugar, cornstarch and the salt until smooth.
  4. Once the milk is heated, slowly drizzle in the milk mixture into the egg mixture with one hand while whisking the egg mixture with the other. Once the milk is completely incorporated into the egg mix, return the entire mixture into the saucepan.
  5. Heat the saucepan while whisking until the mixture becomes thickened like pudding.
  6. Take it off the heat and stir in the butter and vanilla extract.
  7. Mix the sweet potato with the pastry cream until homogenous.
  8. Place a piece of plastic wrap directly onto the pastry cream and refrigerate until cool and set. (about 4 hours, or overnight)

The Best Edible Cookie Dough

I’ve been in a motivational slump lately. Creative juices are at their all-time low, and laziness has taken over my life. It’s not like I don’t have content to share with you, but parking myself in front of the computer and writing a post seemed so pointless and boring I just didn’t have the heart to write. Anyway, I’m working on moving past the slump and onto a more productive track.
These mini cupcakes are vanilla cupcakes that I made from leftover wedding cake batter (a post on that soon) and are topped with a scoop of (what I think) is the best cookie dough, homemade magic shell and flaky salt. While all the parts of the cupcake are delicious, the star of this particular recipe is the cookie dough. What I think makes this cookie dough better others is a key step: toasting the flour.
Did you know that ingesting raw flour can cause foodborne illnesses such as E.coli and Salmonella? I know. I was surprised too. Toasting the flour not only makes it safe to consume, but it also gives the cookie dough a delicious nutty flavor that cuts down the sweetness of the cookie dough too.
Other than toasting the flour, you would need some great quality chocolate chips. Artisan Kettle happened to send me some bags to work with, and they were delicious. I’ve really tried about every brand of chocolate out there, and for the price point, they’re hard to beat. Bonus, they’re organic, fair-trade and gluten free. It’s simple to make and so so easy. I happened to make the cupcakes because I had them on hand, but you can always just make a jar of cookie dough and store it in the fridge for a cold scoop able treat.

The Best Edible Cookie Dough

Recipe for cake can be found here: Strawberry Ombre Cake

Ingredients:

¾ c. all-purpose flour
½ c. butter, softened
⅓ c. sugar
2 tbsp. heavy cream
½ tsp. kosher salt
½ c. semi-sweet chocolate chips
½ c. milk chocolate chips

Instructions:

  1. Preheat oven to 325˚F. Line a small sheet pan with aluminum foil.
  2. Spread flour evenly on the sheet pan and toast in oven for about 10 minutes, or until the flour is lightly browned and smells nutty.
  3. 5 minutes into baking, stir the flour to toast it evenly.
  4. Remove and cool flour before use, about 10 minutes.
  5. In a medium bowl with an electric mixer, cream butter and sugar until light and fluffy, about 3-4 minutes.
  6. Add the sugar, cream and salt and mix until combined.
  7. Add flour and mix until combined.
  8. Fold in chocolate chips. Either scoop on top of mini cupcakes or store in fridge for easy snacking.

Recipe adapted from espresso and cream.

Chocolate Unicorn Easter Eggs

I know it’s been a while! If you follow my Instagram feed, you would know that I’ve been making some cakes during my weekends off and that took time away from blogging. But I hurried my butt to share this project with you this week, because I could not wait another year for an Easter post.
These unicorn eggs are made of hollow candy melt shells, with swirls of pastel buttercream and adorned with a golden fondant horn and pearls and stars. I originally wanted the eggs to be filled with a rainbow mousse that would have beautiful layers when you cut into the candy melt. But I had the toughest time molding the eggs.
The eggs are made with an egg shaped Jell-O mold that I used for my tiramisu eggs a while back. As much as I appreciate the mold, I have a deep love/hate relationship with it. It fails to close properly unless you use excessive force (this might be because my mold is old), and it’s hard to fill because of the small opening on top. But it does make the perfect egg shape when it is molded properly. The tiramisu had a cracked shell look to it, so I didn’t need a perfect shape. Unfortunately, this project required a whole egg shape and it made it more difficult.
If I’m being honest, I almost gave up after failing to mold the eggs on my first attempt. I wasted a whole afternoon of prepping everything, and gathering all the supplies and decorations. But I just had to make it, even if the mousse was a long lost dream. After trying it a second time, I was somewhat successful and 3 out of 6 eggs were usable, and I was a little worried but the end result was so cute that it made the journey worth it.

Chocolate Unicorn Easter Eggs

You will need:

jello egg mold*
1 c. white chocolate candy melts
½ batch vanilla buttercream
a small amount of white fondant
purple gel food color
blue gel food color
pink gel food color
gold luster dust
vodka
edible silver stars
tiny confetti sprinkles
colored edible pearls
metallic edible pearls
black edible ink marker
white pearl dust

Assembly:

  1. Roll out a small amount of fondant with your palms to create a thin white rod. Twist two rods together to create a horn shape. Taper the end of the rod to create a unicorn horn.
  2. Mix a few drops of vodka with a small amount of gold luster dust and paint the unicorn horn. Set aside to set.
  3. Place white chocolate in a microwave safe bowl/cup with a spout.
  4. Melt the white chocolate melts in the microwave in 15 second intervals until completely melted.
  5. Thoroughly spray the inside of your egg mold with a non-stick cooking spray.
  6. Use the spout of your bowl/cup to pour white chocolate into the egg about ¼ of the way.
  7. Start rotating your egg mold (left, right, and upside down) until it starts to set. (When flipping the egg mold upside down, do so above your melted chocolate so the excess can drip back into the bowl.)
  8. Once set, repeat steps 4 and 5 two more times to ensure through covering and place in freezer to completely set. (4-5 minutes)
  9. While the eggs are setting, fit three disposable piping bags with small star tips (I used wilton tip #16, 15, and 17), color your buttercream and fill your piping bags with each color.
  10. Take the eggs out of the freezer and carefully unmold the chocolate. It may stick a little. Just wiggle it around gently, and it should come out in one piece.
  11. Use the frosting to swirl different colors to give your unicorn a mane. Leaving a small gap at the tip of the egg for the unicorn horn. Tip: Use the largest star tip to give the mane a general shape and use the smaller tip to make the mane fuller. Use the smallest tip to fill in the tiny gaps in between the large and small swirls.
  12. Use a tweezer (kitchen use only tweezers) to place pearls, stars, and confetti sprinkles to give the eggs a little more dimension. You can pretty much use any sprinkle you desire. Just make sure it is small so that you don’t lose the swirls of the unicorn mane.
  13. Place the eggs in the freezer for the buttercream to harden, about 3-5 minutes.
  14. Remove eggs from the freezer and with the edible marker, draw on the eyes.
  15. Use a food-safe brush to brush on pearl powder around the egg to give it some sheen.
  16. Squeeze a little swirl of buttercream right where you want the unicorn horn and place the unicorn horn in the center of the swirl.
  17. Display eggs in an egg carton to really sell the “egg” look.

*After doing extensive research, the egg mold I used has been discontinued. I did find some eBay listings for them. Look up the term “jello egg mold” and it should give you purchasing options.